
Matt's Weekly Shop Update
Kitchen Island, Barn Power – March 2024 Update
Welcome to my shop! This is a quick update to let you know what I’ve been up to. This big chunky thing is the leg
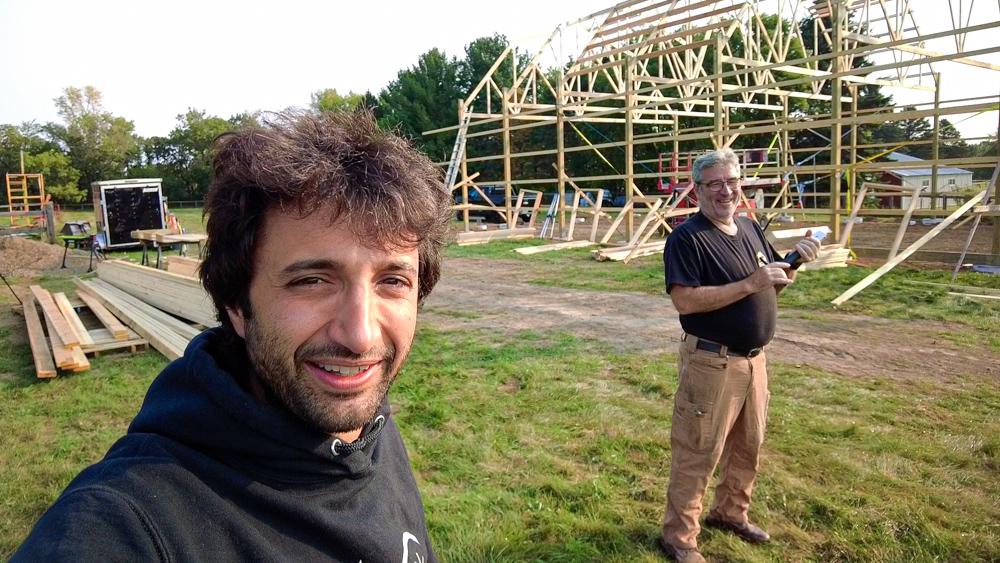
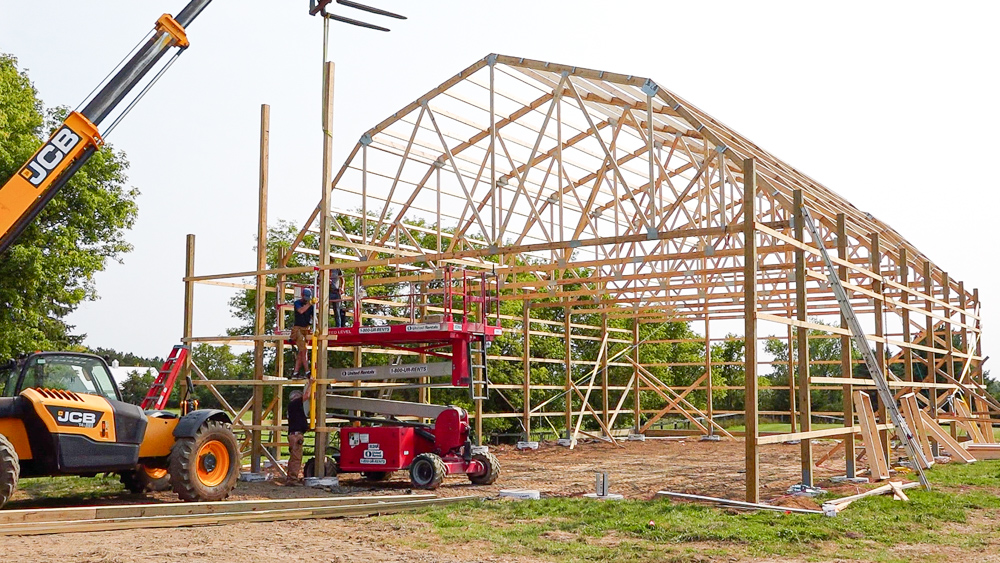
Welcome back to the build!
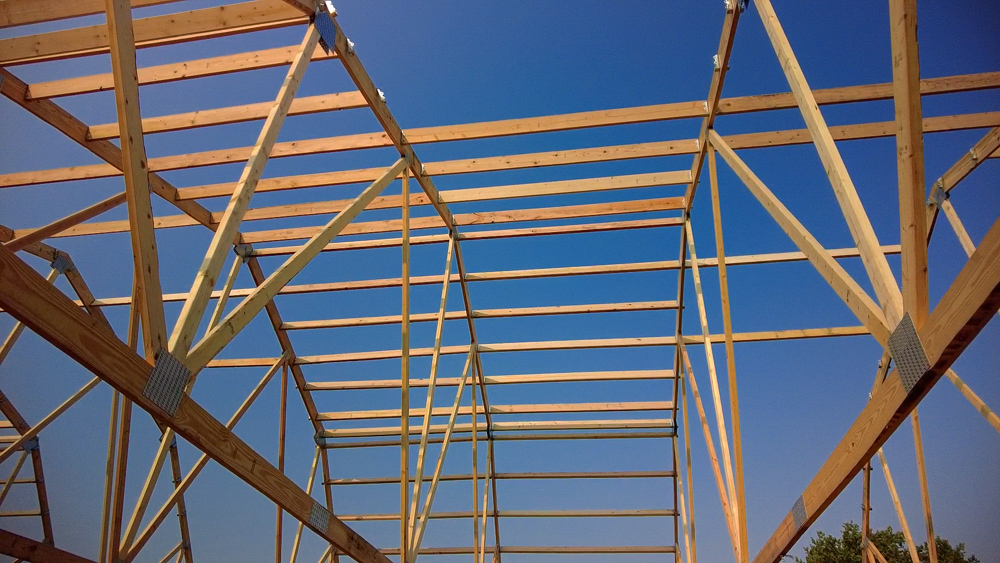
Last time we got all the trusses flown in, and this time, I’m going to go to purlin purgatory. I’m going to be up in the lift setting purlins, and that’s probably going to take me the majority of the day. As of right now, we have purlins done in two and a half bays, and five more to go.
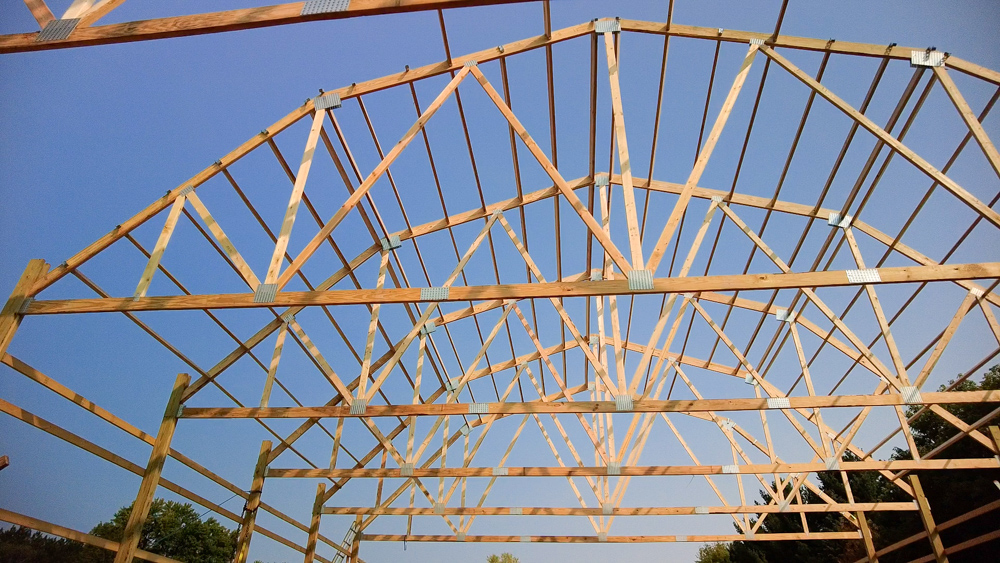
Here is the purlin installation after our first lift position of the day. Now time to move the lift and do the other side.
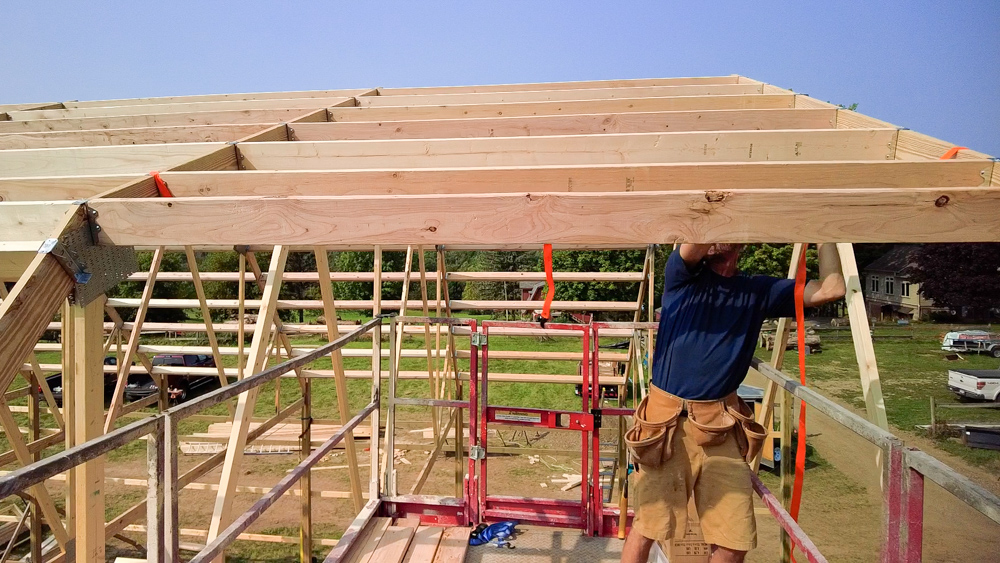
Progress update: we are most of the way through the next bay, which puts us at halfway done now. We’re making really good time; it’s only been an hour and we’ve done two bays already.

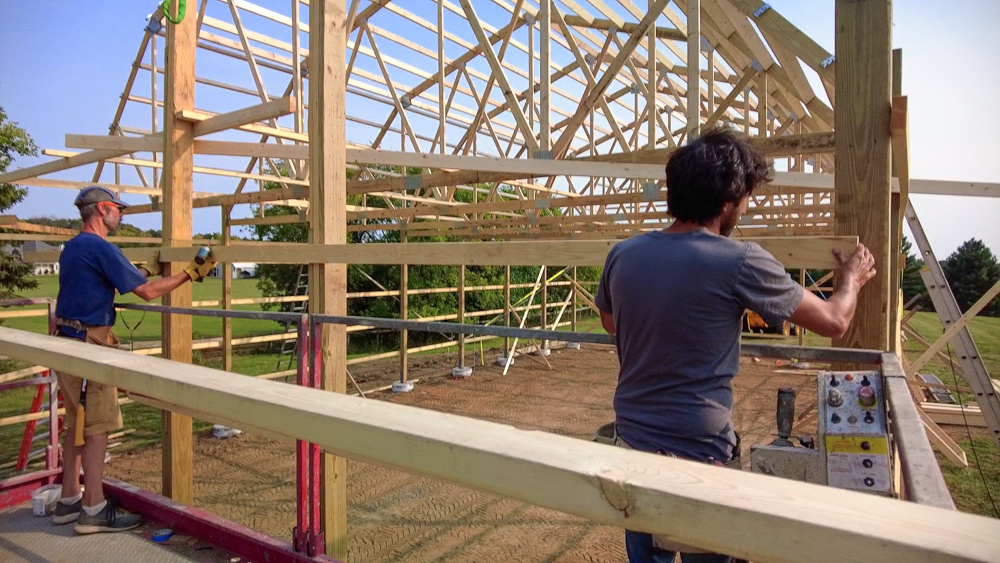
While Jack and I are working on purlins, Donavan has been working on the end wall, and that’s looking like it’s coming together too.
We are raising a strap to suck the trusses together and make sure that they are parallel, so the purlins actually end up bottomed out in the hangers. This seems like an appropriate time to answer a question, which is :why are we doing the drop purlins versus the nail on purlins. We thought doing drop-in would be a little bit easier, especially on some of the steeper pitches. The biggest downside to drop-ins is that these purlin lengths have to be dead-on, because any error in those lengths will accumulate as you go along.
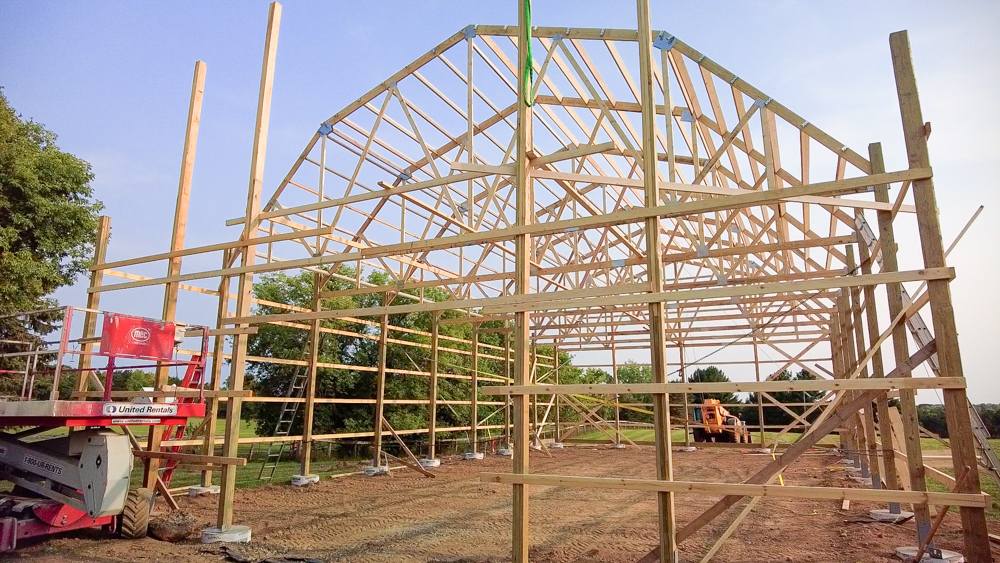
We’re done with purlins for now, and we’re setting another one of these giant posts for the edge of the bay door. We’re going to bring it in here, set it on the footing where it needs to go, plumb it up, and get it attached to the girts.

So now, as we’re trying to get the building squared up, we’re going to start adding in a few braces inside of the truss cavities to space all the trusses out at exactly nine feet. We have 20 foot 2x4s, and we’re going to connect this wall all the way through all these trusses to get the spacing we need.
We got all of the trusses spaced evenly all the way down, and we ended up pretty much right on the money, as far as the the spacing goes on all of those. Now, I’ve taken the lift outside, and we’re going to finish up this end wall, and get all the rest of the girts installed out here.
The end wall is pretty much ready to go for tomorrow, when we start to do the final alignment of the building. That entails getting everything all perfect, and square, and plumb, and level all the way down the whole building.
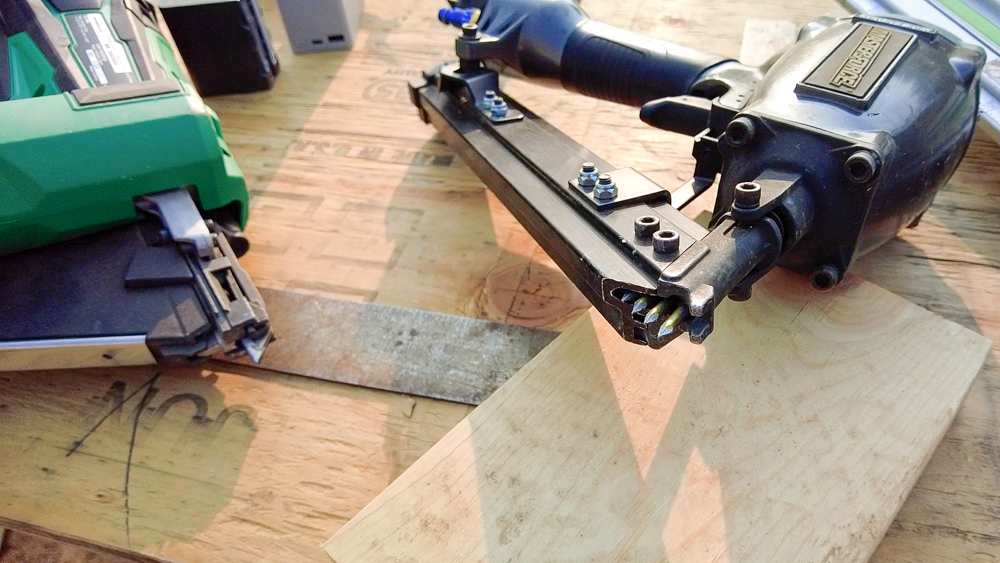
Since I got a pretty good amount of questions about hanger nailers, and because we used this a lot today, I thought I’d share a little bit about these things, for those of you who are curious how these things work. So we have two different styles, with the biggest difference being how the nail is presented to the hanger. Both of these have a protrusion here, which actually catches on the nail hole of the hanger.
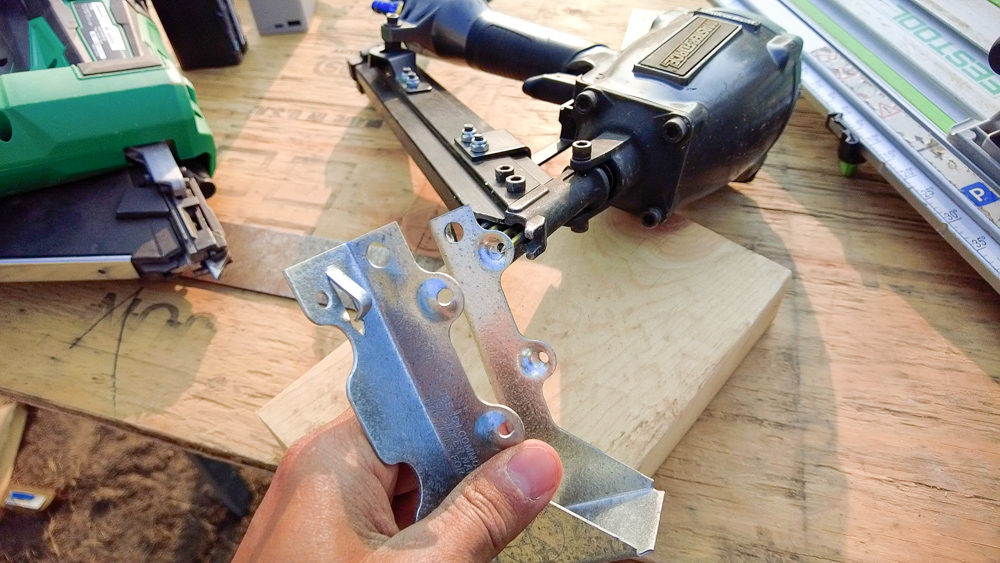
So on a joist hanger like this, the little nail fits in there, and that’s how you index where the nail’s going to go. So this one, the nail from the clip protrudes out of the bottom, and that’s how you index.
On this one, this one’s got a little beak kind of thing. I like this style better because it’s a little bit easier to align. With the other one, you can get hung up on the next nail in the clip. With both of these, though, you have to have a really good idea of how you’re holding the gun and what your angle is.
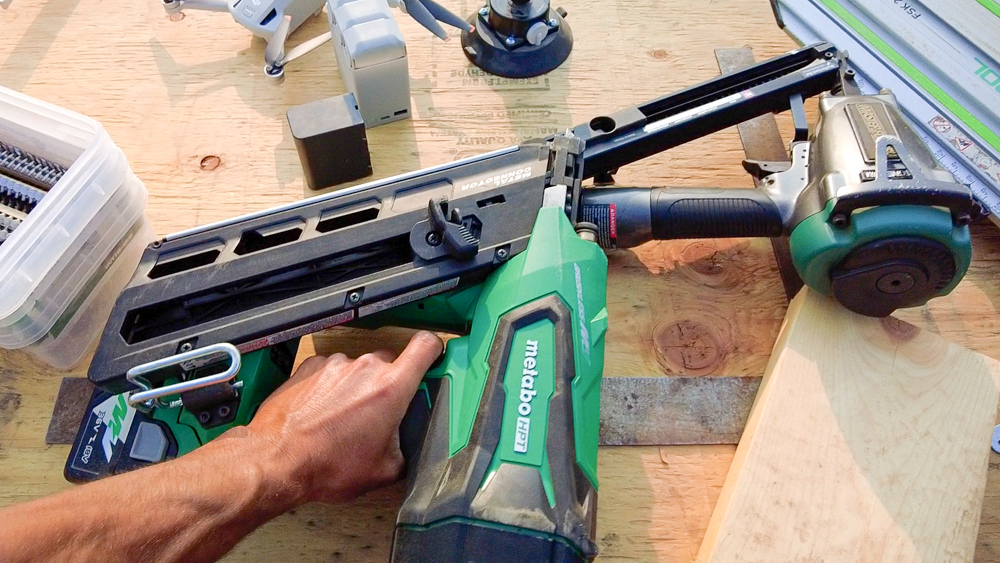
Now the cordless versus corded is a really big plus and minus. With the cordless, you have no wire to worry about, which is amazing, especially when you’re up in the lift. The biggest downside to the cordless is the absolute weight of it. It is extremely exhausting to use that. The corded is super light and very easy to manipulate, but you have a cord attached to it. With these tools, we have officially put in two and a half thousand hanger nails, at this point!
So that is the progress for the day! Thank you, as always, for joining, I greatly appreciate it. If you have any questions or comments on the barn, please feel free to leave me a comment. As always, I’ll be happy to answer any questions you might have, and, until next time, happy woodworking!
Welcome to my shop! This is a quick update to let you know what I’ve been up to. This big chunky thing is the leg

Welcome back to the home renovation. This time I’m going to be working on the kitchen island. Here is a small model of the island.

Welcome back to our home renovation. Today I am going to be working on this wall. It needs some upper cabinets and the surround for