
Matt's Weekly Shop Update
Kitchen Island, Barn Power – March 2024 Update
Welcome to my shop! This is a quick update to let you know what I’ve been up to. This big chunky thing is the leg
Welcome back to the home renovation. This time I’m going to be working on the kitchen island.
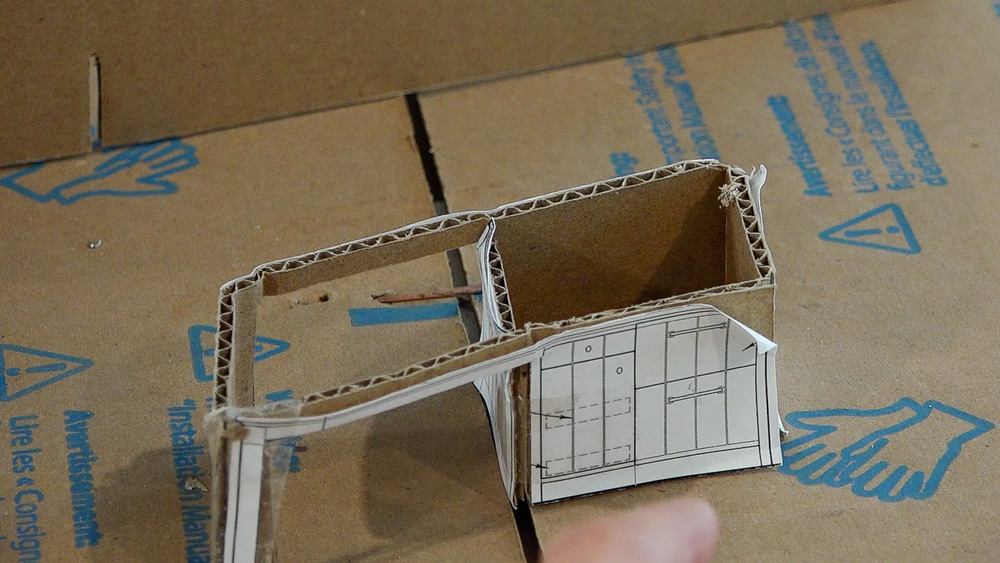
Here is a small model of the island. On this face of the island there are two things going on: a two-drawer fridge on the right side and some cabinets with pullout drawers on the left.

On the other side of the island, it has a couple of drawers and a cabinet.
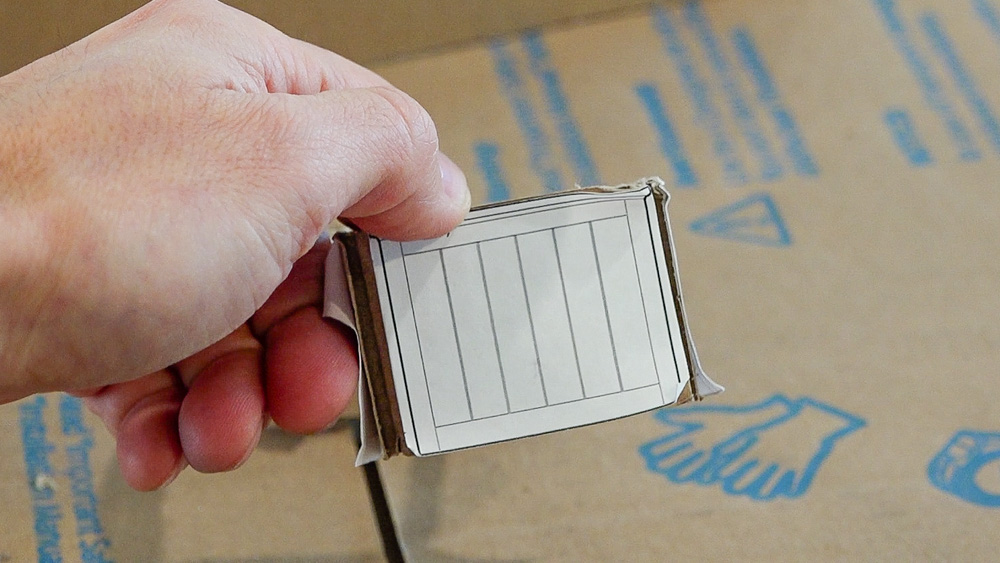
There is V-groove paneling on the ends.
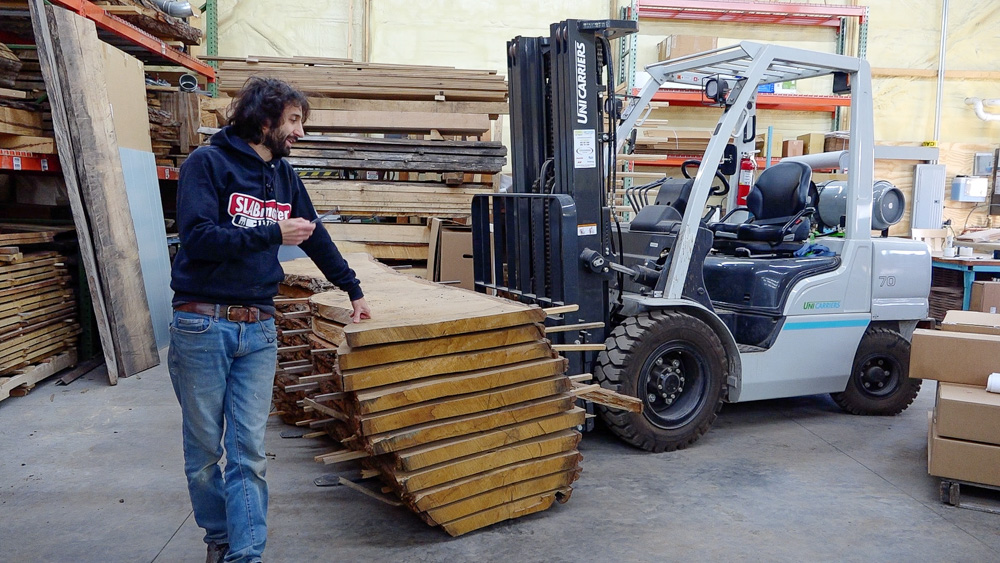
Lindsay decided she wanted the island made out of white oak, and luckily I have some white oak slabs that I am going to use. I’m going to make this differently than most people probably would. I’m going to build some end panels and then build cabinets in between them. I’m doing it that way because then my corners will be one piece rather than two faces mitered together.
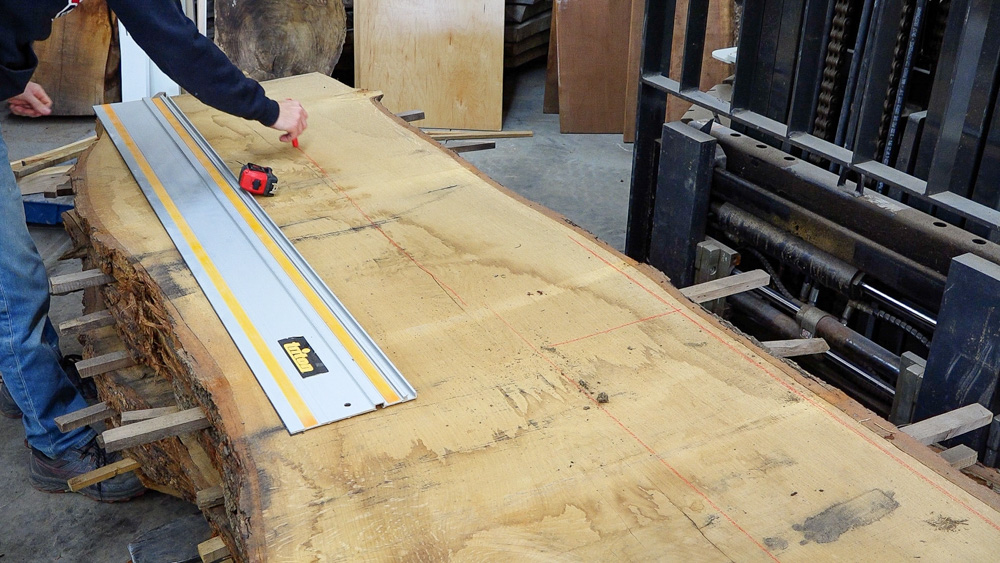
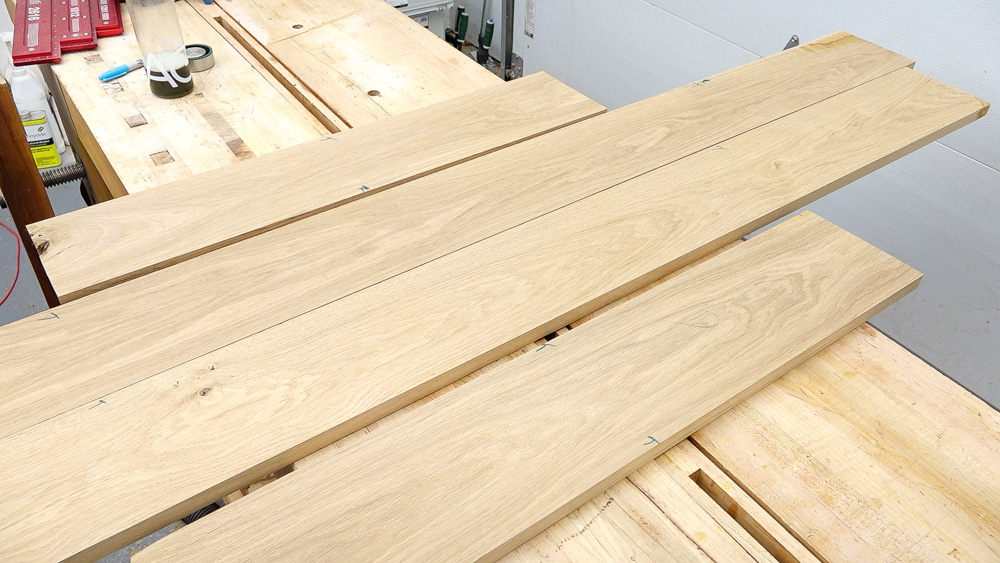
For the leg stock, I’m going to use something that’s rift sawn. I laid out the legs and rails in this slab. I still need all of the V board paneling stock, which I can either get from the same stack of slabs, or I can get it from the stock I used to make the flooring.
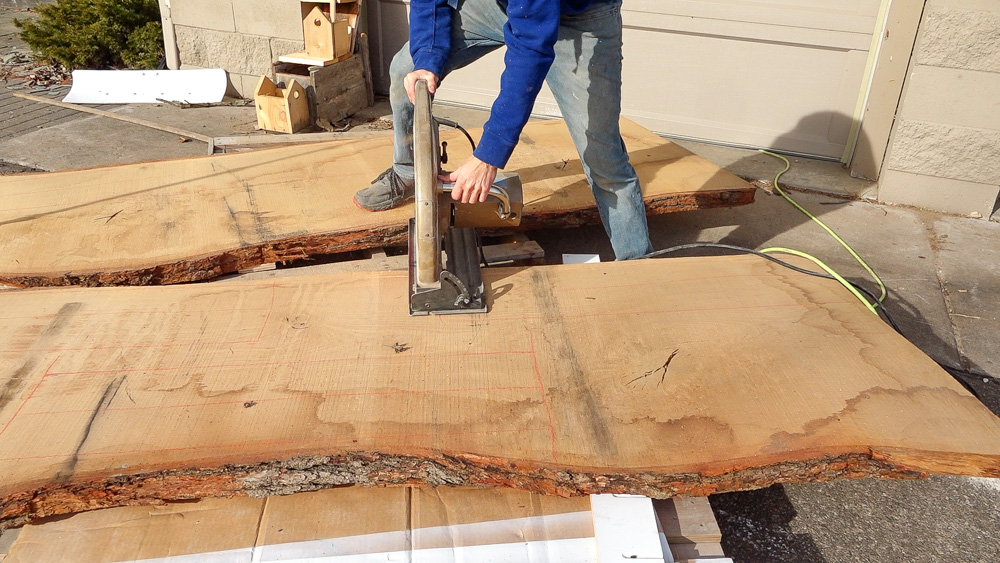
For now, I’m going to chop all of the chunks out of here and start making the frame assemblies.
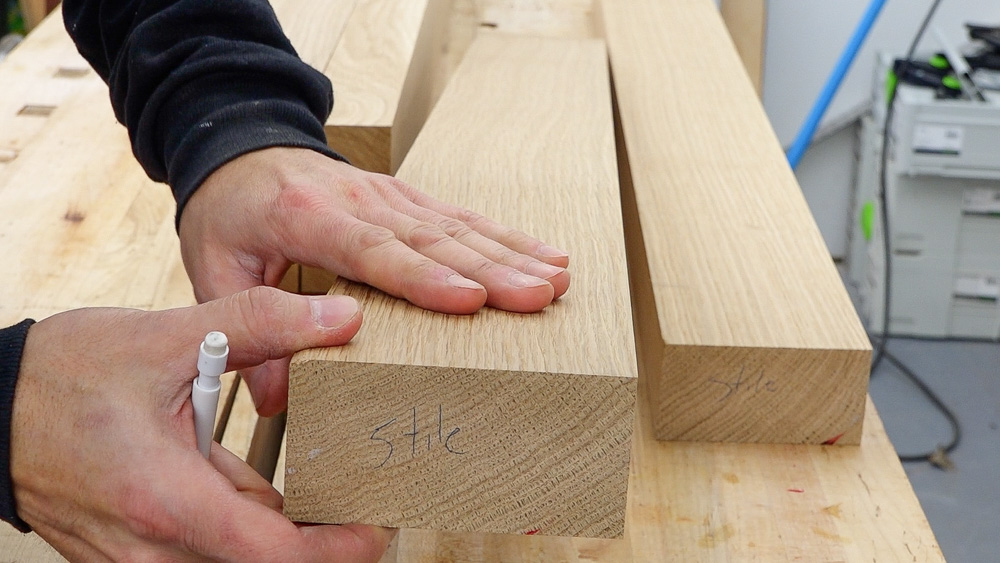
Here’s the stock for the stiles. As you can see, the growth rings are running at a diagonal, so at the surface they present at the rift sawn orientation.
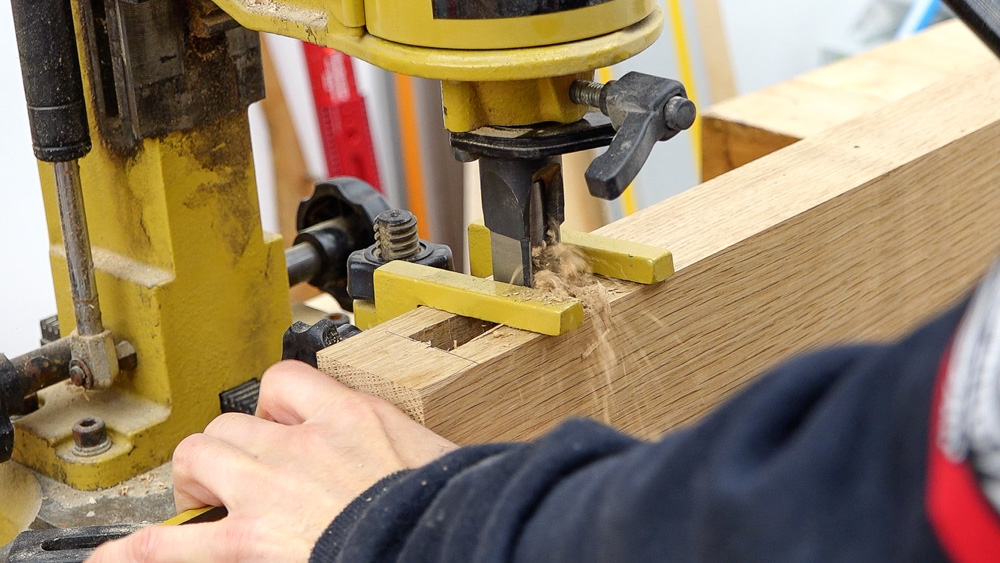
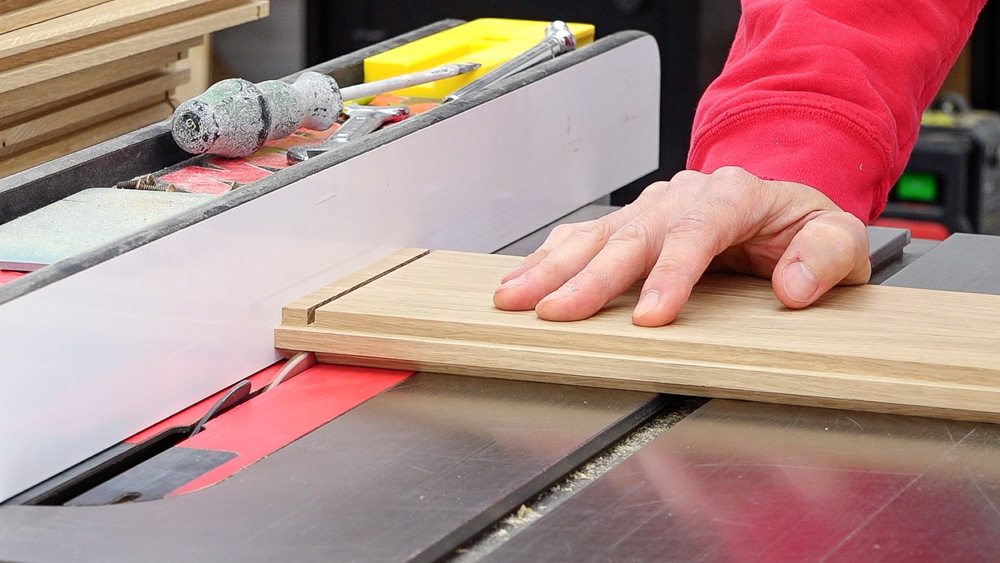
With my frame stock all prepped and cut to length, it’s time for some joinery. I’m going to use integral mortise and tenons to join my pieces.
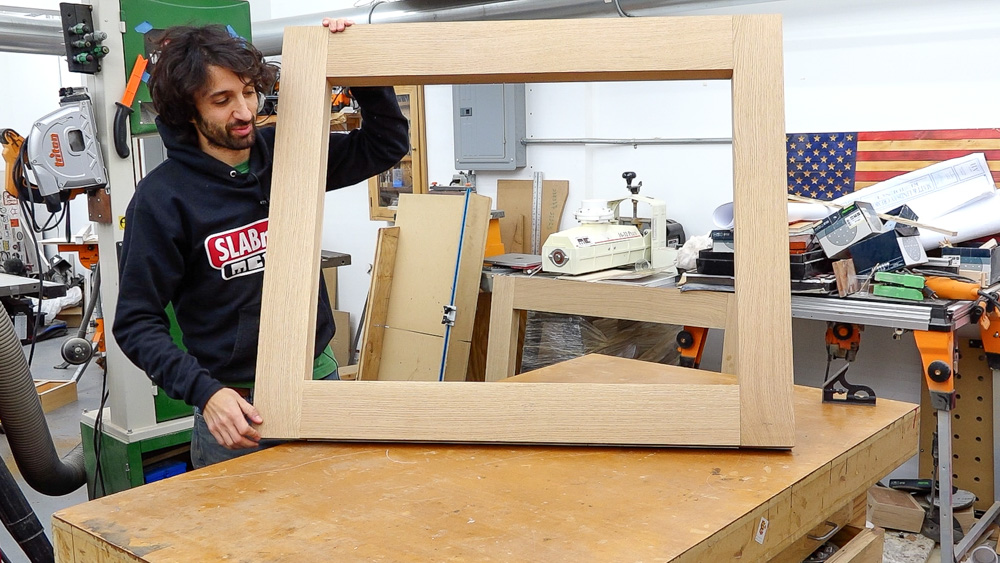
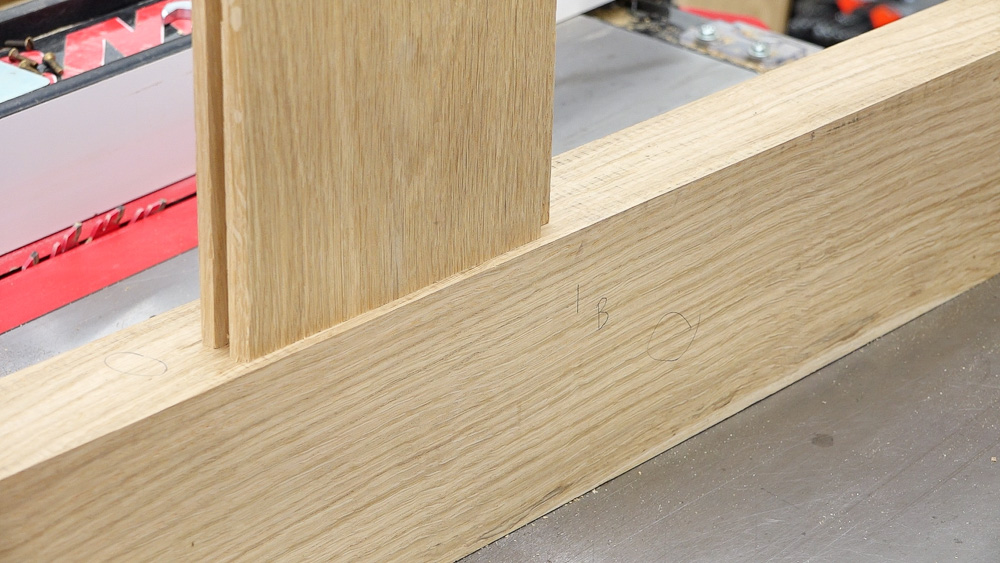
Here is a giant frame, ready for some paneling to go inside of it. I am planning to have the panels be plain sawn with some cathedrals. Luckily, I should be able to find some stock from my leftover flooring boards to achieve that look.

As I process these, I’m careful to keep my cathedrals centered in the panel.
Here is my first layout. This is going to be the end that’s more visible on the island. I’m really happy with this, I think the layout worked really well.
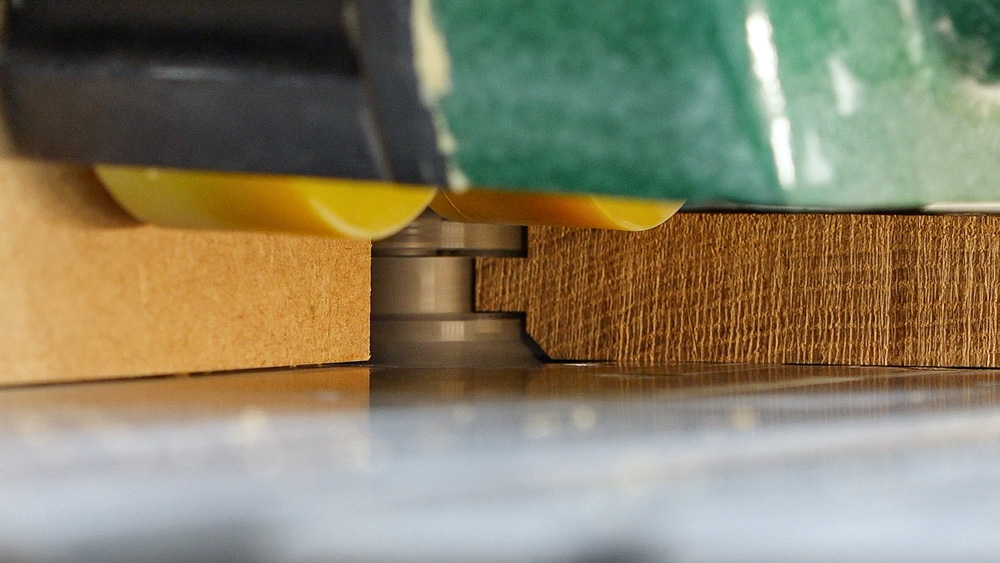
Let’s make some V-groove paneling now. I have it set up so that the cutter is removing a 16th of an inch of material off the width.
Next thing on the list is creating a matching tongue on the bottom. That makes it a lot cleaner where the V groove actually intersects that rail.
Now that the panel stock is prepped, I have to prep the frames to receive said panel stock. I’ve been going back and forth on where in the frame I want the panels to sit. All of the other faux V paneling is set back an eighth of an inch. With these, I think I am going to go with three-sixteenths of an inch.
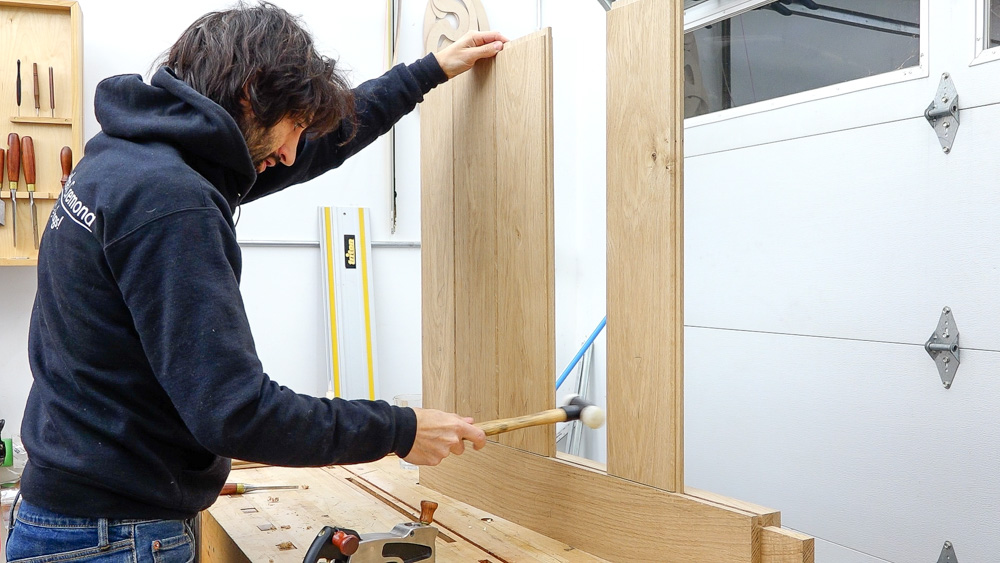
Fits nicely!
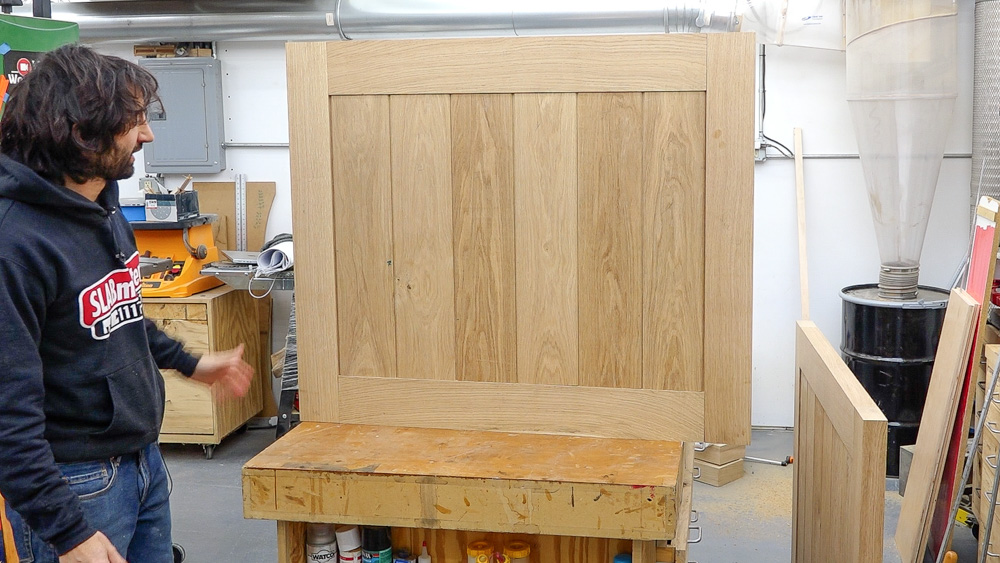
Here is this one. This is the end panel which is going to be fully exposed on the island. I’m pretty happy with it overall, but some of the boards were a little difficult to work with. But I think it will all even out when there’s some finish on it.
One thing I think this project highlights is that you can use slabs for something other than tabletops. As someone who makes furniture, I really gravitate towards using slabs, because I have figured out and embraced the grain selection process. Once you understand how the grain is going to present itself on the surface, you can select exactly the design and layout of the grain. That’s the beauty of making furniture parts out of slabs: you have the full flexibility to make that thing whatever you want because you can lay out your parts in three dimensions. You don’t have to lay out your parts just sitting on the face of the slab, you can also lay out your parts in the thickness. There’s so much you can do because you as the furniture maker, you as the woodworker get to decide how that tree is actually cut.
Anyway, now that I have both end pieces, I will connect these together and build some cabinets between them. But that’s for another time. Thank you, as always, for joining me in the shop. If you have any questions or comments on the island, please feel free to leave me a comment. As always, I’d be happy to answer any questions you might have. And until next time, happy woodworking!
Welcome to my shop! This is a quick update to let you know what I’ve been up to. This big chunky thing is the leg

Welcome back to our home renovation. Today I am going to be working on this wall. It needs some upper cabinets and the surround for
Welcome back to our home renovation! Today I will be working on the pantry. A while ago, I had Donavan out here with his portable