
Matt's Weekly Shop Update
Kitchen Island, Barn Power – March 2024 Update
Welcome to my shop! This is a quick update to let you know what I’ve been up to. This big chunky thing is the leg
Welcome back to our home renovation! Today I will be working on the pantry.
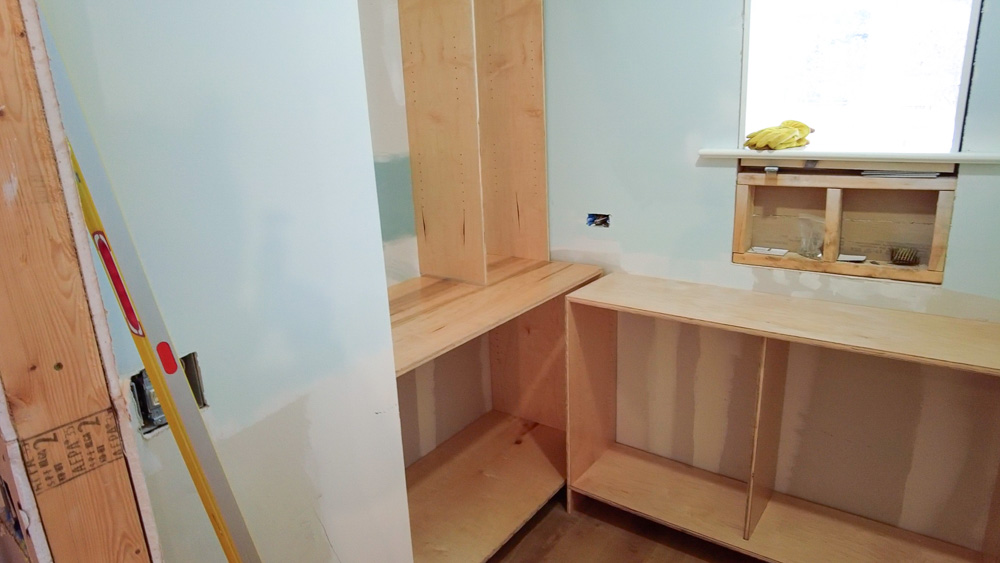
A while ago, I had Donavan out here with his portable CNC, and we cut the boxes for the cabinetry in here. The pantry has two lower units and an upper unit, and today I am going to work on getting the lower units finished so the countertop can be installed. One of the lower units are open cabinets with open shelving, but the one beneath the window is a little more unique. It has two doors, and they are sliding bypass doors.
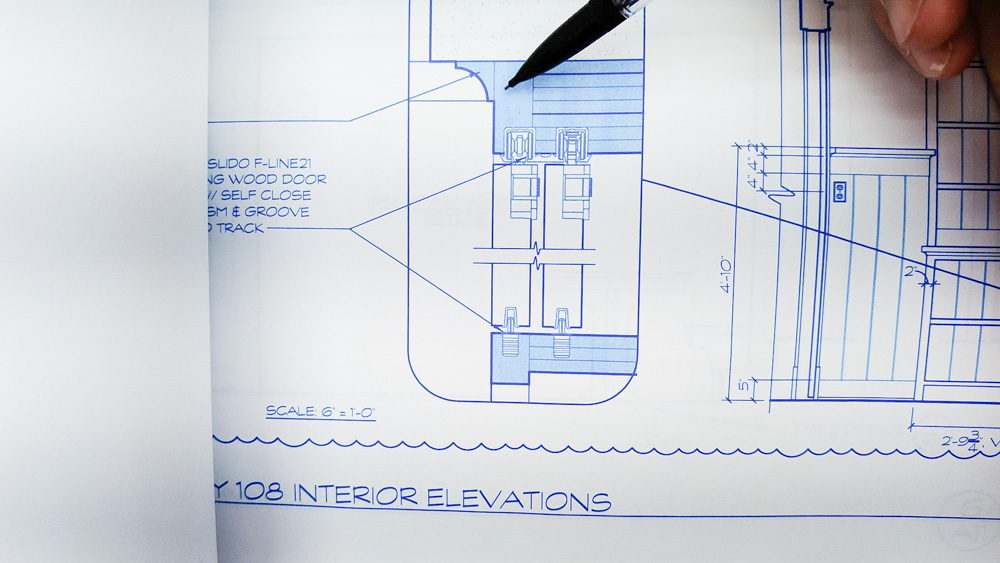
These are the plans for that sliding bypass, but I am making some modifications, because these plans are for 3/4 stock, but I am going to make the face frame deep enough to contain the entire rail, so it’ll be about two and a quarter inches deep. That way, when the door actually closes, it’ll close into the face frame.
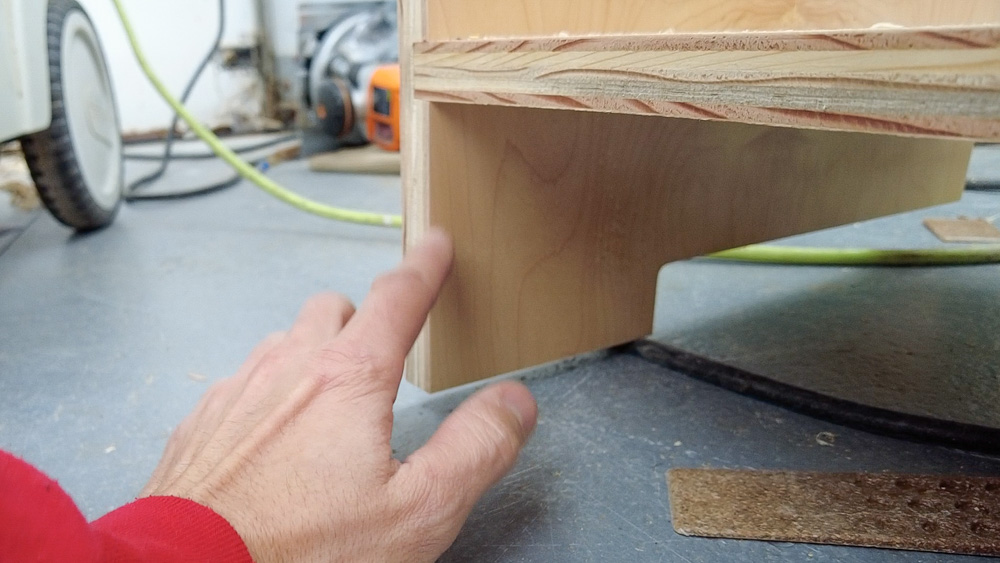
I am also changing/fixing this toe kick, because this is not anywhere near the show face of my toe kick. So I will put a toe kick return onto the face frame, and then that’ll all get set onto the box that way.
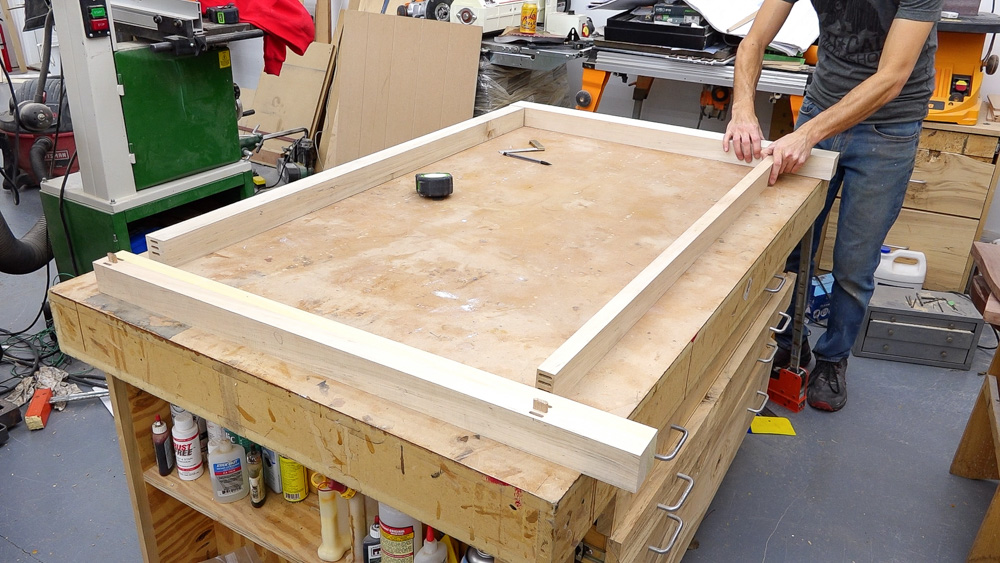
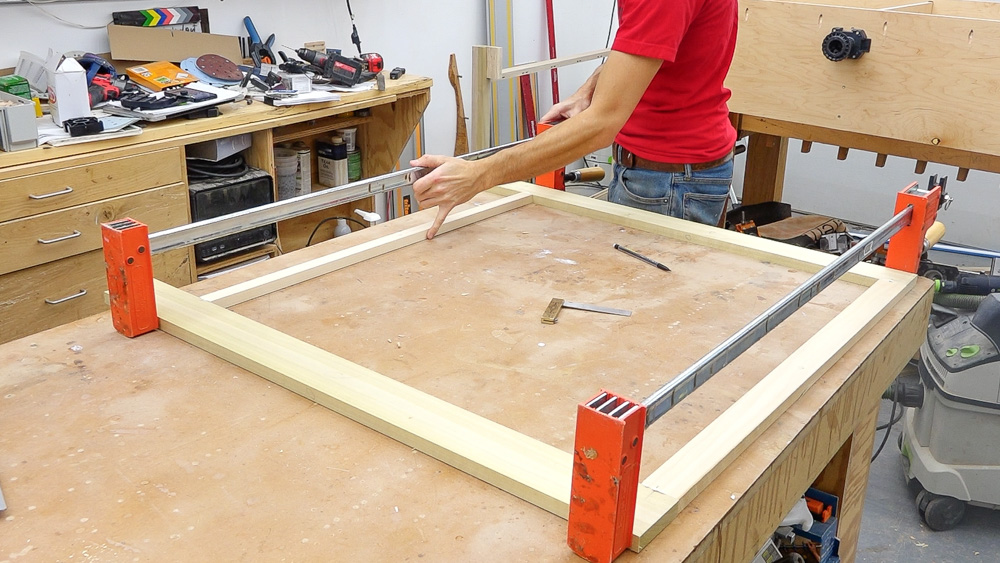
Now that I know what I’m doing, I’m going to take my glued up face frame stock and make a face frame.

As you can see, the bottom of the face frame is flush with the box, and the sides and top are stepped back about a half inch from the face.

Next I’ll get the rail stock mounted, and I’m doing an inset flush mount.
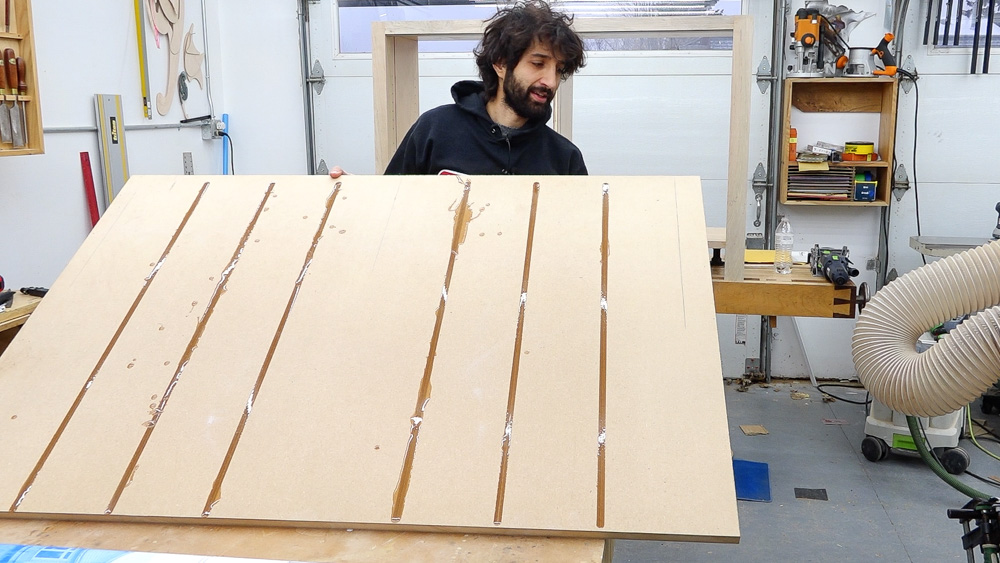
Now I’m going to work on the doors. This is the panel we cut on the CNC when we cut the boxes. As I was looking at this, I realized the V-groove spacing we did isn’t going to work out, so this is going to be the backside. I filled it with epoxy, even though you’d never see the backside of this anywhere. I will recut the V-grooves once I have the doors cut to fit the case.
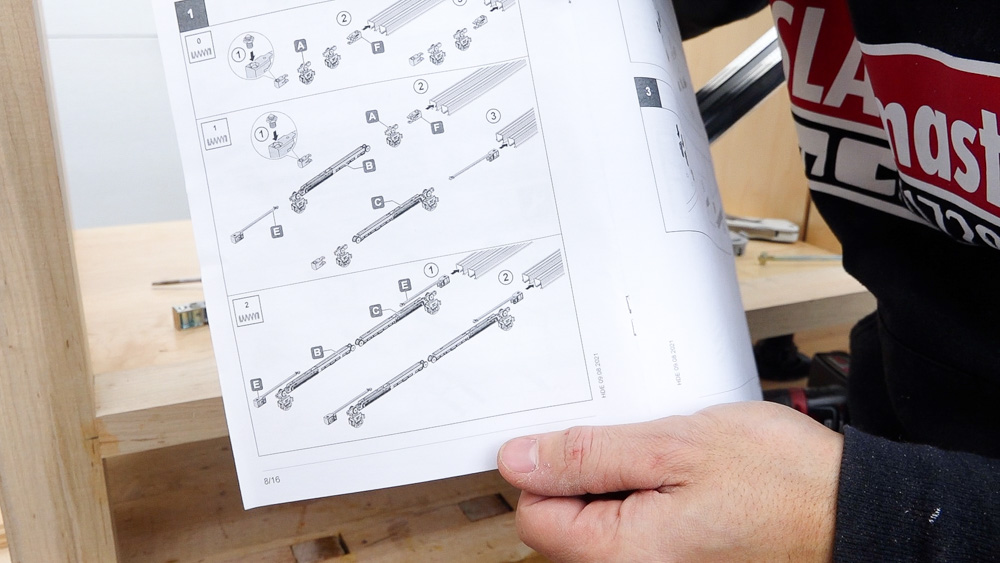
Time to tackle the hardware for the bypass doors. I think I’m doing the one on the bottom.
There are adjustments on the hangers that allow you to tip the door or make it go up and down in order to get all of your gaps consistent and square as it closes. It has a soft open and close, which is pretty slick. I’ll put some knobs on it, but without knobs, it is technically reversible right now, meaning that either door can be the front door.

With these doors cut to size, I can do the V paneling now. I’m cutting the grooves into the door so that it will have the illusion of a continuous V groove pattern when the doors are shut.
Now I can get started on the next lower cabinet face frame.
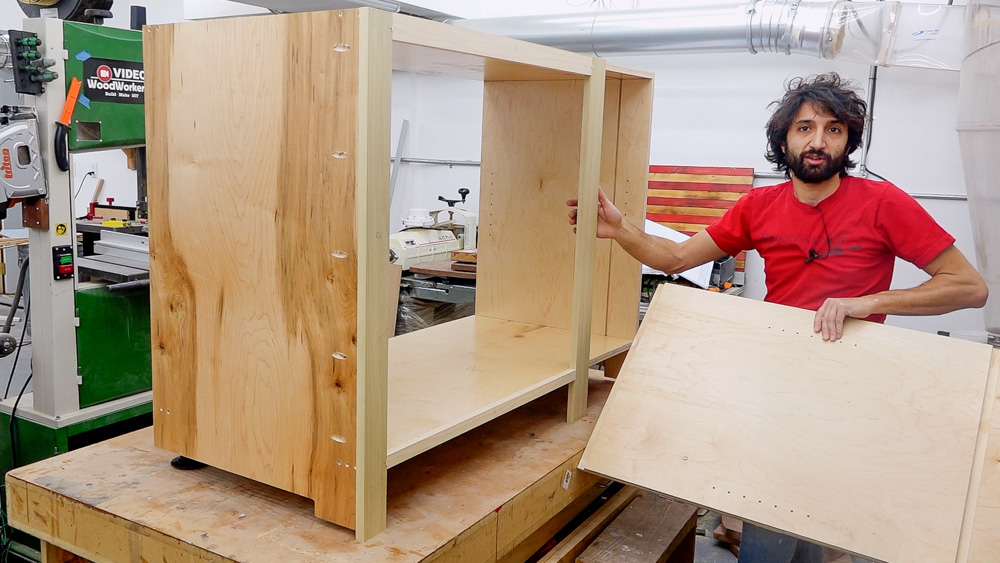
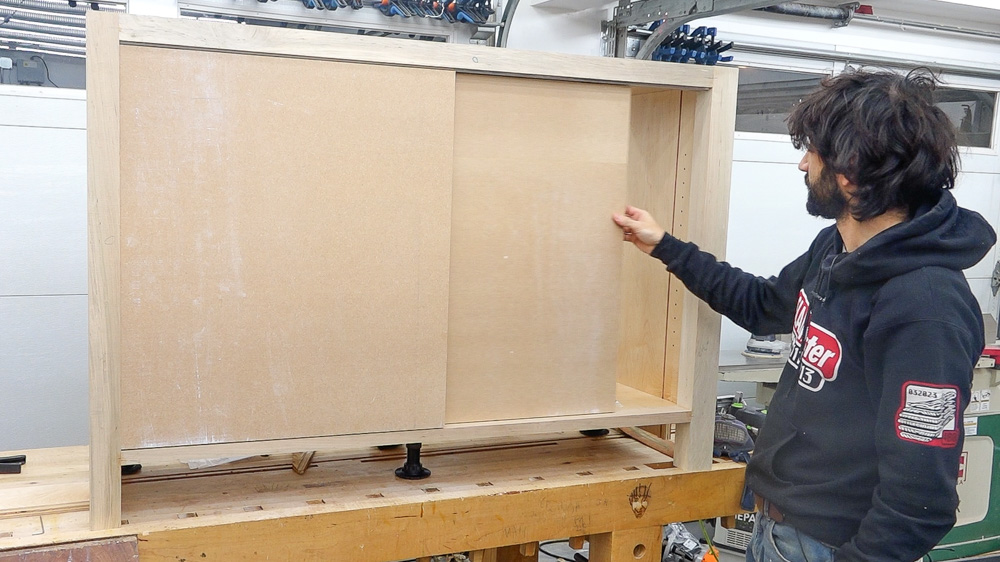
Here is the shell of the second unit. When we cut these on the CNC, Donavan made an extra side, which gives me these shelf pin holes, which I can use to fill the whole cavity so nothing falls out behind and underneath the cabinet. So I’ll get this installed, along with the back panel.
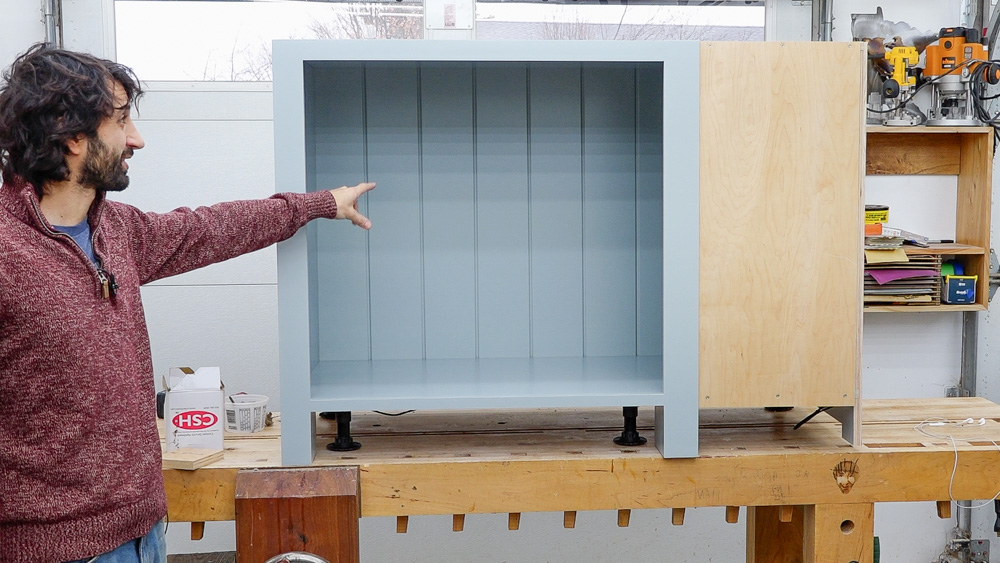
All right, there’s that one! I’m actually super happy with the way this thing looks. I think having this V paneling back is a super nice touch. Now that I know what this is going to look like, it’s going to be even cooler with the top unit on here with that continuous V board that goes all the way up. I also like the color.
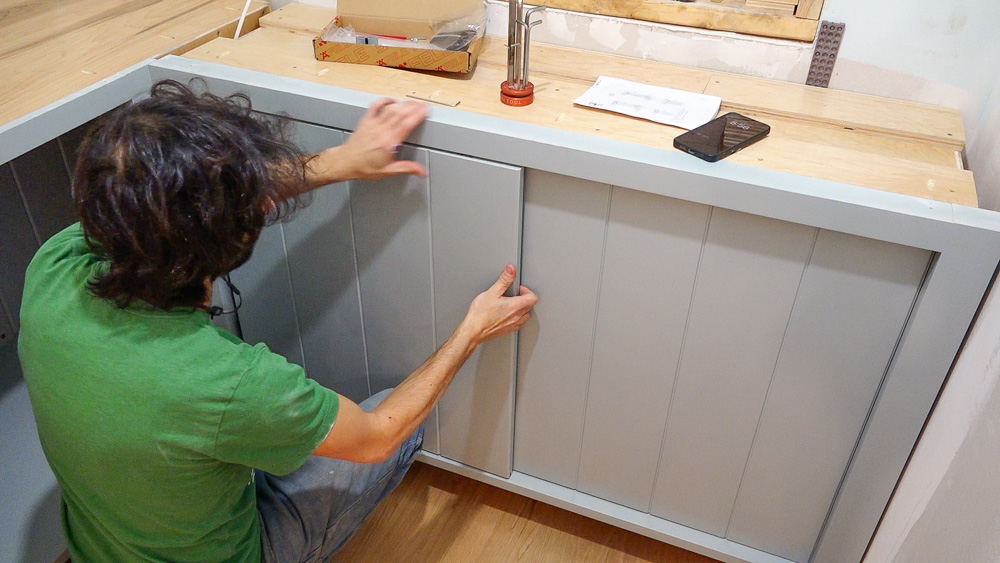
Now I can get these installed in the house. I think these turned out pretty nice! They are now ready for countertops.
Thank you as always for joining. I greatly appreciate it. If you have any questions or comments on the pantry, please feel free to leave me a comment. As always, I’d be happy to answer any questions you might have. And until next time, happy woodworking!
Welcome to my shop! This is a quick update to let you know what I’ve been up to. This big chunky thing is the leg

Welcome back to the home renovation. This time I’m going to be working on the kitchen island. Here is a small model of the island.

Welcome back to our home renovation. Today I am going to be working on this wall. It needs some upper cabinets and the surround for