
Matt's Weekly Shop Update
Kitchen Island, Barn Power – March 2024 Update
Welcome to my shop! This is a quick update to let you know what I’ve been up to. This big chunky thing is the leg
Welcome back to our home renovation and remodel series!
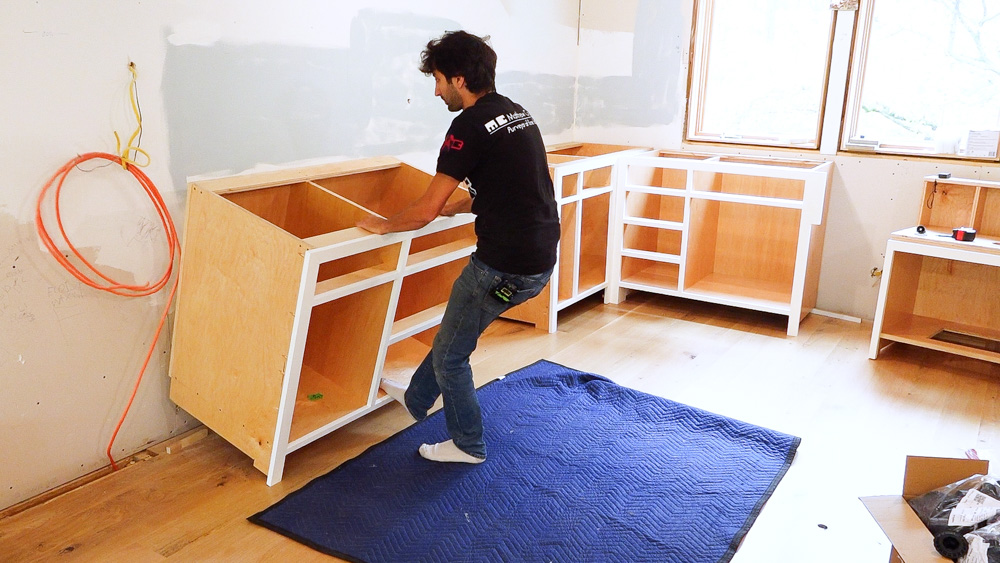
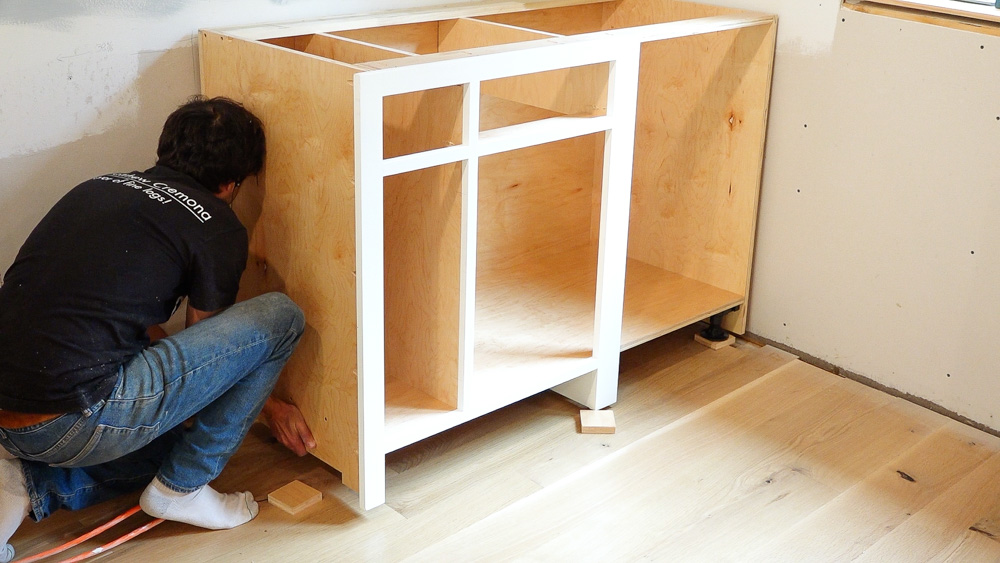
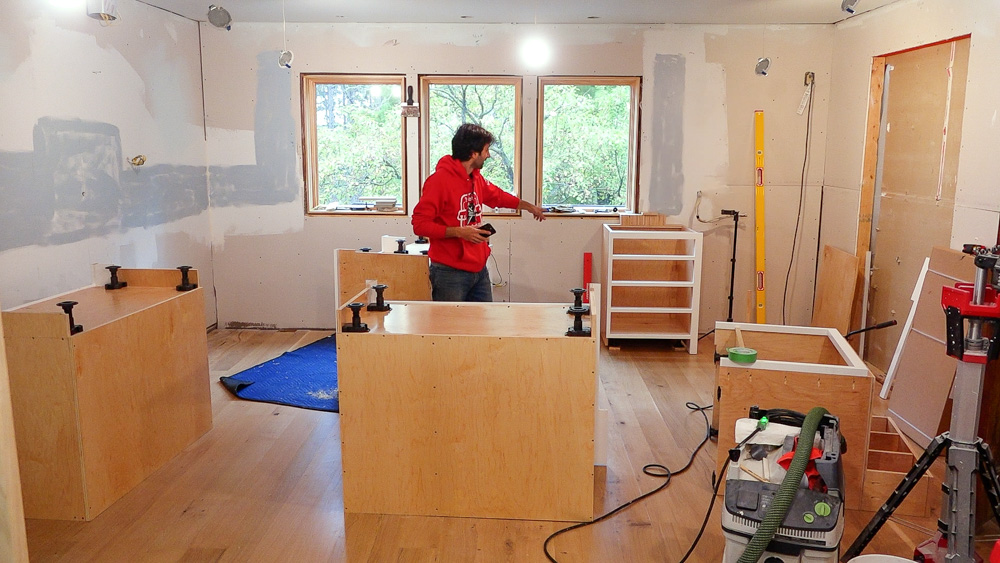
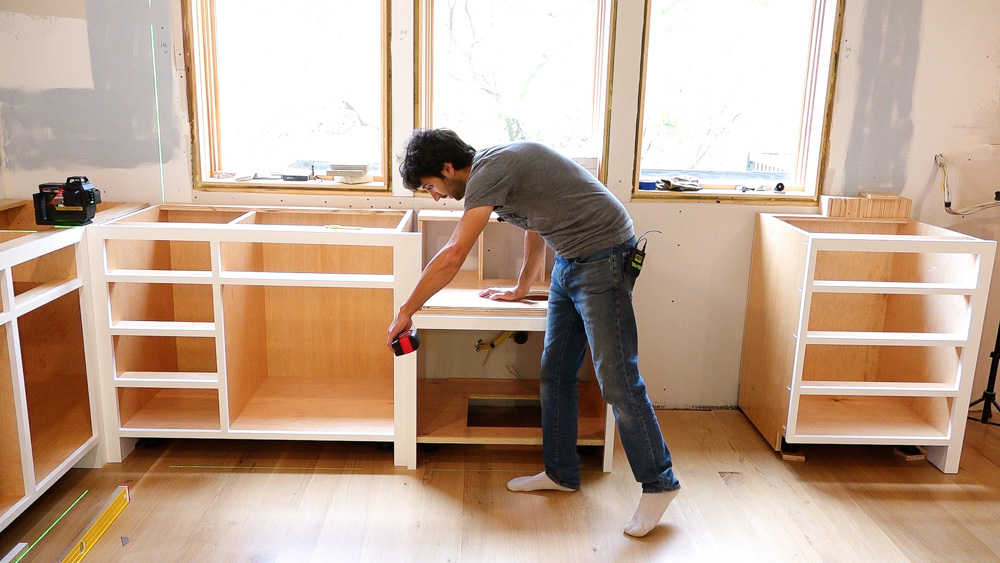
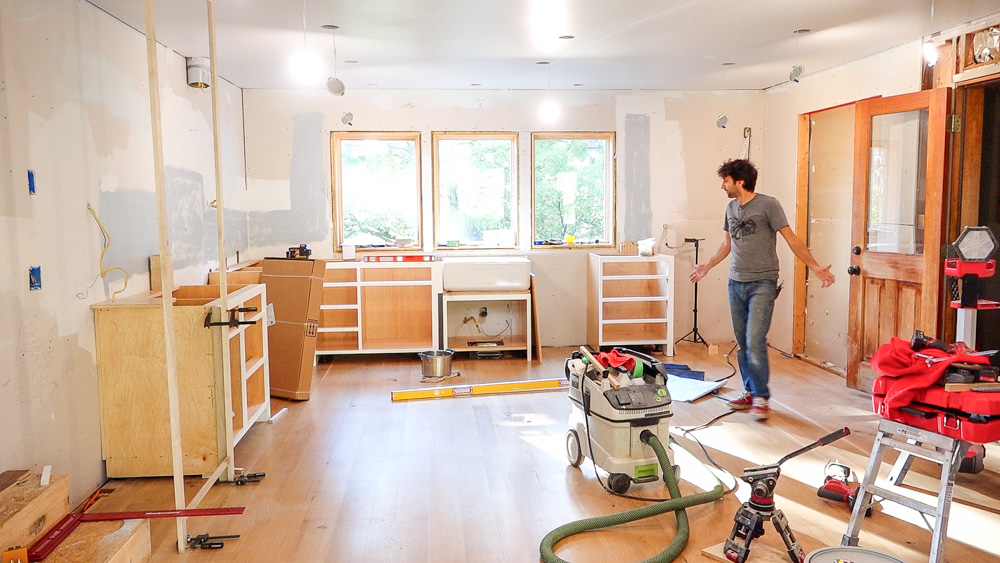
In the last couple episodes we made these five base cabinets, and this time I want to get them set and installed so our plumber can come by and finish running all the supply lines and set the sink. These cabinets get scribed to the floor, so it’s going to be an interesting procedure getting these set. First I’m going to pull everything out and attach the leveling feet to the bases.
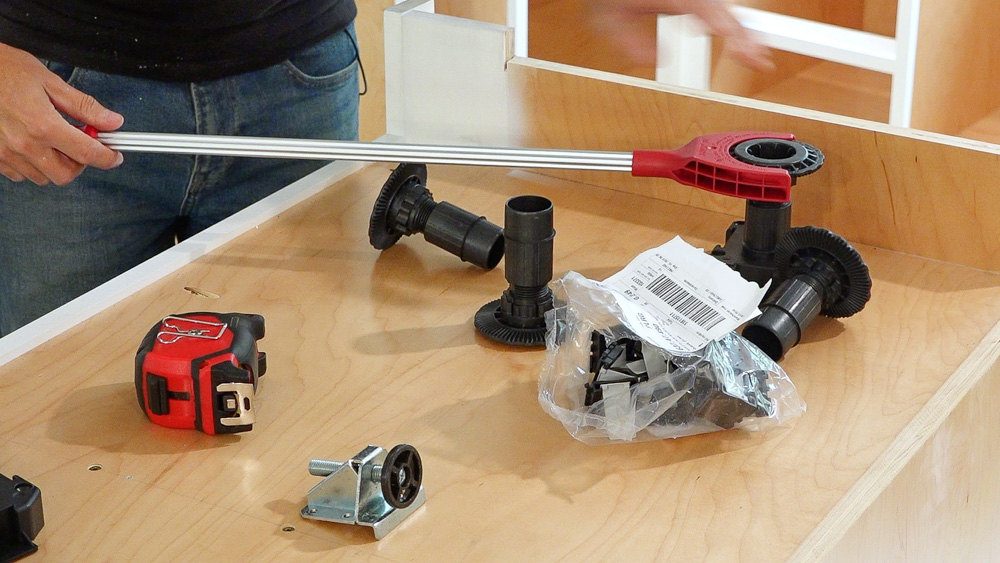
These are the leveling feet I’m using. They’re plastic feet that you can turn up and down, and they have different mounting bases. Plus they have this adjuster tool, so I can use this to reach the ones in the back to twist them up and down as needed.
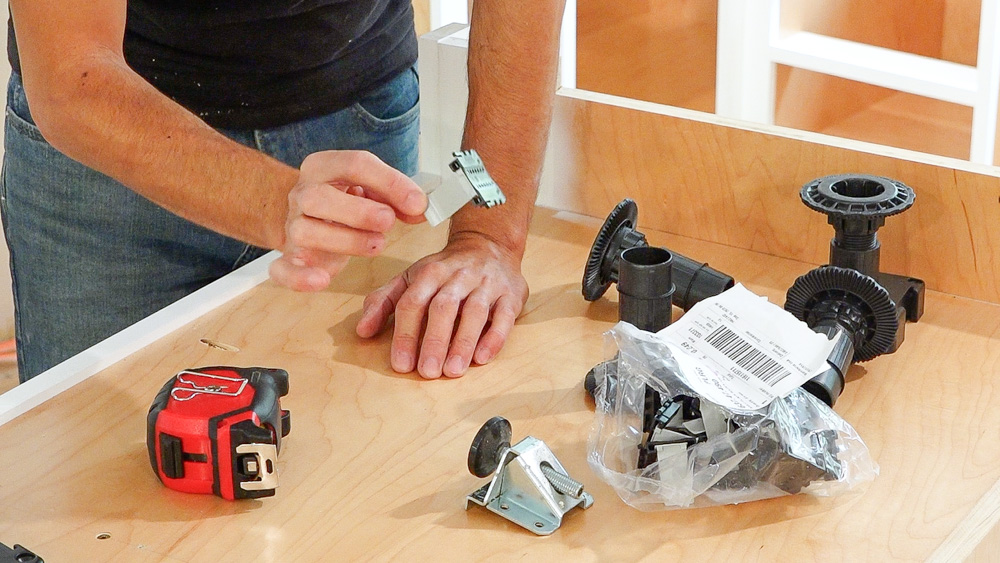
The biggest reason I went with this system is this little doodad right here. This allows you to clip the skirt board that covers the front of the toe kick and have it be removable if you want to get under your cabinet for anything.
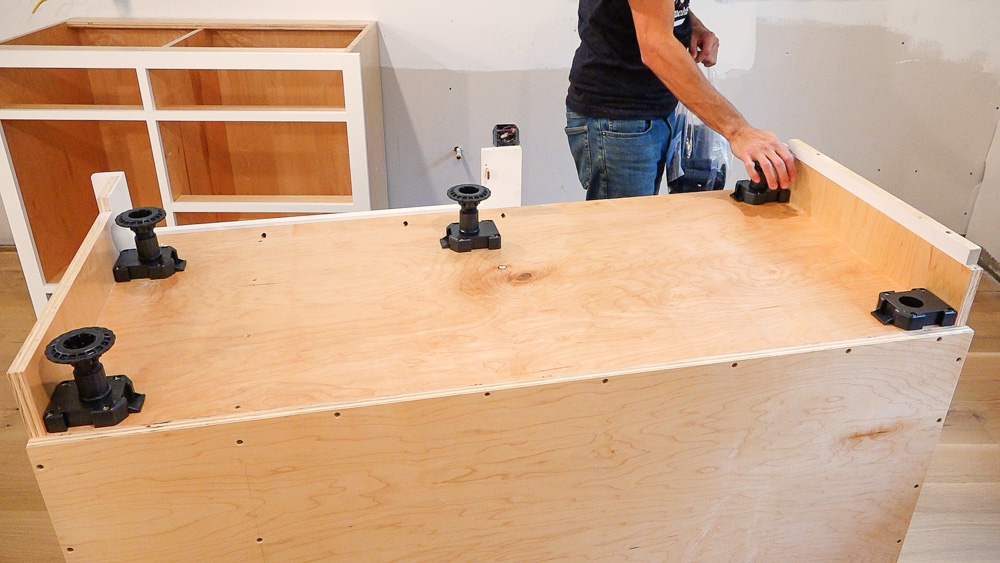
So I’ll get these leveling feet attached now.
So to scribe the cabinets to the floor, here is my strategy. I’m going to basically set the cabinets twice. I’m going to set this piece of plywood under every foot, and that’s going to raise the whole cabinet off the floor by the thickness of the plywood. Then I will scribe that thickness off of the feet on the cabinets. Then when I put the cabinets back with these removed, everything should drop down exactly the right thickness. Then I can do any fine tuning and placement along the wall and go from there.
I set up the laser, so next I’ll get all of these cabinets leveled. Once I get them all done, that will be the rough install, with each cabinet within about a quarter inch of where it needs to be. Then I can go in and scribe everything.
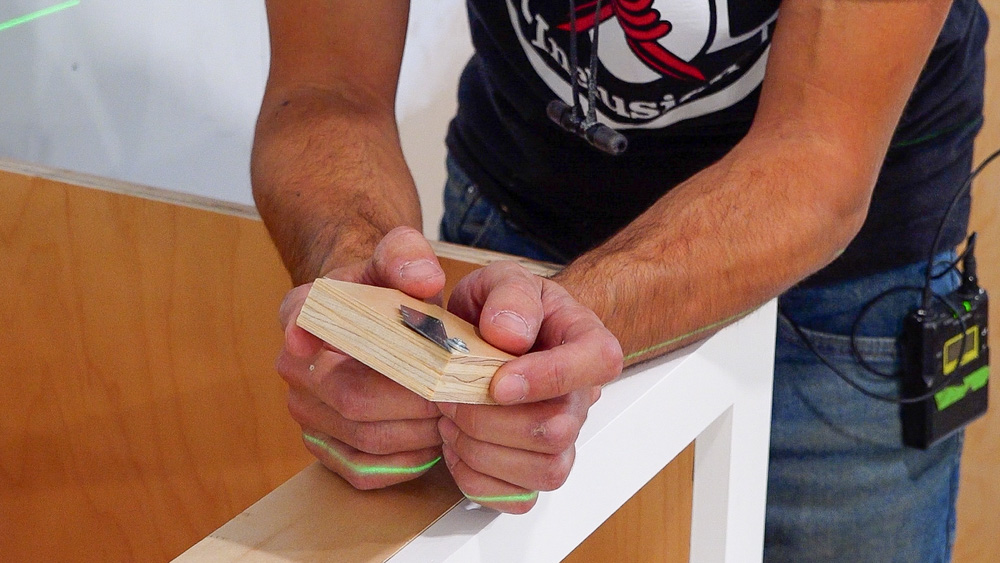
Here is the scribe block I’m going to use. This is probably indicative of me being a woodworker and not a carpenter, but I’m using a knife for my scribe. I much prefer to work to a knife line instead of a pencil line. I have the blade at a bit of an angle, and I’m clamping on the bevel side. This is a double bevel blade, so if I were to clamp this down to the block flat, I’d be off the block by the width of the bevel and I’d be scribing a little higher than I want. So I have the blade right at the top level of my plywood, which will now allow me to just score those legs.
The nice thing about using a knife is that I shouldn’t have to worry about chipping or damaging the paint like I would if I did a pencil line, because the paint and the fibers will be severed by the knife and they should break off or cut off cleanly. So I’m going to go around and scribe all these cabinets down to the floor. Then I’ll start removing the waste and working back to that knife line.
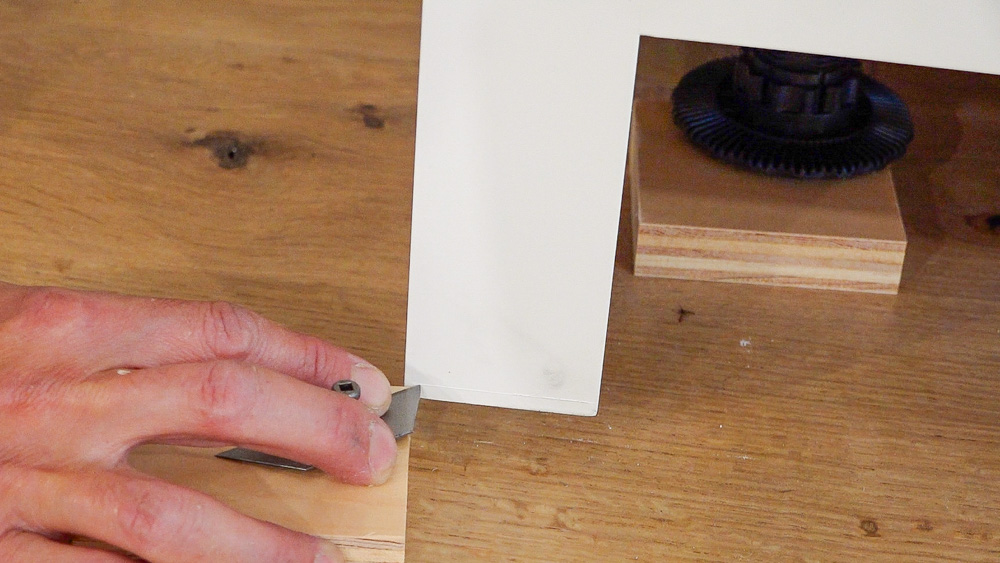
I have the scribes cut on these four cabinets. I need to prime the bottoms where I cut, and then start getting them back into position.
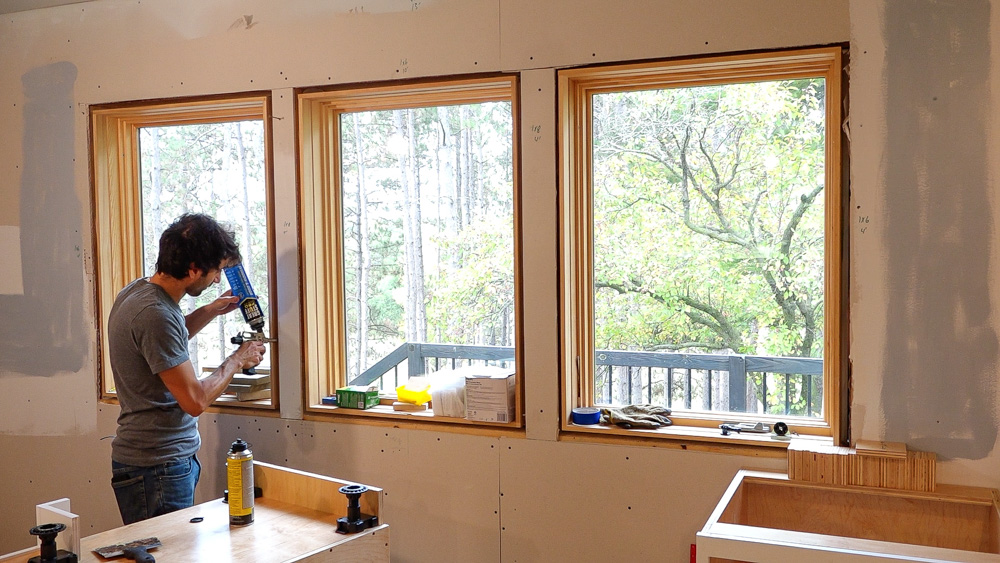
While the primer is drying, I’m going to get these windows foamed in. It’s been on the to-do list for a long time, and I figured that would be easier to do now before I have cabinets sitting in front of them. On the topic of windows, here is a detail I have been meaning to share. The countertop itself is going to wrap up into the window sill, so the bottom part of the extension jamb on the window will come off and be replaced with stone. I have to be careful as I’m foaming them in that I don’t get anything in there that will encumber that coming off later.
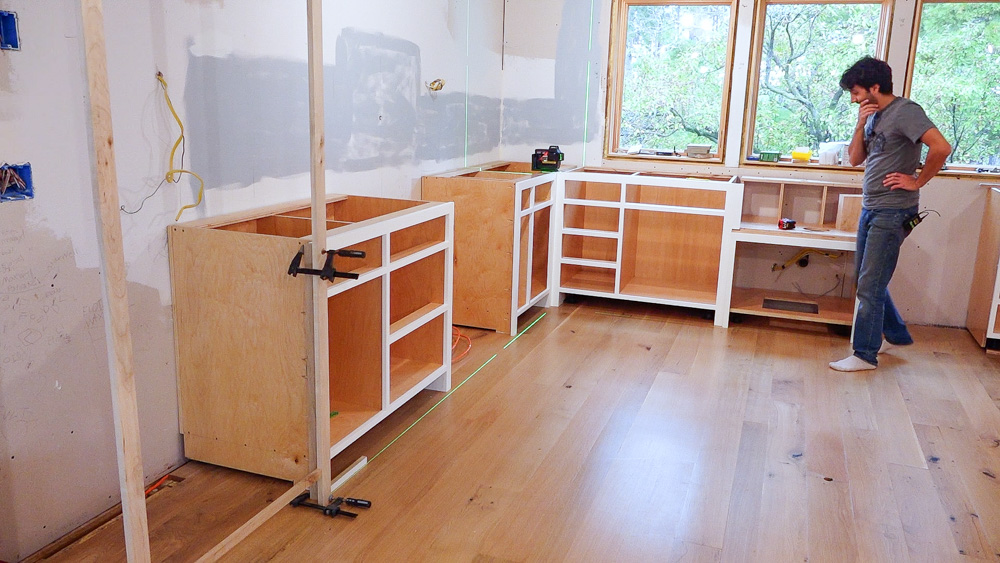
Next I’m going to put the laser in the corner and see if things are plane and square with each other. Luckily, things are looking surprisingly square, they just need a little bit of tweaking.
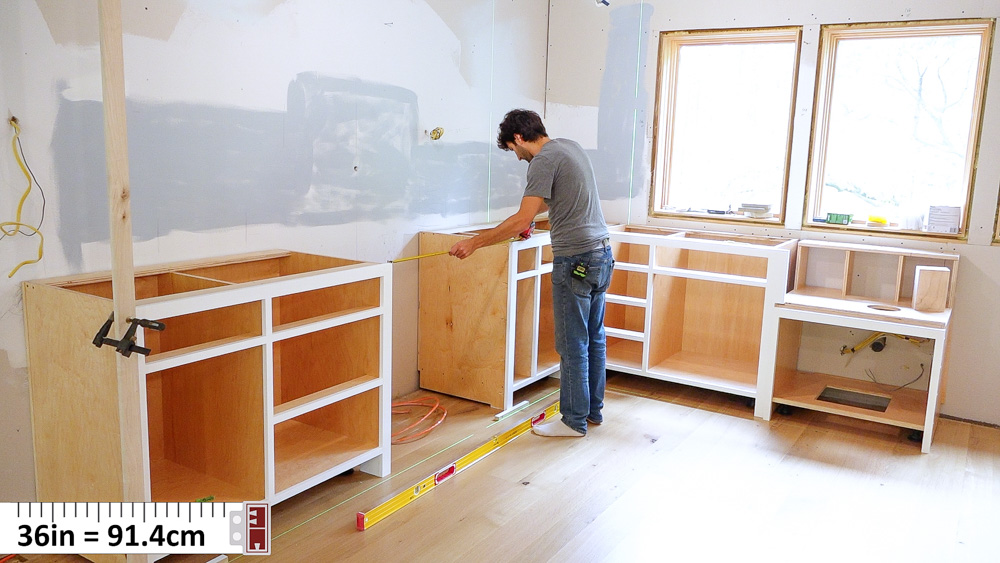
The gap for the range is 36 inches on the dot, which is exactly what I want it to be. I feel like this is too easy, it’s working out so well.
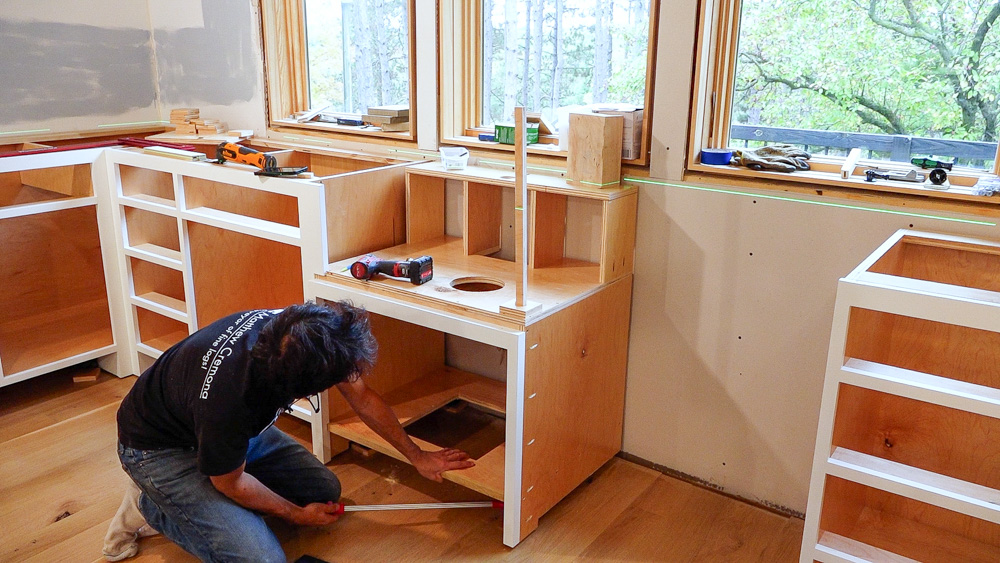
Now that I know where everything has to be, I’m going to secure the corner cabinet, check everything again, and then keep securing the cabinets.

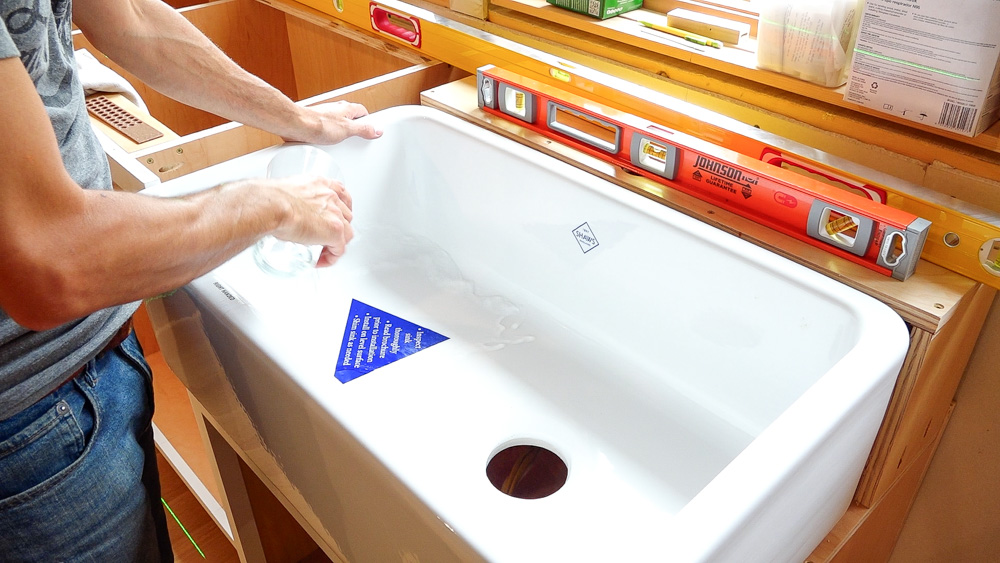
I have the sink positioned where I think it should be. The plumber will do the actual setting of the sink, but I’m going to test to see what needs to happen for shimming. Based on a water pour test, the left side needs to come up a bit. But I am going to put the sink on hold until the plumber gets here.
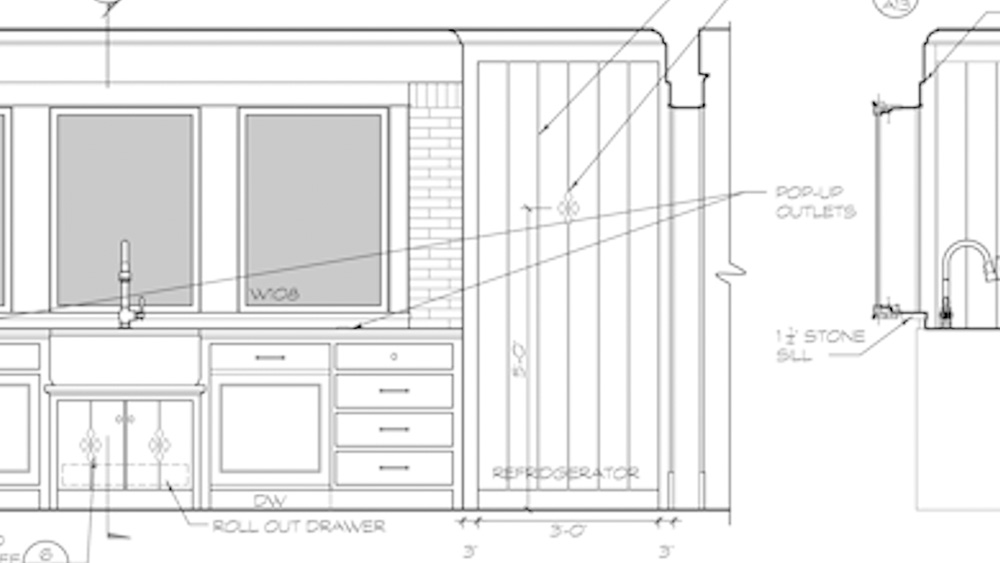
Instead I’m going to focus on the refrigerator zone. The way the plan is drawn, there is a 36 inch fridge opening with three inch styles on either side. The style on the right side of the fridge comes into the wall, and then the casing comes into that. So it is asymmetrical when you’re looking at it, which would be ok, but I am making the details symmetrical everywhere else. So I am going to make the right style three and three-quarters wide, and the left style will be three inches.
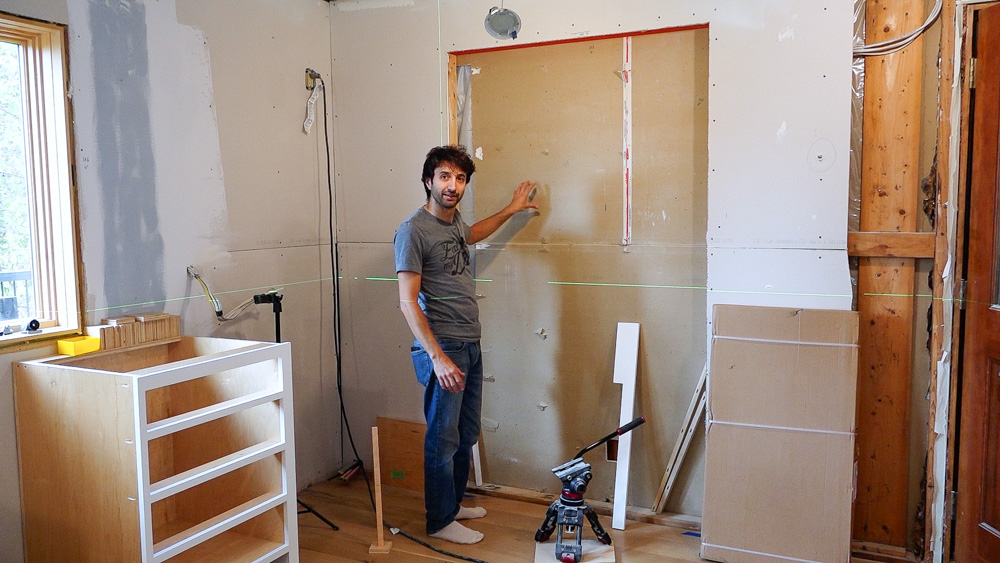
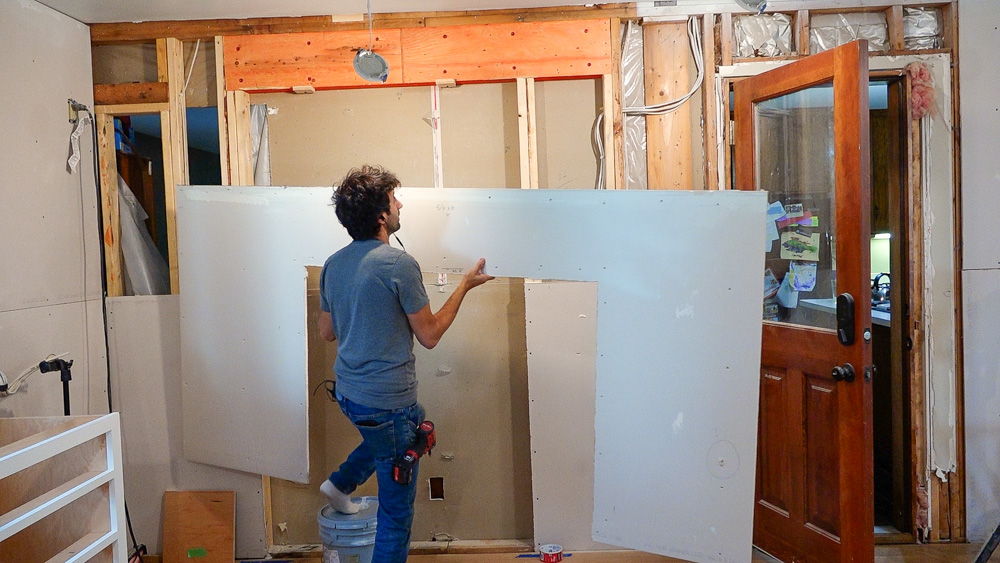
But before I can do that, I need to work on this opening, which is going to be the doorway into the foyer room. I need to fix some framing issues that we didn’t get quite right.
It’s supposed to be a four foot wide opening, and along the wall to the left of the opening is first the refrigerator, then the cabinet, casing, and then immediately the jamb, because there is no drywall anywhere. We made the spot for the refrigerator cabinet 24 inches deep, because that’s how deep the fridge is. But in the plans, it’s actually drawn at 26 inches deep, to give a little bit of a bump out against the facade of everything else. On the other side of the room will be the tall appliance garage, and that one sticks out two inches as well. So the idea is that the appliance garage and the fridge book-end the L run of the cabinetry.
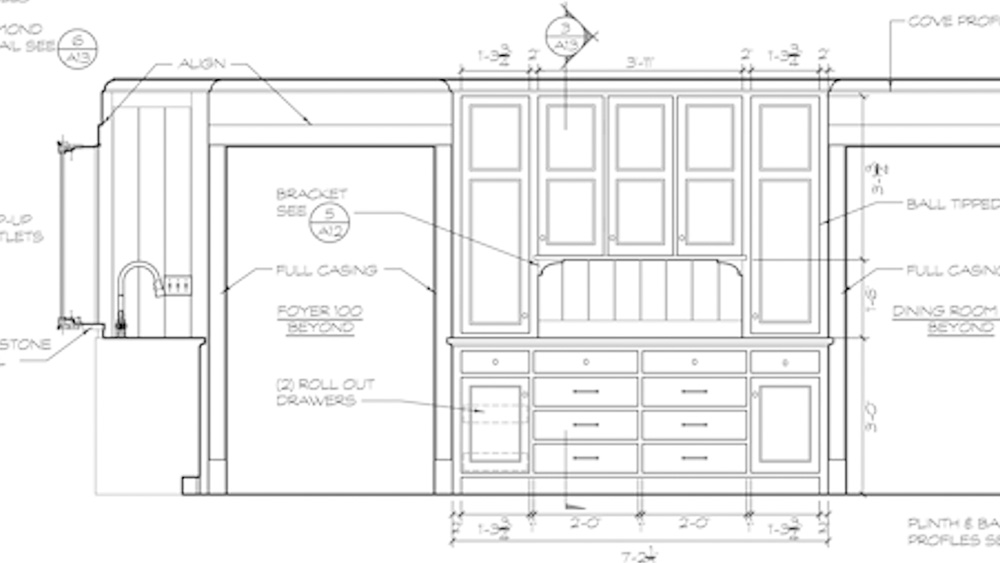
So now my rough opening is too far to the left. I could make the opening narrower, and make it a 40 inch wide opening, but this is going to be a pretty main thoroughfare, so I want to bump the opening over. One side is easy to fix, I just put some filler and that will give me an inch to adjust my jamb. The other side of the opening has to come over three inches, which is a double stud over.
Luckily we have a beam in the ceiling that runs far enough out that I can move the opening a bit without too much of an issue, because that beam up top is continuous.
The next bit of framing that I have to fix is right here with this light switch. We framed this opening oversize, because the jamb of this door is going to line up with the V groove in the panel. By making it oversize, we can adjust it side to side to land the door directly where it needs to be. The V paneling is also supposed to split between the two switches on the wall, but the box is too far to the left in order to do that. The box should be six inches off the finish, but it is currently six inches off the framing.
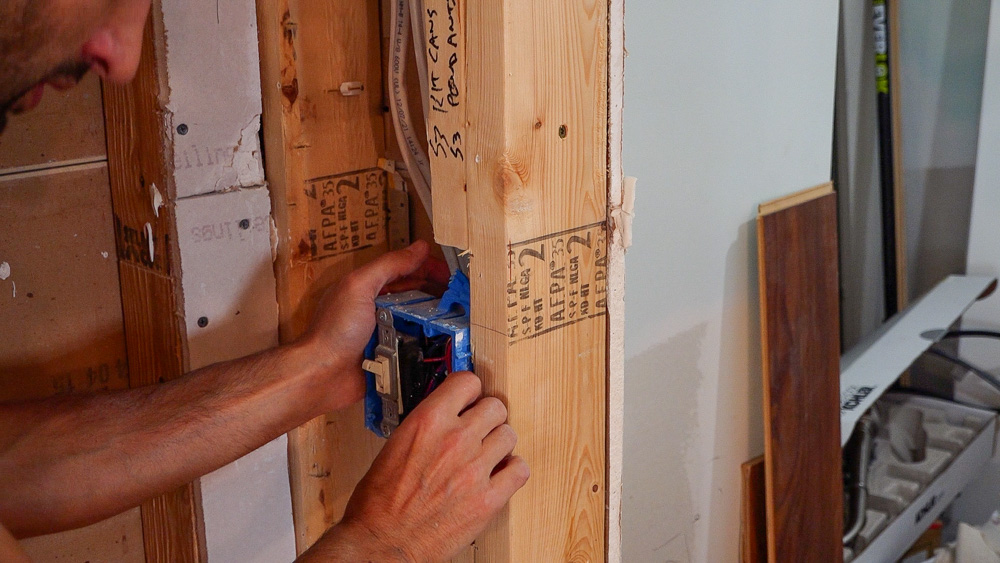
So I am just going to cut the stud out and move the box to the right so it’s in the right spot.
I’m going to call it here for today. I didn’t get as far as I was hoping, but a lot has still been accomplished. The space keeps coming together, and it’s making me really excited to see the final results. (Even though I’m still just in the very beginning of all of this)
Thank you as always for joining. I greatly appreciate it! If you have any questions or comments about the home renovation, please feel free to leave me a comment. As always, I’d be happy to answer any questions you might have. Until next time, happy woodworking!
Welcome to my shop! This is a quick update to let you know what I’ve been up to. This big chunky thing is the leg

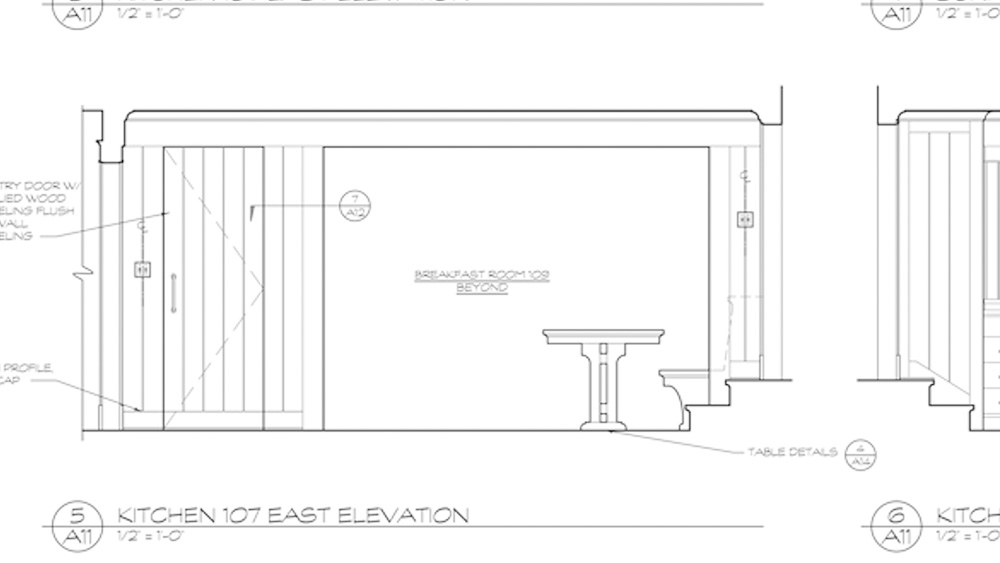
Welcome back to the home renovation. This time I’m going to be working on the kitchen island. Here is a small model of the island.

Welcome back to our home renovation. Today I am going to be working on this wall. It needs some upper cabinets and the surround for