
Matt's Weekly Shop Update
Kitchen Island, Barn Power – March 2024 Update
Welcome to my shop! This is a quick update to let you know what I’ve been up to. This big chunky thing is the leg
Welcome back to our home renovation and remodel project.
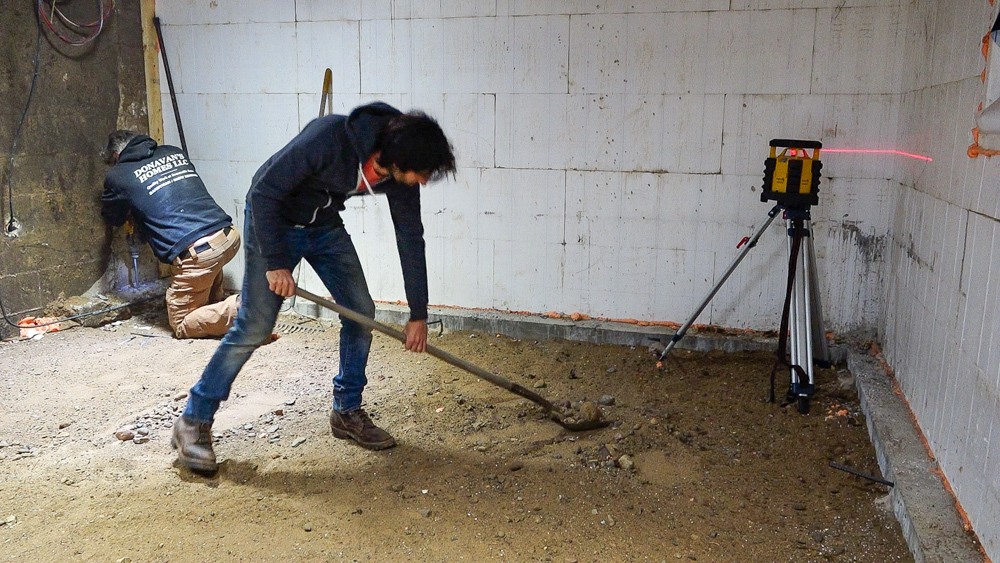
We are going to be working on the floor here in the office, which is going to be a heated concrete floor. Last time we were down here, we got the grading pretty close to being done. We have a little bit of high spot where the laser is, so we’re going to have to take a little bit more material out of here and then start prepping our floor base.
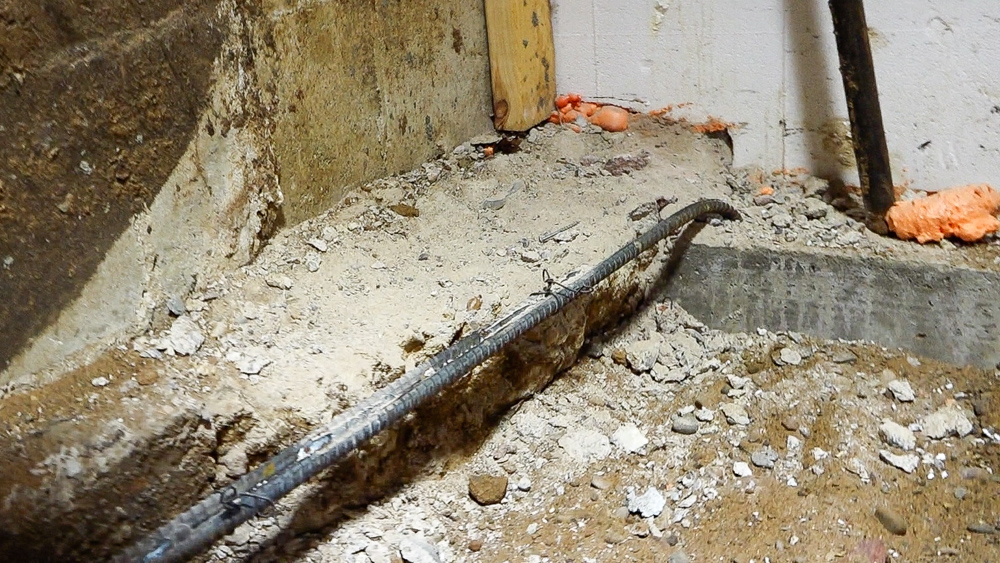
Over here in the corner, we have the footing from the original house which is a little high. So Donovan just shaved that down a little bit, so it wouldn’t stick up into our floor.
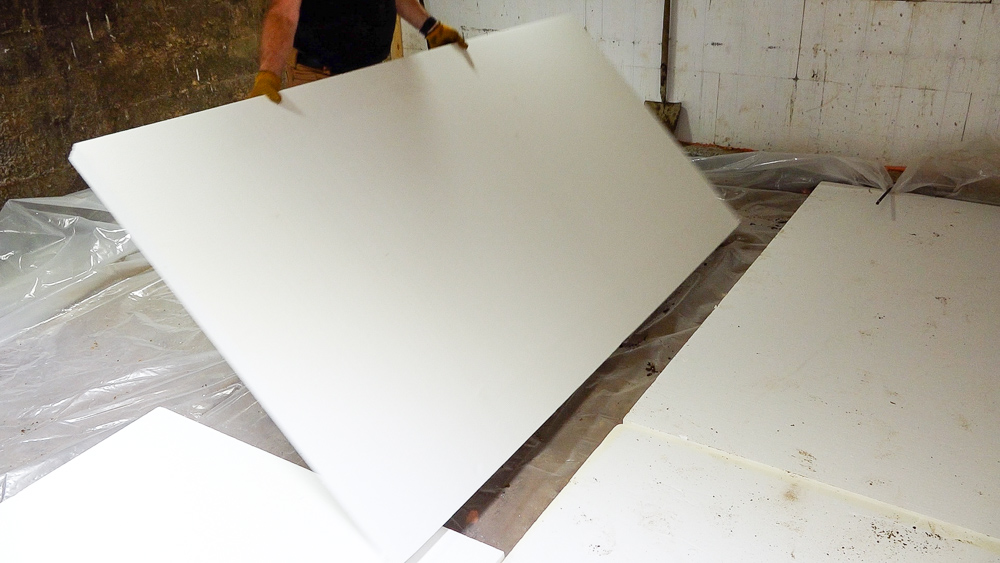
Next we are prepping the floor with this foam.
There’s all the foam laid down. Now the last step is to tape the seams with some sheathing tape. Then this will be all ready for the plumbers to come in and install the PEX.
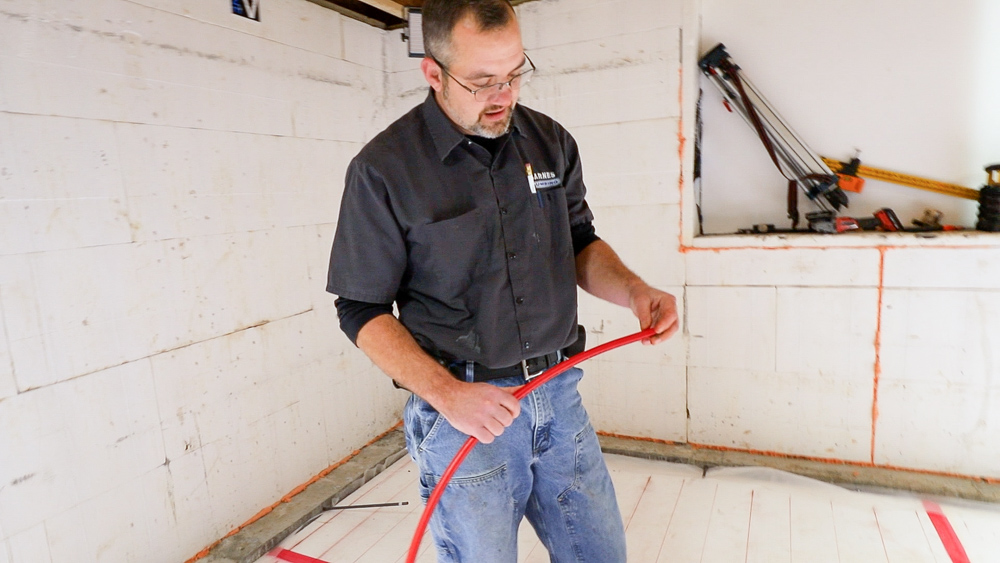
It’s now Wednesday, December 15, and we have our plumbing contractor here today to install the PEX into the floor and prep for pouring this thing. This is Mike, he’s our plumbing guy. Essentially what we’re doing is putting this PEX tube into the floor. This PEX tubing is heat considered – It’s called Heat-PEX. It’s different from your household PEX that you use for your water, because there is an oxygen barrier on this PEX to keep oxygen particles from being absorbed into the PEX and into the water. In hydraulic heating, air’s the enemy. We want to make sure that there’s no air in there. When doing infloor heat, you can’t just use standard PEX. You have to use Heat-PEX. It will be labeled Heat-PEX to let you know that it is for infloor heat jobs.
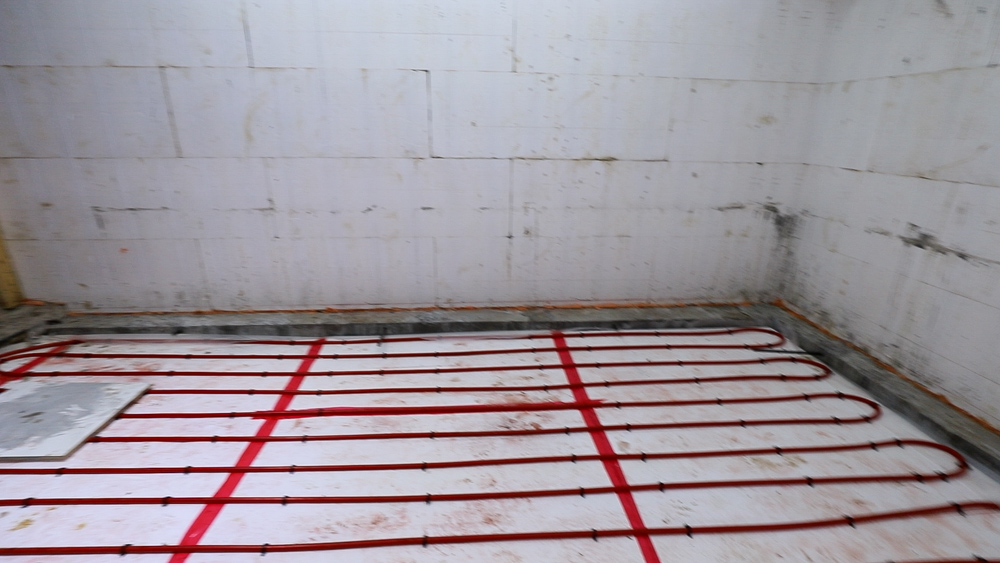
This office room is 20×15 feet, and it’s typical to have six inches of spacing between the courses of the PEX. Any tighter than that, and the tubing will kink. Some tubing can go a little tighter than six inches, but as heat wise, six inches works out great. When you go to a wider pattern, as you walk, especially on concrete floors, you’ll step down and feel heat, then your next step, you don’t feel heat. There’s too much of a gap in between the tubing.
In terms of maximum length for each loop, that is dependent on pipe size and pump. The pump has a certain head pressure which determines how many GPMs it can push. Most people are going to use a standard pump, which is either a 77 or a UP1558 pump. You don’t want to get over 225 feet of total length per loop.
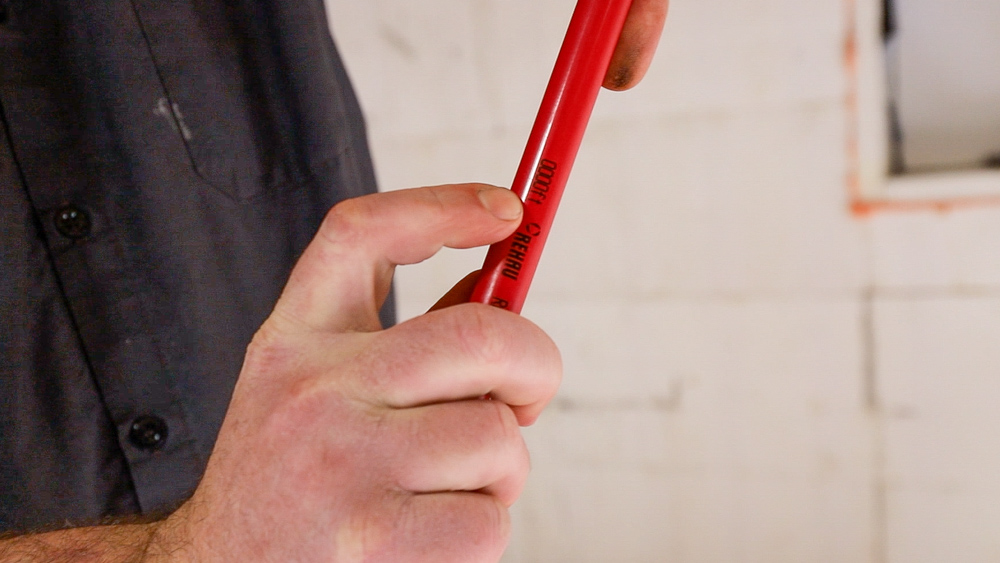
On this particular pipe, it actually tells you the footage. So when you start, you look at the tubing as to where the footage is. This particular one says zero feet, so this is starting from zero. As we roll the tube out and you keep going down, you get to the next spot and it says six feet. That way you know approximately where you’re at. A lot of heating PEX has that feature. Otherwise, what you have to do is measure your total length. When it comes to purchasing tubing, you want to overbuy so that you have a roll that’s long enough, because you don’t want any joints underground.
We already have the existing in-floor heating system we’re going to tie into. So this is going to be on its own zone, and then everything else is going to be tied into one of the existing zones later on when we do the upstairs.
![]()
Here in the basement, we’re installing this into concrete, which is a better conductor of the infloor heat than the staple up method or the channel up method of installing into sub-flooring. Those methods use transfer plates, which do a good job, but the concrete acts as one solid radiator. Once you heat the whole slab up, it has a lot better heat communication with the room.
The staple ups work fine, and the transfer plates are very important when you do the staple up method because that transfer plate takes the heat from the tube and transfers it out to whatever subfloor that you’re hooked to. It does a good job, you get similar results, but if there’s a better result, that’s from the concrete. It’s going to be a little more noticeable than on the subfloor.
To install the PEX on the concrete, Mike is just stapling right down to our foam. And then for the upstairs, we’ll use the transfer plates. Mike will also be installing an insulator, leaving about an inch of gap between the subfloor with the tubes in, and then the insulator, which is a reflective foam, to have an air gap for the heat to transfer up and make sure it’s not radiating down.
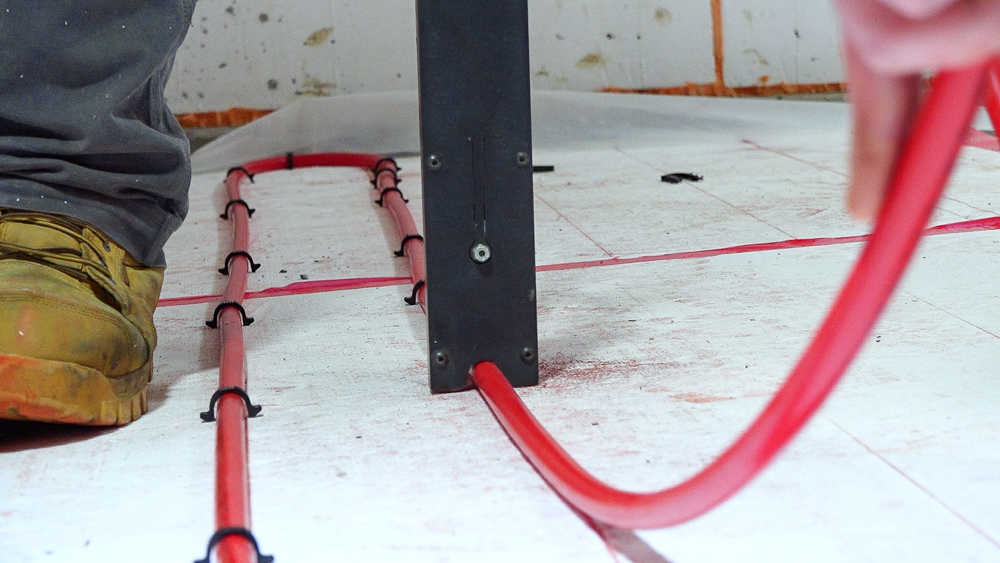
Now I’m going to let Mike get to installing. He’ll staple the PEX down and start making loops. In the end, he installed about 500 feet of PEX.
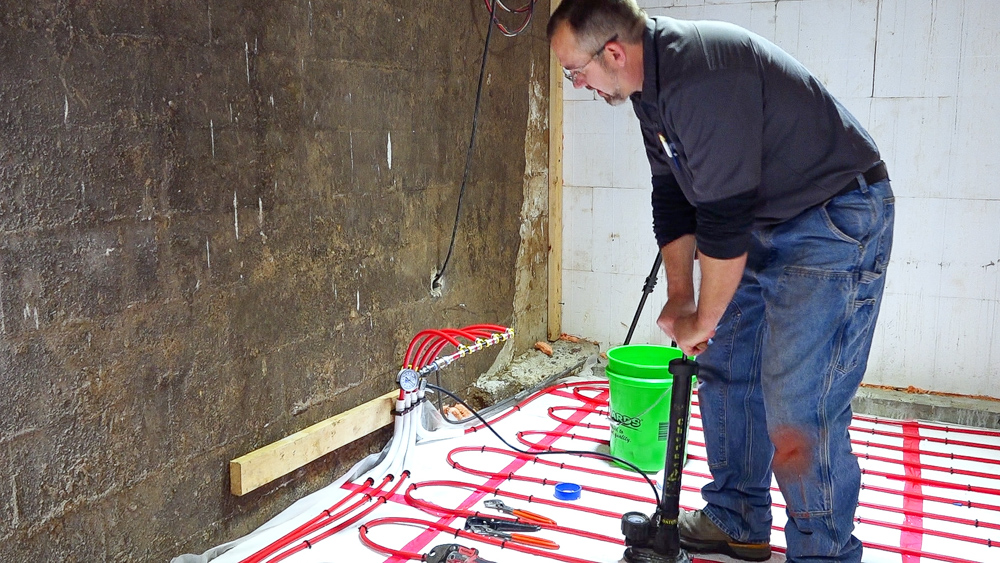
Now Mike is going to pressurize the system and just check for leaks. He pumped it up to 40, and now we’ll let it sit for a few days and make sure this holds pressure. We have an inspection tomorrow and then the concrete pour will be on Monday!
It’s Monday now, and the concrete crew is here, and we are getting ready to have the concrete poured. We have gone around and snapped the chalk line for the finished floor height, which we’ll be working towards. Our PEX is still holding pressure, which is good. We’ll keep this pressurized during the pour, which will do two things for us. First of all, if the lines get punctured at all, you immediately know because that gauge will go to zero, and second of all, it makes the PEX a little stronger.

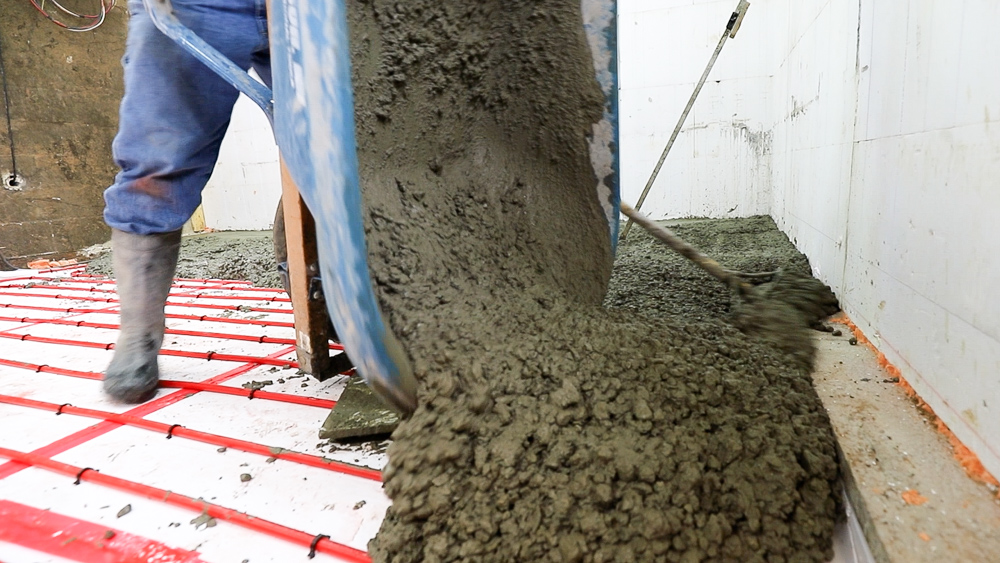
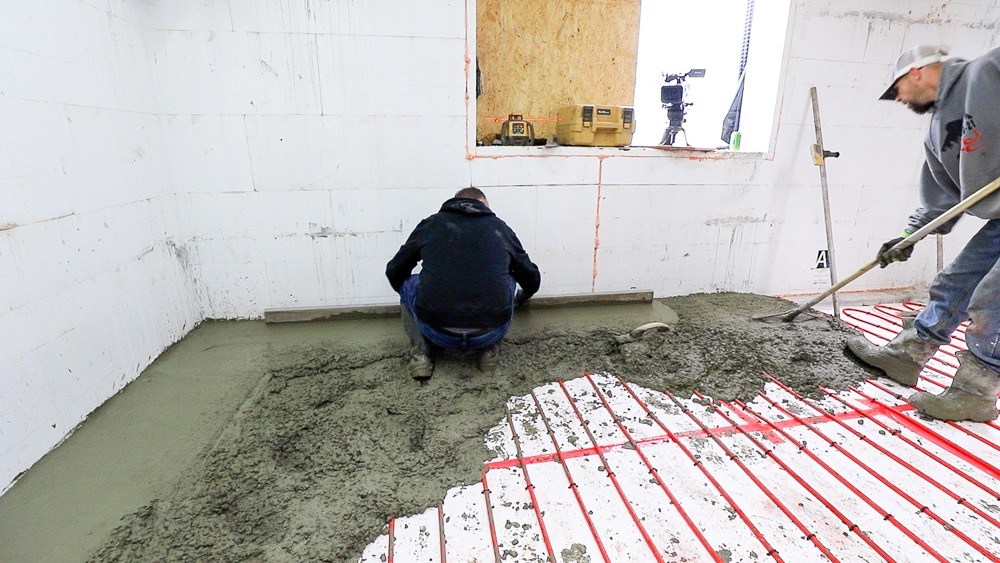
They start with the edges, get that set, and then fill it all in.
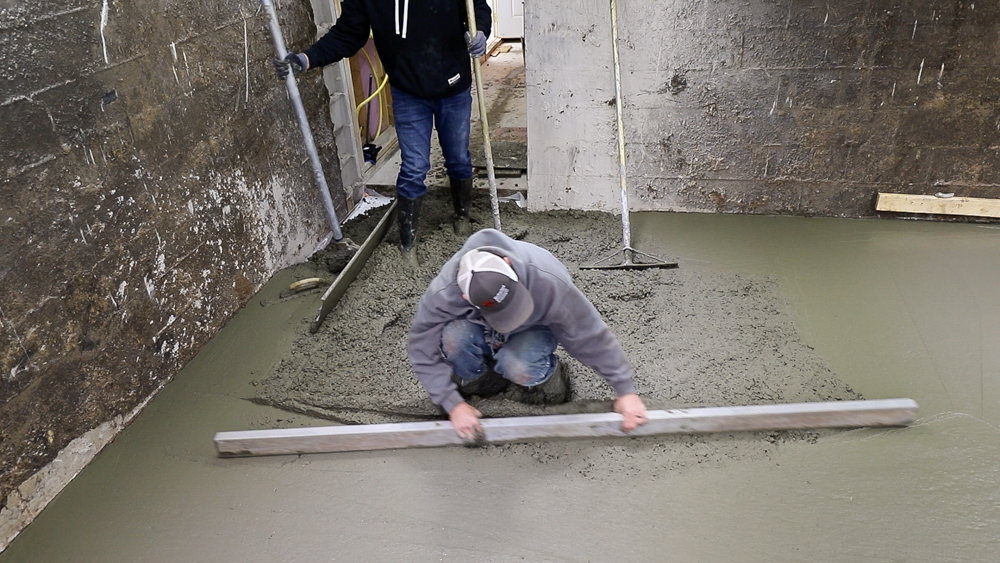
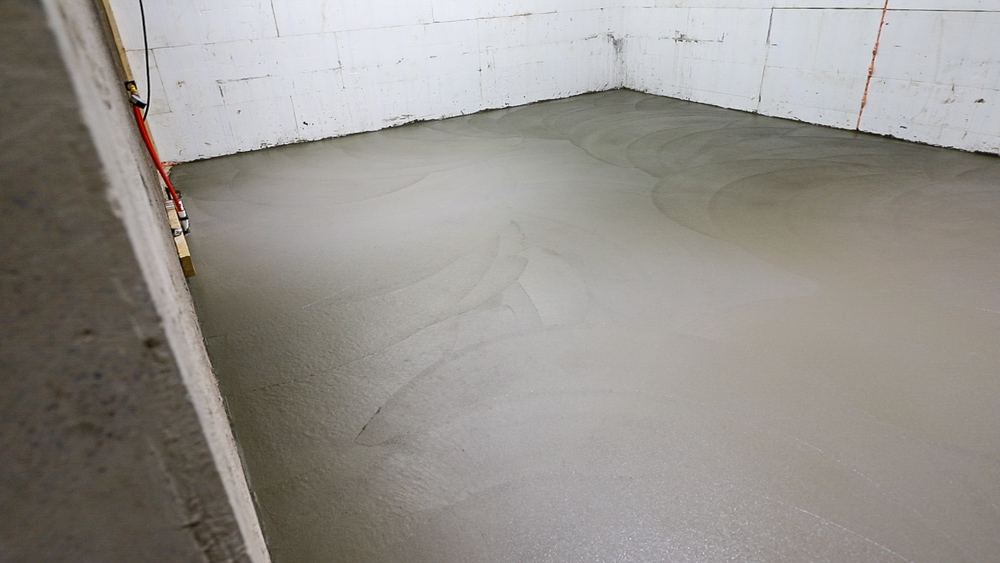
Here it is after the first troweling. We’re doing a half hour break again before the next one..
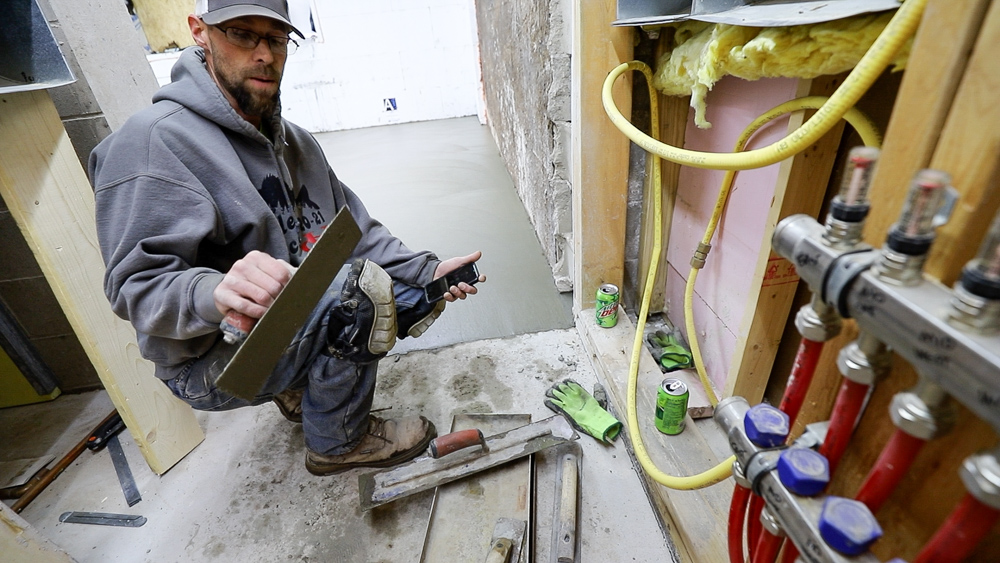
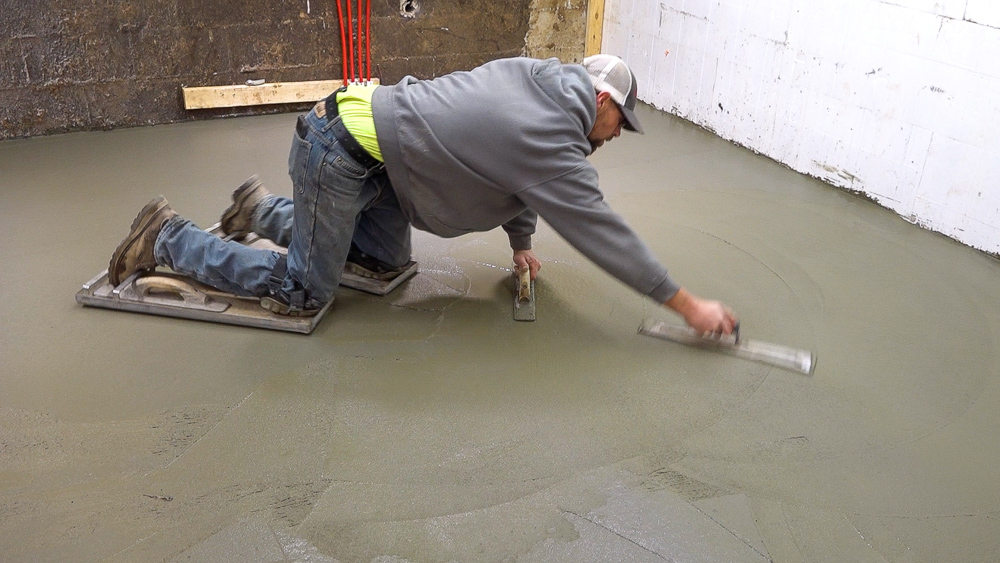
There are different trowels used based on which pass is being completed. One for the first pass which takes all of the big ones out, one for the second pass which helps get the finer stuff out, and then the one Dan is holding allows him to scrub things out even as the concrete is hardening.

One of the things that you take for granted is having an actual floor, because it is crazy what a difference not having dirt floors can do. It really transforms the space into a much more finished looking space. It’s not quite finished yet, but it feels way more finished than it did not too long ago.
A big thank you to Mike and Christian from Barnes Plumbing for taking us through the PEX install. Mike is going to be back here quite a bit because there’s actually a lot more plumbing that’s going to be happening here. So you’ll see more of him in the future.
And a big thank you to the guys at Unlimited Concrete Concepts for doing a nice, amazing job on the floor. They had the concrete down and placed in 45 minutes from the time the truck pulled up to the time they’re floating out the door. And then thank you to Dan, who did a ridiculously awesome job hand-troweled the floor. He was here until three o’clock, so about four hours after the pour was done. It was so cool to watch him work and learn about the process of hand troweling concrete to get it finished like this. The skill that he has to do this is just incredible.
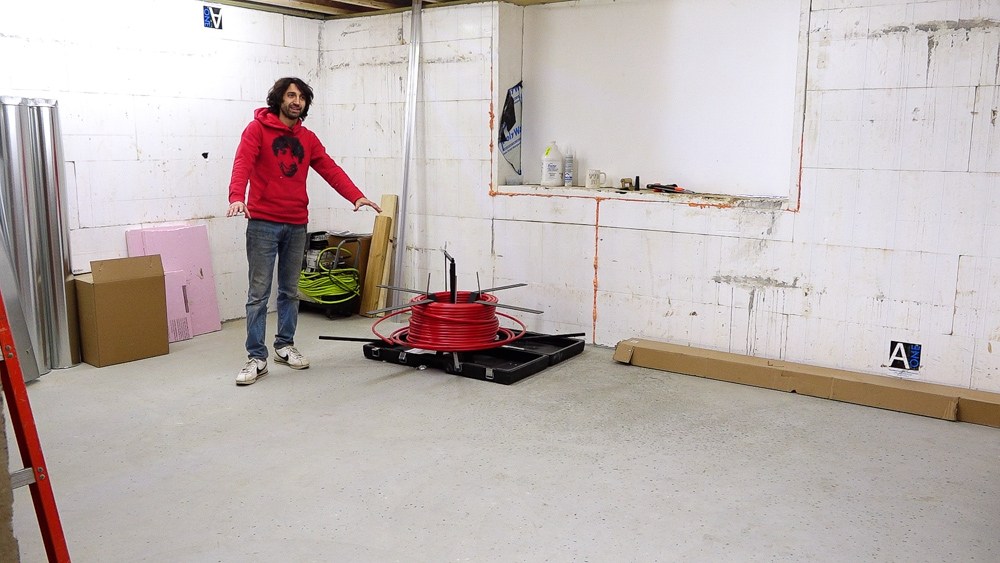
That’s going to do it for this one. Now we have an office floor, and this is an actual usable space now. As you can see we are using this as a material staging area now, and it’s great. This will be the finished office space in the future.
Next time we’re going to be back in the house, starting on the new kitchen space. We’ll be expanding our existing area out into our additions we did in the fall. That’s going to be a heck of an adventure. So thank you as always for joining me. I greatly appreciate it! If you have any questions or comments on the home addition and renovation or anything back in the shop, please feel free to leave me a comment. As always, I’ll be happy to answer any questions you might have, and until next time, happy woodworking!
Welcome to my shop! This is a quick update to let you know what I’ve been up to. This big chunky thing is the leg

Welcome back to the home renovation. This time I’m going to be working on the kitchen island. Here is a small model of the island.

Welcome back to our home renovation. Today I am going to be working on this wall. It needs some upper cabinets and the surround for