
Matt's Weekly Shop Update
Kitchen Island, Barn Power – March 2024 Update
Welcome to my shop! This is a quick update to let you know what I’ve been up to. This big chunky thing is the leg
Welcome back everyone to our home renovation! This time we’re doing some more trim, specifically, the crown molding. I will be making and installing all of the crown molding for the sunroom and one area for the breakfast nook area. The long wall in the sunroom is 18 feet, and the stock I have is 12 footers, so I’ll need two for both of the long walls, and then one stick for the shorter walls.
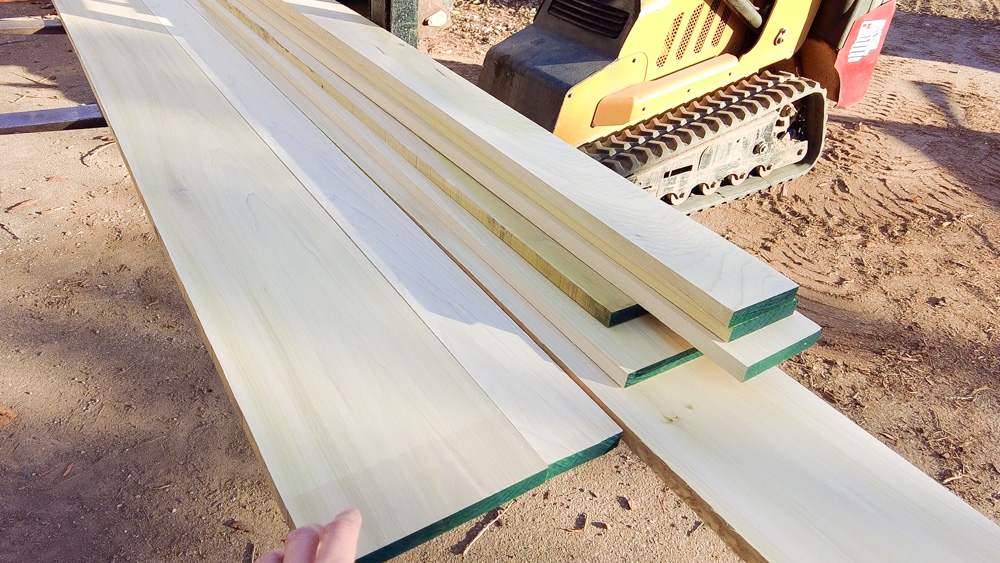
Before I can run the crown, I need to make all of the blanks. Here is the stock I’m going to use. This is a five quarter S2S and straight line one edge. I can rip my blanks out of these and go from there. The blank needs to be an inch thick and four and a quarter wide.
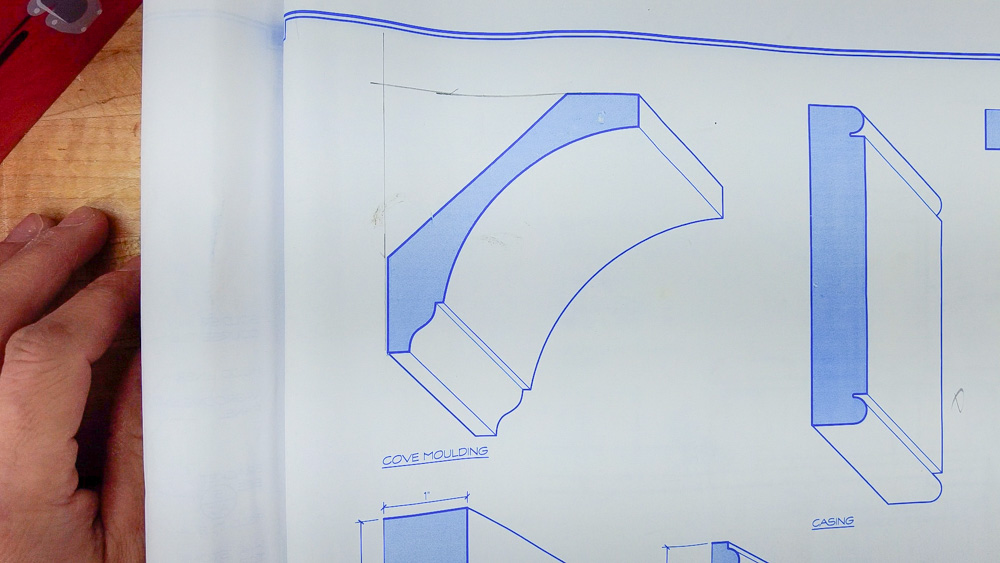
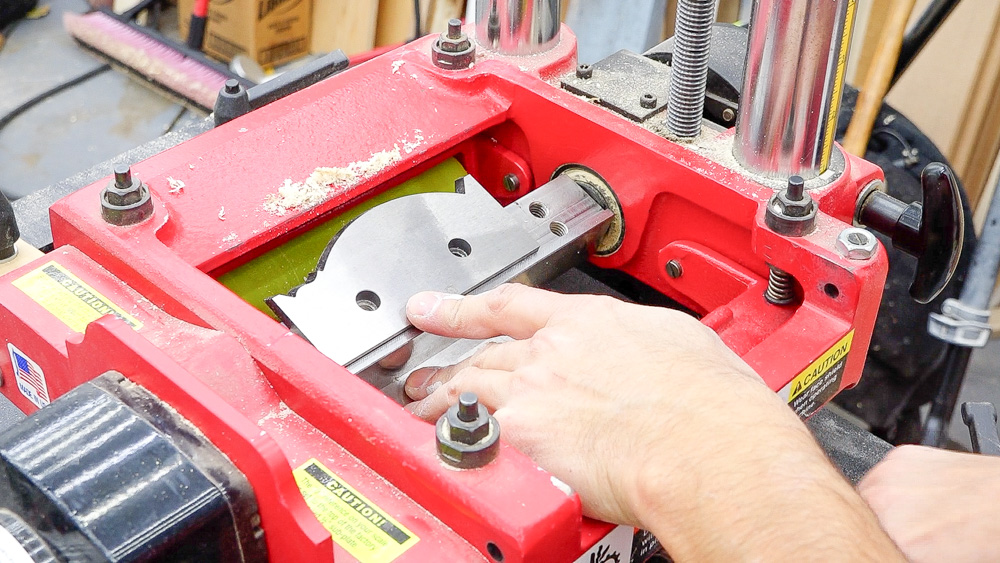
Here is the final profile that we are going to be creating, so our blank is basically the diagonal. I can run this thing on the flat, and then create the cove and the ogee detail.
So I am going to rip these down to their final width. One benefit to making your own crown molding is that you can make it in batches as you go. Because I am renovating different rooms in my house at different times, I can do them in batches as I go. Making my own crown molding also allowed me to stick with the original crown molding design that the architect drew up for us. Suppliers can do custom millwork by making a custom knife, which results in an extra tooling cost. So every time you have a run done, they’ll probably charge you a set-up fee. I am saving the set-up fees by doing this myself.
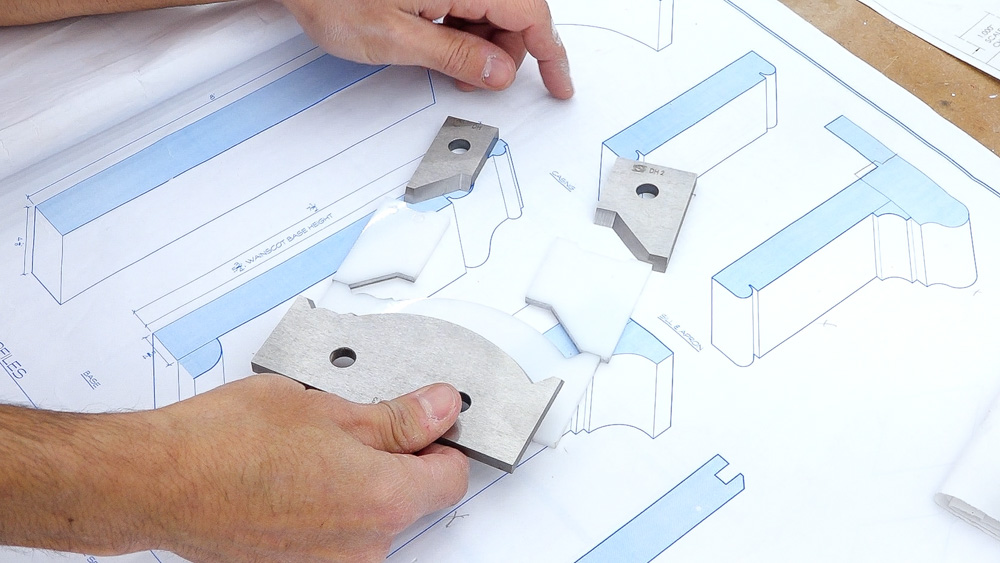
I have three different knives. One is this cove molding knife, as well as two back cutters that are going to cut the spring angle onto the back of that molding. The spring angle on a piece of molding is the angle that it’s sitting on the wall versus the ceiling. In my case, it’s a 45 degree spring angle.
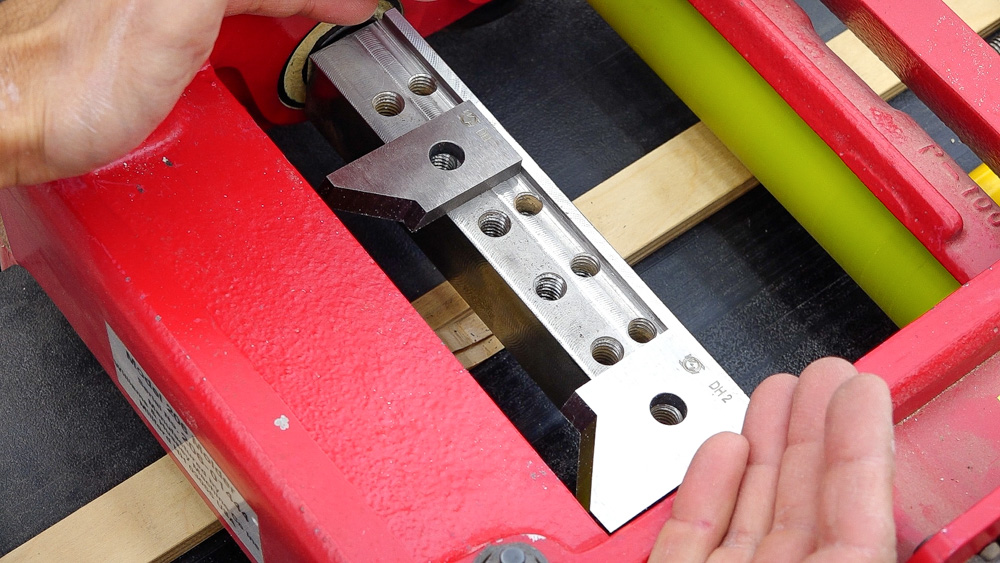
There are two different cuts for the back. Because of the spacing, I have to do this one two runs because I can’t space the knives perfectly to the width I’m going for.
I realized I actually had to use one of the knives for a vertical cut, but luckily I was able to salvage what I had already cut.
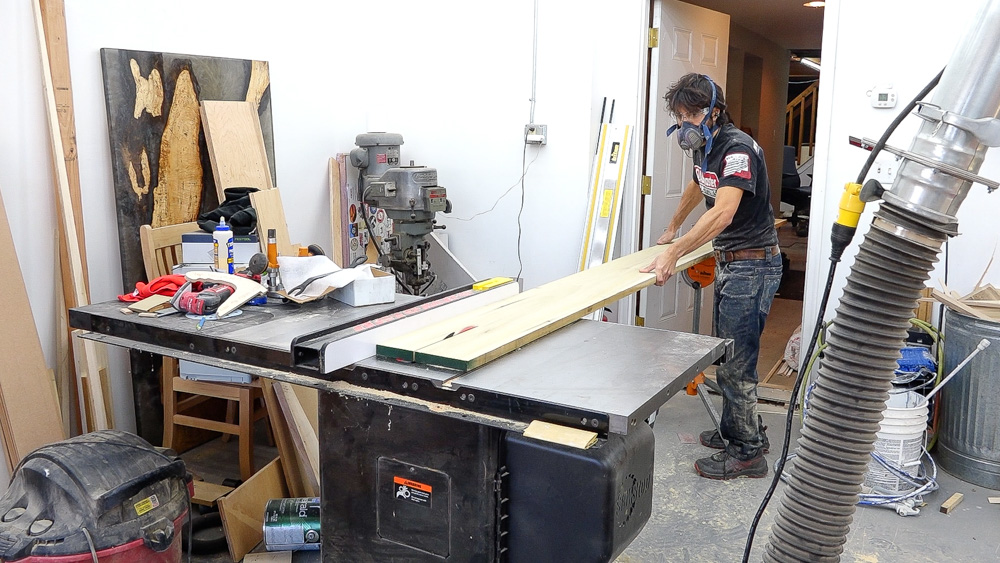
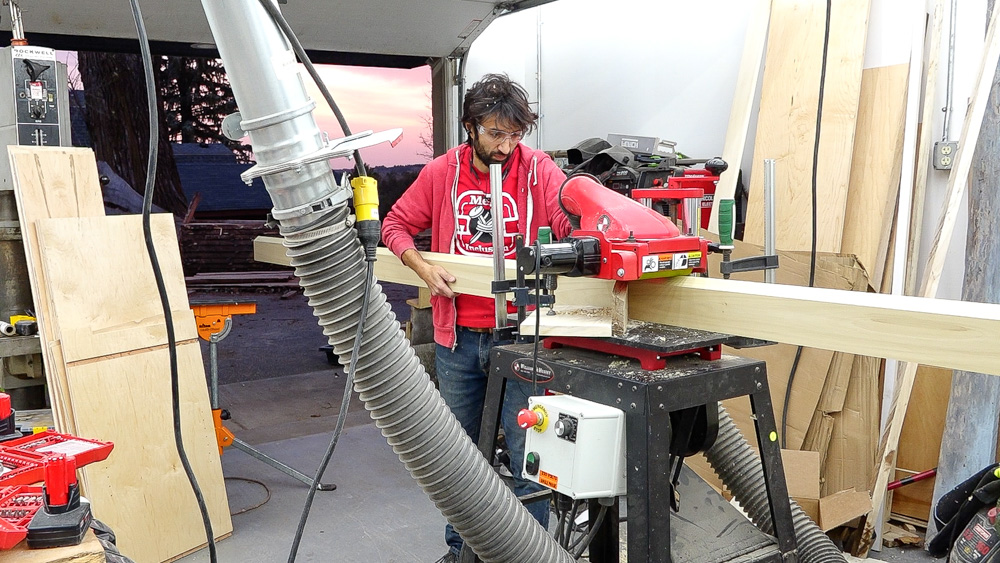
Second pass went really quickly, now that I’m past the learning curve of how this works. Now I’m setting up for the big knife, which needs some taller fences and an accurate roller height. It’s going to take three passes in order to get the profile to turn out correctly and prevent the workpiece from rolling and distorting the profile.

Kind of weird to think that I made crown molding, but here it is! I made eight of these and then the two long ones. Now these things need to get prepped and painted.
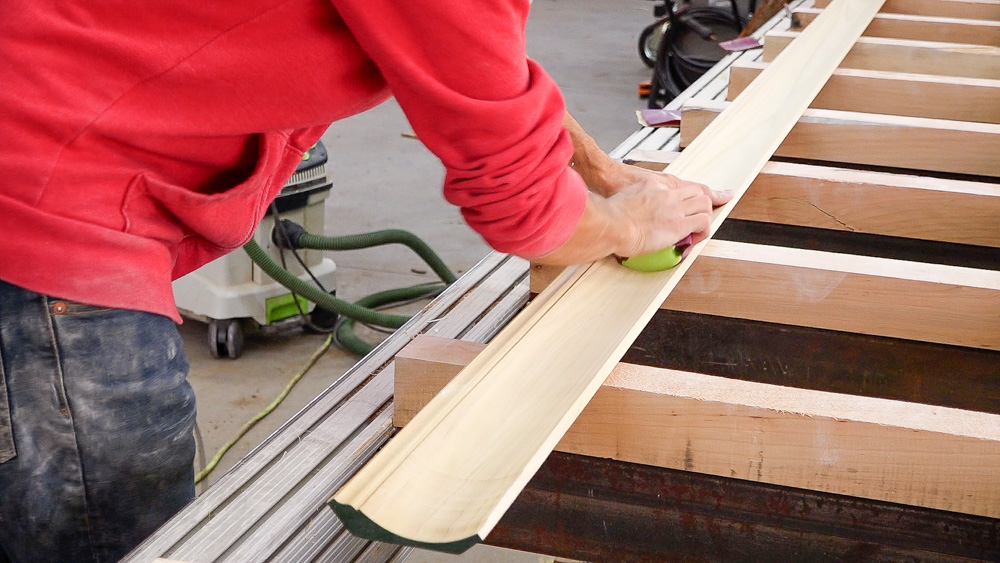
Now I have to do a lot of sanding to knock down any fuzziness in the grain and chatter marks in the cove, in particular.
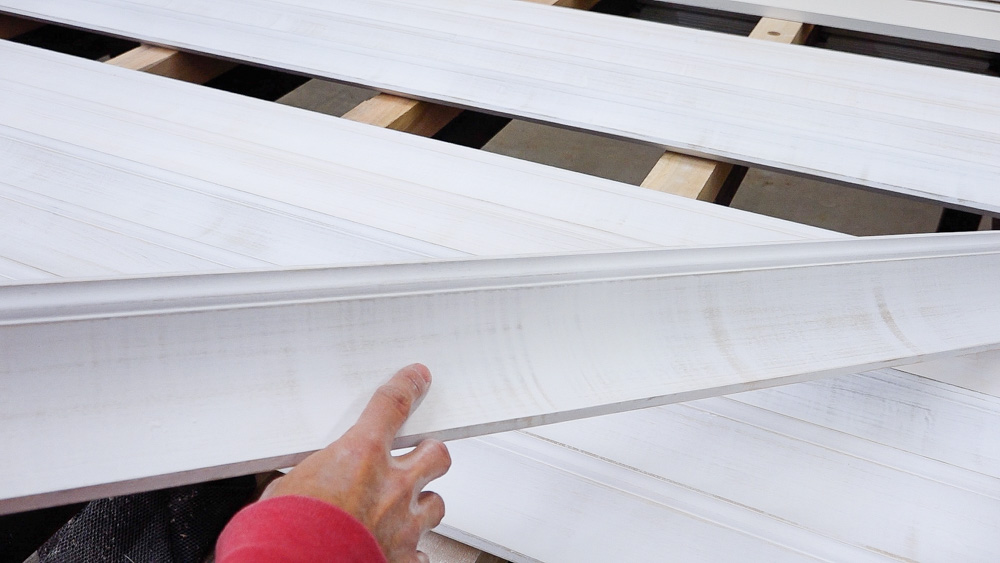
I just finished sanding these after the first primer coat. I was pretty surprised as I sanded this how small a lot of the chatter marks are. Overall, not as bad as I thought it would be.
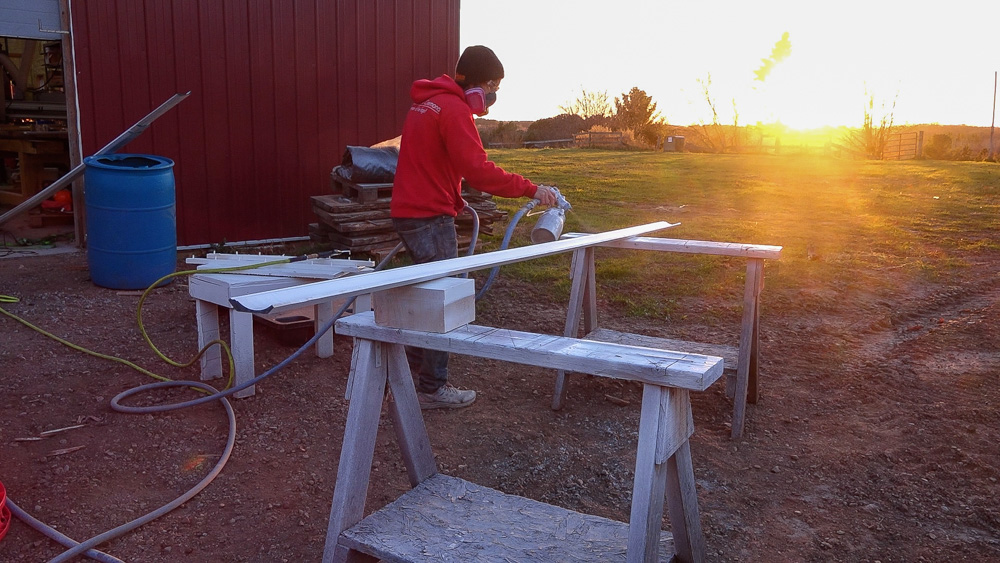
I’ll spray the top coat on, and these can cure for a bit, and then they’ll be ready to be installed.
I’ve never made crown molding before, and it was an interesting experience. There was a lot going on, and a lot of things to consider and learn. But eventually it all clicked and made sense.
That’s going to do it for this one. Thank you, as always, for joining. I greatly appreciate it. If you have any questions or comments on crown molding, please feel free to leave me a comment. As always, I’ll be happy to answer your questions you might have. Until next time, happy woodworking!
Welcome to my shop! This is a quick update to let you know what I’ve been up to. This big chunky thing is the leg

Welcome back to the home renovation. This time I’m going to be working on the kitchen island. Here is a small model of the island.

Welcome back to our home renovation. Today I am going to be working on this wall. It needs some upper cabinets and the surround for