
Matt's Weekly Shop Update
Kitchen Island, Barn Power – March 2024 Update
Welcome to my shop! This is a quick update to let you know what I’ve been up to. This big chunky thing is the leg
Welcome back to our home renovation and remodel! Today I am going to be installing the first batch of the trim, and then making some more parts.
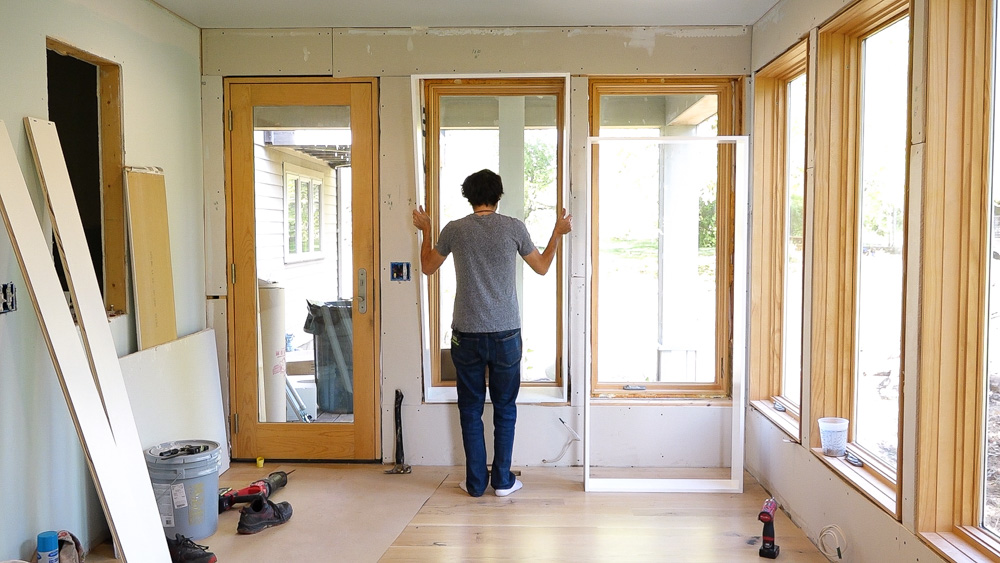
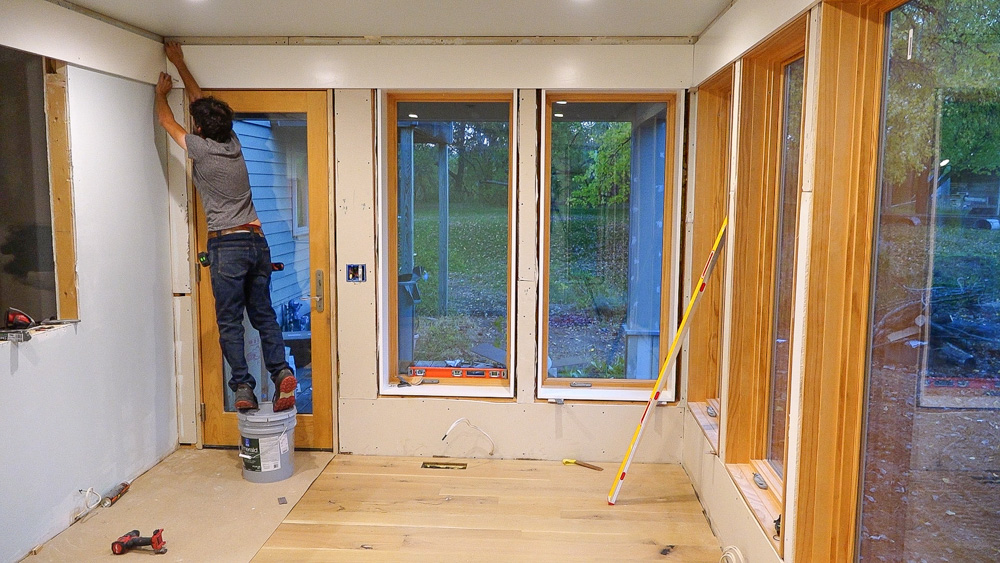
The first thing to go in is the jamb extensions. I’m going to reassemble them, get them into their opening, see how they fit, make sure they’re still good, and then fix them onto their windows for real.
While the glue sets on those, I’m going to go to the shop and start making the sill, which will run under all of the windows in the room.
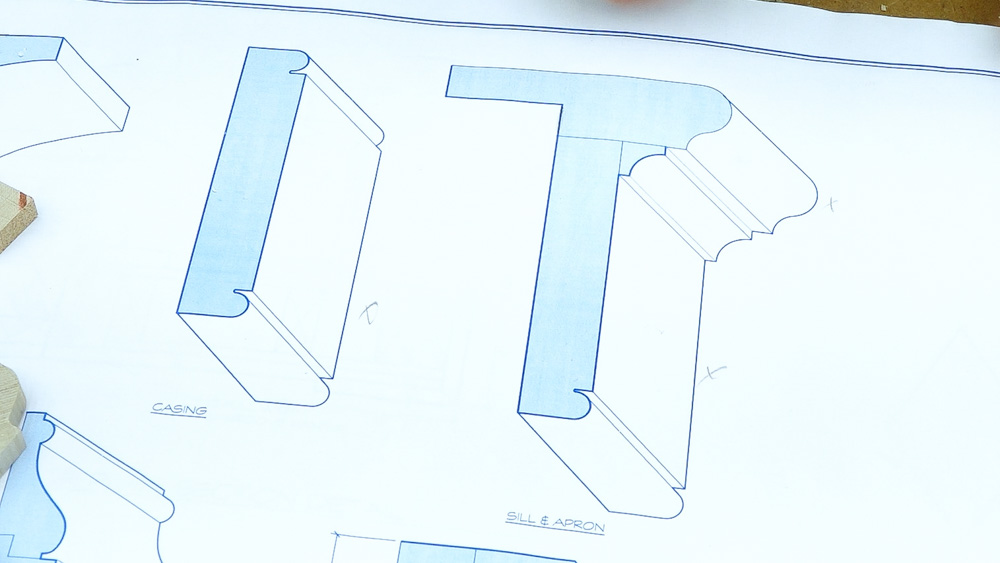
Here is a drawing of the sill, which is just this piece right here. When we did the great room, we made this a three quarter inch piece because we made the jamb and the sill one piece. With it being two pieces in the sunroom, we’re going to make it an inch thick.
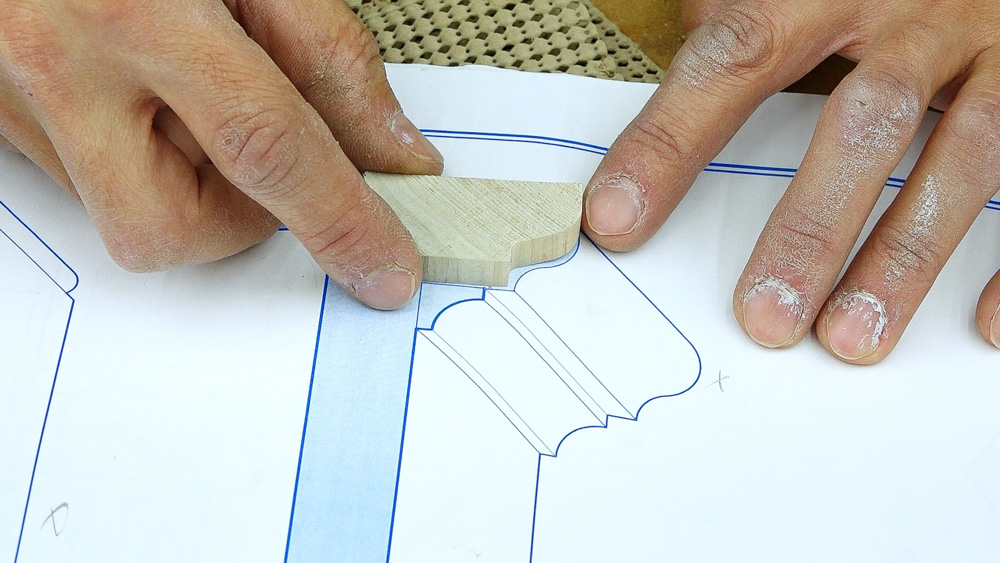
I don’t have the exact bit I need for the profile, but I do have a drawer edge bit, which creates a bit of a flat spot and then it comes into the curve, which I think is going to be pretty cool.
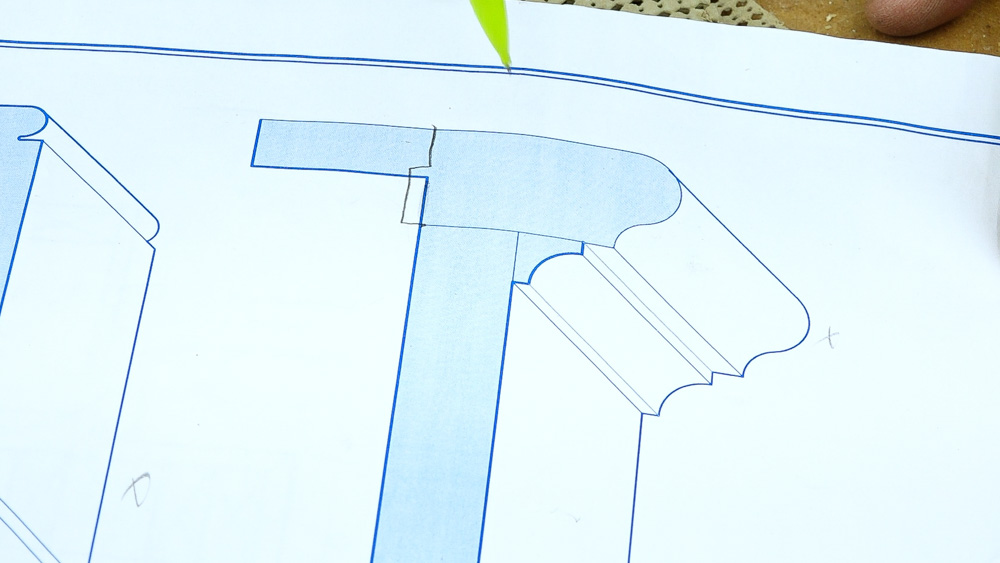
I’m also going to extend the sill back a bit and create a bit of a rabbet on the back so that I can receive the jambs on the window. Otherwise, I don’t have a way to fasten this very well.
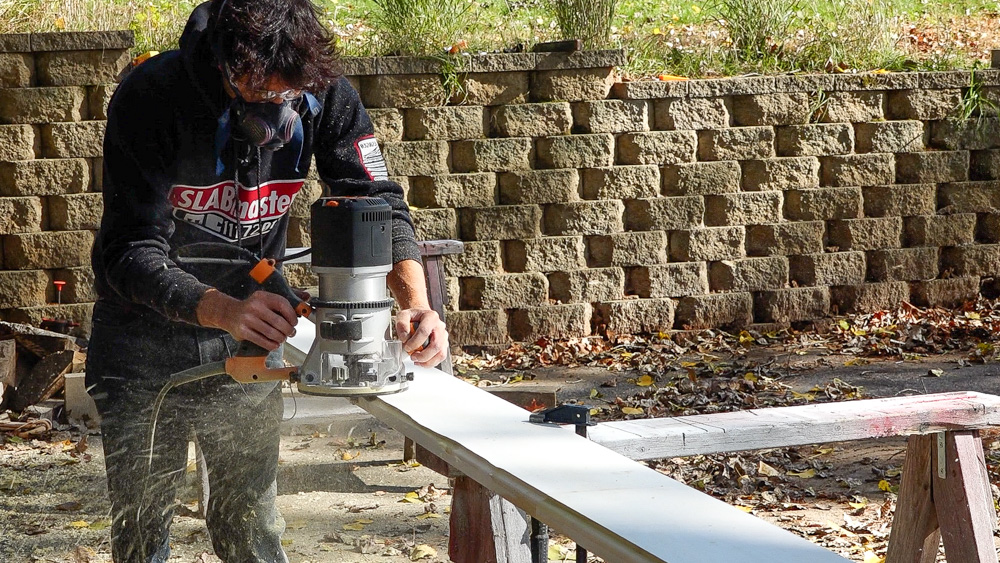
I’m going to run this router and make one long piece. So I’ll run my router down both sides and make two 18 foot sticks of the moldings.
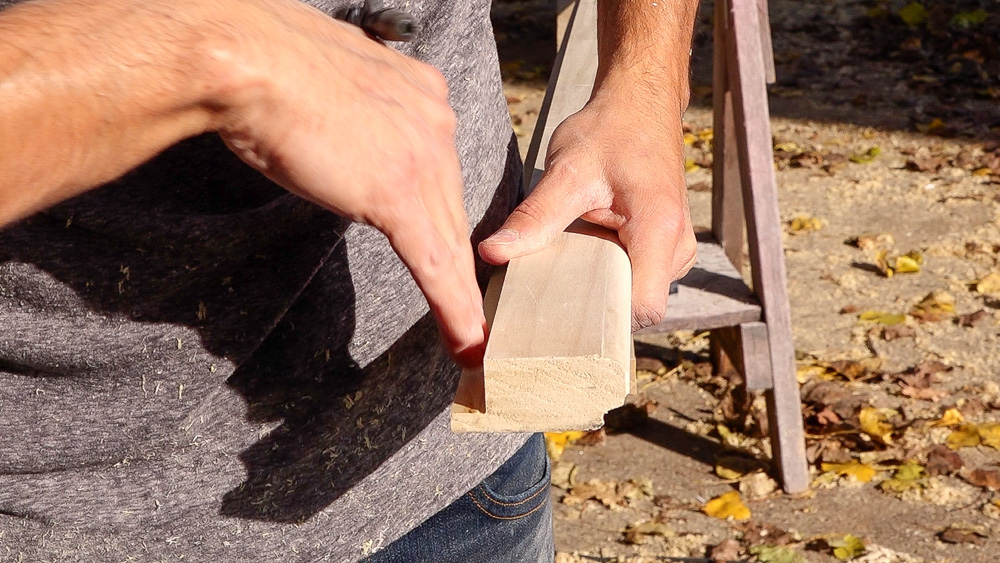
Here is the finished sill stock. It has the profile on front and the little rabbet in the back. These are ready for paint, but I’m going to go back inside and work on getting the band boards up onto the wall.
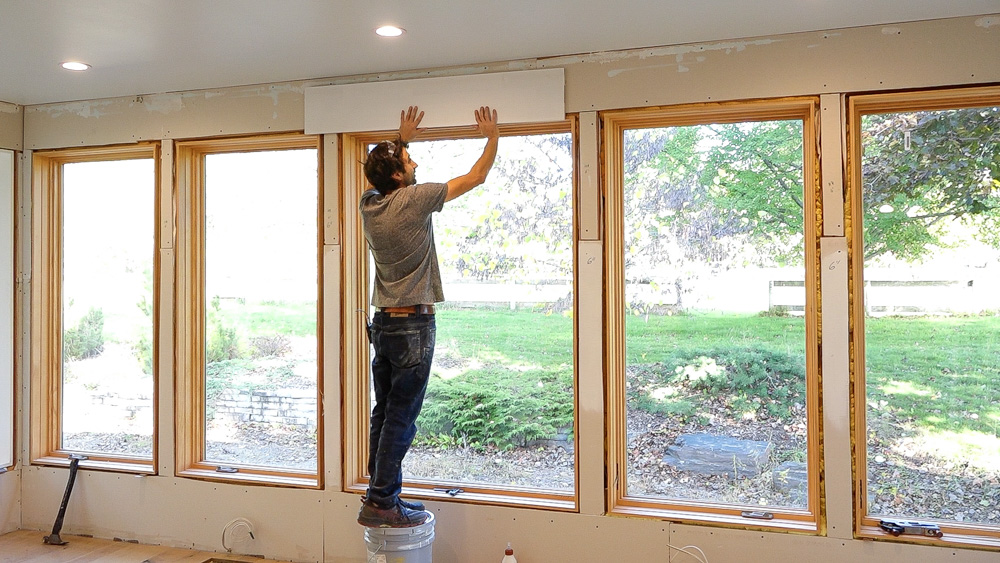
To illustrate the band board detail, this is a 10 inch wide board. It will go up here and sit on top of all of the windows and link the height of all of the pieces. There will be some space at the top, which is fine because crown molding will go up there.
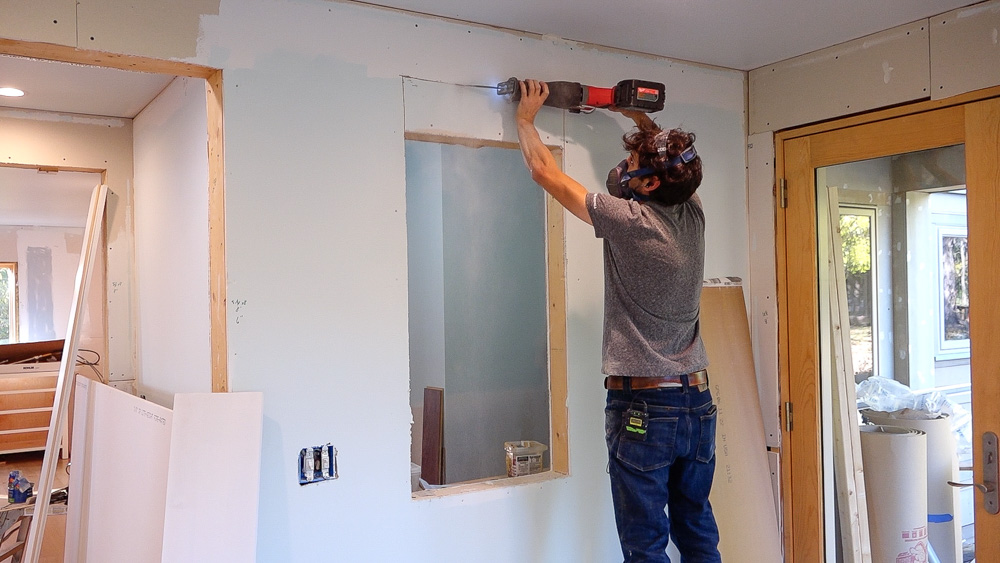
Before I can install that band board, I have to fix the head height of the pantry window. We went back and forth on whether or not to have this window here at all. But having natural light in there makes it feel less like a closet, so we have decided to keep it. To keep the head height consistent across the room, this hole needs to be extended upwards another four inches or so.
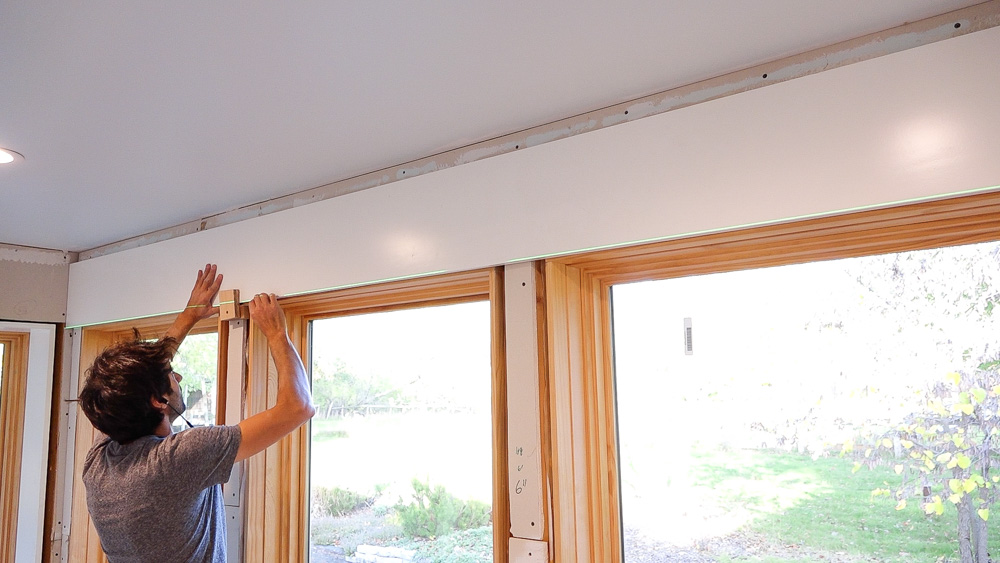
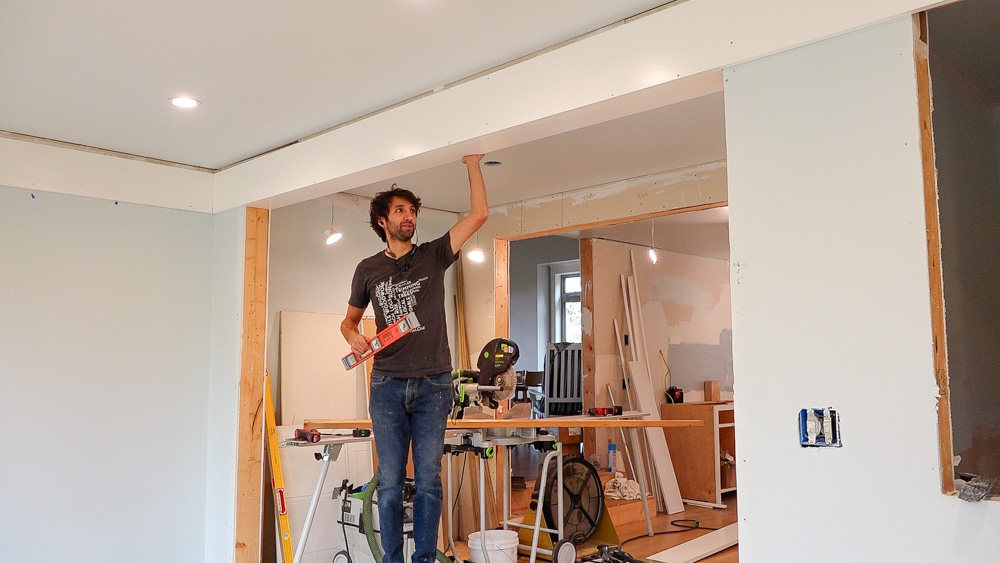
Now that that’s done, I’m going to set up my laser and start getting this first band board in here. Surprisingly straight out of the gate, so I’m going to take it in place for now and secure it for real later on.
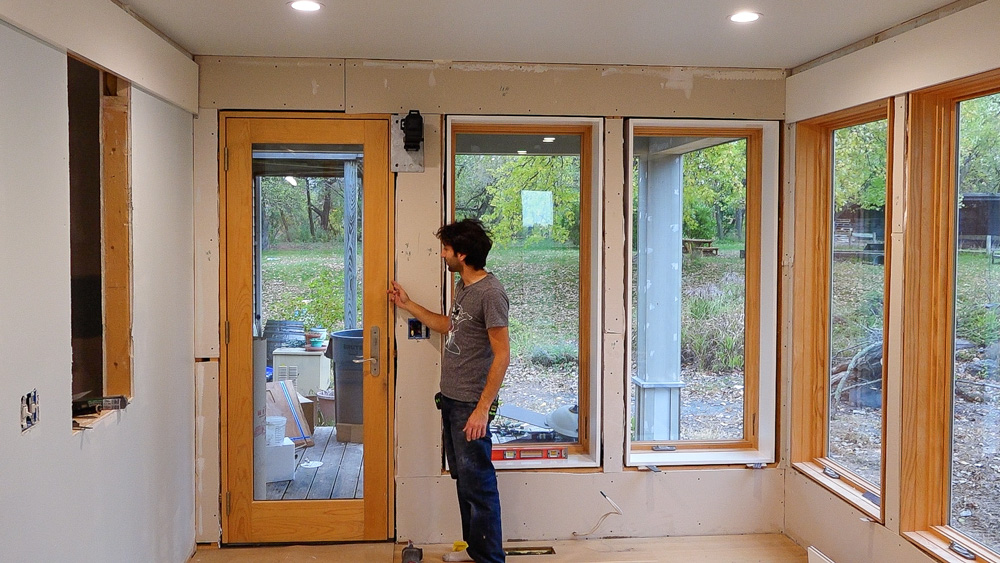
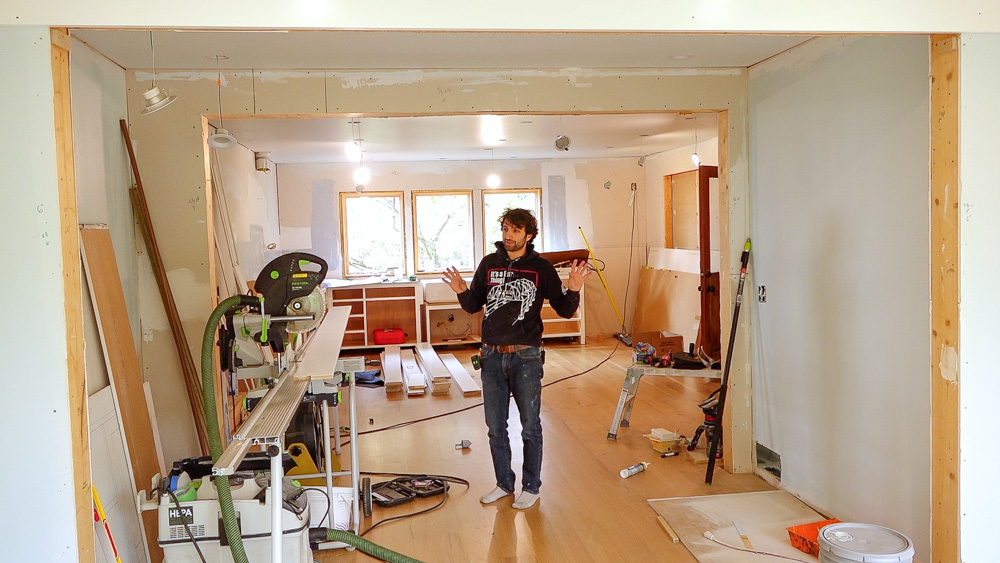
With the board band on all the other walls, I can turn my attention to this wall. It also needs a band board on top, but of course there’s things that need to get done before I can get the band on there. I need to get this door finalized. It needs a half inch extension jamb on the front, and I also need to confirm placement of the lightswitch box. I want to have even casings to the right of the door and the left of the window so that the center line of that casing comes straight through the switch box and lands dead center between the switches.
Ok, the door install is done! Only a year and a half later. And as for the light switch, I just had to move it 3/16th of an inch.
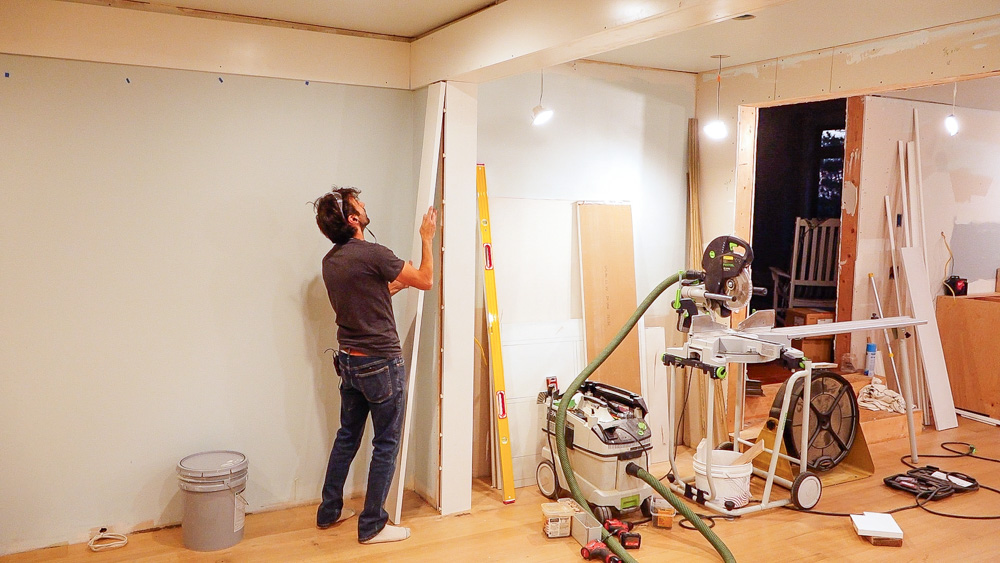
And that last band board can go up there finally. The next thing on the list is to make all of the casings for this wall. I need the left door casing, right door casing, two window casings, and then the corner window casings.
Next I’m going to start on this archway, which has a beam and column detail. Unlike the other casings and jambs, which had a quarter or eighth inch step to hide any inconsistencies, this is all flush. I’m going to create the beam first, and then I will set the U-shaped columns.
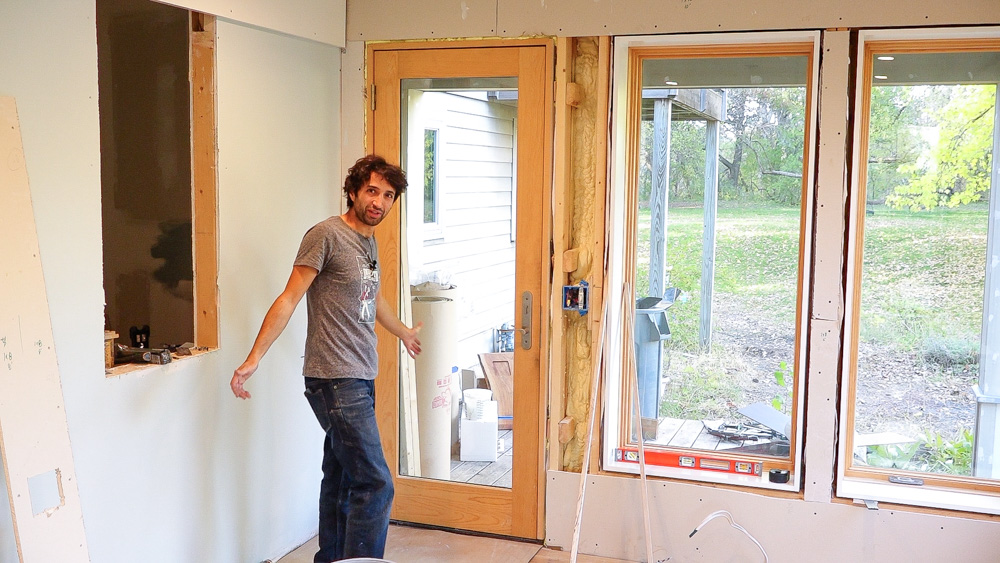
It’s crazy how much nicer it looks having a little more framing covered up. Next I want to secure this jamb in position and make sure it’s not rolled down.
Next up, I’m going to assemble the columns.
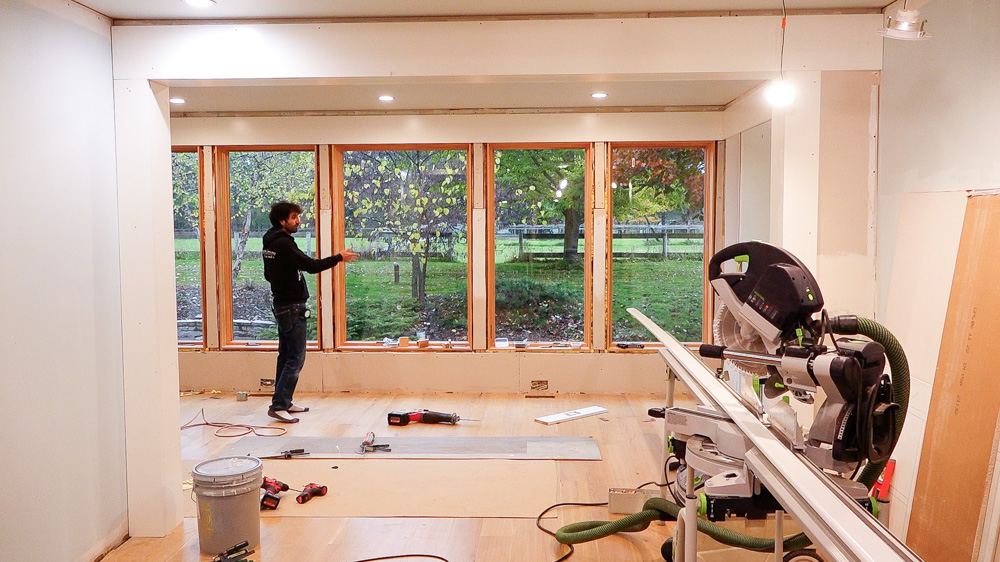
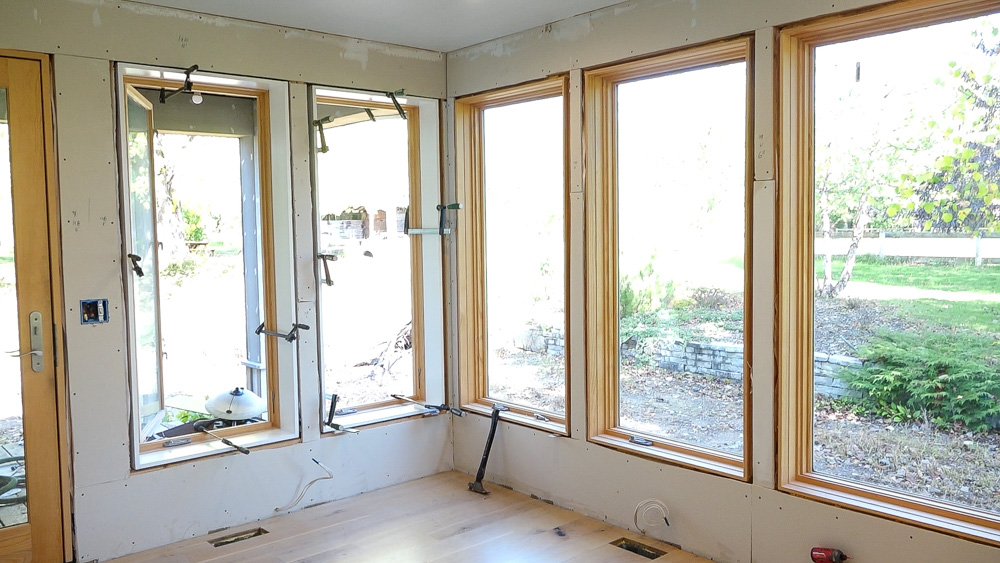
The first archway detail is done! So I’m going to move on to this wall of windows. I’m going to get the sills on, and I’m going to do inside corner miters into the corners so I have some space for my dominoes.
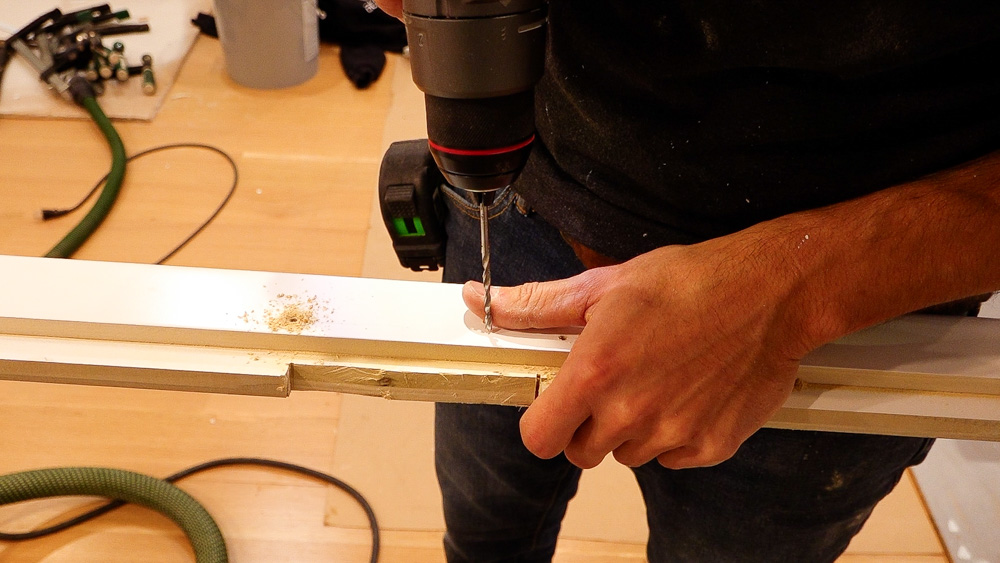
I need to notch a little rabbet for the framing and put some screws in from the bottom side to catch the casings.
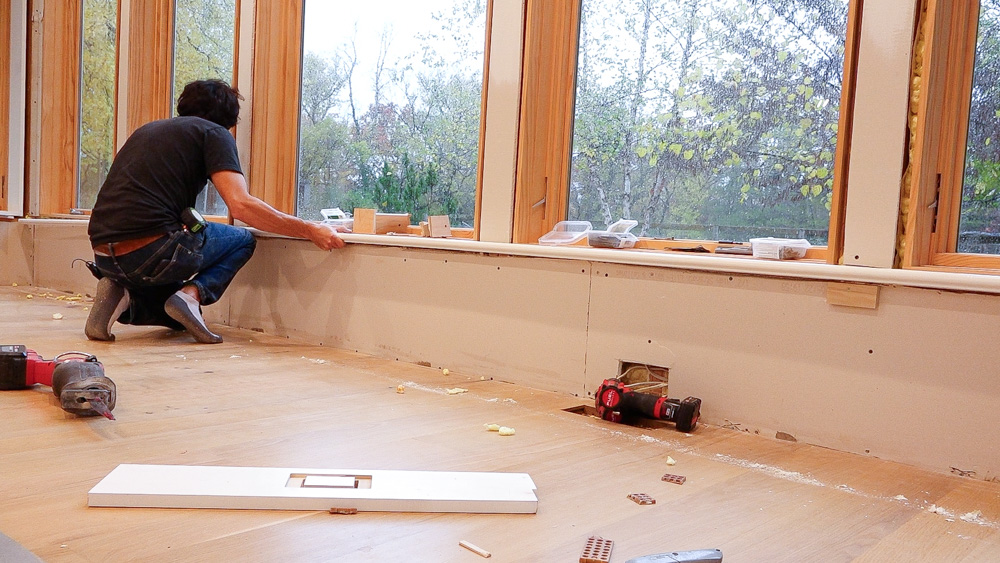
It passed the test fit, so I’m going to get it installed.
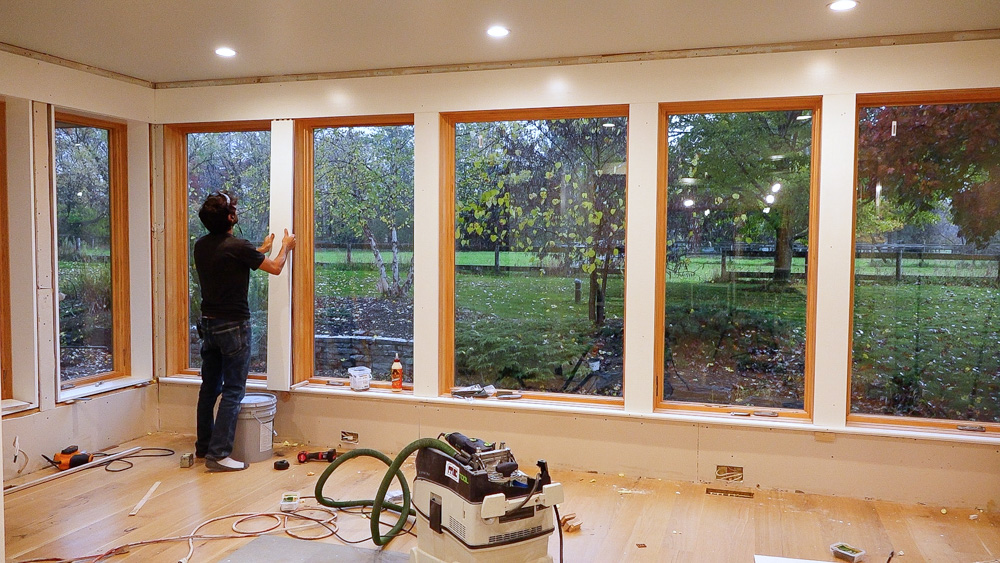
The last thing I’m going to do for now is install the window casings. The big windows are almost fully cased. I just have the corner ones to do, and I’m going to wait until I have the sills on there before I do those. But having these casings installed makes a huge difference! A lot of progress.
That’s going to do it for this one. Thank you as always for joining, I greatly appreciate it. For any questions or comments on the home renovation, please feel free to leave a comment. As always, I’ll be happy to answer any questions you might have. And until next time, happy woodworking!
Welcome to my shop! This is a quick update to let you know what I’ve been up to. This big chunky thing is the leg

Welcome back to the home renovation. This time I’m going to be working on the kitchen island. Here is a small model of the island.

Welcome back to our home renovation. Today I am going to be working on this wall. It needs some upper cabinets and the surround for