
Matt's Weekly Shop Update
Kitchen Island, Barn Power – March 2024 Update
Welcome to my shop! This is a quick update to let you know what I’ve been up to. This big chunky thing is the leg
Welcome back to our home renovation. This time we are going to finish the floor install: getting the last couple boards laid down, then sanding and finishing it all.
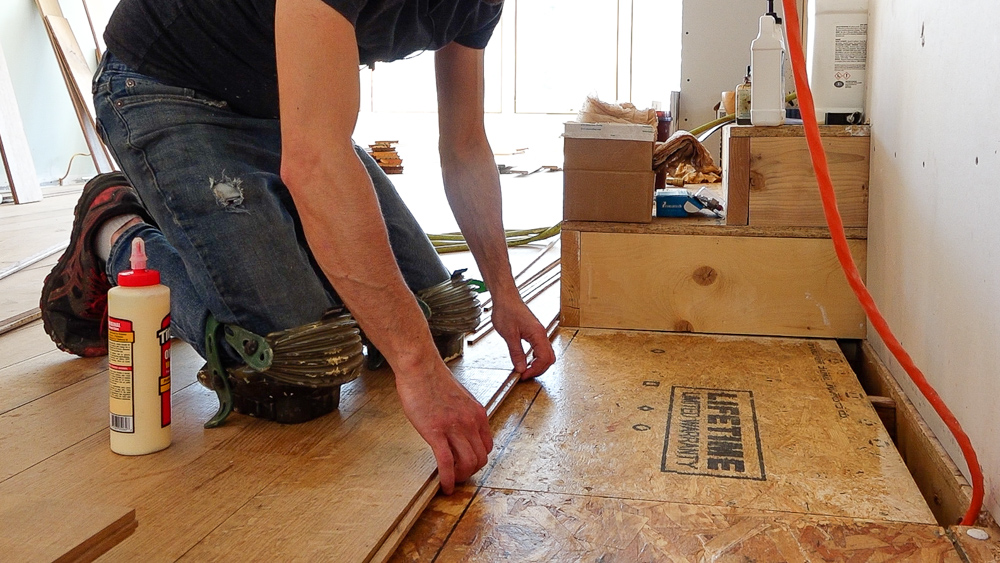
I already laid down the fill pieces for this side of the room. This section here is a little bit different than the rest because I want to be able to nail as much as I can. That means that the tongues are going to be facing the opposite direction than they have for the rest of the boards. I made some splines, which are basically just double tongues, that I can use to turn this groove into a tongue side and then continue with a reverse lay. So now I will get this section glued down.
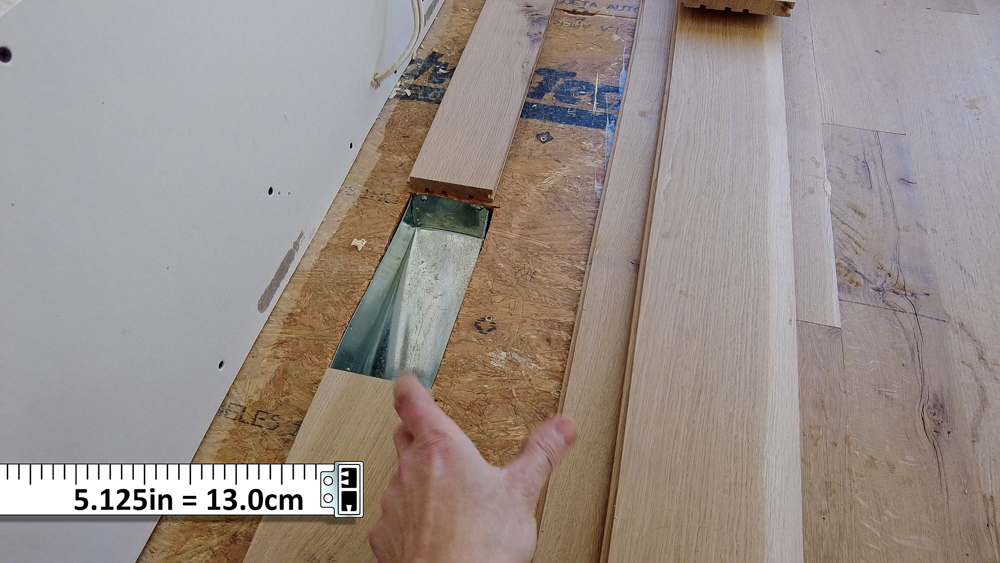
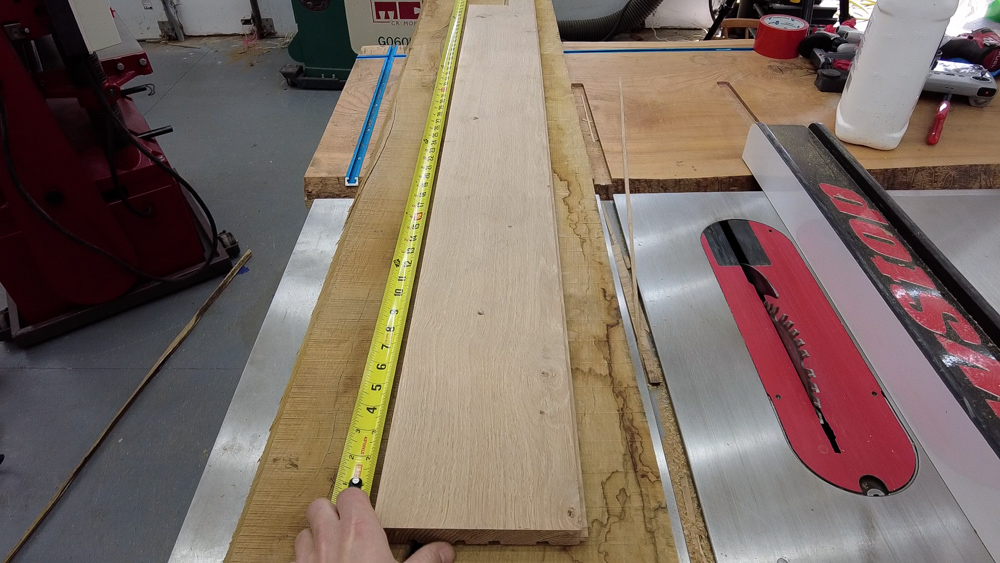
Next I need to make some custom fill pieces. Here, I need a piece that’s got a five and an eight inch coverage to get me up into the vent. Then in the pantry, I need a piece with seven inch coverage. So I can make those custom pieces using my sample boards, and then get them installed.
While the glue is setting on those pieces, I can work on this spot. I set this board aside when I was doing the main layout because one edge has some live edge, but it’s a really nice piece of wood. So it’s going to go here, after I get it chopped to length.
Next up, I’m going to start working on this area, where I’ve been specifically instructed to place bow ties. A lot of this lumber didn’t crack, and it didn’t have a lot of defects in it. So I’m going to my reject pile to find a cracked piece to go there.
I have this board in the reject pile with a nice split in it and some good length which will work nicely with the boards that are already installed in that area.
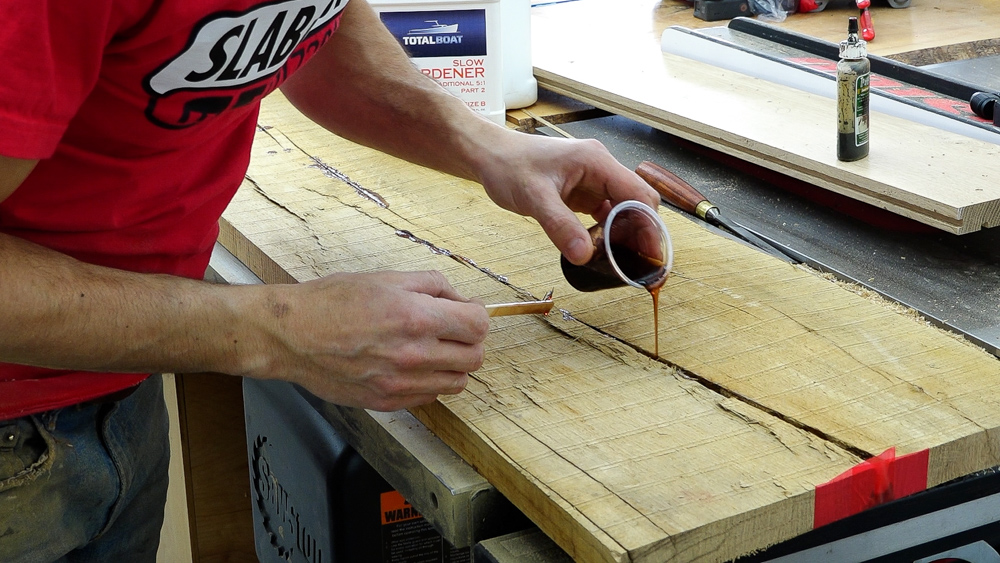
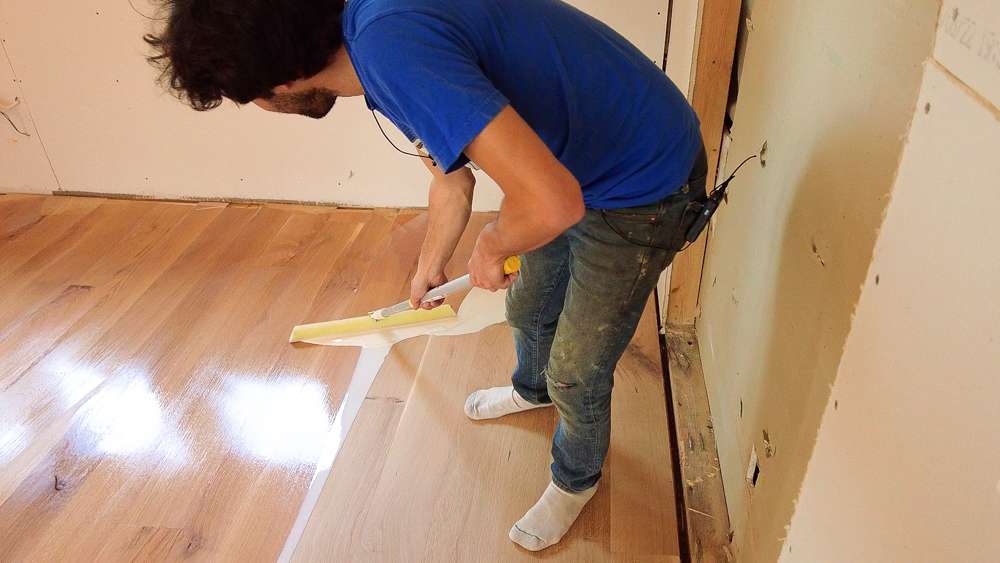
I’m pre-filling the crack with epoxy to ensure that the board stays the same size as it goes through the machine. If I leave the cracks in there, the machine will close them, and then when the board comes out of the machine, the cracks will open again, leaving me with a board that is not a consistent width anymore. So I’m using Total Boats 5:1 traditional epoxy, and I’m using a lighter tint so that when I install the bowties (which are going to be Bocote), they will be fairly pronounced.
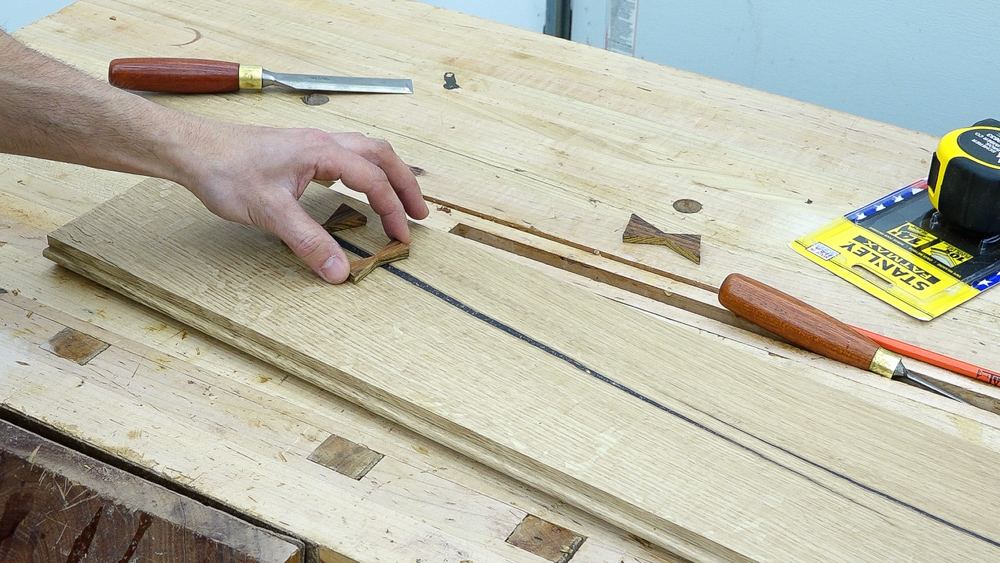
I cut some bow ties out of Bocote, and Lindsay likes the layout with those bow tie sizes, so that’s where these are going to be. I’ll get these installed right now, because it’s going to be easier to get them installed with the floorboard on the bench compared to when it’s in the floor.
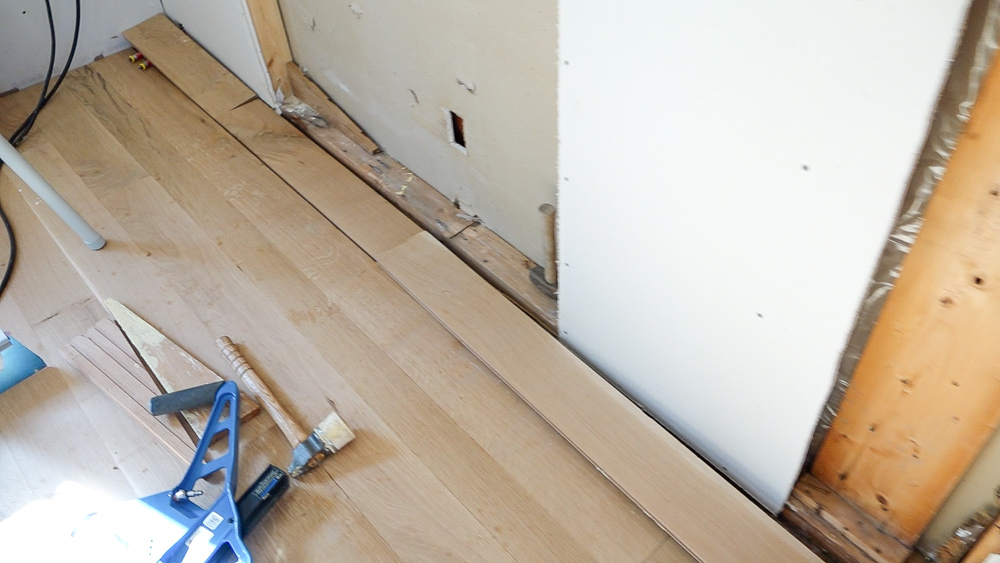
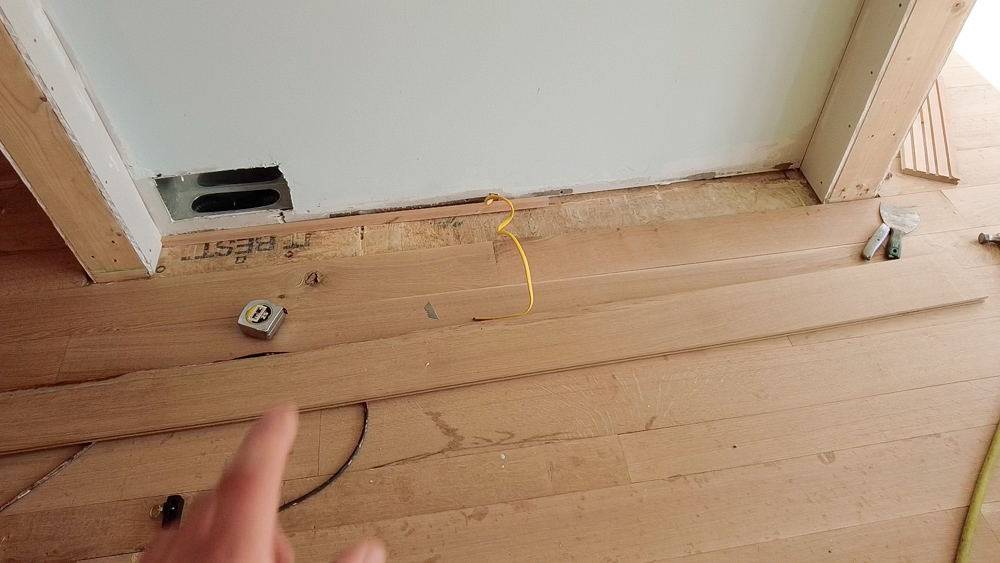
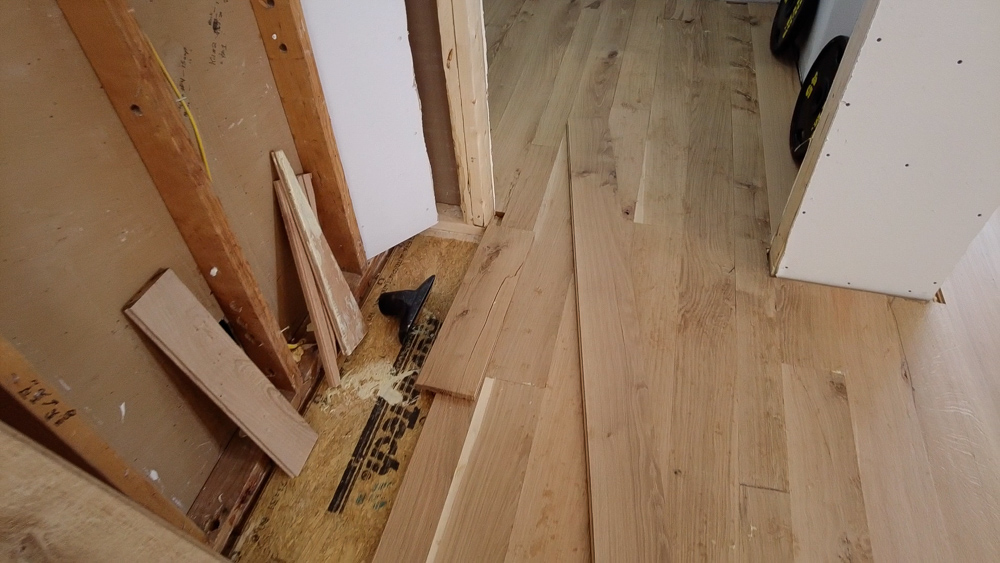
Now I just have to get these last couple boards installed.
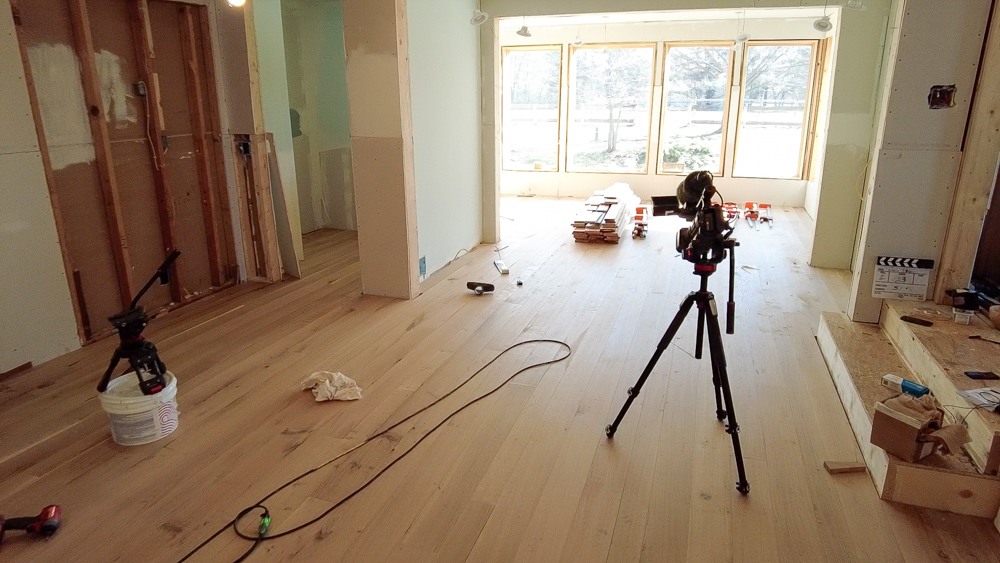
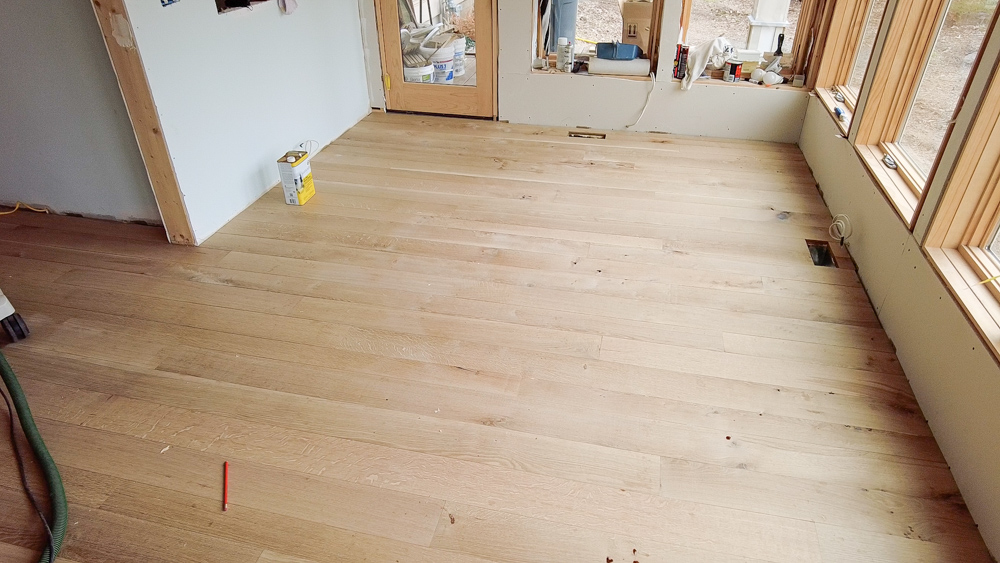
I’ve done it: I reached the end of the install! I’m ecstatic, and this looks absolutely amazing. It’s so transformative to have this wood flooring installed and not see the subfloor anymore. Absolutely gorgeous.
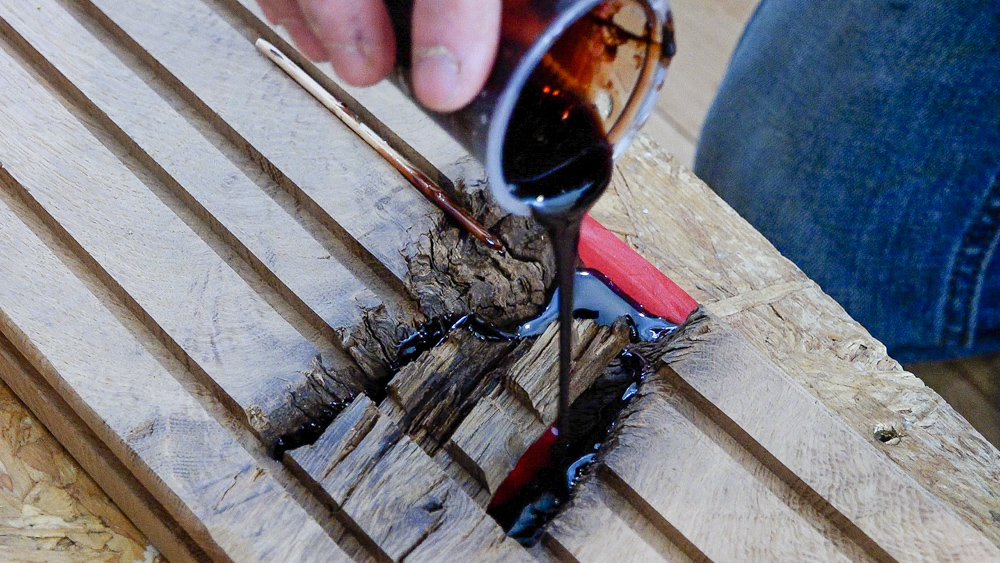
Now on to filling defects. I’m using Total Boat traditional 5:1 epoxy with some brown trans tint, just like I did with that cracked board. So I am filling any voids, like knot holes and bark inclusions that are in the actual wood itself. I’m not filling any of the gaps or joints between the boards. You can use a putty for that, which I did on the last floor I made, but the putty didn’t really last.
I also installed the final couple of bow ties, including this tiny little baby one here in the sunroom, which is my favorite one.
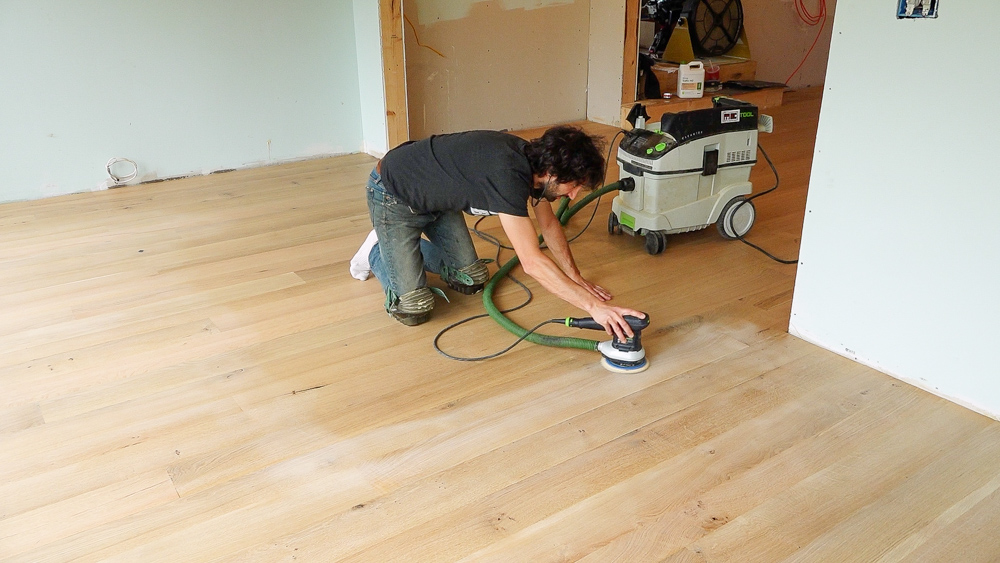
The floor is ready for sanding now, and it’s not all that different from sanding a piece of furniture. The most important thing is that first sanding to get rid of your bulk surface removal. On this first pass, I want to remove all of the machine marks and chatter and tear out, as well as get the top seams flush.
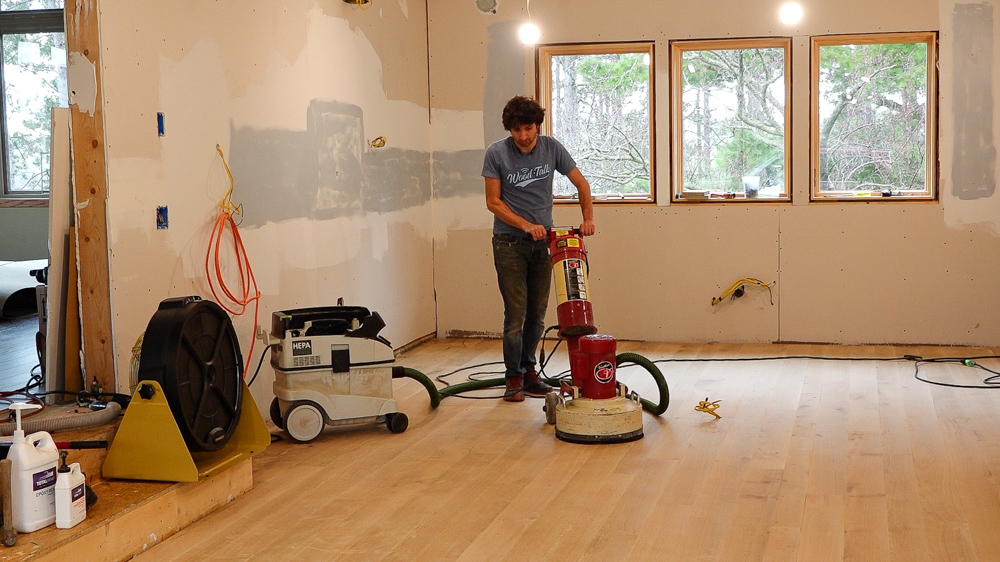
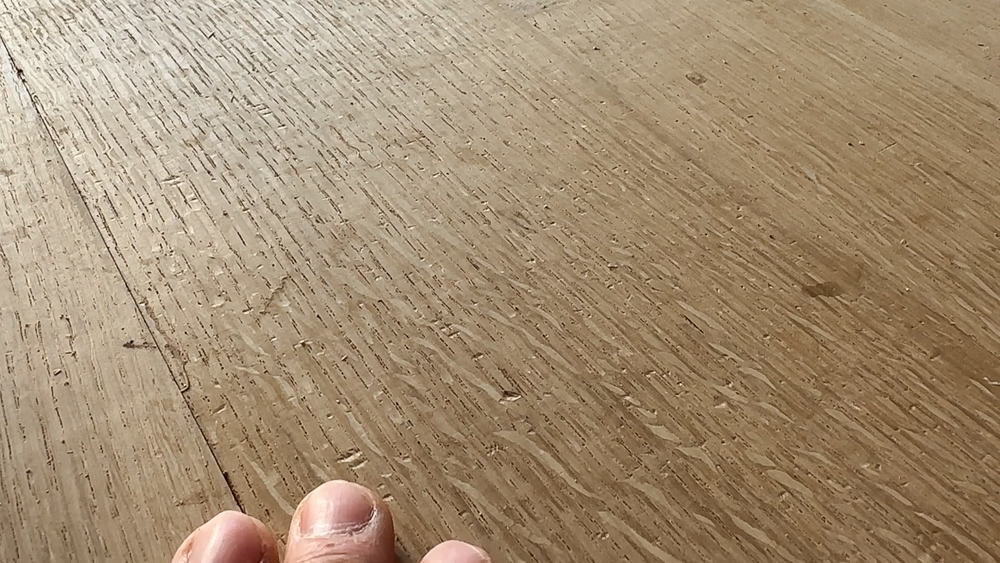
Here it is after two grits with the floor sander, 50 and 80 grit. Now I’m going to go around with the orbital sander and take the edges to the same place.
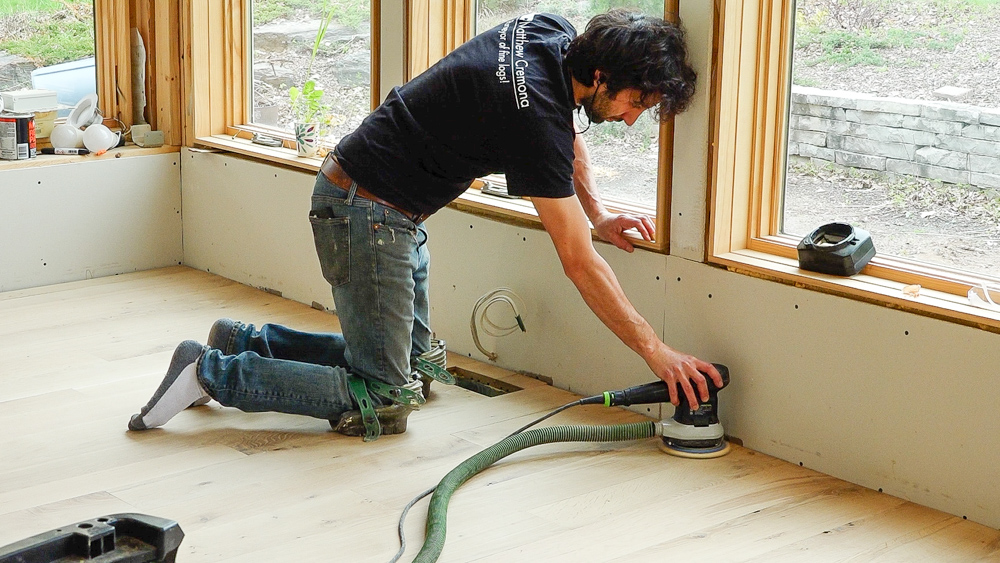
Time for the square buffer sander, which is a vibratory sander, so it’s easy to use for these finishing passes. So I’ll do the finishing grit with this sander, which will be 100 grit. I am still going to go around with the orbital on my hands and knees, because I feel better about getting close and seeing all the issues and scratches I might have missed.

One last detail for underneath the fridge, before I get everything prepared for the final finish.

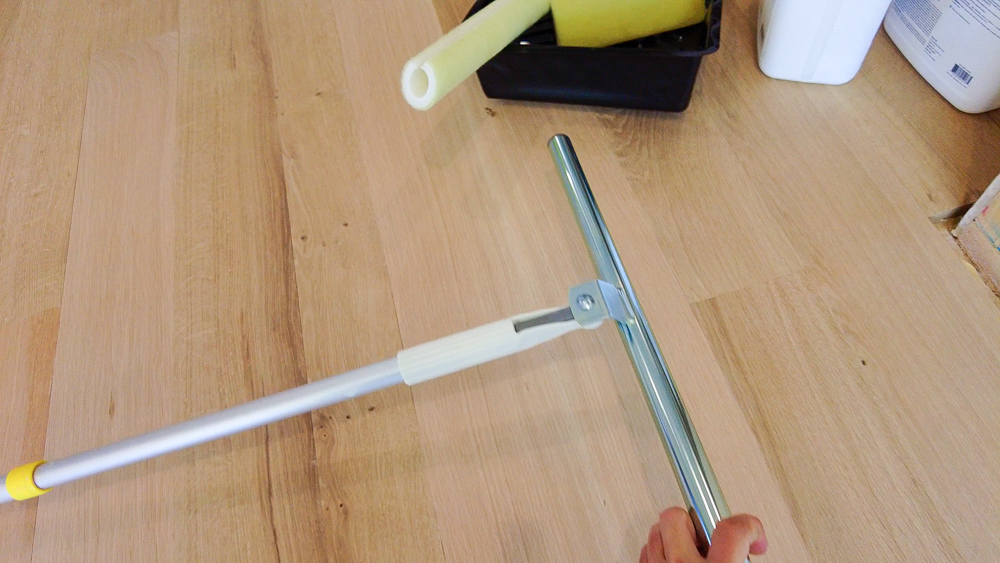
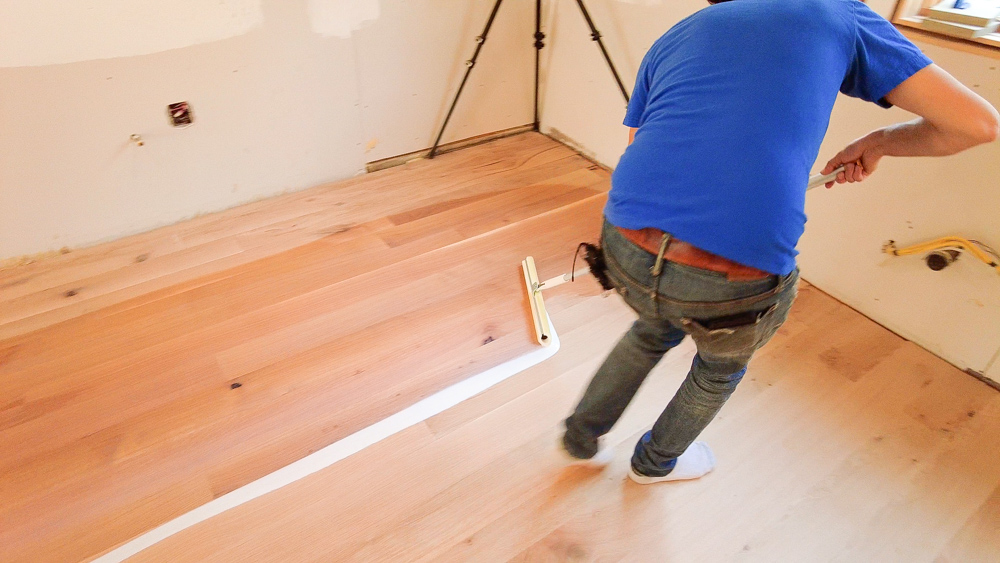
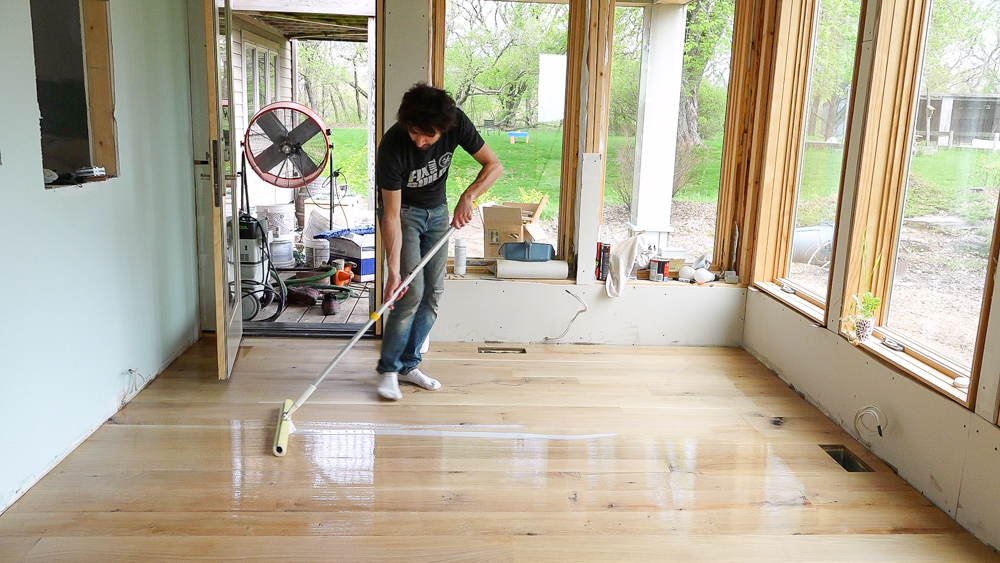
After a crazy amount of cleaning to get as much dust removed as possible, the space is ready to go for finish. I’ll be applying the finish with a T-bar, which is basically a metal tube at the end of a pole that allows you to squeegee the finish around on the floor. I’m using a water-based finish, which dries and cures extremely quickly, so the faster you can get it on the, the better it will look.
This is the sealant that I’ll be using. Last time we did a floor, we did a solvent-based top coat, so I used an oil-based sealer. This time I’m using a water-based sealant because Lindsay wants a more natural wood look.
This is both the easiest and most difficult thing I’ve ever had to do, because I have to go so quickly. Oil-based sealer is way easier to apply because you have so much more working time.
It has been about four hours now, and it has dried to a much more even look than it had before. Also, this sealant truly makes that wood maintain its natural look and doesn’t impart any real color or pigment.

Because this was a water-based sealant, it has raised the grain, making the floor fuzzy. So I’m going to go over the floor with the sander to knock that fuzz back, which will help even out coverage too.
Now I am ready to apply the top coat, which is this Bona Traffic HD, which is a two-component finish.
Here is the first coat applied and ready for another coat. It’s been about six hours since I applied the first coat.
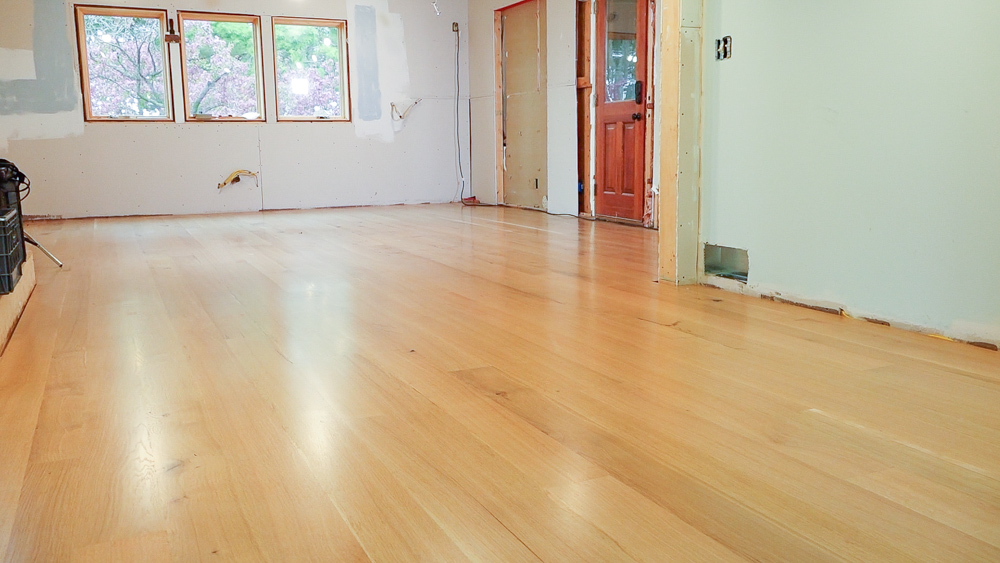
And here it is, all finished! I ended up doing a third coat because the manufacturer recommended that for high traffic areas. I will say that this water-based finish is much more forgiving than I expected. It might look like crap as you’re putting it down, and you’ll be panicking that you screwed it up, but this really evened out extremely well as it was sitting. I’m really happy with the way it turned out. The finish is nice and even and it’s just so pretty.
That’s going to do it for this one. Thank you, as always, for joining. I greatly appreciate it. If you have any questions or comments on the home renovation, please feel free to leave a comment. As always, I’d be happy to answer any questions you might have. And until next time, happy woodworking.
Welcome to my shop! This is a quick update to let you know what I’ve been up to. This big chunky thing is the leg

Welcome back to the home renovation. This time I’m going to be working on the kitchen island. Here is a small model of the island.

Welcome back to our home renovation. Today I am going to be working on this wall. It needs some upper cabinets and the surround for