
Matt's Weekly Shop Update
Kitchen Island, Barn Power – March 2024 Update
Welcome to my shop! This is a quick update to let you know what I’ve been up to. This big chunky thing is the leg
Welcome back to our home addition renovation and remodel project. Yesterday we did most of the demo in the old entryway. Today we are changing gears a little bit, because our HVAC subs are here. Exciting for a few reasons: mostly because we’re going to get those ducts out of the hallway, but also because we are moving forward with that part of the project too. We’re knocking some things out.
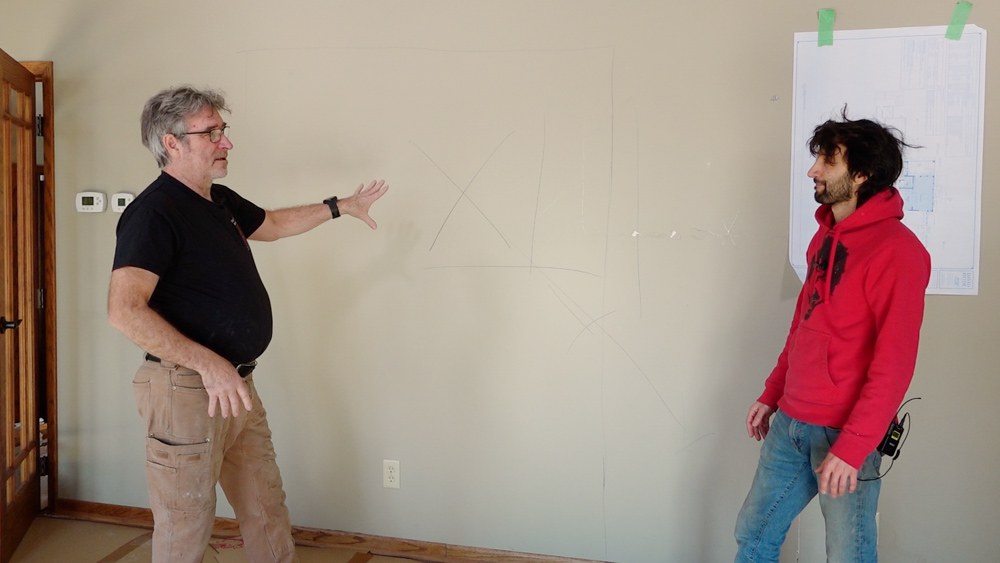
Eventually we have to open up this spot, which will be the new access point to the great room from the kitchen. But right now, in the middle of this path is… a fresh air return. So that has to go. Part of what we’re doing today is figuring out where the new return is going to go.
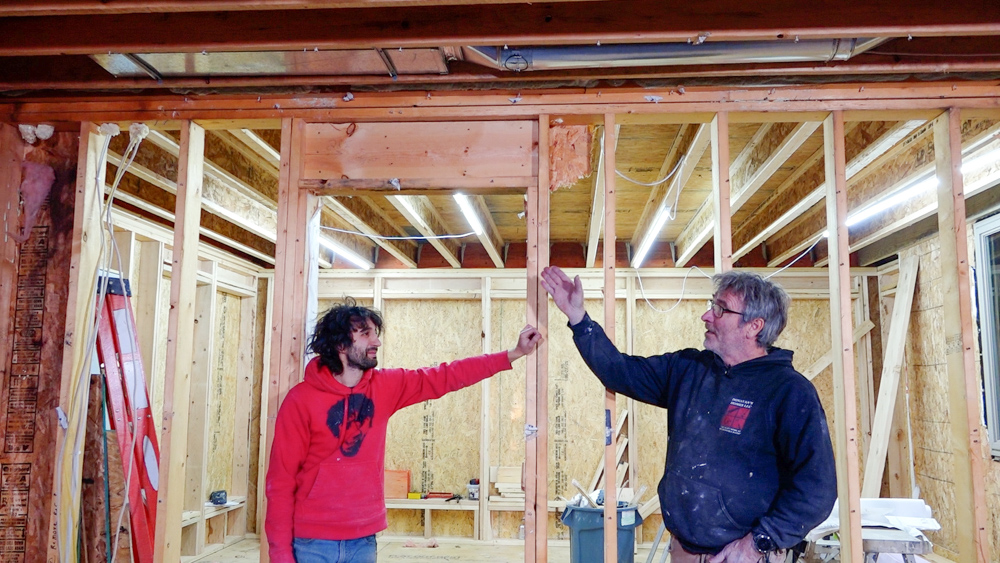
Donavan is going to roughly cut in the entry right now so we can see through and get better visibility.
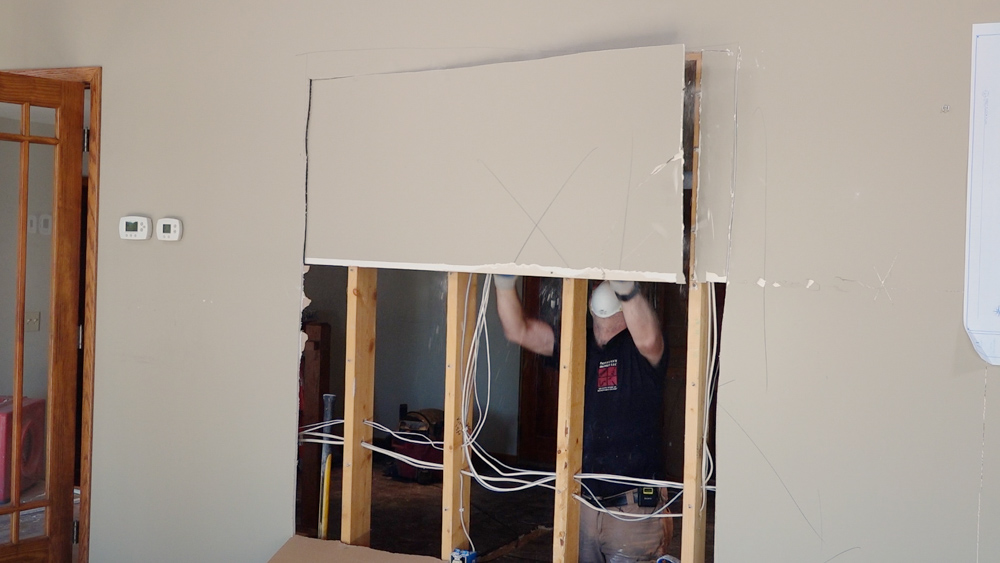
Now we’re in the shop, and we are going to destroy some of this drywall too. This has the supply and return for the great room, which is right above the shop. In order to change the trunks that were in the staircase, we need to get access in here so that the HVAC guys can disconnect and reconnect them. We have to open up this ceiling so they can get access basically.
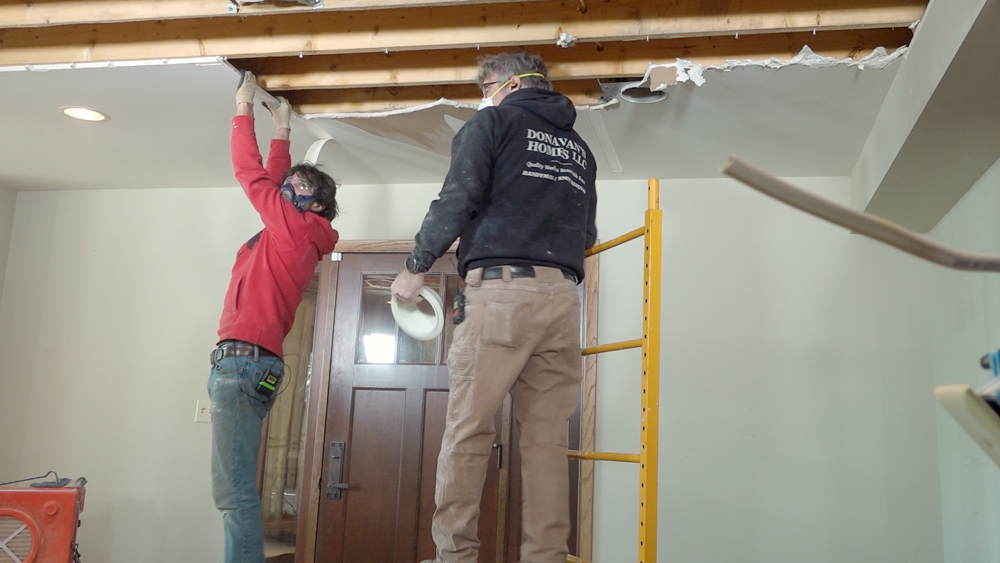
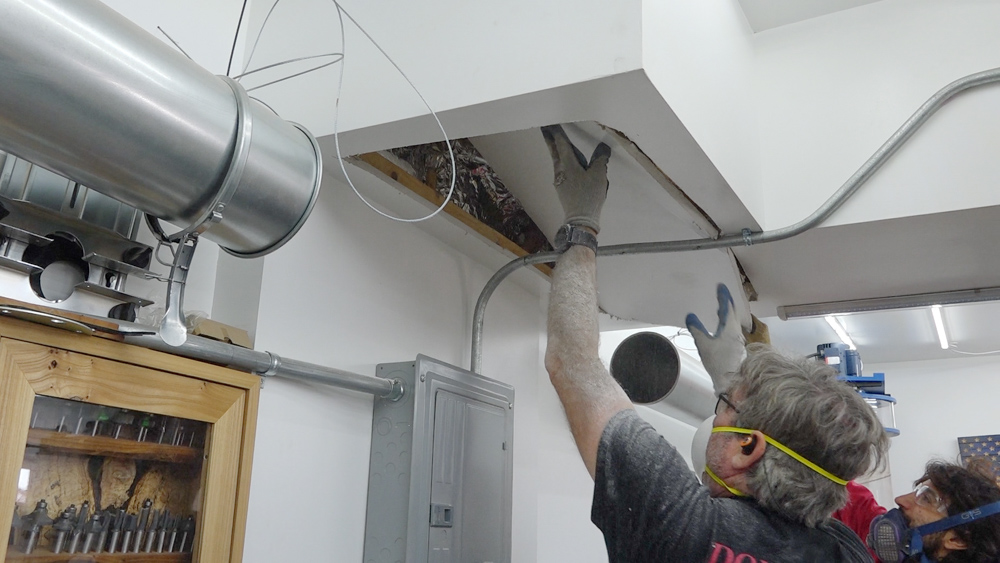
Next we are taking down the ceiling in the kitchen space.

We’re going to start cleaning up some of the wires and stuff. This is the coax for TV and then there’s an ethernet line. So they got a couple of lines that they pulled at some point that terminate here that were never used. We’re going to pull them back and probably reroute them, but at least to get them out of the way from now.
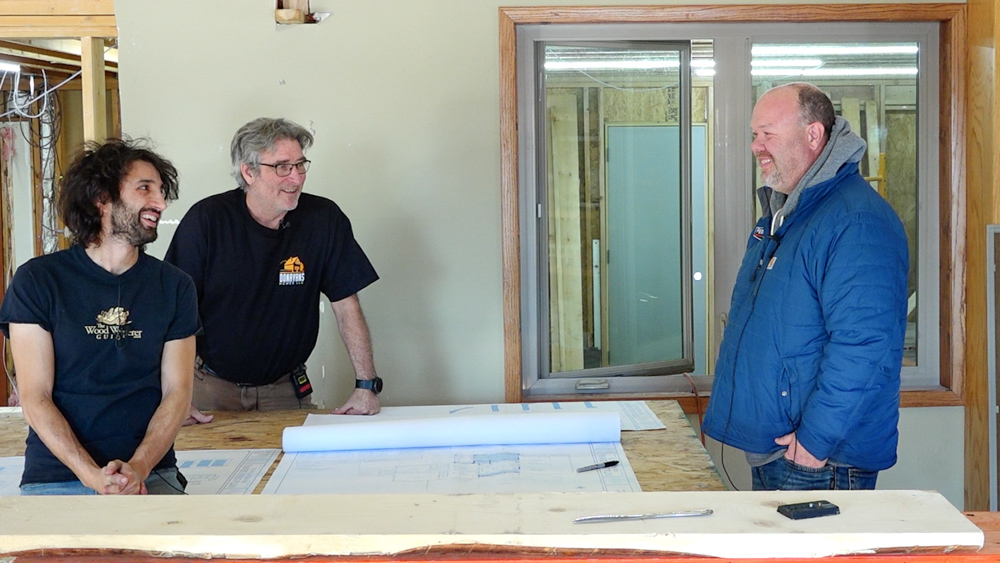
Now we’re here with Jordan, from Perfection Heating & Air Conditioning. Jordan and his crew are going to be helping us out with our HVAC situation. To give everyone a little bit of a background, we have two HVAC systems in this house. We have one that handles the original 1960s house and a second system, which handles the addition that was added about 15 years ago, which we are now adding onto. We’re going to be primarily tying into the addition’s HVAC system. Jordan is going to tell us a little bit about HVAC and how it all kind of works. First, a general umbrella question: how do you go about sizing a system for heating and cooling? Is it just by the size of the house, by square footage, or are there other variables that you might take into consideration when you figure out the size of the furnace, how much tonnage for my AC, etc?
Jordan: To figure out load calculations for any home, it matters based on your market. In Minnesota, we have extreme temperatures and extreme temperature swings. So our market is going to be different than California or Arkansas, for example. There’s a book called Manual J which was developed by engineers years ago to figure out how to measure our value in a multiplier for the loss or the gain. We put in your square footage in, exterior walls, what’s below grade, what’s above grade, and building materials being used. So you could have two houses look very identical in the same market, in the same region, and come up with a different heat loss based on materials used. These days, spray foam is being used a lot. Typically you’re going to get a little higher R value, a little better seal, and then the infiltration rate drops. So there’s a tremendous amount of variables on load calculations.
Matt: So if you’re doing a really good install, you’ll take those things into consideration. Do you have a software that allows you to put in a bunch of different variables?
Jordan: Yep. We basically pick one wall, and consider what size it is, what direction it’s facing, what the square footage is, and the building type. As you go through the whole project, it’ll come out with a number for you. You can do it by hand too, but in this day and age with computers, why would you.
Matt: After you have that, how do you go about translating that into figuring out where to put in my ducting and how big of a duct I need.
Jordan: If you’re doing a full load calculation, you can do it in two different ways. You can do an envelope, which is basically outside walls, that’s my loss. Or you can actually approach it with a much more refined method in a room by room method. That method will give you the CFM per room need to achieve the loss or the gain of the room.
Matt: So like for this great room here, this is about 600 square feet. That’s going to need a different amount of heating and cooling than somewhere else which is maybe 200, right?
Jordan: Correct. Or you could have two rooms that are 600 square feet, but one could be interior versus one that has four outside walls. One could be facing south with 80% glazing glass on that wall, and your solar gain would be massive. So there’s really no rule of thumb out there. I can’t say for every square footage, this many BTUs may be needed. There’s just way too many variables. Even your eaves coming out on your fascia or your soffit can affect things. The further you go with that, it changes the angle of the sun, and that will actually help with the load. Windows are typically going to be your highest transfer of heat. So we typically will put supply ducts on the outside wall to create an infiltration blanket, which basically gets the airflow flowing to help stop the migration of the cold or the outside unconditioned air into the conditioned area.
Matt: Let’s talk a little bit about this specific install here for the house. So we have the existing system you’re tying into. Does that cause any challenges at all?
Jordan: Your remodel is very close to the mechanic room so that’s good. Let’s say for instance you have a furnace on the south side of a house and your addition’s on the north side, you have to outweigh what you’re going to be changing to keep that system. You could put an addition on a house and it could be 300-400 square feet and make very little impact on the load. So the furnace and the equipment that you have right now might not be affected at all. So for instance, in this house, the furnace is basically on the same end of the remodel. And we already had a trunk line, which is our main ductwork. That was the one that was underneath the staircase. The main trunk line is basically delivering the air to the branch ones. It’s actually going to deliver to each individual room. That is sized to handle the capacity of the load. In this case, we had to enlarge it a little bit bigger because we added four additional supplies to the system.
The reason it’s so important to make sure that your main trunk line is size appropriate for your individual branch ones is that air is a lot like water. It’s very lazy, it will take the least path of resistance. So if I didn’t up-size that trunk line, the heat and the air is going to go to the closest registers. It would have affected this existing great room because by the time the ductwork gets out here, the air is not going to have the same velocity and volume. If you just put on additional runs and don’t touch the trunk line, it will affect you.
Matt: So real quick, lastly, can you run us through the plan of where everything’s going to go and get reconfigured?
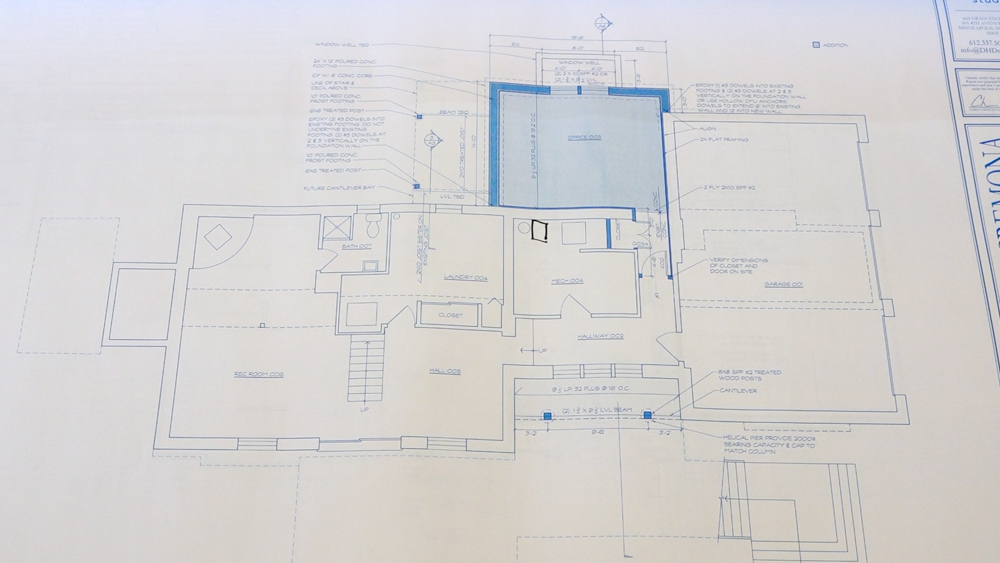
Jordan: You can see the blue area is the new addition, and that’s the area we’re going to try to condition. The white area is the existing home. The mechanical room with the furnace is the black box near the addition. The ductwork, which is our main truck line, is running towards the great room. The office space is also being heated through in-floor heat, which is heated through the slab. So we are not going to try to cover the heating load for the office space. All we’re going to try to do is cover the cooling load, which is going to be minimal because I would say 2/3rds of this area is below grade. It’s insulated really well.
So what we’re going to try to do is, like we spoke about before, creating an infiltration blanket across that window in the office. So we’re going to put a ceiling supply blowing down. The deflection is going to be a double deflection to the right and left. And the throw of the register is designed to have a 15 foot throw. That’s important because when we have a return coming back through the wall, we’re going to be able to splash that floor and create a good airflow cross stream across that rung that should create comfort.
We size for about 1200 feet per minute in the main trunk line, and we try to be between 600-900 feet per minute on the branch runs. And if we vary on that, if we’re lacking, we’re not going to get a full throw out of that register, which will create comfort issues.
Looking at the sunroom now, we have a lot of glass here. So we’re going to throw some supplies here and try to splash these windows. Most registers are going to deflect left and right. So we don’t want to put something right in the corner, because we are only going to get really deflection on one side of it, and it’s going to stagnate in one area.
I get a lot of questions on return air placement. One thing you can do, if the supply is on the floor, which is very common these days with our construction, we’d like to get the return air as high as we can. Pull that heat from the air or from the top of the ceiling. With the new equipment these days, variable speed or ECM blow motors, the fan should be running all the time. It’s very inexpensive to run. So it really helps promote removing the heat from the top. Even in heating season, if you’re trying not to remove the heat, you have heat stagnated on the ceilings. If you do this, it’ll keep the air circulating.
But also why do we have returns? Furnaces are non-pressurized systems. They pull what they push. They push what they pull. A great way to explain it is if you had a small room, and you had one supply in it and no return, and you had a threshold on the door so there’s no leakage. The door is shut and your system’s running, eventually you’re going to achieve the same pressure in the room as you have in the ductwork. And if we have no differential on the pressure, we can’t move air.
I mean, we’re measuring ductwork at like 0.1 inches of water column. That’s a really small measurement, and it doesn’t take a lot to get that. If you can’t get a return in a room, undercutting a door, doing a transfer grill, things like that to help promote airflow.
So what we’re going to do is we can heat without hitting the outside walls. We just have to make sure there’s enough volume of air to deliver the BTUs we need. So we’re going to put a toll kick in, in the island area. A toll kick fits in this toll kick space, which keeps it out of sight. So basically we’re going to be coming up and blowing out under the cabinet.
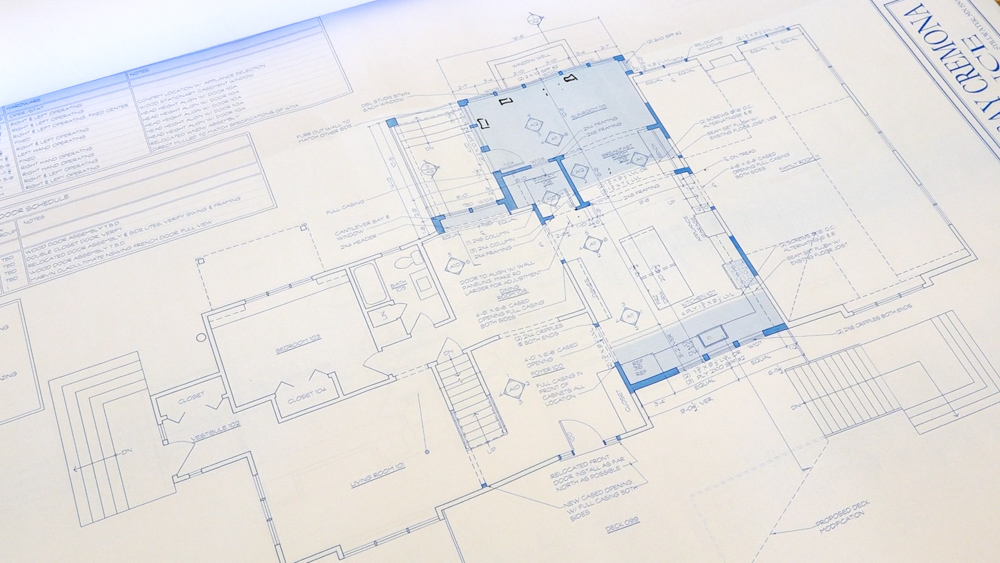
In the old system, we had a trunk line running under that staircase, and then it picked up a big return in the great room. But with the new framing configurations, we really can’t make that work. So we basically reconfigured the trunk line downstairs to accommodate the new office in addition, and we are splitting two returns on either side of the new entryway.
Matt: In thinking about supplies and returns, do you want those to be the same size, in terms of square inches?
Jordan: So like we spoke about it earlier, like the system is not pressurized, so you theoretically should have the same resistance, which we would measure that in static pressure on the duct system. So we typically will size our supply trunk line for 0.1 and a return trunk line for 0.1. And then based on that, we have a tool called a ductulator. It’s basically a calculator for ductwork. So we can basically say “okay, we’re a 0.1.” We need a size ductwork. That’s going to give our CFM. So then we work it backwards. I have the ability to say, I need a thousand CFM and I can get 10 returns. Well, for easy math, that’s, you know, we need a hundred CFM per return. So we’re making sure that we have the same amount of CFM going back to the furnace, not so much the same amount of one return and one supply. It’s not a one to one ratio, it’s a CFM ratio.
Typically there are more supplies than returns, because our returns are bigger. A bigger duct is going to have less velocity, and velocity is what creates air noise, and we want our returns to be a little quieter. Increasing the return size is going to pull more CFM.
Matt: We’re really excited for everybody to get in here and rearrange things, especially get those ducts out of the way.
It’s getting kinda late in the day, so we’re going to call it here. Some good progress today! We have a plan now for the layout of everything that I think will make everyone happy.
Tomorrow we’re going to be continuing with demolition and hopefully get completely rid of the east exterior wall. We’ll see how far we get, we have a little bit of a complication.
They sprayed all of the foam up here, which is good, but bad for us. All of that foam has to come off the existing rim joist clean so we can apply our new lamb beams to that. And there’s no room to work up in there. And we have to leave the wall in place until we do that. But Donavan has an idea. Tune in next time!
That’s going to do it for this one. Thank you as always for joining us, I greatly appreciate it. If you have any questions or comments about this home destruction adventure, please feel free to leave us a comment. As always, we’ll be happy to answer any questions you might have, and until next time, happy woodworking!
Welcome to my shop! This is a quick update to let you know what I’ve been up to. This big chunky thing is the leg

Welcome back to the home renovation. This time I’m going to be working on the kitchen island. Here is a small model of the island.

Welcome back to our home renovation. Today I am going to be working on this wall. It needs some upper cabinets and the surround for