
Matt's Weekly Shop Update
Kitchen Island, Barn Power – March 2024 Update
Welcome to my shop! This is a quick update to let you know what I’ve been up to. This big chunky thing is the leg

Let me catch you up on what’s been going on with this motor. Typically if a motor is buzzing, the most common problem is a bad start capacitor. That’s a very inexpensive and quick thing to fix. So I bought a new start capacitor, swapped it in, and I had the same exact problem – the motor was buzzing.

So of course I can’t help myself and I started to take things apart. I took off the fan cover and the fan, so I could look into the starting mechanism to see if any of that is the problem. For example, the switch could be stuck, but that was moving just fine. The ring that the switch presses against was working fine, and the bearings still spin fine in the rotor.
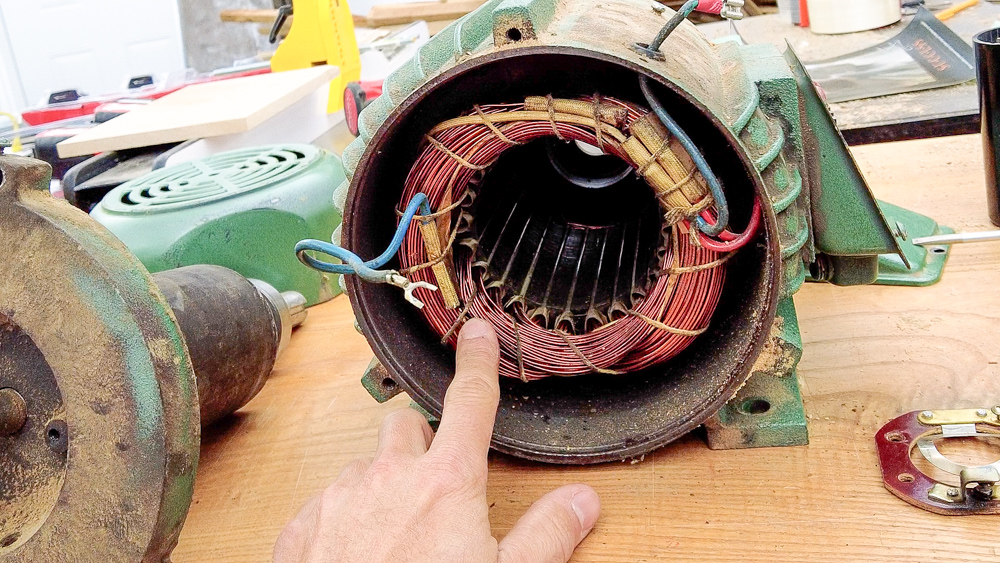
But inside of here there is some burning, which means the start winding is probably fried. That’s not a huge deal, because I’ve been meaning to swap this motor out for a while now. But like most things in life, if you put a project like this on the back burner, it’ll come up at the most inopportune time. I wasn’t really planning on doing this now, but now is when it’s going to happen.
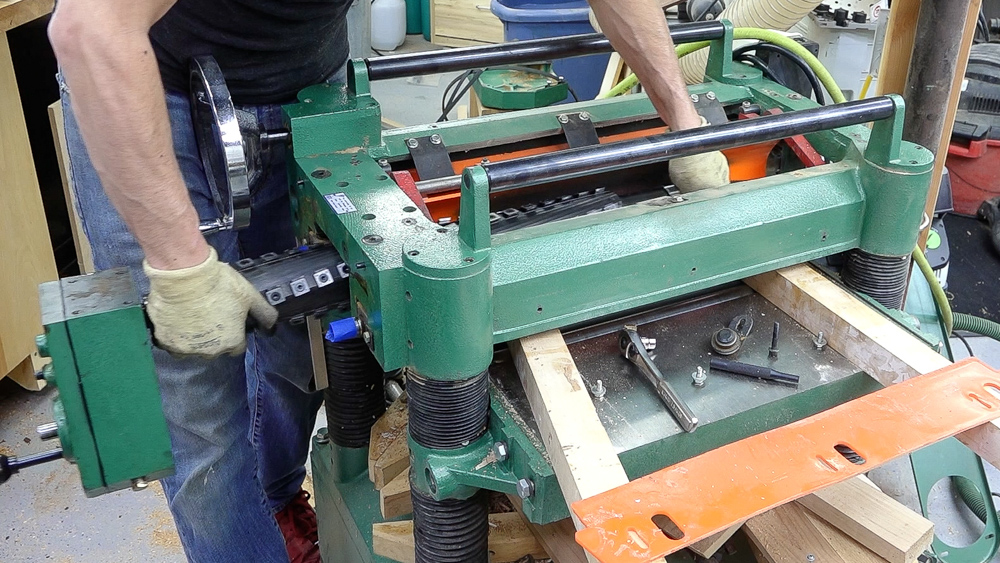
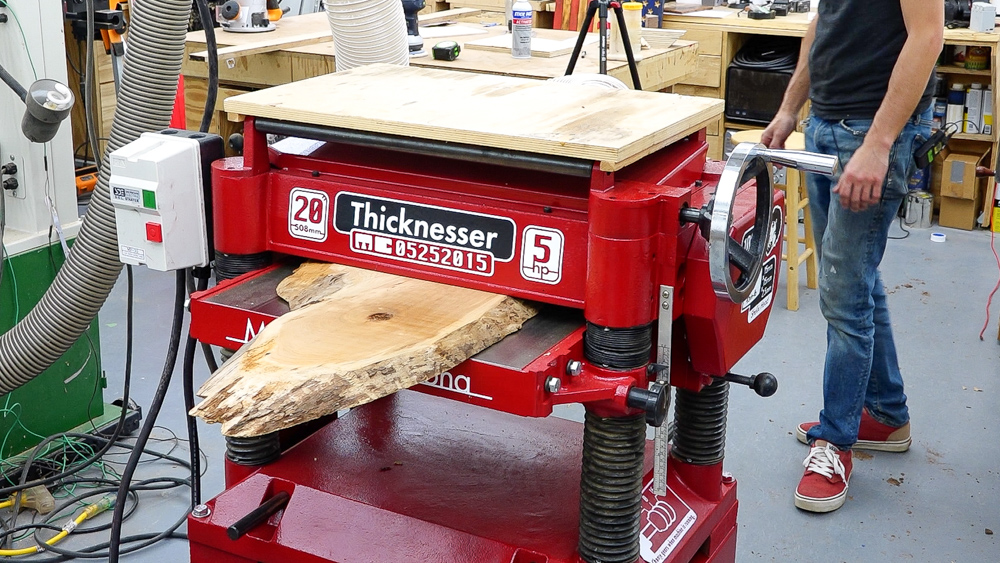
If you recall, a few years ago, I swapped the straight knife cutter head in my planer for a spiral helical head, and we did the testing on the power draw between the two heads. The spiral heads take more power, and I have been missing the ability to hog as much material as I used to be able to do.
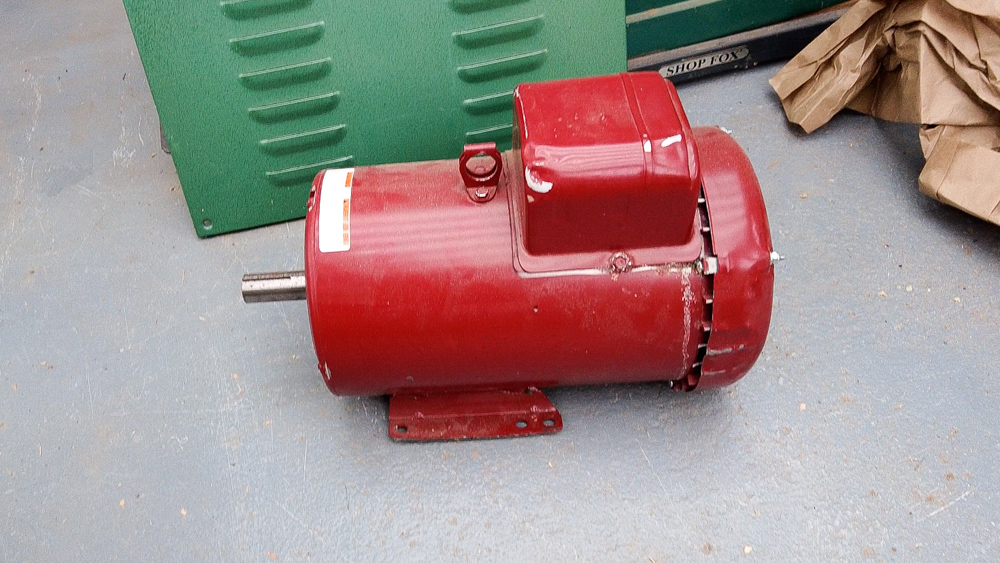
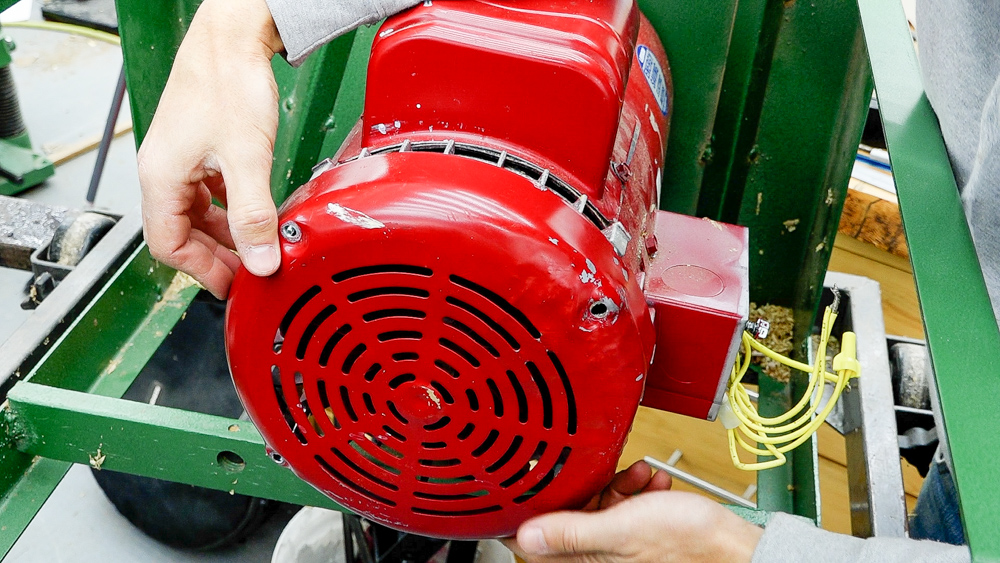
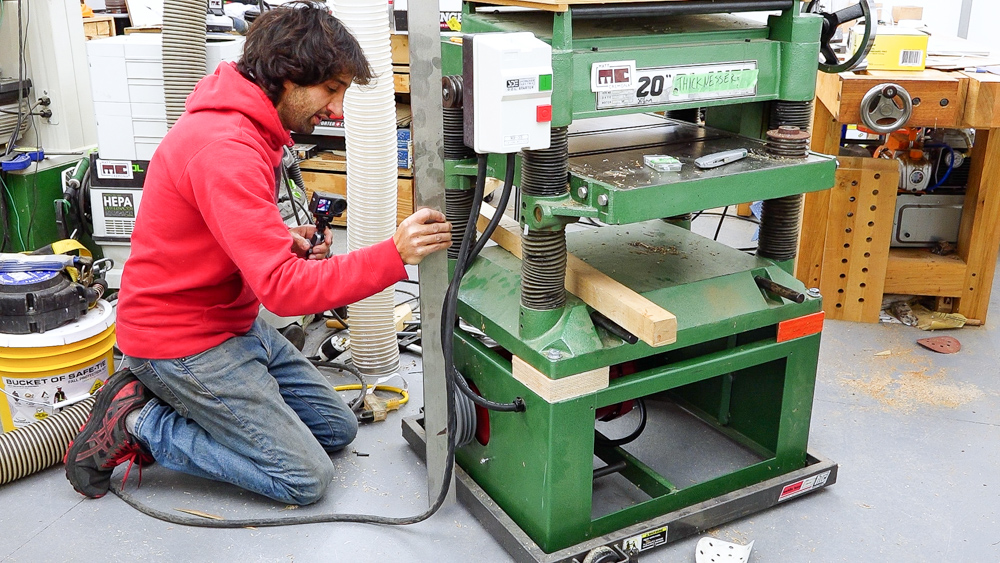
I have this motor which is a five force power motor. When you buy a new planer with the spiral head, it comes with a five horse motor, so this motor is more in line with what this machine actually needs to be able to perform in the way that I’m using it. A viewer actually sent me this motor a few years ago because he received it damaged, so it does have some dents and dings in it. The fan is rubbing on the shroud a little bit, so that’s the only thing I have to fix.
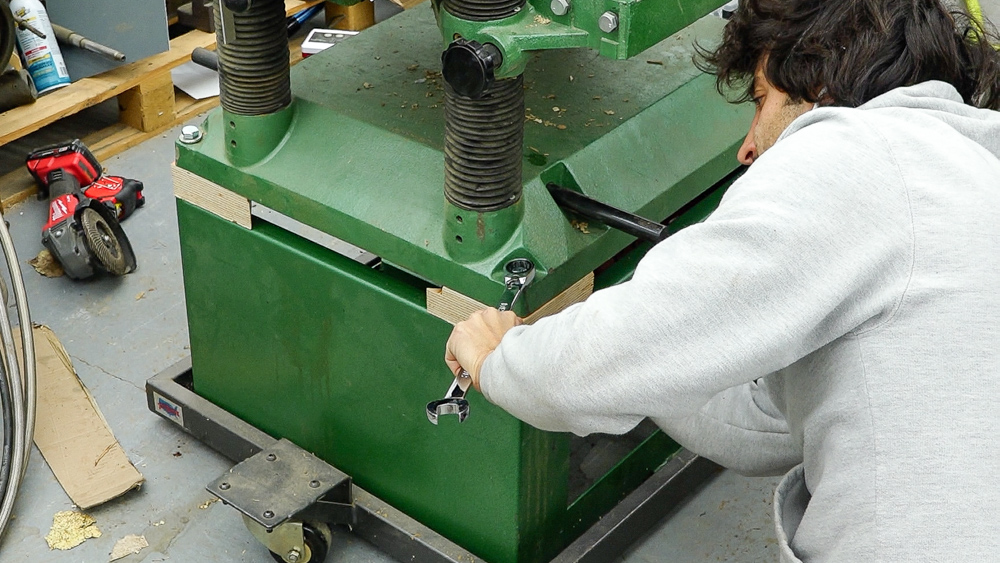
And because it’s not just a simple swap of one size motor to the same size motor, we’re going to have some extra things to deal with as well. First of all, that mounting plate down there is meant for the base plate on a three horsepower motor, so that needs to be adapted. I need to install a five horsepower starter because the electrical is set up for a three horsepower motor currently.
![]()
Lastly, I have to deal with the transmission system. I need to keep the cutter head spinning at the same speed it’s spinning now. The new motor is a low RPM motor compared to the old one, so I need to adjust the pulley sizes to keep it spinning at the same speed.
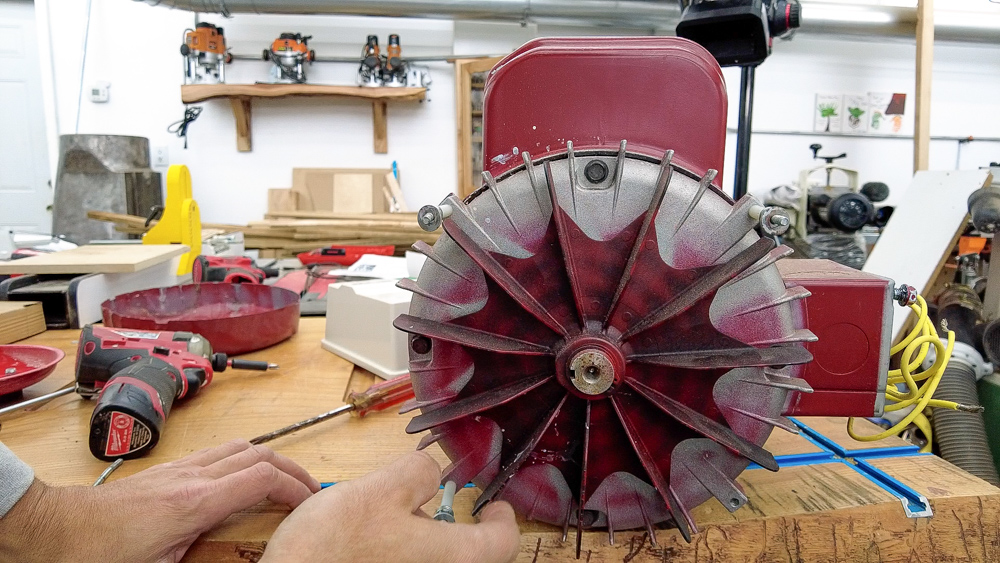
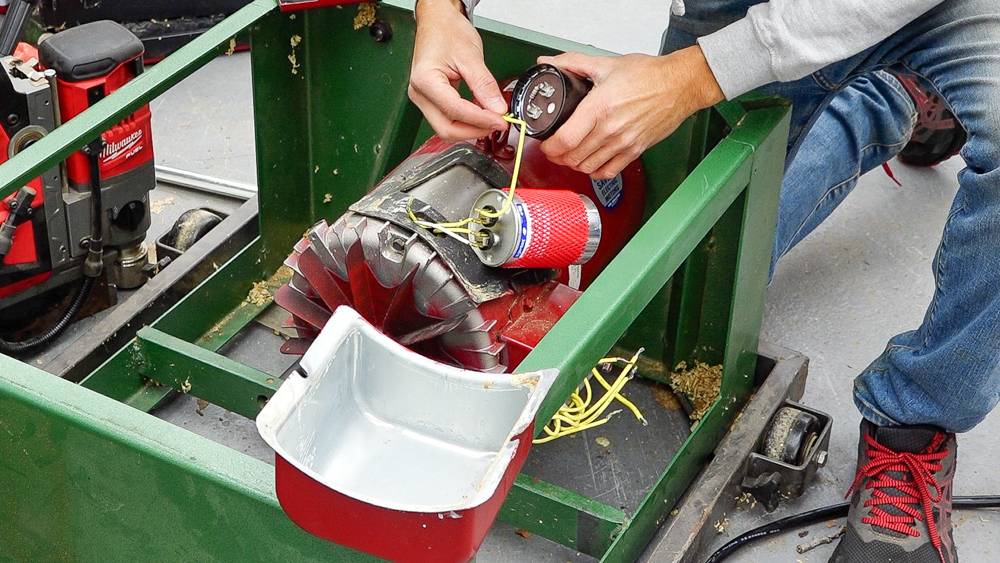
First I’m going to figure out what’s going on with this fan. There’s a broken fin on the fan, but otherwise it looks fine. The fan cover is pretty well banged up though.
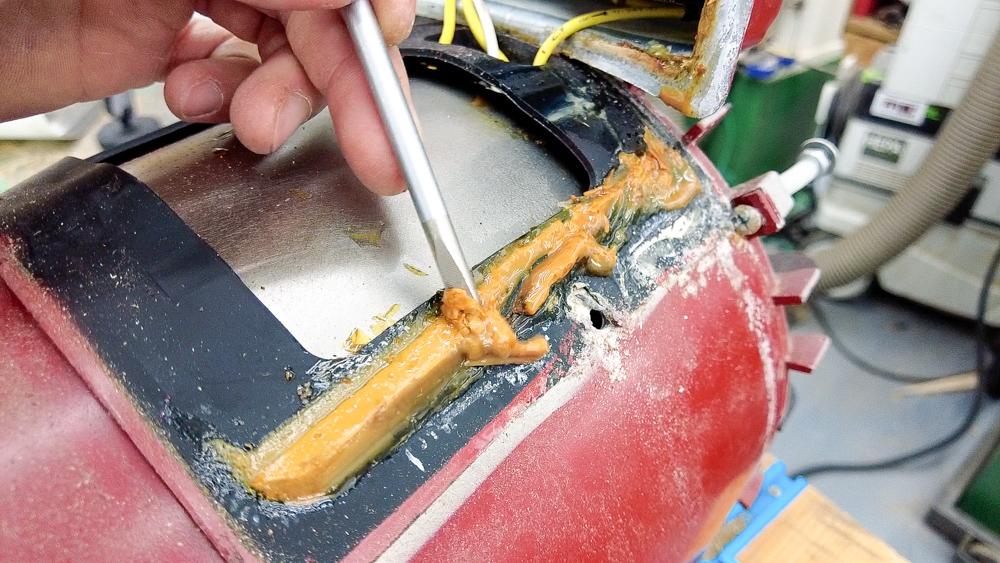
I also noticed some junk coming from the capacitor cover, so I investigated that as well, and it looks like the capacitor is cracked and broken. So I’m going to order another capacitor, and we’ll come back to the fan situation later.
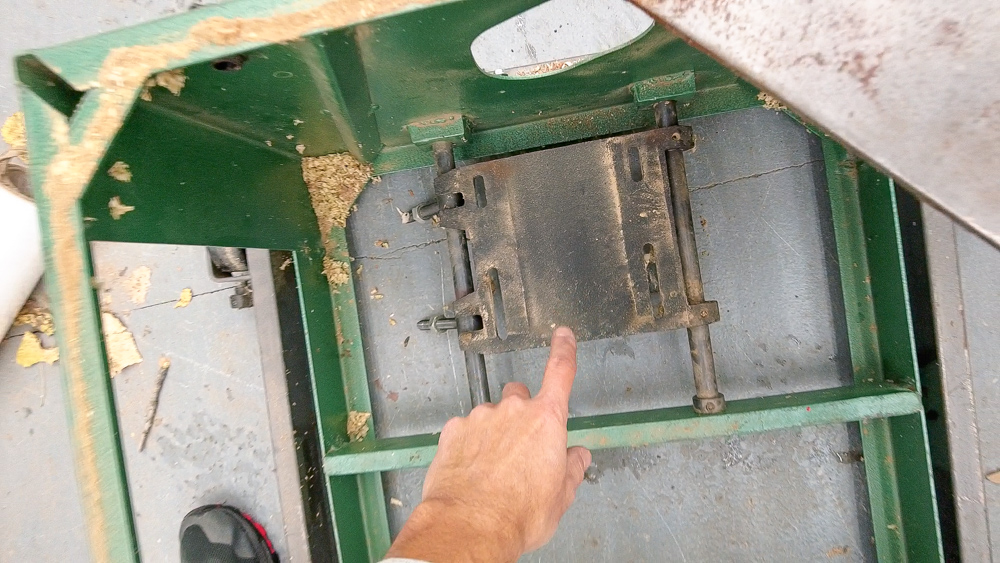
In the meantime, I’m going to adjust that mounting plate. I’m planning to make an adapter plate, which I will put some studs in to tie into the slots of the old mounting plate, and then I’ll put some studs on the top side to receive the new motor.
![]()
The new situation is that the motor is a bit too tall to go in there. So I will need to install a spacer in the frame to make the gap just a little bit bigger.
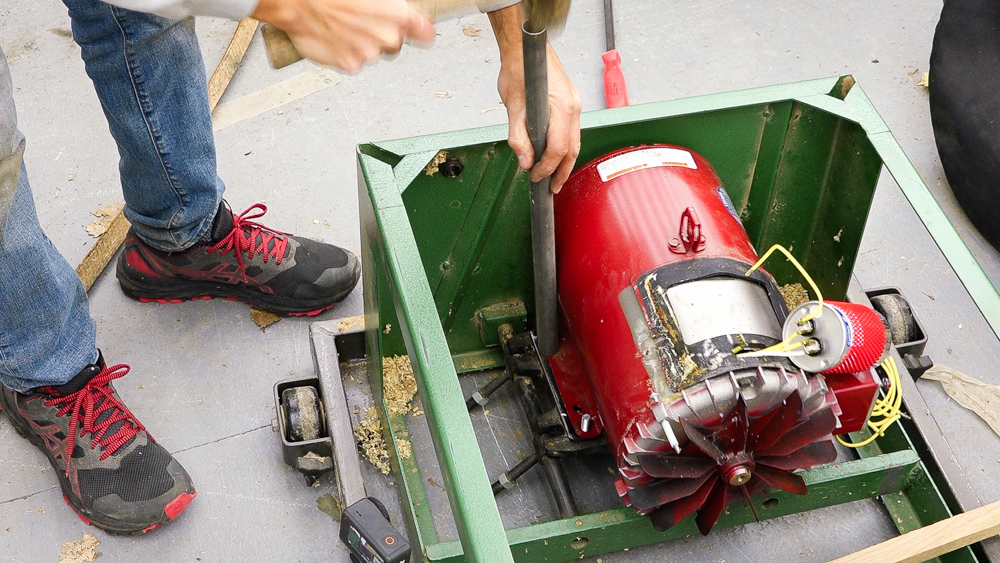
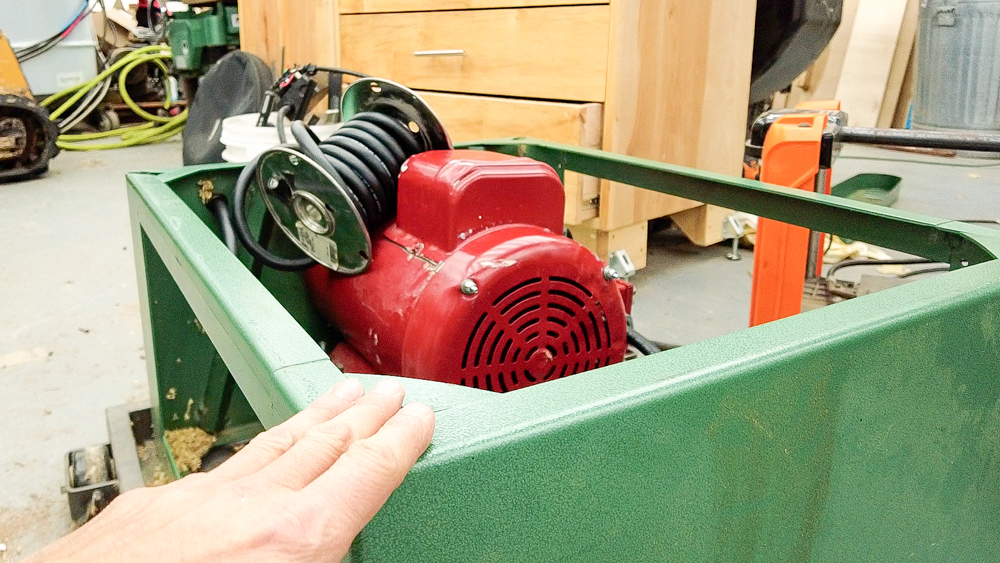
After some trial and error, I got the adapter plate in there, and the new motor is installed.
The new start capacitor is here, so I want to get it into the motor and make sure it actually spins. The motor is reversible, and I want this to be spinning counterclockwise so that it’s spinning the right direction for the cutter head.
That worked just fine, so next I fixed the fan, put some spacers in there, and hammered out the fan cover a little bit. So now everything is all bolted down and in the right spot.
So now we need some kind of spacer on here to clear the little bump for the capacitors.
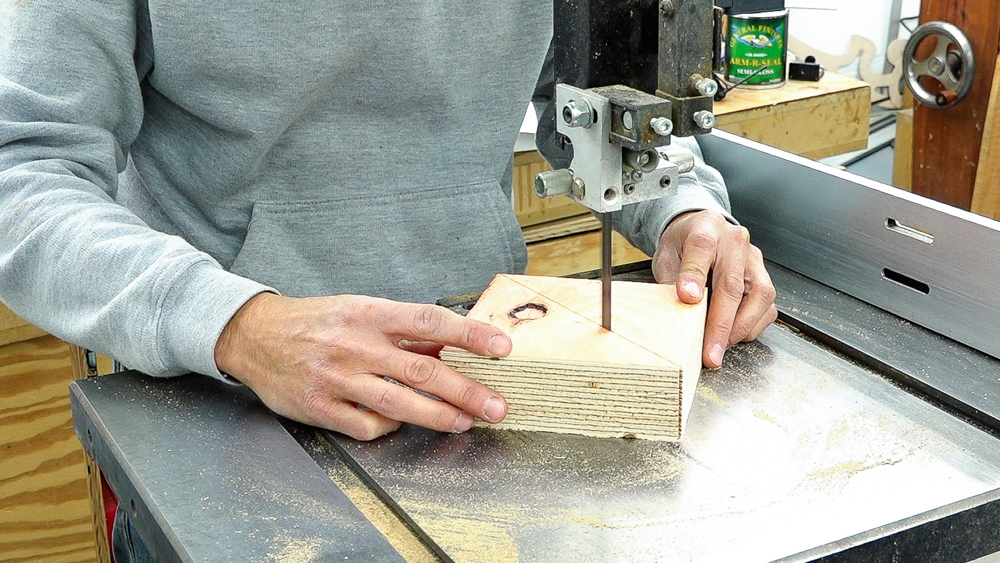
I’m going to make some little triangles to go in the corners out of some LVL that I have, and I will have some very basic risers.
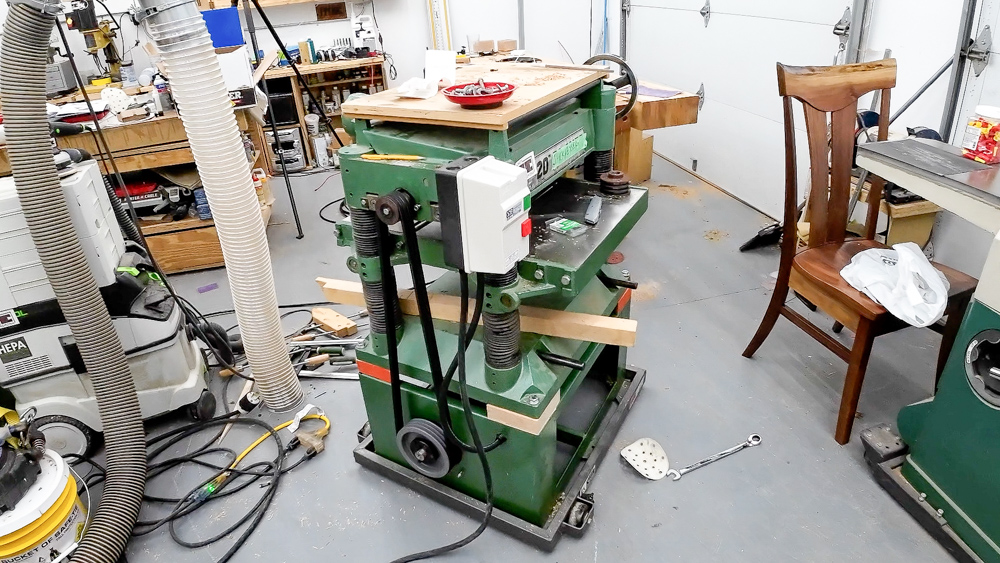
Now I can get the top of the planer back on, and all of the physical things are taken care of. Next up: the transmission. And this is where things get interesting. I want to keep the top pulley spinning at whatever speed it was spinning at before. The owner’s manual tells you want RPM the cutter should be, and in my case, it should be a 5000 RPM cutter head.
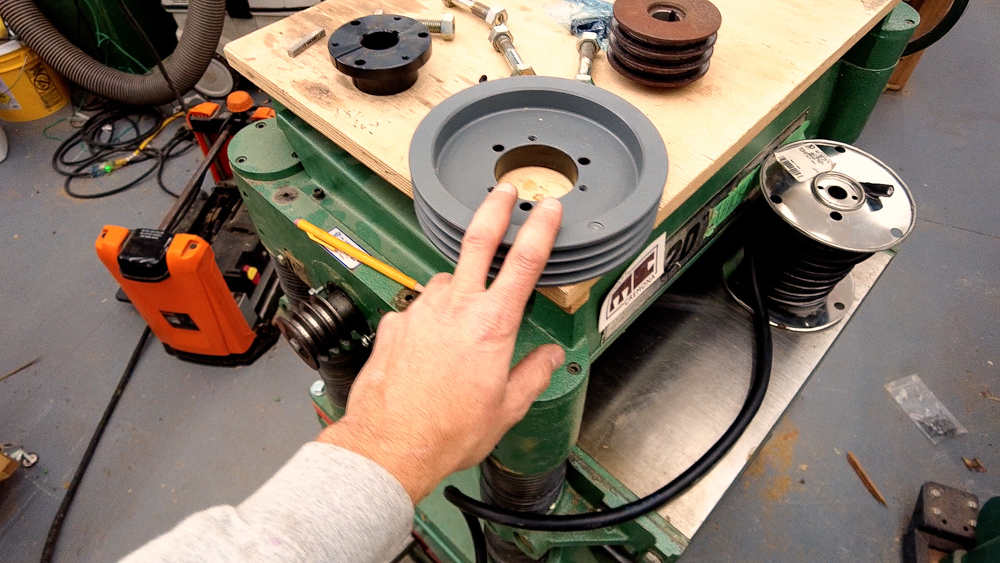
Because the new motor is at a lower RPM, and because I’m going to a larger motor, I need a larger drive pulley on the bottom. And in my case, the new pulley is twice as big, meaning that it will not fit in the guard assembly that was on here before.
So I’m going to get this pulley on here, and then order new belts, because I measured the length of belt I would need before realizing that I would need those spacers in here.
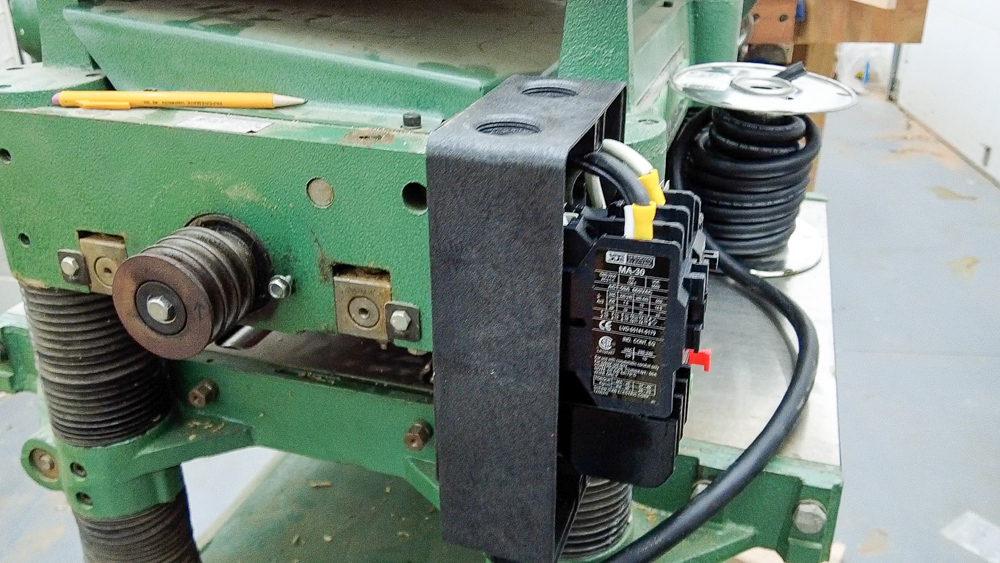
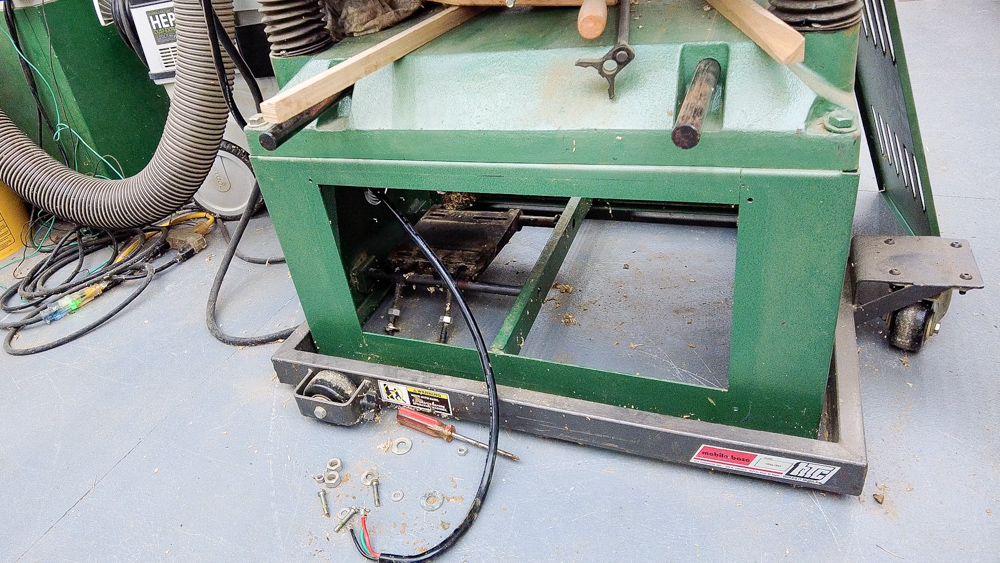
I’m going to switch over to working on the electrical now. This box is bigger than the last one, which means the mounting plate doesn’t match up. I’m just drilling a hole in the new box to have a mounting point inside the box.
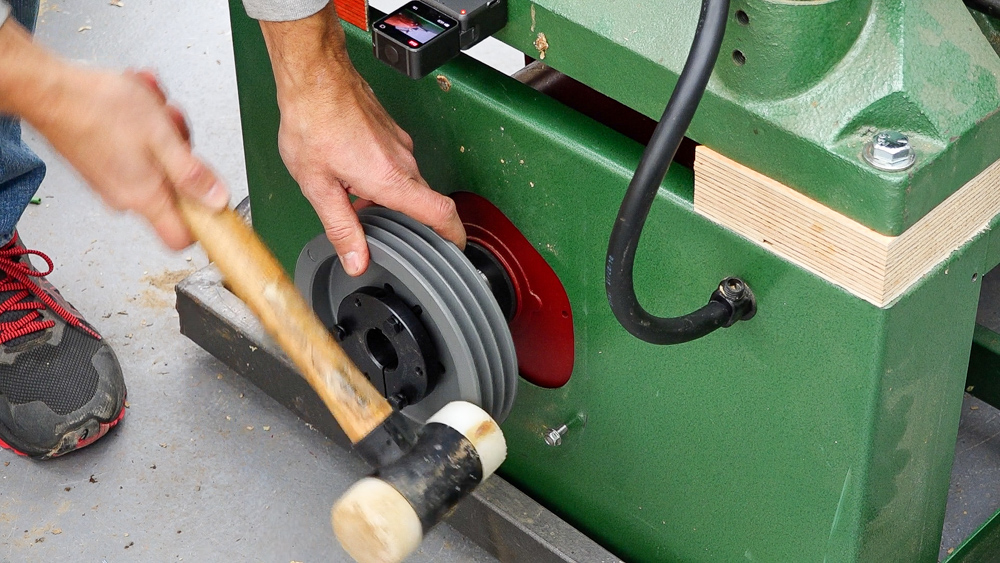
The longer belts got here, so now I can install the pulleys. I’m using a straight edge to align the pulleys. Once they are aligned, I’m going to start tightening down the bolts.
Got the belt on, made sure it was spinning the right direction, and then tested the planer.
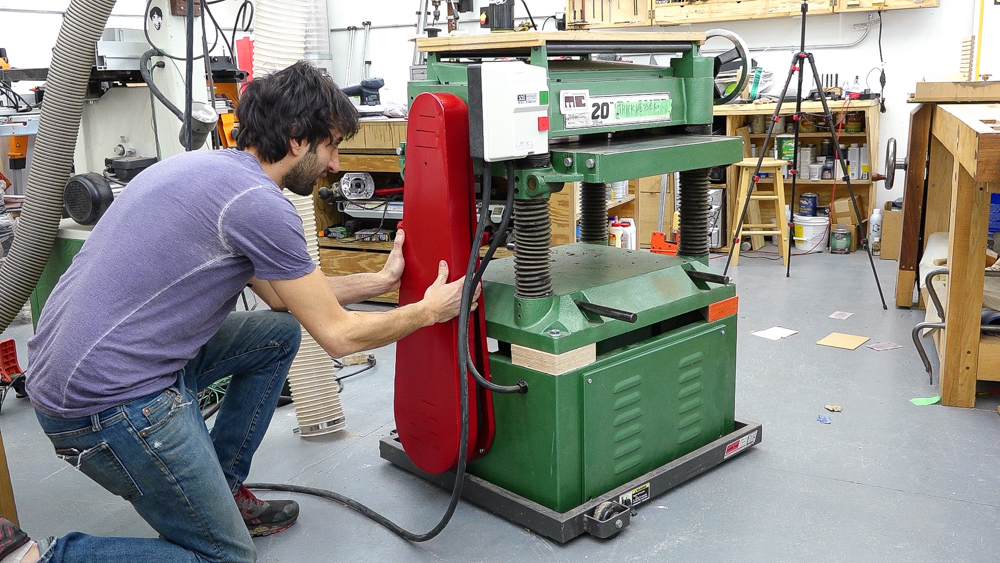
Next up, I need a belt guard, which I already made using my new welding table.
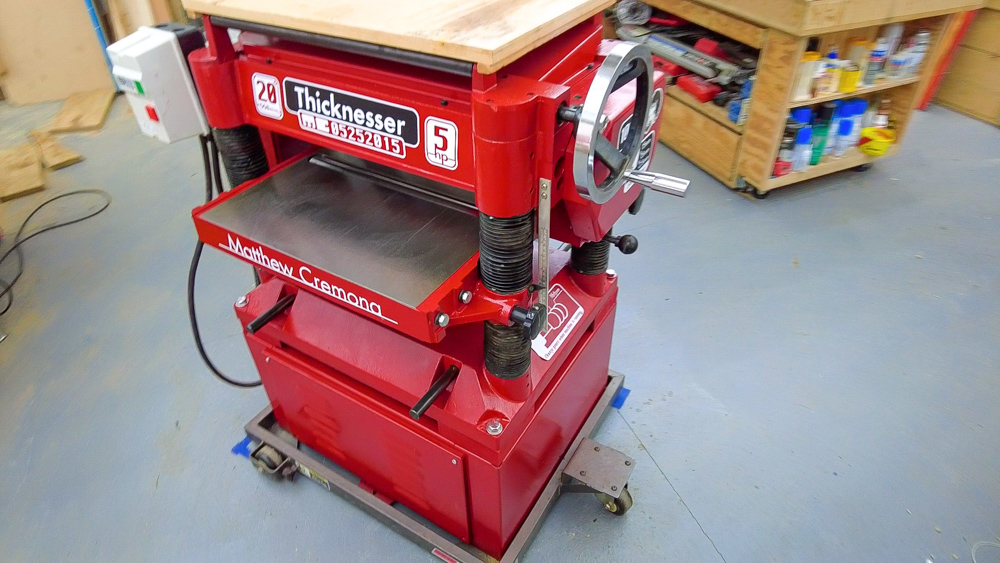
And then I realized… I wished the rest of it was red too. I think that’s the best upgrade yet.
Finally, I wanted to test if the bigger motor allows me to have the same experience that I used to have with the straight knife cutter head in here. The main thing I’m looking for is will this planer now make a 3/16th inch deep cut on a cherry board 10 inches wide? It wasn’t super happy about it, but it did do it.
Would I recommend doing this? Well, if you really want to. I enjoy side projects every now and then, but if that’s not your idea of fun, I wouldn’t recommend it. So thank you as always for joining, I greatly appreciate it. If you have any questions or comments on anything else here in the shop, please feel free to leave me a comment. As always, I’d be happy to answer any questions you might have. Until next time, happy woodworking!
Welcome to my shop! This is a quick update to let you know what I’ve been up to. This big chunky thing is the leg

Welcome back to the home renovation. This time I’m going to be working on the kitchen island. Here is a small model of the island.

Welcome back to our home renovation. Today I am going to be working on this wall. It needs some upper cabinets and the surround for