
Matt's Weekly Shop Update
Kitchen Island, Barn Power – March 2024 Update
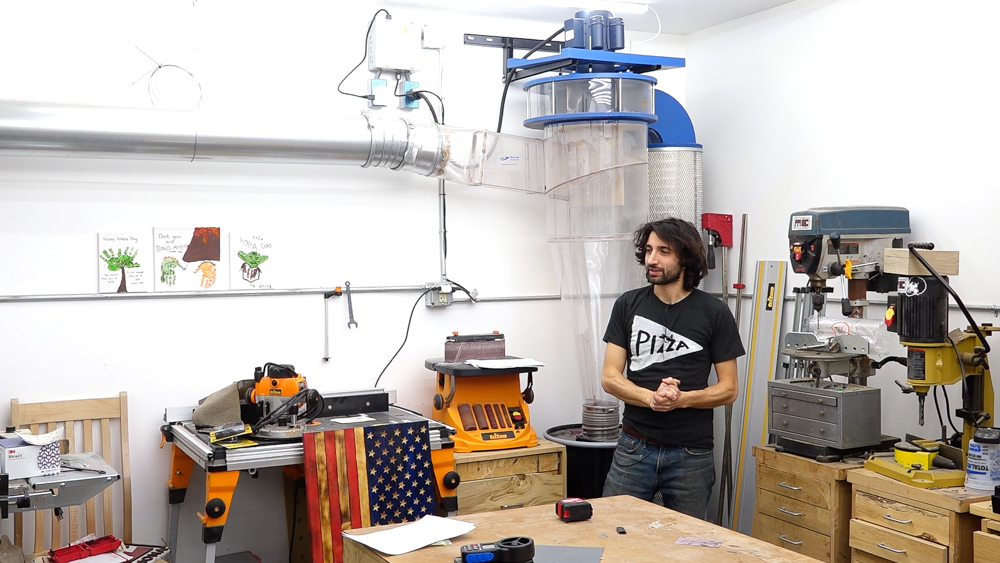
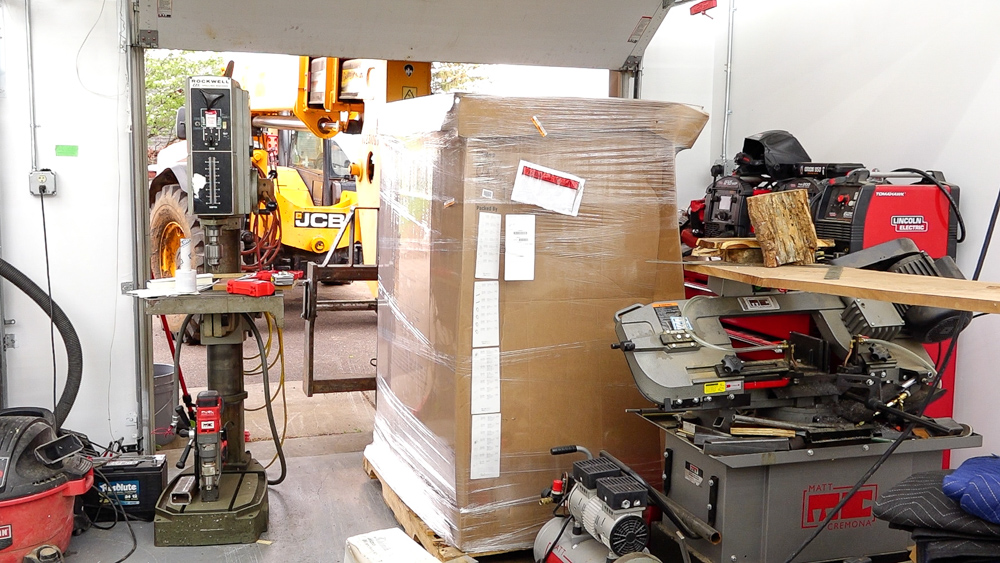
Welcome to my shop! This is a quick update to let you know what I’ve been up to. This big chunky thing is the leg
Welcome to my shop and welcome to another episode of my shop move and setup series.
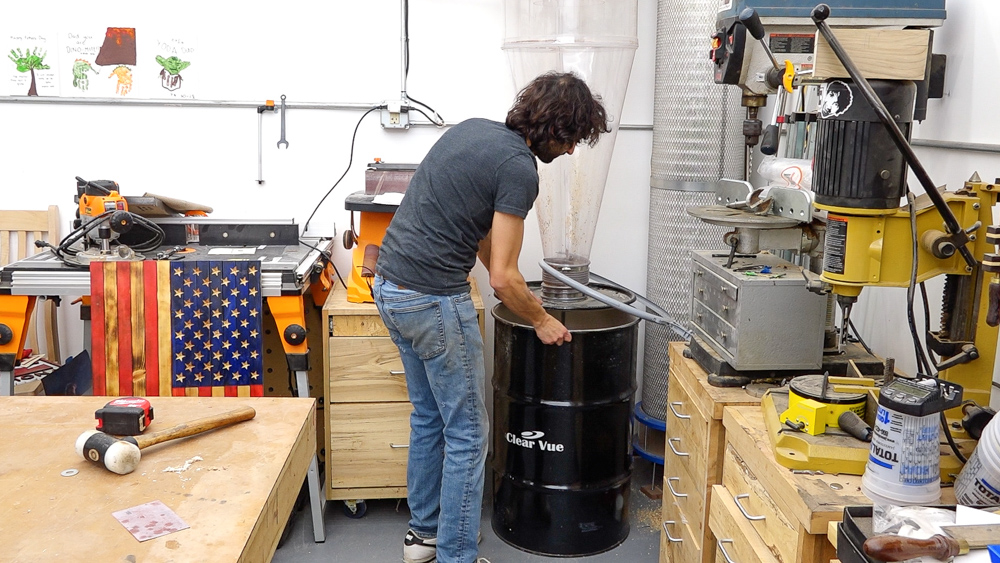
This time we’re doing dust collection, including a Clear Vue Cyclone and Nordfab duct work., Clear Vue did provide the duct work as well as a collector, which I am excited about because this is what I wanted to put in my old shop. In the last shop, I had to settle for a compact Cyclone because I had seven feet of height and that was it. Now I have eight and a half feet, so I can assemble this and get it in here with a little bit of room to spare.
So in this blog, we’re going to cover the assembly of the dust collector, the install of all of the duct work, a little test to see where things are at, and I’ll give you some final thoughts at the end.
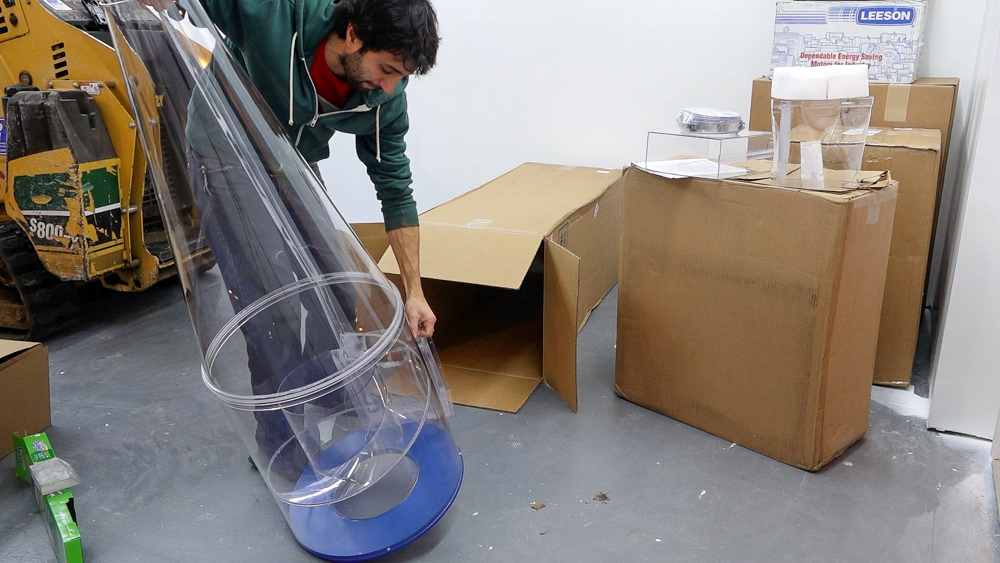
Let’s jump into putting together one of these dust collectors! Clear Vue has two versions you can go with: either a clear Cyclone or a metal Cyclone. If you’re a little more mature than me, and you don’t want to see your dust rolling around as you’re working, you can go with a metal Cyclone. But for me, the clear Cyclone adds a little bit of fun and excitement to any dust-making project in the shop. You can add or subtract a lot of features and options from the package. If you want to do your own setup to do something a little more custom, you can do that. For instance, if you wanted to make your own wall hanging brackets, you can not order brackets at all. Or if you want to do a stand, you can make a stand or you can order a stand. Or if you want to direct vent, you can order this without filters as well. And while we’re on the topic of that, I’m not going to be doing a direct vent, because my shop is conditioned most of the year.
The first thing on the list is to assemble the mounting studs. These will suspend the Cyclone assembly from the hanger plate and allow the entire unit to be adjusted up and down relative to the mount and also leveled independently from that mount. The impeller is shipped inside the impeller housing and needs to be extracted from its prison, so it can be mounted to the motor. These tabs hold the motor mount to the housing and need to be removed. These will be used later to hang the Cyclone to the motor once it’s all up on the wall.
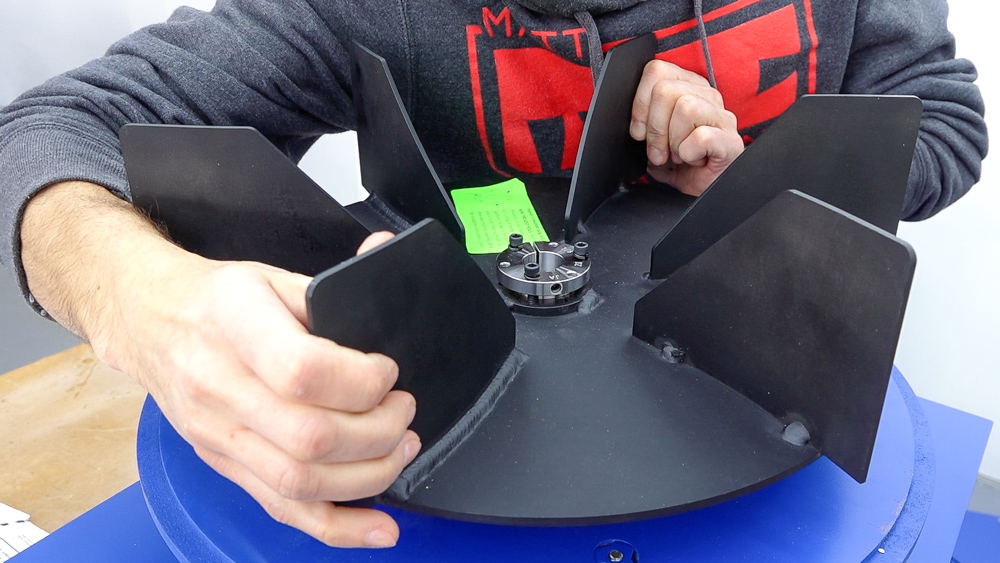
Inside the little box is the taper lock bushing, which will connect the impeller to the motor. The studs get threaded into the motor mount and the hanger plate can be dropped on. The motor mount hanging from these studs is what allows for that adjustability. The assembly is slid over the motor and the motor is bolted to the motor housing plate. And next we can get the impeller attached, it’s still bolted inside the housing for transport. I’ll loosely install the taper lock bushing onto the middle of the impeller and drop the assembly onto the motor. The keyways are aligned and the key stock is then dropped in. The impeller needs to be held up a bit off the motor mounting plate. I use some parallels for my bridgeport because at this point in the shop move, there’s no scraps of wood laying around. The three bolts on the bushing get evenly tightened down and in doing so the taper on the bushing causes it to compress over the motor shaft. You can see the split in the bushing get smaller as the bolts get tighter. Lastly, the set screw holds the key stock in place.
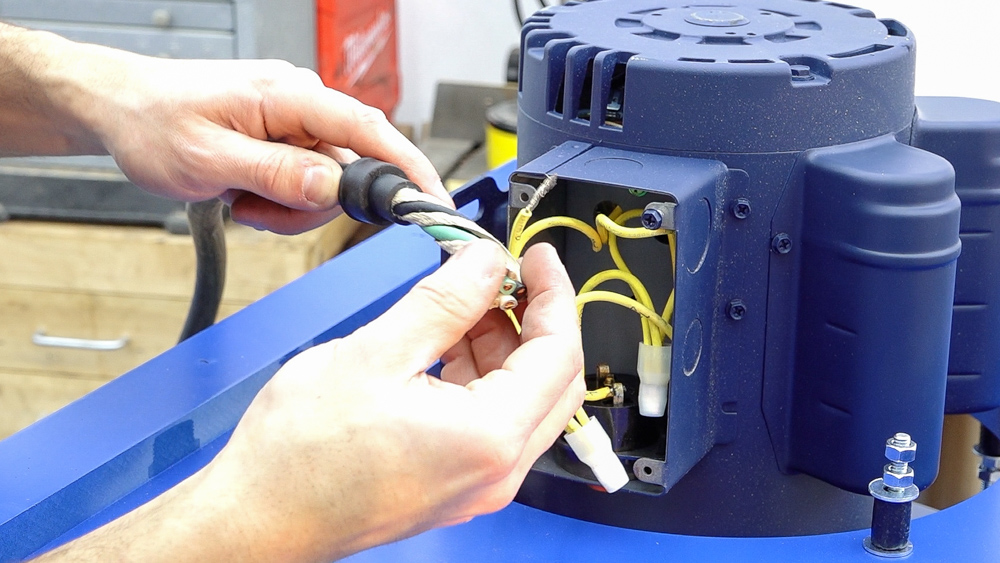
Now I’ll take care of the electrical prep on the motor by installing the pigtail. I picked up a cord clamp to make the install a little cleaner. The connections inside the motor could be made with wire nuts, but I opted to use ring terminals because I’m fancy like that. I’ll secure the ground wire to the grounding screw and then make the hot connections that bolt in the terminals together. I put a little antiox on the terminals and then I’ll wrap the connections with electrical tape. I’ll throw that cover back on and now it’s time to start getting this onto the wall, by getting the bracket hung.
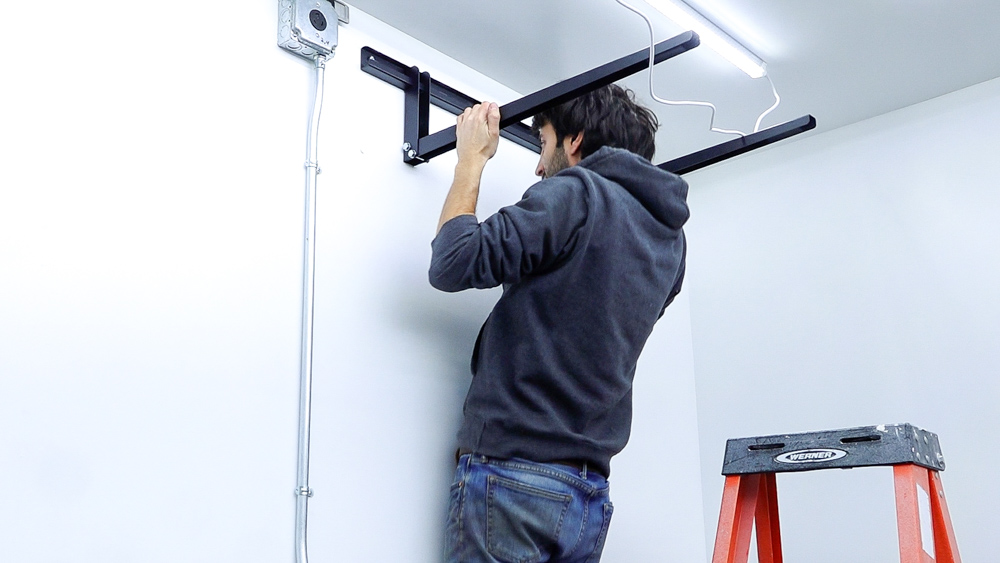
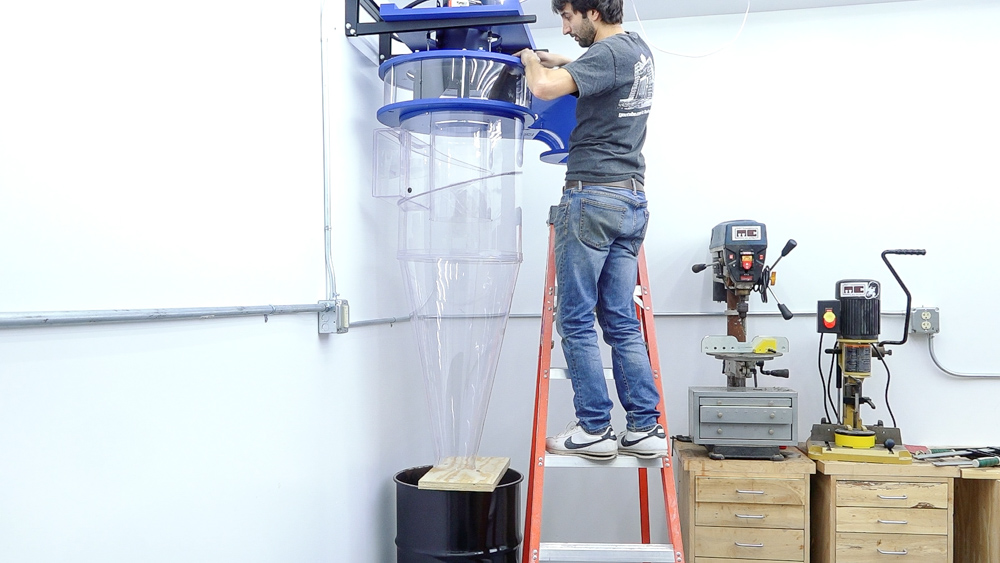
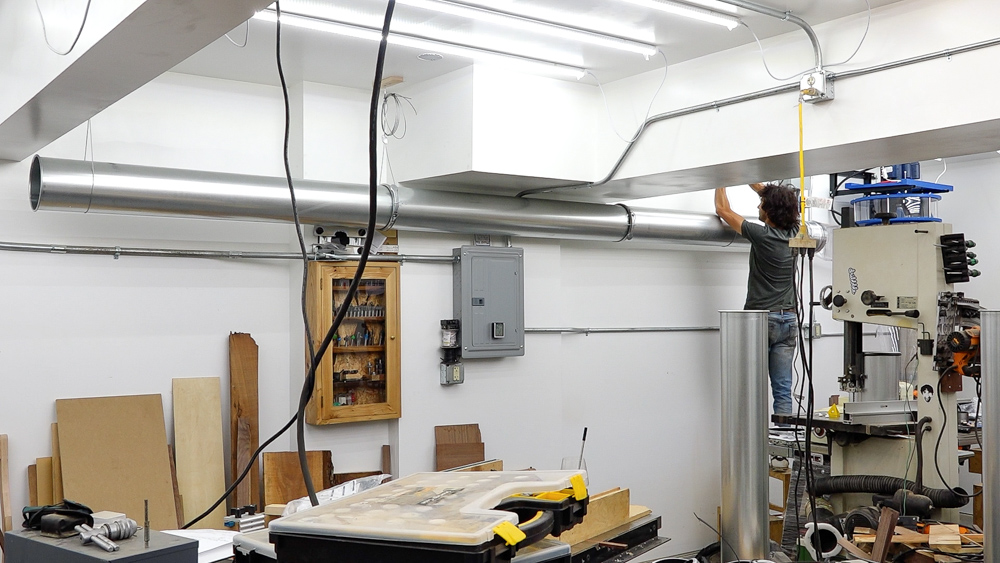
I want to get the collector mounted as high as possible so I’ll measure the offset between the top of the motor and the mounting bar. I’ll install a leg on one end into a stud. I’ll level the bar and then drive a leg on the other side. I’ll do a few pull ups to make sure it’s not going to come off the wall.
Now we just grab this thing and climb the ladder and throw it up there. I’m just kidding, I’ll use the skidsteer for that.
![]()
Next up is the filter transition, which is pretty easy to assemble. The sides are slid into their slots and the end cap is attached. That assembly is slid onto the end of the impeller housing and the bolts on the housing are tightened up to clamp the filter transition in place. Holes are drilled through and bolts finalize the connection. The last thing is to run a bead of silicone over all the seams to make everything airtight.
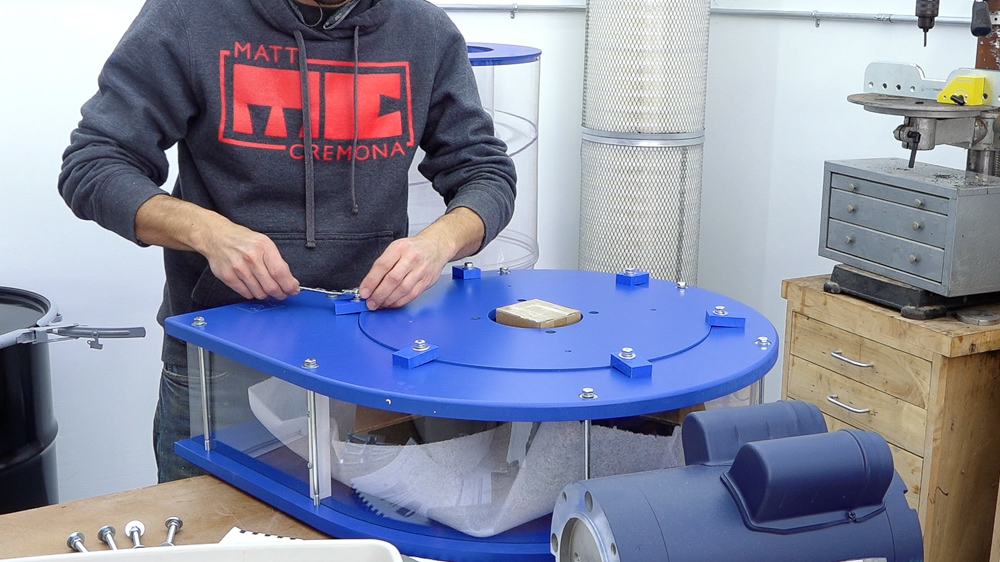
Now the impeller housing can be connected to the Cyclone. This is where you can adjust the inlet and outlet orientation as the impeller housing can be rotated 360 degrees around the Cyclone. Once it’s in position, the two are secured together with some screws.
I then rest the Cyclone on the bin and reattach those tabs. You also have the ability to rotate the entire Cyclone and impeller assembly while those tabs are loose. And now I can use those studs from the beginning to adjust the Cyclone. I pulled the Cyclone up as high as it would go to make enough room for the bin connection. These studs are also used to plumb the Cyclone so it’s not sitting there crooked. I’ll install the inlet extension with a couple screws. Then, to get them out of the way, I’ll assemble the filter stack. These get a bit of silicone and a band clamp. To get rid of some more parts, I’ll install the ducting adapter.
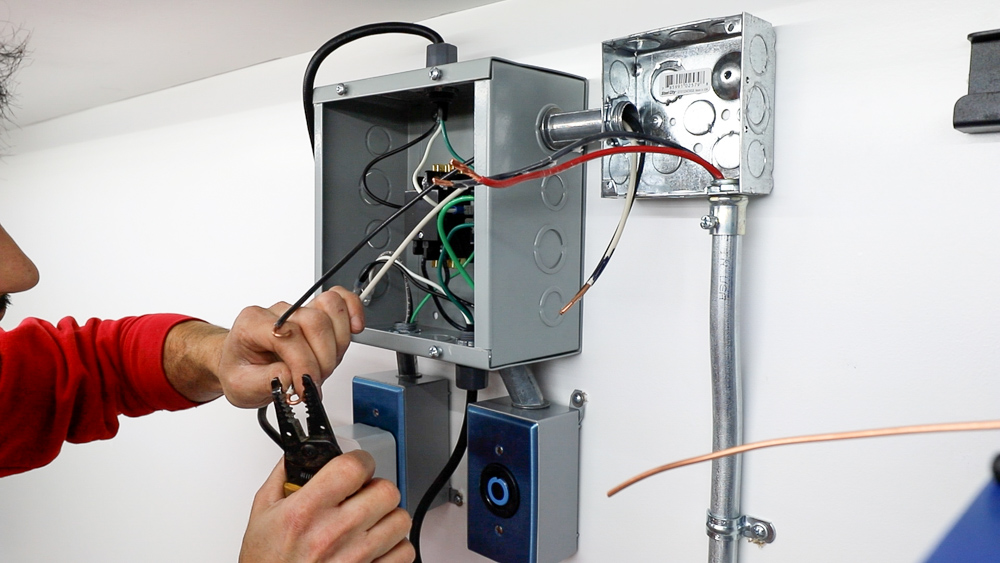
Now I can take care of the electrical hookup. I mounted the control box up on the wall next to the electrical service that I had installed. This box has a relay in it, which will turn the motor on when it receives 110 volt power. The little white box thing is a remote switch. I connected the relay box to the existing junction box with an offset connector and fed some short wires through it. These are connected with two input terminals on the relay, and I’ll bring the ground connection over and that takes care of everything inside the relay box. Put the cover on and label those circuits. Back over at the junction box, I’ll connect the two hots with wire nuts, or marettes if you’re Canadian, and bond the ground. The motor can then be plugged in and that takes care of this portion.
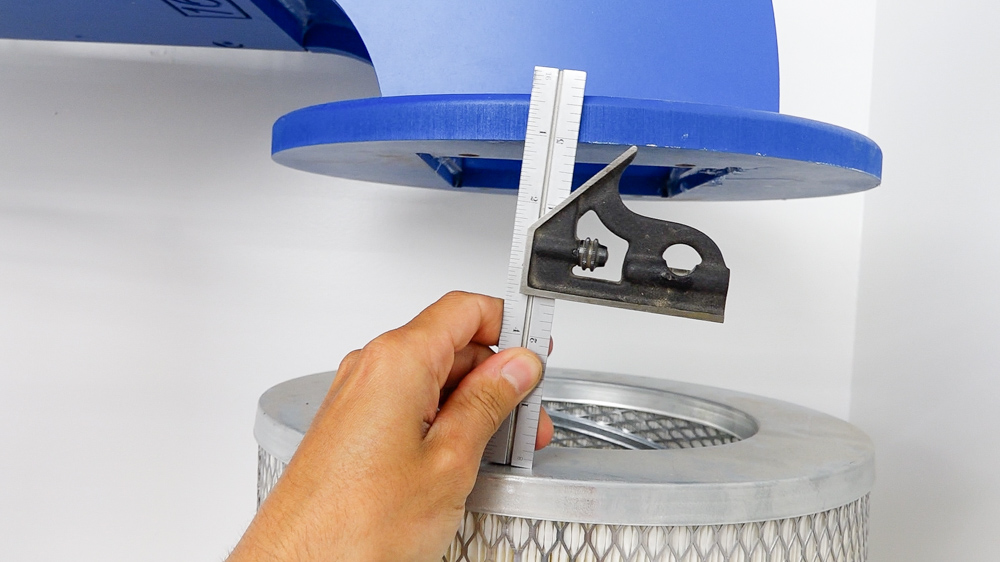
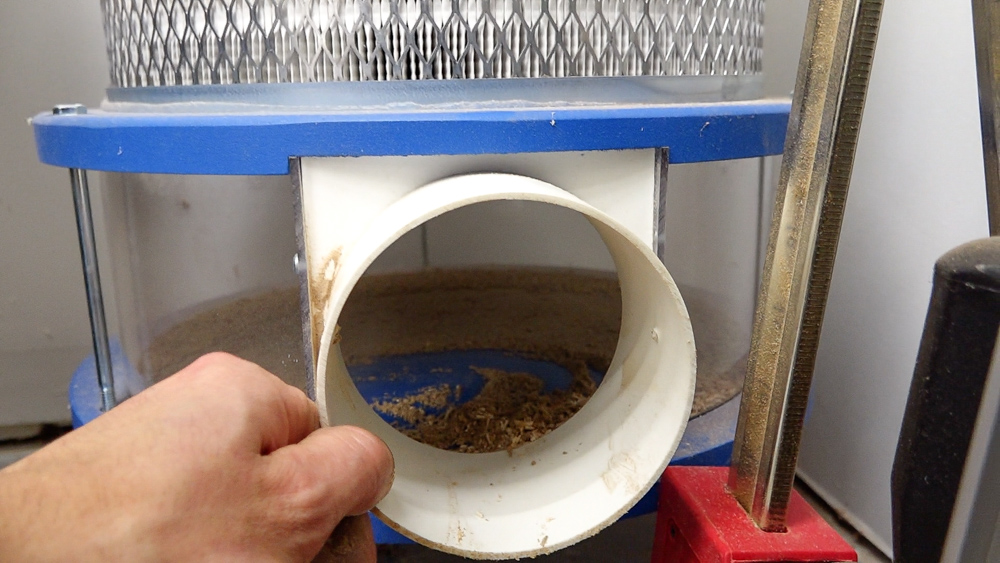
Next I will attach the flex seals between the cone and the drum and I can move on to installing the filters. My installation leaves about five inches of space between the filter stack and then the filter transition. The gap can be bridged with either some tube or the filters can be raised. I went with the easier option. The bottom of the clean out has three leveling feet. I swapped those with longer carriage bolts and made some fancy walnut feet to make up the last little bit. I’ll add a bit of silicone into the clean out and the filter stack can be dropped in place. I slid it back in place and evenly raised the stack with the adjusters before securing the stack on top with a couple of screws.
And that takes care of the assembly of the collector!
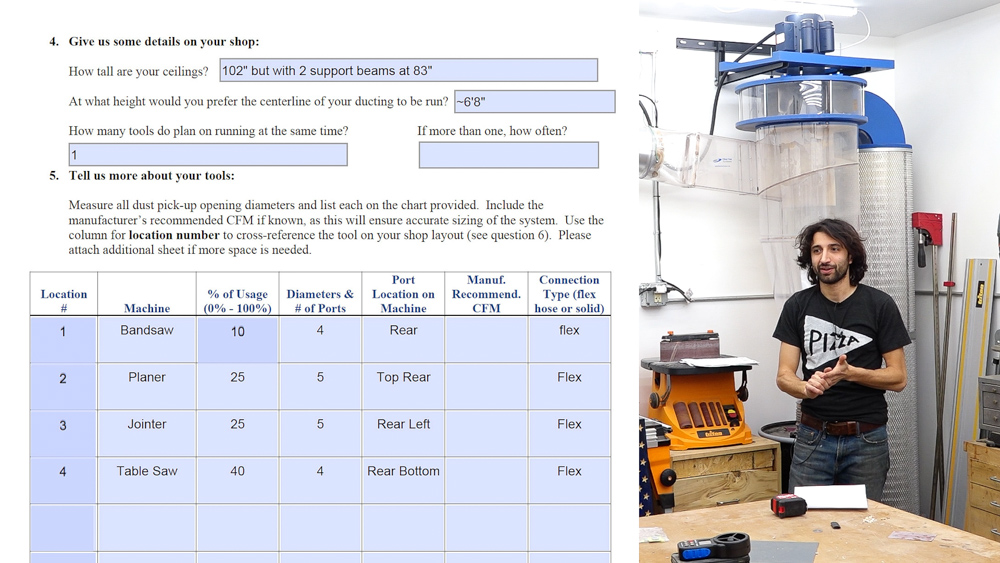
Next, let’s take a look at putting in all the duct work. For all of that, I went through Clear Vue’s design service, which was super nice. They give you a questionnaire and you tell them what machines you have, where the dust ports are, what size they are, how often you use those machines, etc. And then you give them as good of a drawing of your shop as you can (I gave them a pretty bad one.) Then they design your entire setup for you.
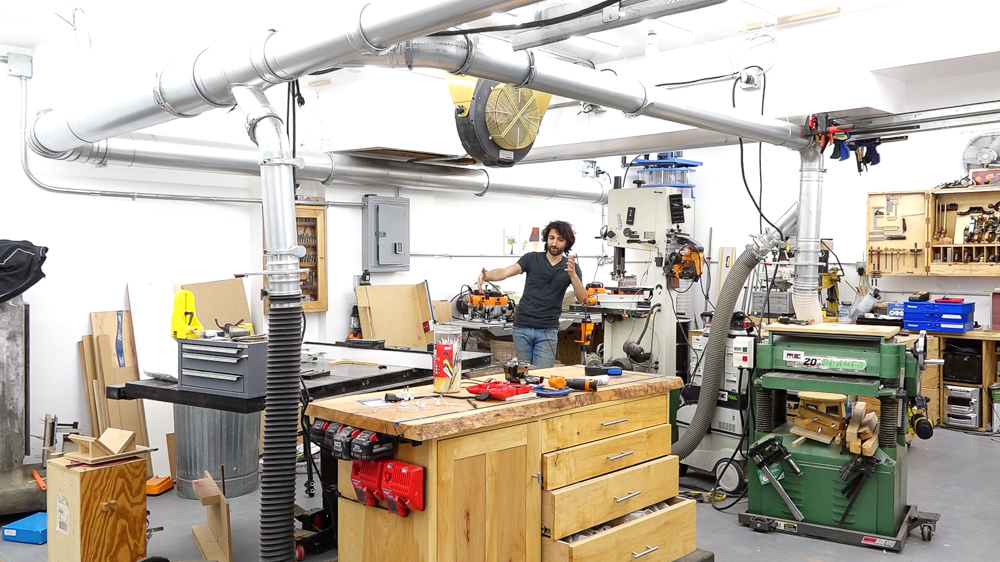
If you decide you want to order duct work through them, they literally send you a single order of every single piece you need for your custom dust duct work setup. Every single hose clamp, every single elbow, every single thing comes in one big box and you’re ready to go. You have a diagram of how it all goes together, and then you just start putting it together. It’s a really great time saver and you don’t have to worry about not having something you need. So once again, this metal ducting is from Nordfab. It’s a modular metal piping, and it’s much more fun to work with than the piping I had in my old shop. My old system used HVAC-style fittings, so every connection needed to be screwed together and every seam needed to be sealed.
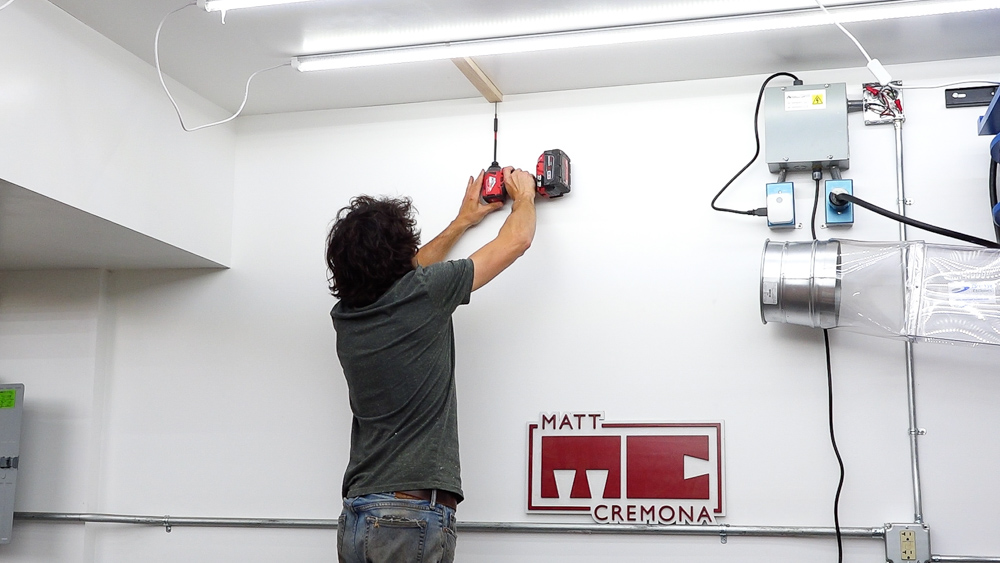
Here is the most annoying part of the entire install: getting anchor points ready in the ceiling. In some areas, my desired placement falls between two ceiling joists, so I attach some pieces of wood to the ceiling between the two joists that I could attach a hook to.
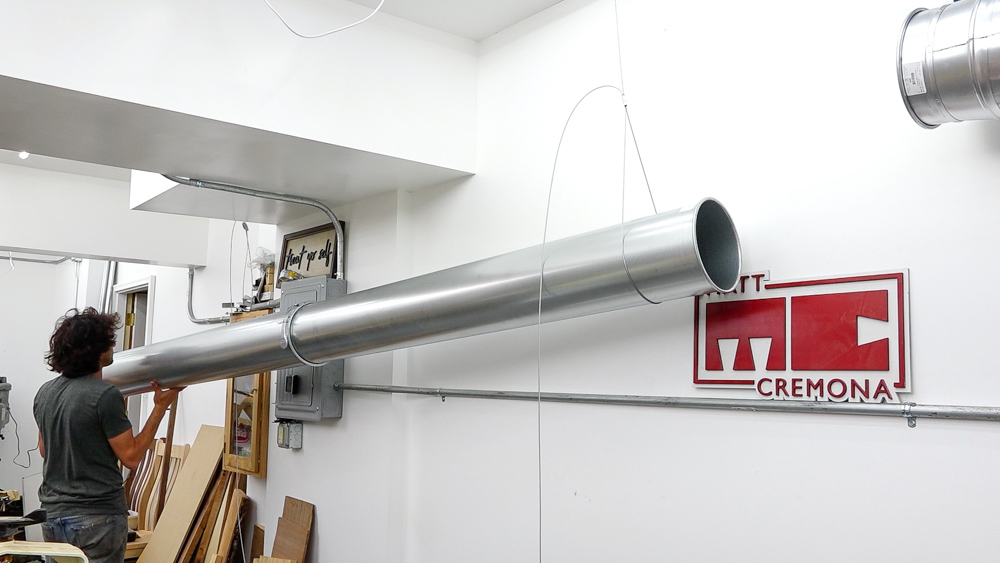
The duct work hangs from these adjustable cable loops, called Gripples. I can get these set where I want them and then drop in a section of pipe. Once it’s hanging there, the height can be adjusted without much hassle. These made doing the install by myself super easy.
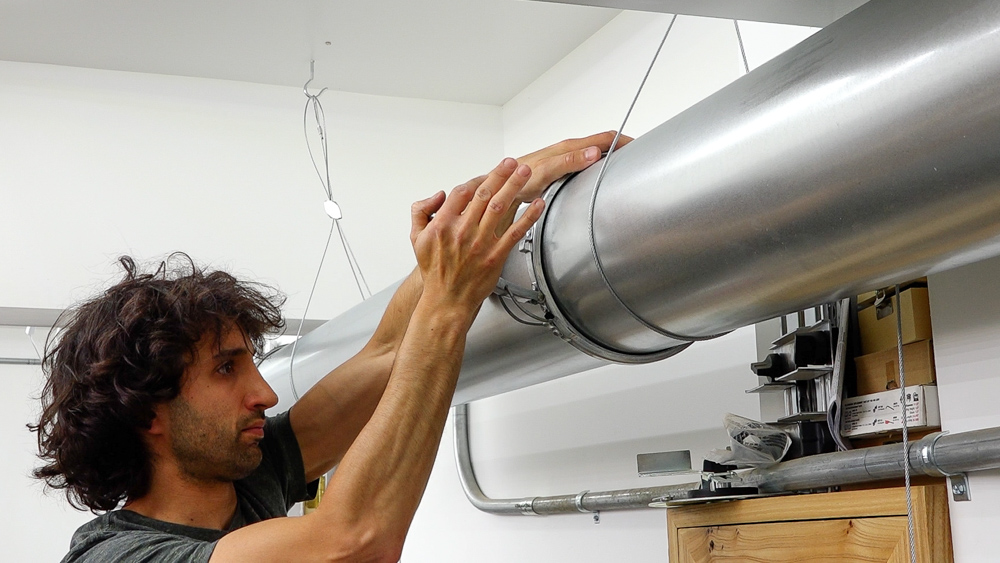
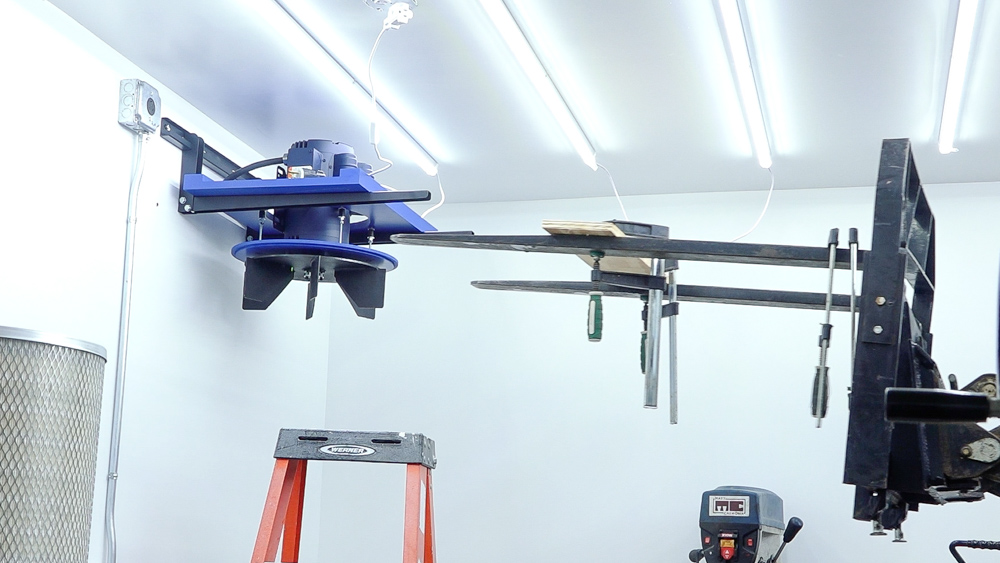
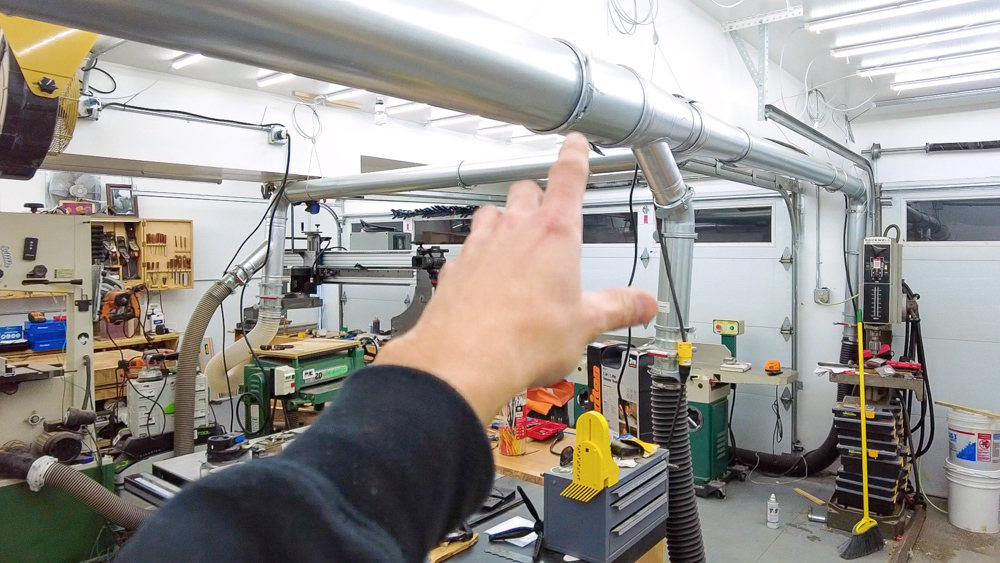
The rolled ends butt together, and the clamp locks it in place. The inside of the clamp has a gasket so it also creates a seal. You just have to watch your fingers when closing those clamps, because they can bite. Over at the collector on the inlet, there’s a duct work adapter and an angle adjustment elbow. I get those in place so I can get the trunk to the correct placement. I’ll come back and make the final connection later.
Here is the main eight-inch trunk, and this is where I started to deviate a bit from the plan. One of those pipes was supposed to be cut down so the trunk turned on the closer side of the soffit in the ceiling, and I decided to leave it long and have the trunk riding along on the other side of the soffit. I thought it’d be nicer to have complete head space over the table saw area.
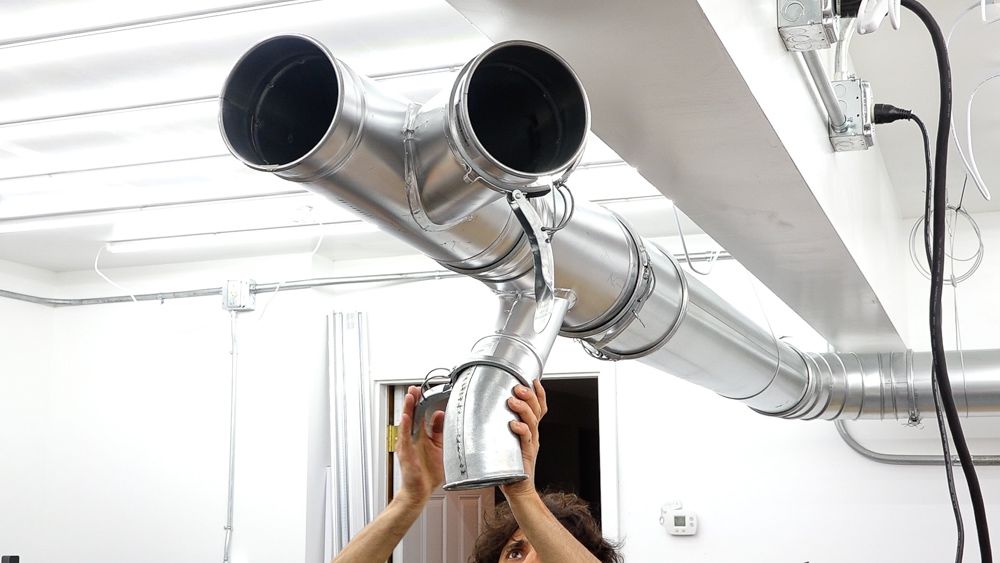
Once I turn the corner, I can install the first wye. This wye also serves as a reducer, taking the pipe size down to five inch for the rest of the runs and four inch for the table saw drop. Next up is the wye that will split the run for the planer and bandsaw. One nice thing about this system is you can rotate the parts in place, and you can do that even after the system is fully assembled, just in case you need change the angle of something. I added another pipe to continue to run to the jointer and assembled the drop for the table saw. This has an adapter for a flex hose on one side of the blast gate.
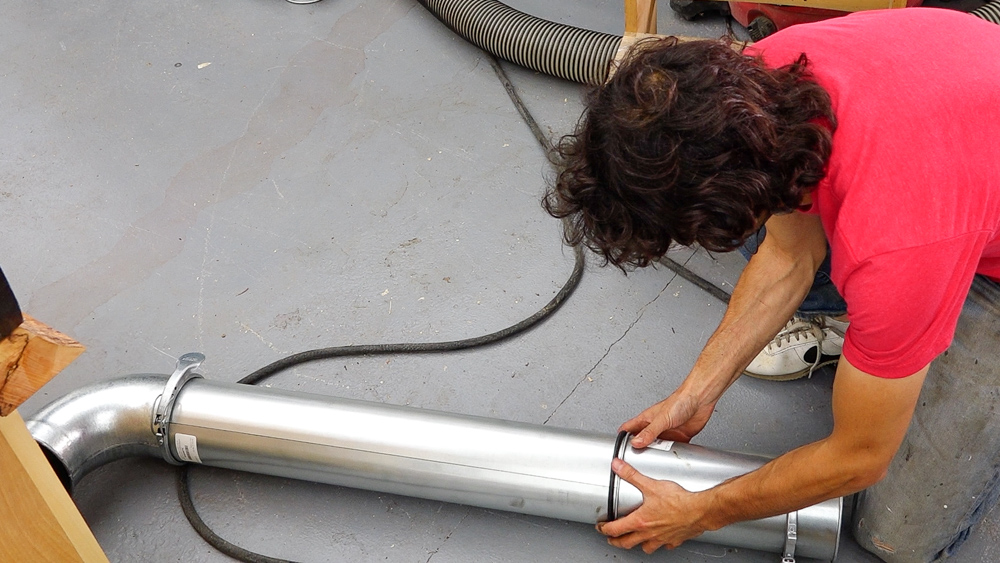
Now I need to make my first cut and use one of the sleeves. These sleeves are telescopic so again, there’s some adjustability built in if things need to change. The sleeve gets sealed to the cut pipe with an O-ring and a clamp. Now for the drop to the jointer, I’ll use the other half of that cut pipe and another sleeve to get the height of the blast gate a comfortable distance off the floor.

So now for the transverse section of the duct work. I mocked up my fittings to get a length of the pipe and I can cut and sleeve it. Since that sleeve is telescopic, I can dial in the length of the duct work in place and set the clamp when it looks right.
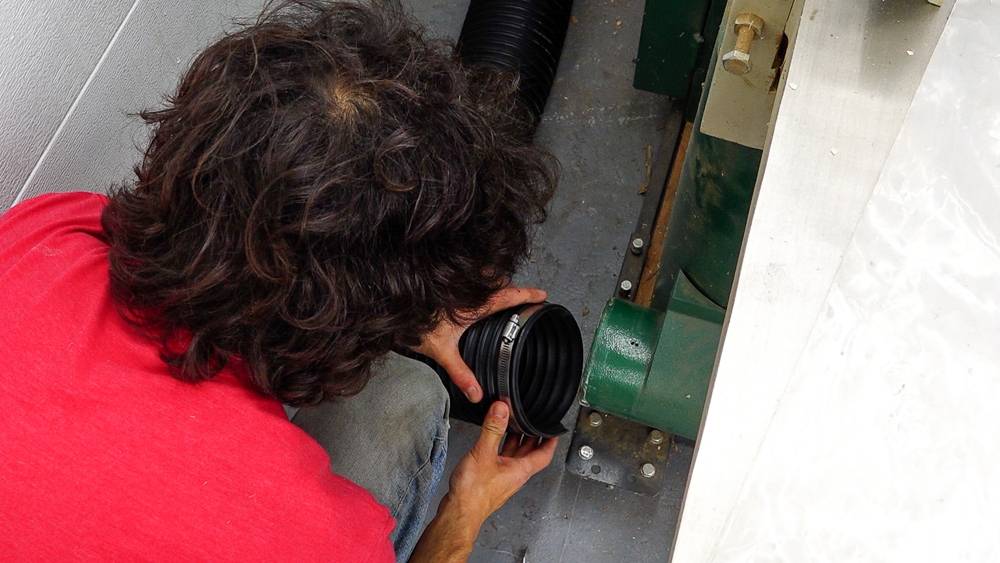
On the end, I’ll add the elbow and the wye to the planer and bandsaw instead of building out the drops. The bandsaw gets connected with four-inch flex hose. I’m using Izzy’s quick fittings so I can swap the collection from the bandsaw to the drum sander whenever I need to use it. The jointer gets hooked up with a section of five-inch flex hose, as does the planer.
![]()
Lastly, it’s back to the start to make the final adjustments and get the Cyclone connected to the duct work. I just need to make an adjustment to the fittings, and then I can clamp them together. The adapter can now be screwed to the Cyclone and sealed with silicone.
So here is the final layout for that duct work with the main trunk that runs along the backside of the shop. Turns along this beam here in the shop, falls down through to the jointer drops, and then we have another run that goes across the middle here and drops down to the bandsaw and to the planer. This leaves the head space of my assembly area completely open, and I’m really happy with this overall layout.

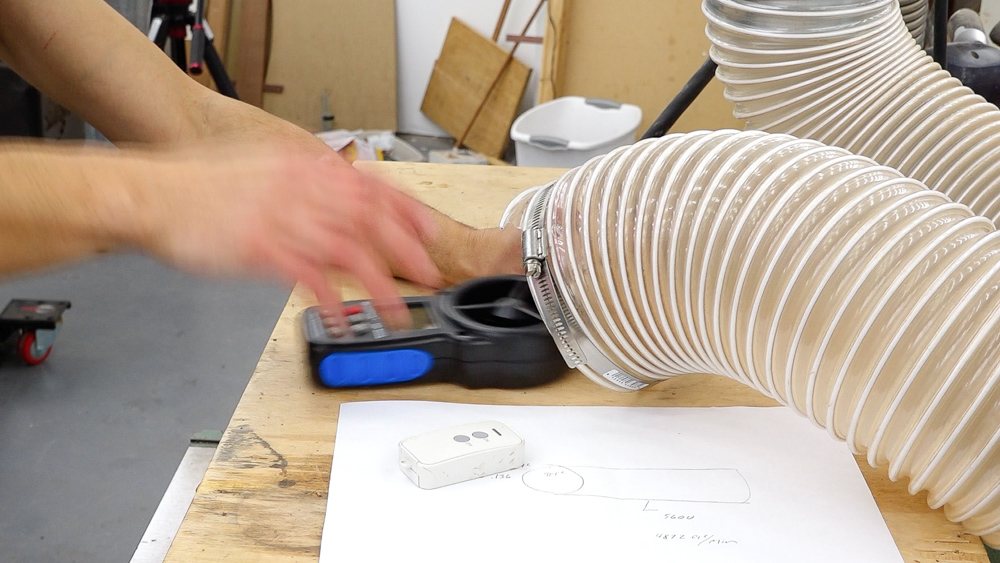
So next I want to get an objective reading of the airflow coming out of the machines. Subjectively it seems like I’m getting a better extraction or a better collection with this system than I was with my old one, but I want to get some objective data on that and what the actual CFMs being pulled out of the machines actually are. So we got the anemometer and we can get some readings on this. Obviously the Clear Vue has a bigger motor, turning a bigger impeller, so is capable of moving more air. Obviously it’s going to be able to pull more air than my last collector, but it’s going to be interesting to see what it’s like once the actual collector is hooked to a system.
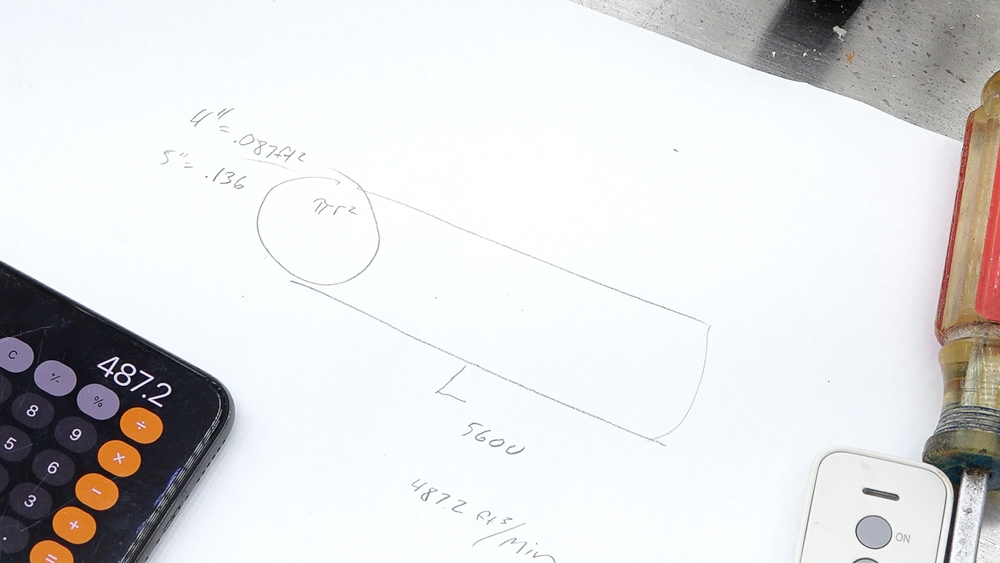
We’re going to do the table saw first, which has a four-inch dust port, twenty something feet of pipe with 10 feet of flex hose. At the port, I get 5,600 feed per minute. After calculating, I got 487.2 cubic feet per minute (CFM).
For a fun comparison, I’m going to do the planer since it’s easy to get at the dust port, and this is a five-inch drop instead of four-inch drop. Unfortunately, I had to conclude this test early, because the dust collector sucked up the anemometer, and I had to go hunting for it in the ductwork instead. After locating it, it shockingly still worked, and I could continue the test, and ended up with 530 CFM.
One final test I did was to see what having multiple machines while the blast gate’s open does to the air speed. Because sometimes I don’t remember to close them. Ended up with pretty much the same thing. It doesn’t matter if I have another blast gate open, I’m getting the same volume of air coming through this port. That’s kind of nice to know.
Now, for some final thoughts. One thing that I like better about this than my old dust collector is the fine particulate separation. On my old collector, it had the agitators on the filters because you had to clean those filters because a whole lot of fine dust bypassed the Cyclone and it went right into the filters. So over the four years I had it, I came to find that the ratio of bin changes to the filter bag changes was about 5-8:1. So for every five to eight times I emptied the dust bin, I’d have to empty the bag on the filter once because there’s that much stuff getting in there. On this one so far, I’m at about 15 drums of sawdust and I haven’t touched the filters at all.
I’ve been waiting to do this video to do that. So I’m going to go and smack the bejesus out of these filters and we’ll see how much stuff falls off. And after doing that, there’s really not a lot of dust down there. That’s one of the things that I’m really liking about finally being at this stage of a dust collection game is not having to worry about cleaning filters constantly.
So as I had mentioned several years ago in the old shop, if you’re looking at a compact Cyclone, price point wise, you might as well go to a full height Cyclone and get the better separation and the better performance.
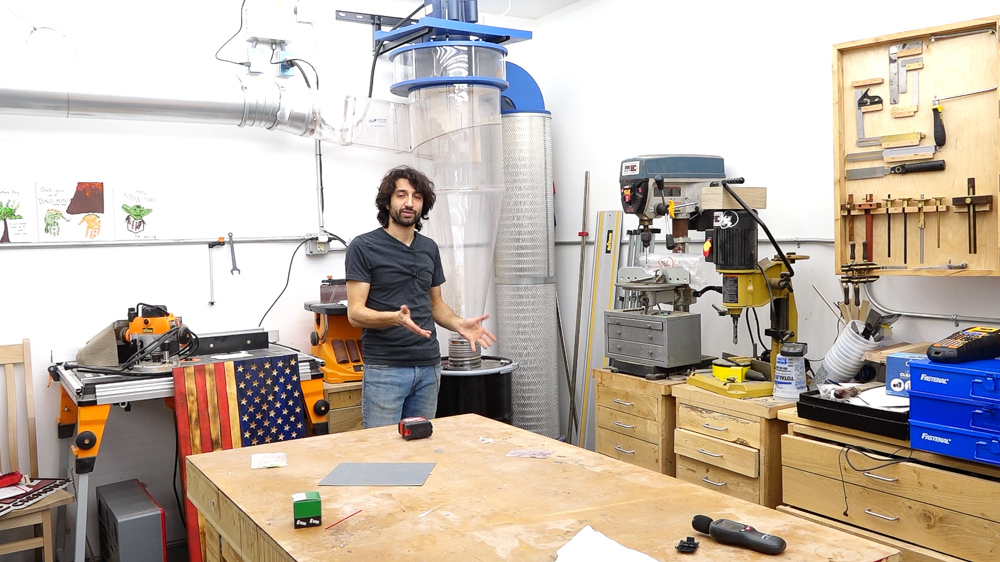
Now as far as the collector goes, I’ve been really happy with this setup, it has been working out really nicely. And yes, I actually really enjoy watching the dust swirl around. This is in a good spot so if I’m standing at the planer feeding boards into the planer, I got something to look at. It’s also really easy to be able to tell when the bin’s getting full, because the cyclonic action of the sawdust in here changes, and it gets weird looking. When you start seeing chips coming up the cone, you know it’s completely full.
As far as changing the bin, I find that to be relatively easy. I can pull the drum out, throw it on my skid steer, take it out in the forest and dump it. I had thought I was going to want to put wheels on the bin, but I haven’t found that to be necessary. If it’s really heavy for you, you can also put a hand truck or a dolly under there and wheel it out on one of those. Another nice thing about these drums is this is just a very simple, generic rolled lip drum. If you want to have more than one drum here, so you can quickly swap them out as you’re working, you can do that.
Lastly, a few things on the piping. To give you a ballpark idea on pricing for everything that came in that big crate box, that was about $4,000. So the duct work is a little more than what the collector is. So the full system is around $7,000, which includes the collector and all of its things. I will say that the user experience with the duct work is sky high. It’s super easy to work with. It’s super easy to change things. So if you’re in a position where this fits in your budget, I would recommend looking at it because you won’t be disappointed.
As far as install time: to assemble the collector and get it completely on the wall took me about five hours. The duct work was four hours, and it was easy and painless. It was a very, very smooth process, both the duct work and the collector.
So that is the new dust collection system that’s been installed in the shop and operational for eight and a half months. And it’s been absolutely wonderful! If you want to take a look at Clear Vue Cyclones, use my coupon code cremona5 to save 5% off your cyclone order.
Welcome to my shop! This is a quick update to let you know what I’ve been up to. This big chunky thing is the leg

Welcome back to the home renovation. This time I’m going to be working on the kitchen island. Here is a small model of the island.

Welcome back to our home renovation. Today I am going to be working on this wall. It needs some upper cabinets and the surround for