
Matt's Weekly Shop Update
Kitchen Island, Barn Power – March 2024 Update
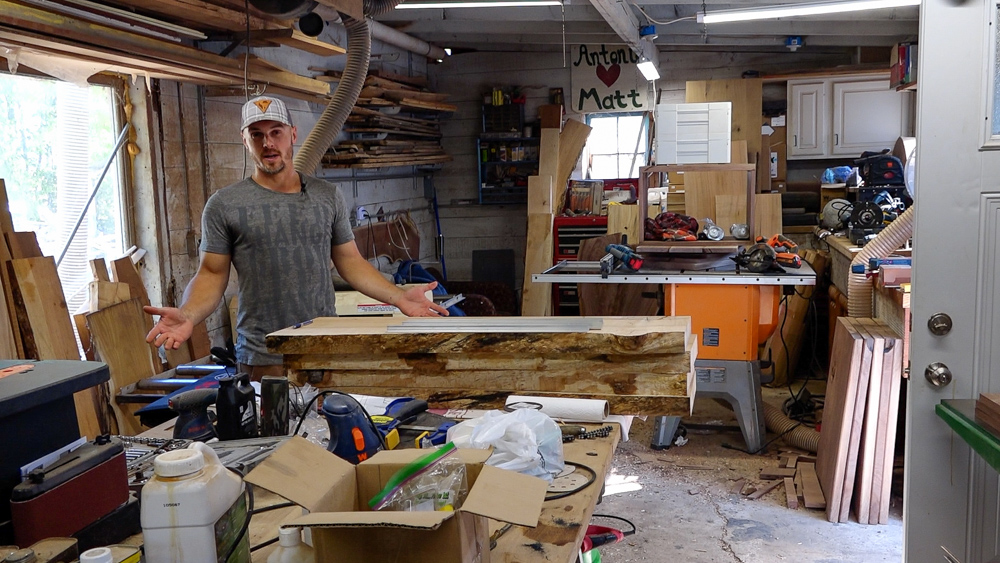
Welcome to my shop! This is a quick update to let you know what I’ve been up to. This big chunky thing is the leg
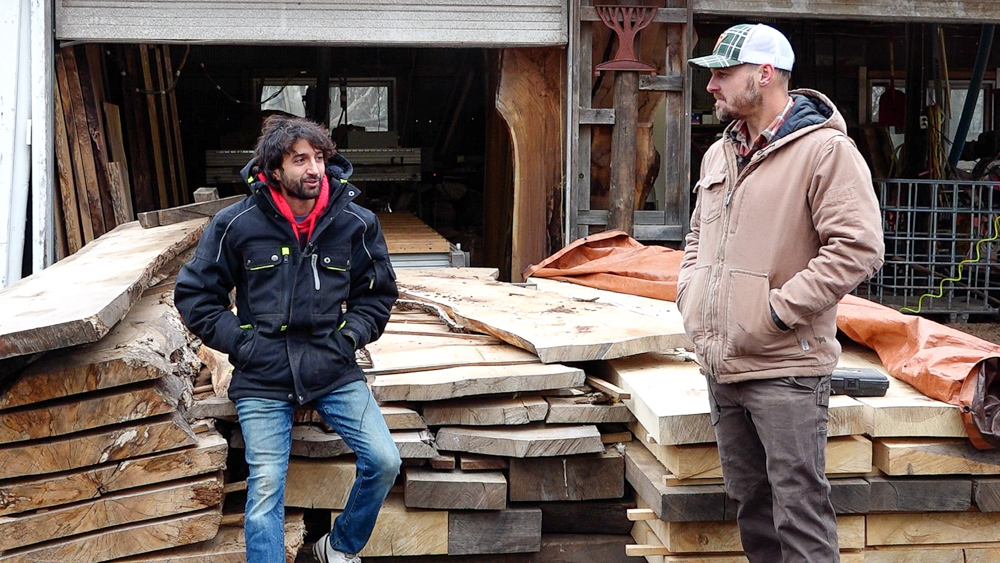
I have something special and a little unique for you today! The folks over at iDry (who make vacuum kilns) reached out and asked if I wanted to do a feature on one of their owners. Today we’re going to visit Matt Ruben, and he’s going to tell us about his journey in building a sawmill. Matt does custom sawing, drying, and furniture, so he works the whole spectrum. We’re going to learn how that all progressed, as well as check out his vacuum kiln and see how that works.
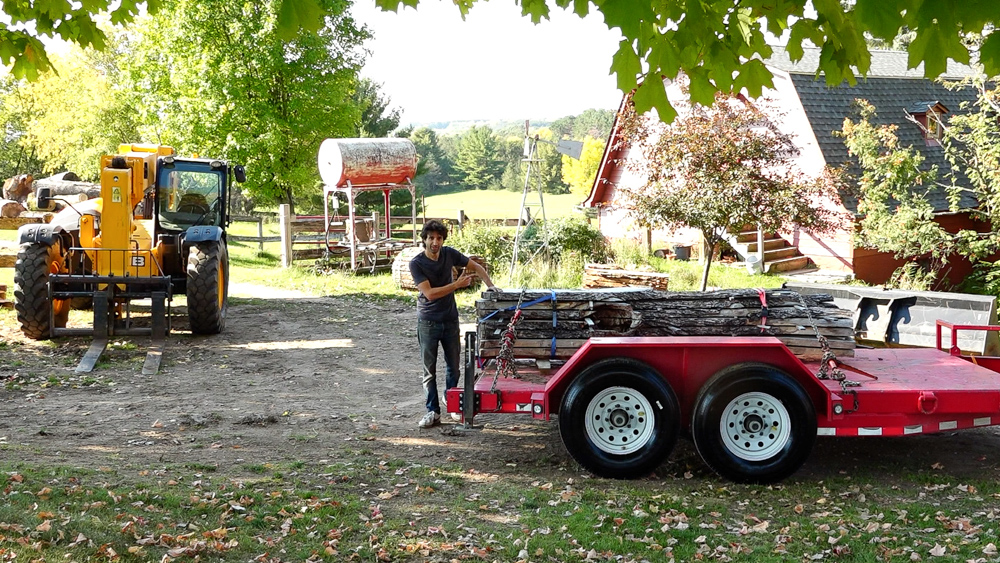
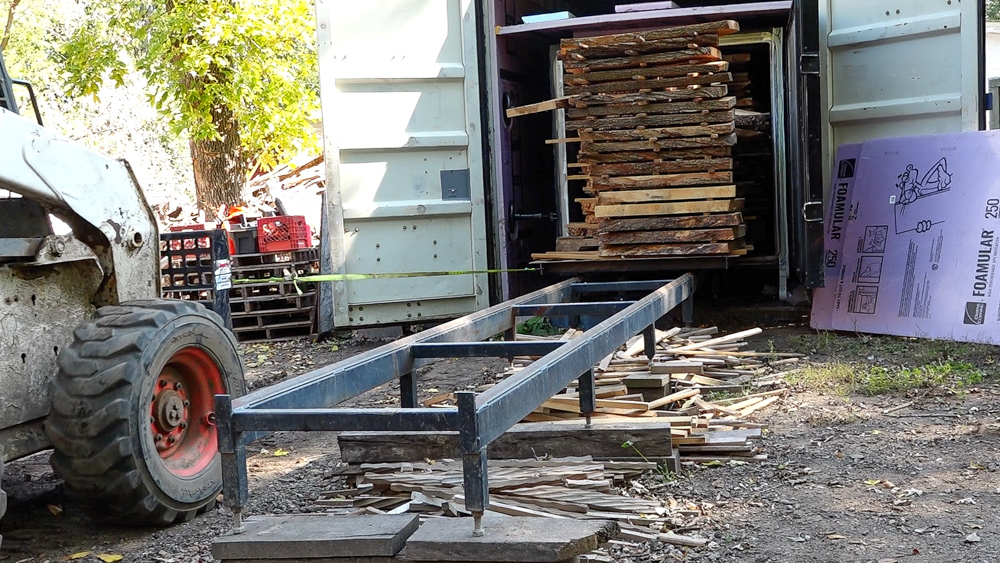
He’s actually loading it today, so I’m bringing over some slabs. This is the silver maple with a hole, and we’re going to dry some of these to fill out his load in the kiln.
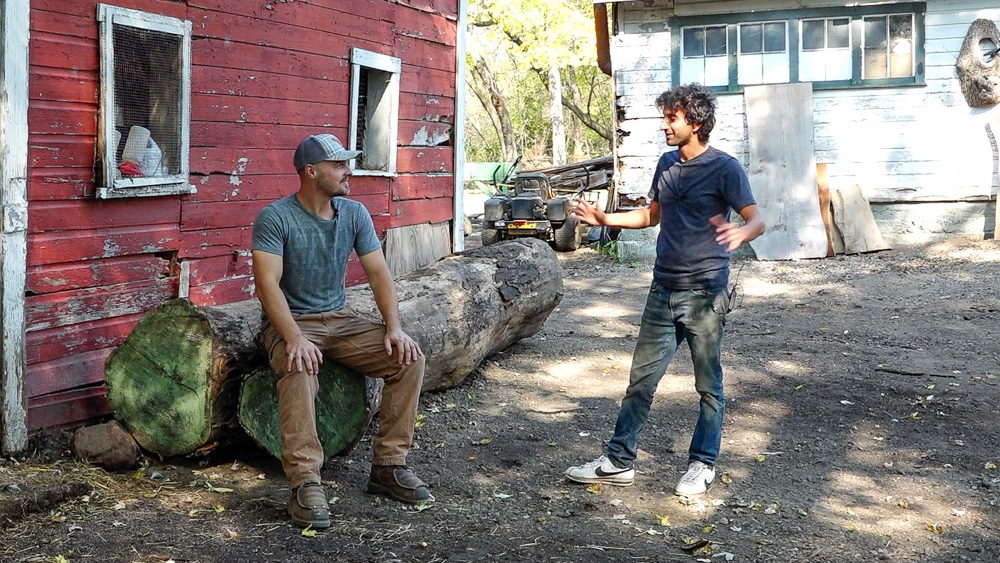
All right, so now we are at the other end of the county, I’m here with Matt Ruben! I’m going to let him take over and tell you about his business. We are here in the Denmark township, which is where the St. Croix and Mississippi meet. Three years ago I started a mill business from scratch, and now I do portable milling, custom projects, and have a vacuum kiln from iDry. The bulk of my business is selling slabs, projects, and milling for people. I live on a five acre farm and I decided I wanted to start a business. There are lots of old buildings and an old house on the property that I wanted to fix up, and so I thought to myself “I need to start a business to get some extra income for the family to take care of all of these projects that I want to do.” I thought about selling chickens or starting a Christmas tree farm, but then saw a YouTube video of a one-man saw mill operation from Nathan of Out of the Woods and decided that’s what I was going to do.
I had never sawn a log before, and only had some high school woodworking experience. When I bought the sawmill, the only other woodworking tool I had was a Bosch jigsaw and a crappy table saw. I bought the Wood-Mizer LT40 to start out with, and didn’t have a single log to saw with it. At first I cut some dead trees on my property, and I had to watch a YouTube video to figure out how to cut down my first tree. I spent the entire summer of 2018 collecting logs and finding people that would get me logs. Three months ago I moved to working with the sawmill full time.
I first thought of transitioning to full time at the sawmill because I had the best sales month I’d ever had a year ago in October. That was the first time I thought “I could do this full time and be sustainable.” Then one day I went into work and quit. It was a scary decision, but I have had an awesome first three months.
All right, let’s go on a tour! When I first started collecting logs, all the logs would get dumped in the driveway. I didn’t have the skid steer (which I now have had for two years), so I would collect logs, dump them in the driveway, and then chain them, drag them to the mill, and roll them up on the mill. That’s how that started, but I’ve streamlined that now.
There’s about 11 different billings on this property. The one that used to be an old pig barn is now my workshop. It’s not very big, but I’ve got enough space to do some projects. I’ve got pretty much all the tools in here that I can handle. It’s about 13 foot wide and 30 foot long, and the biggest piece of machinery in here is the 25 inch Helical Head planer. I sold a lot of wood just out of this little tiny shop. It used to be stacks and stacks of wood in here, but now I’m trying to keep all of the wood out and have this be my work area.
Here’s a funny story: I started building this solar kiln three years ago. When I first started selling wood, I’d sell it wet, which I would disclaim to buyers of course. I knew I had to figure out a way to dry wood. I started building this solar kiln, got it to the state that it’s in right now, and then I found iDry, and went with that instead. So for three years, this has been a storage shelter and it’s getting taken down very soon.
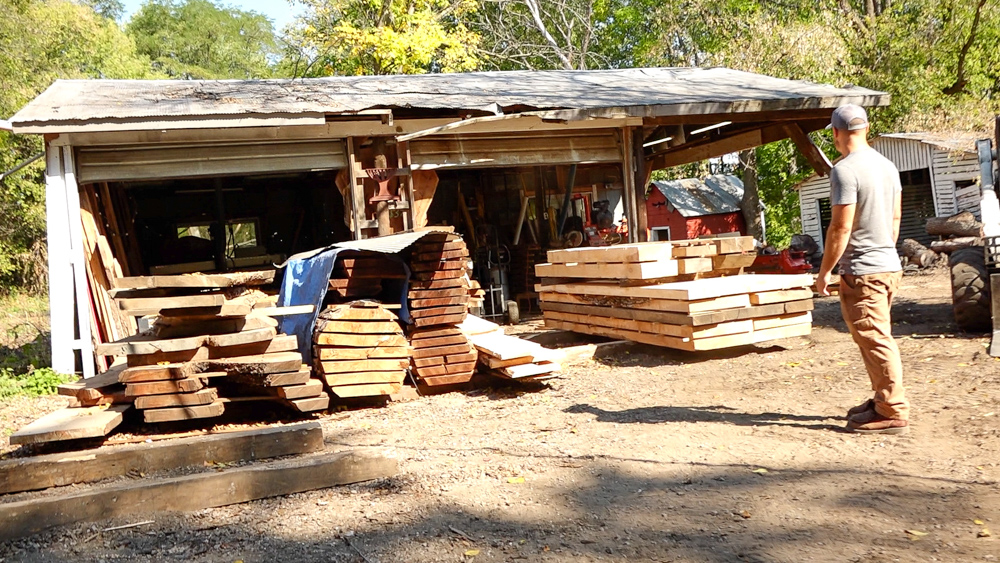
Over here is my sawmill shed, and it’s an old 36×24 shed which I’ve done some modifications to. I took down the wall on the far side to have logs come into the sawmill, and that also used to be a wall on the front here.
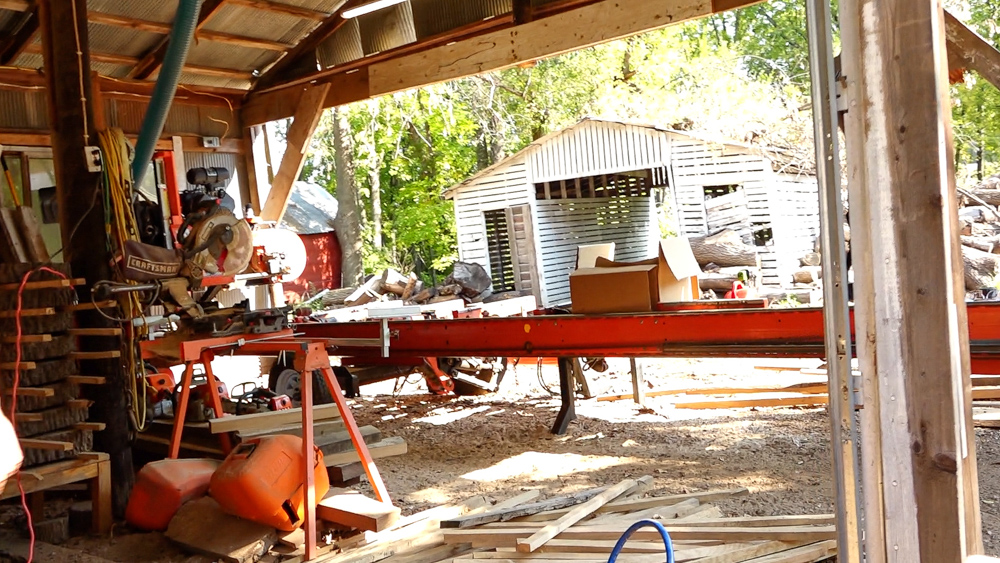
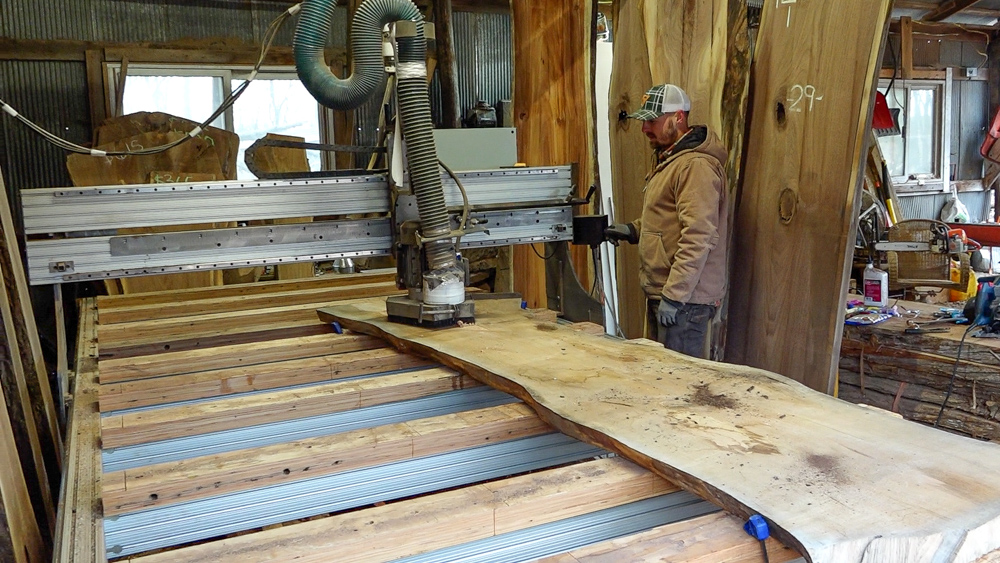
If you come inside, it’s a saw mill on one end, a little storage bay in the middle, and my big slab flattening machine from Black Horse Designs on the left side.
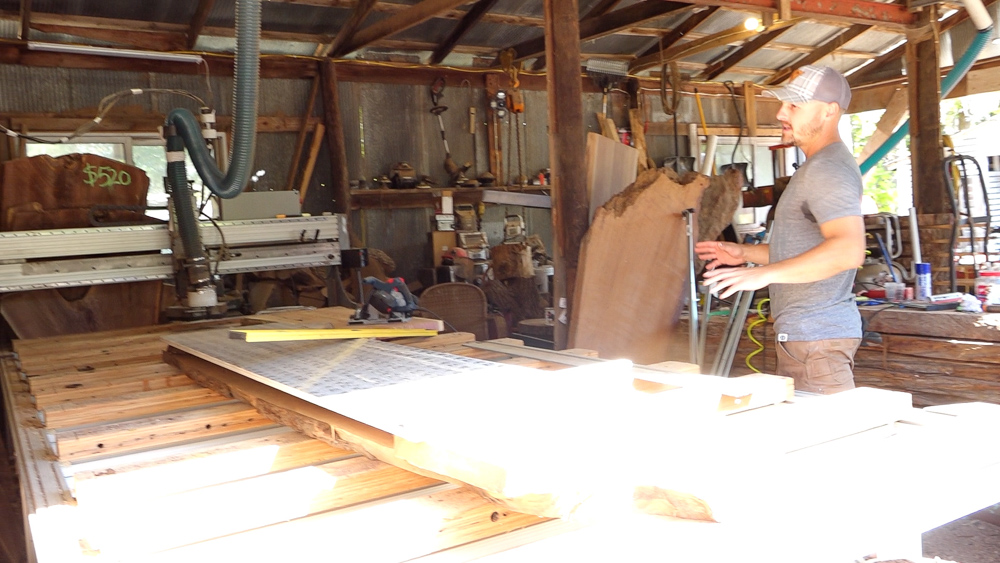
This was the piece of equipment that set me into going full time. I had all these nice, big slabs dried, but I didn’t have a way to plane them. I wanted to start doing custom projects, dining tables, whatever else, and this was the machine that got me to being full time. Iit barely fits in here; it’s 17 feet long and 70 wide.
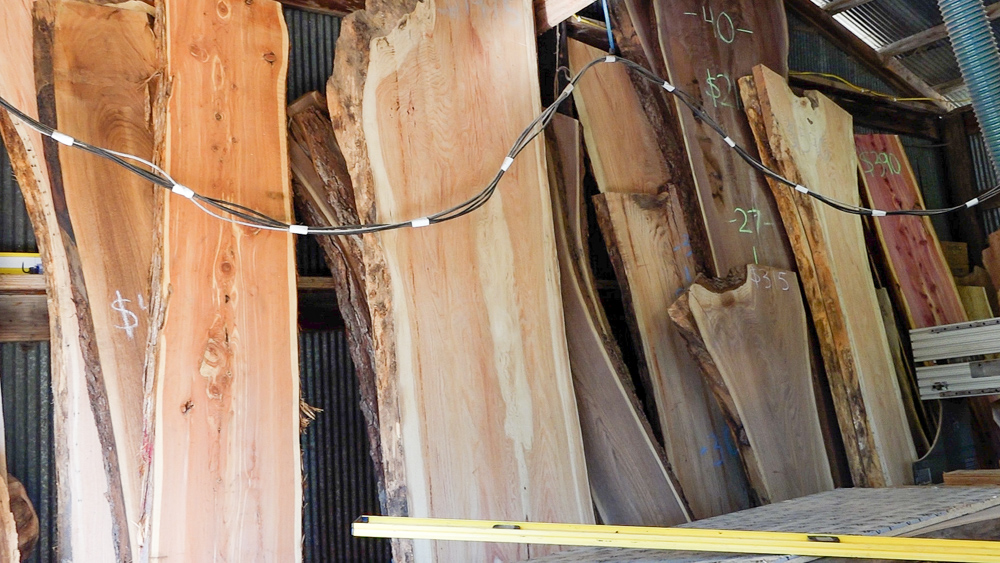
I plane the slabs, they go up on the wall, and that’s how I sell my stock right now. I don’t have a lot of stock right now. It’s been going pretty fast.

There’s a lot of buildings in the back as well. One is used almost exclusively for parking the Bobcat, one has some walnut cookies air drying in it, there’s an old dog house, an old chicken coop, etc.
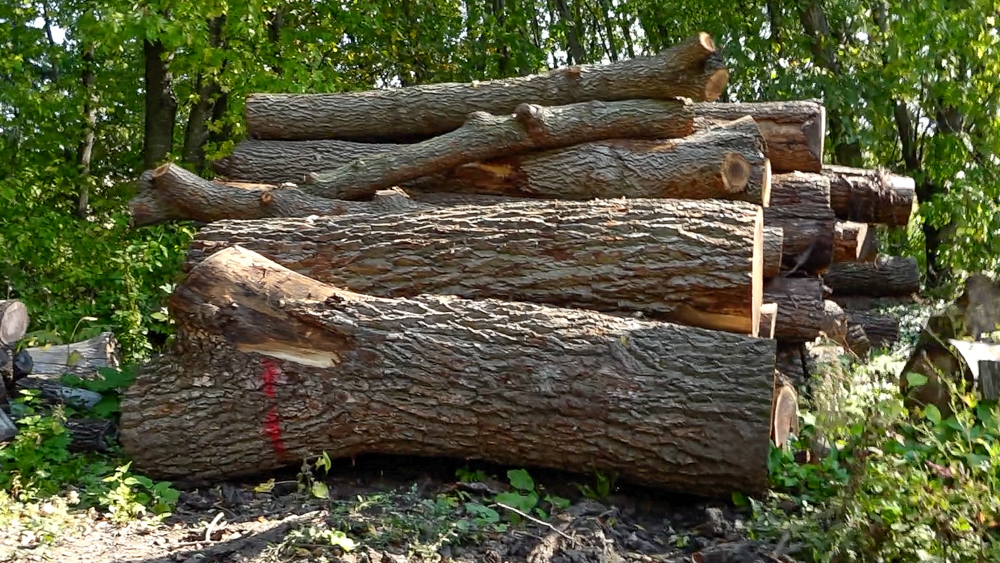
Every single log that I saw for myself, I have gone out and gotten myself. I’ve had people deliver logs for their milling purposes, but everything that I’ve sawed up has been me going out and getting it. So a lot of this has been getting logs and getting an inventory of logs here. With a healthy inventory, I can feel comfortable that I have enough in process stock to keep the business going. That whole pile is walnut. I’ve got piles of black locust, red oak, pine logs, populars, white oak, and of course a pile of random logs that I’ll probably never get to.
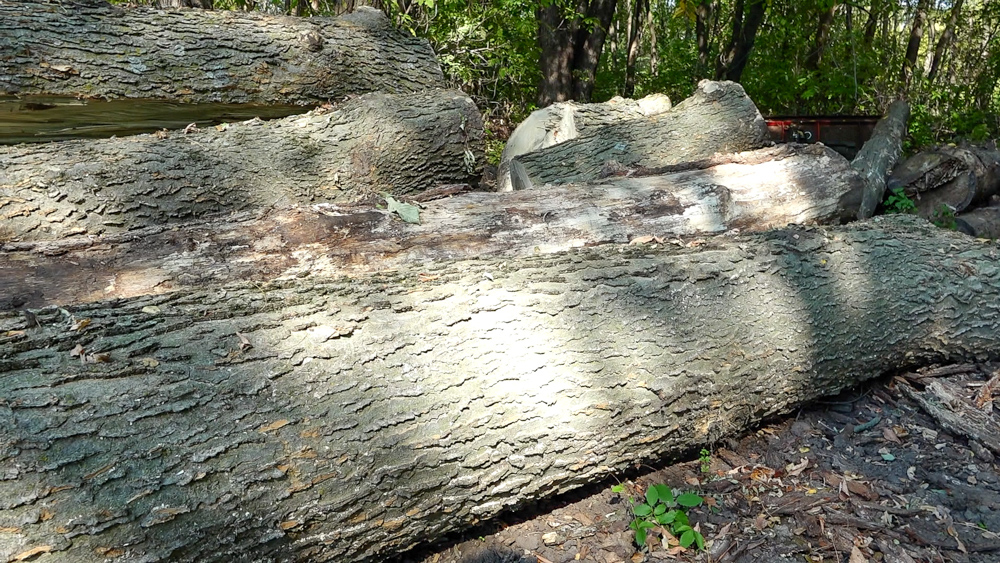
Here is some hackberry from a storm that came through a couple of weeks ago. I drove by it a few times and then the owner actually called me without me asking for it. I knew from the street as I was driving by it that it was a hackberry. I’m going to let this one sit and spalt for a couple of years.
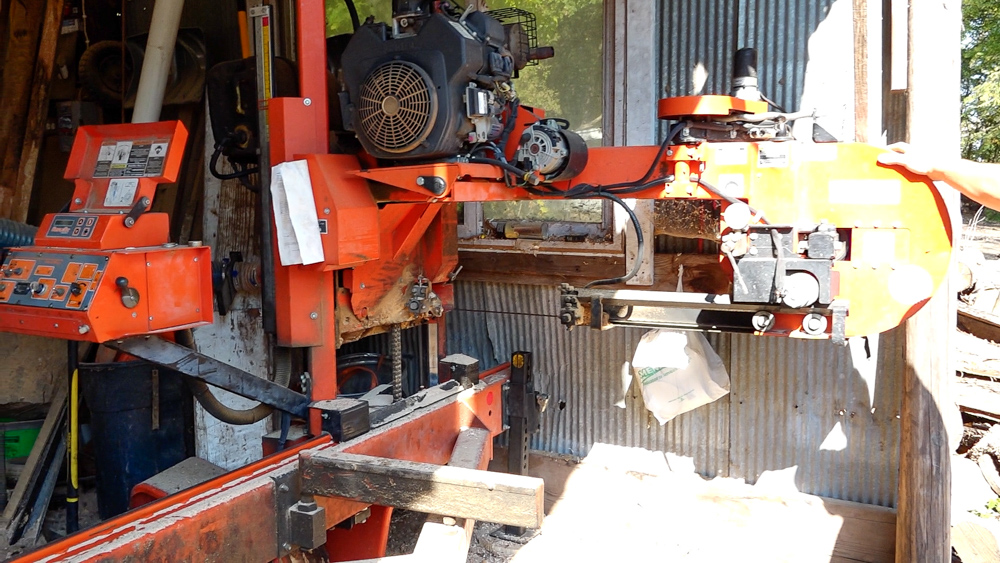
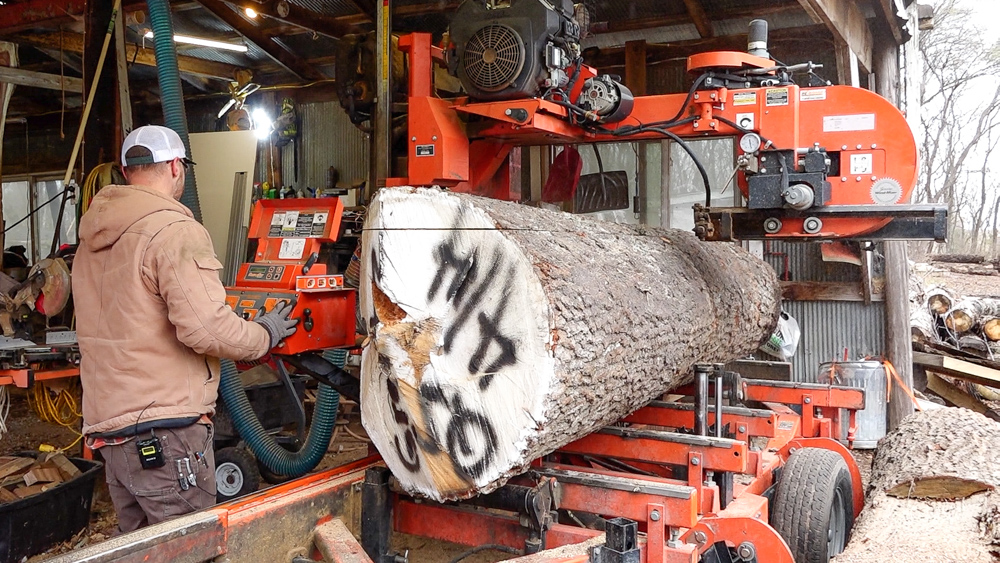
This is the same saw I bought three years ago. This was originally a standard LT40 with a 28 inch cut width max. I said that wasn’t good enough, so I saw that Canadian Woodworks had modified their mill to make it extendable. I said, “Hmm, that’s a really good idea.” I mentioned it to a few local customers of mine, who happened to be woodworkers, and they knew a guy down the road about a mile and a half, and they said, “you got to go see Charlie Brown.” He’s a third generation welder, and I said, “Hey, can you make this wider?” And he looked at it, he goes, “Oh yeah, no problem, 300 bucks.” I’m like, “Okay.” So he cut the mill, added in a 10 inch extension roughly, so I can cut 37 inches wide now, and I can still trailer it. You’d never know that he did any work on it, and it’s never had a problem since he’s done it. I don’t know if I’ll keep this forever, I might want to upgrade in the future. Maybe get an electric one once I have a nice shop and this can stay here. I do get a lot of portable requests, so it’d be tough to let that go.
In terms of the process to do portable sawing, most of the time people have never had a sawyer come out, and they have no idea what the process is or what they can do with the tree or the log. I have to educate them on what’s possible based on what they have. Then I try to figure out a drying plan for them, because I don’t have the capacity to dry for people, but I try to make them understand that that is part of the process. It’s not just cutting the logs for them, it’s really educating them about the entire process. I’ll go out on site, and most of the time, it’s just a few logs. I do have a three hour minimum and then I charge for mileage. People are usually really happy to use the trees that they had in their yard.
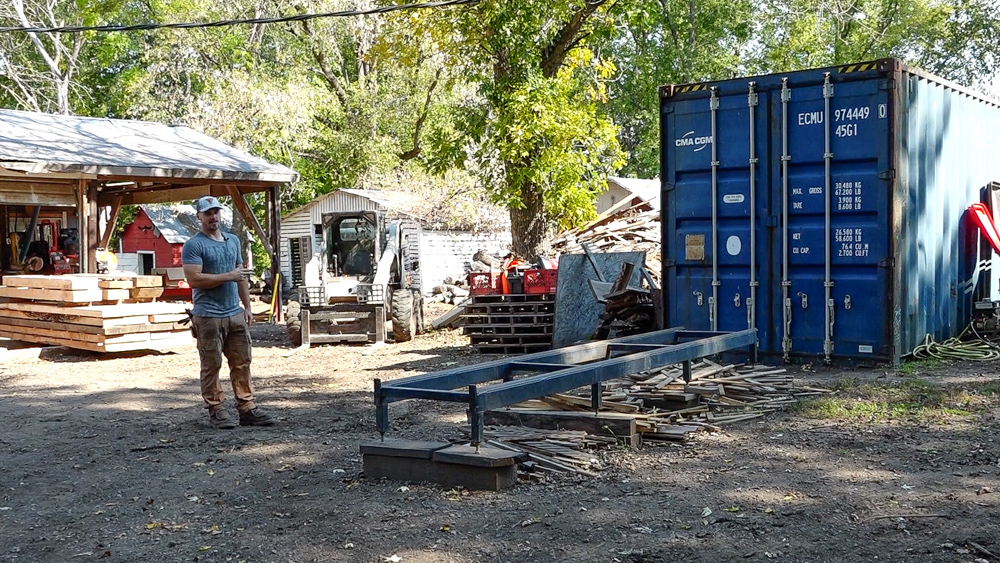
The most important part of the business is drying. Like I mentioned earlier, I had decided I wanted an iDry, but at the time I wouldn’t get financed for it. I had to wait another year, and I finally got it last year. I went out to Vermont to pick it up myself.
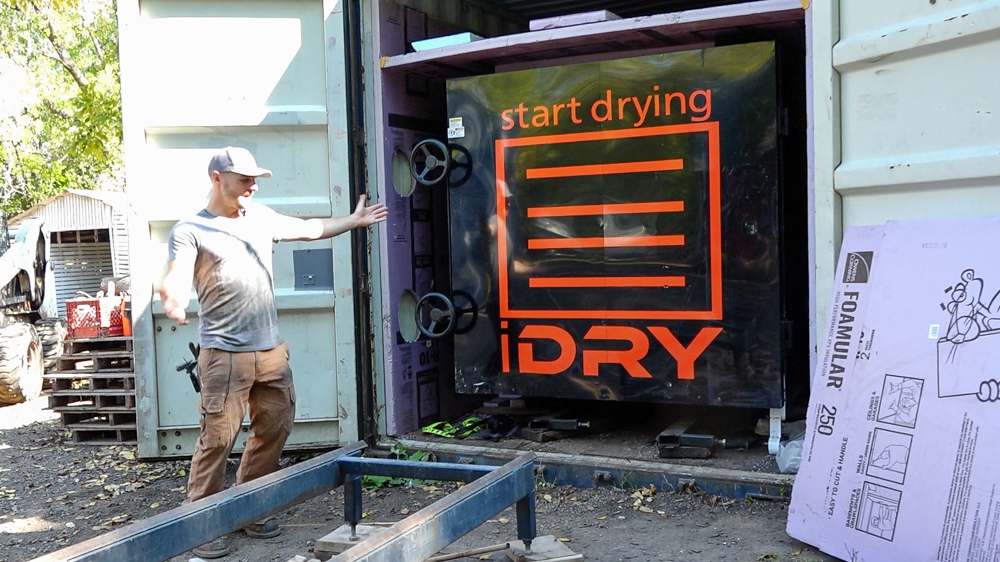
Let’s open up the doors and see what’s inside. This is a 40 foot shipping container, and its nine feet high. I insulated all the way around, including the kilns and the base so that in the winter, it doesn’t freeze up.
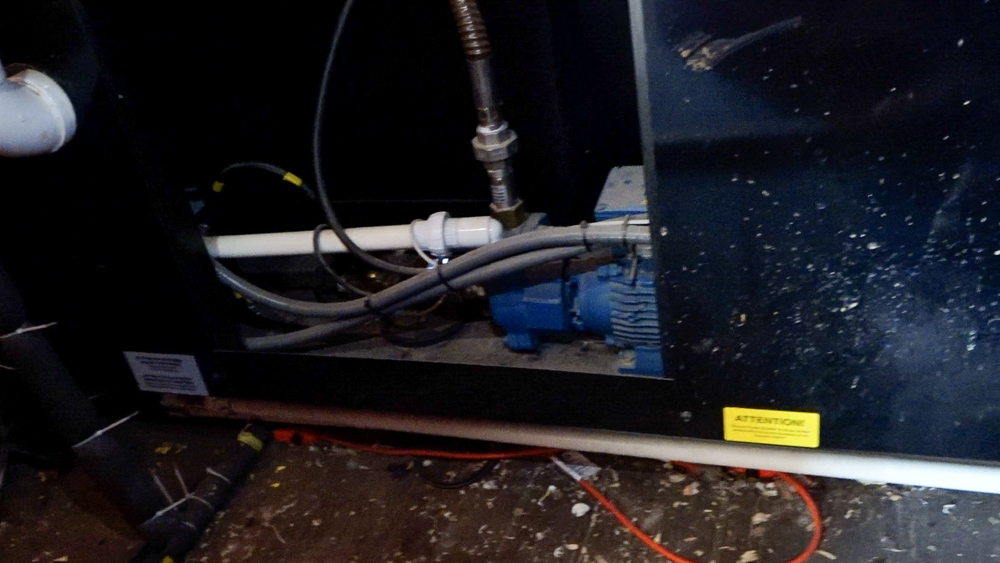
Here is the backside of it. This is all electric. The electric line comes from the well house, which is right next door, and the water line comes in the bottom. It has a control panel, and that’s how everything runs. This charge has been in here for a little over a week, so we’re going to decompress the vacuum now. To do that, I just have to hit “vacuum release” on the control panel, and in about 15-20 minutes, the kiln will be drained and the vacuum released.

Over here is where the water is released. The big bucket is the vacuum pump water. The green bucket is for the daily discharge, so I get to monitor how much comes out. When it starts to be a trickle, I know that the load is probably getting close. On a full charge, wet wood, we get 10-15 gallons a day.
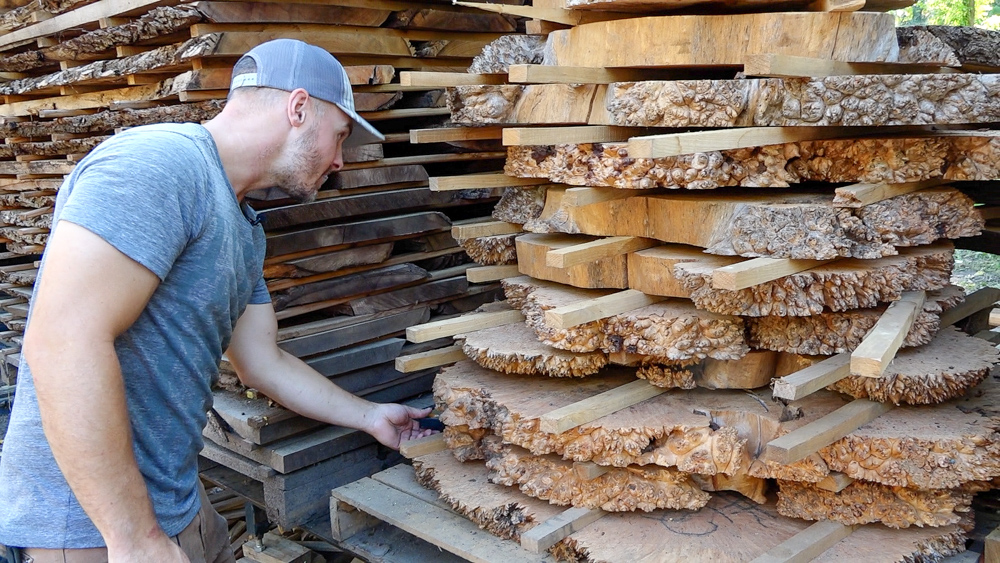
I pull the wood out on to a trolley when it’s ready. On this load I have some maple for Duck Hill saw mill, some awesome burl for Denali Woodworks, and pne whole stack is all mine.
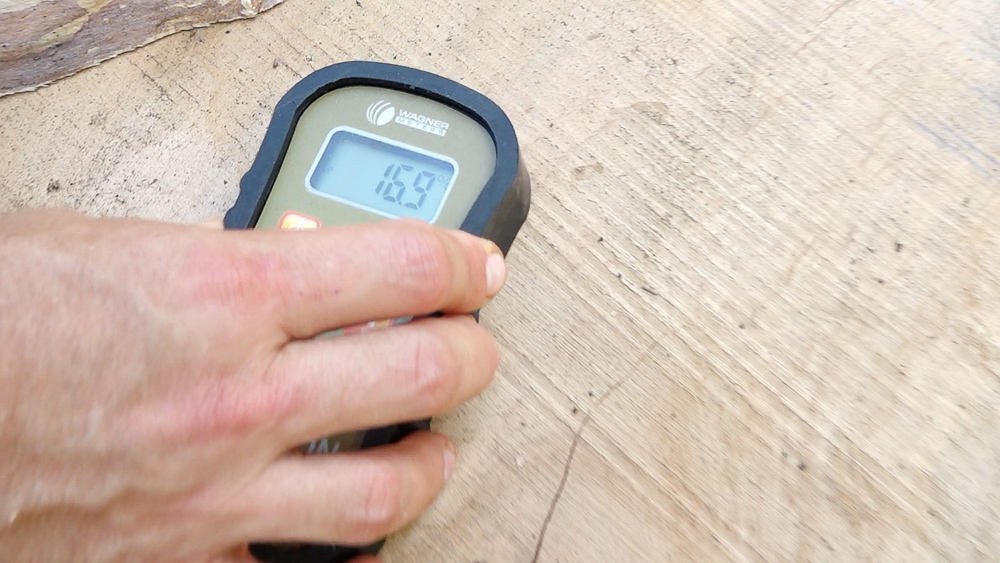
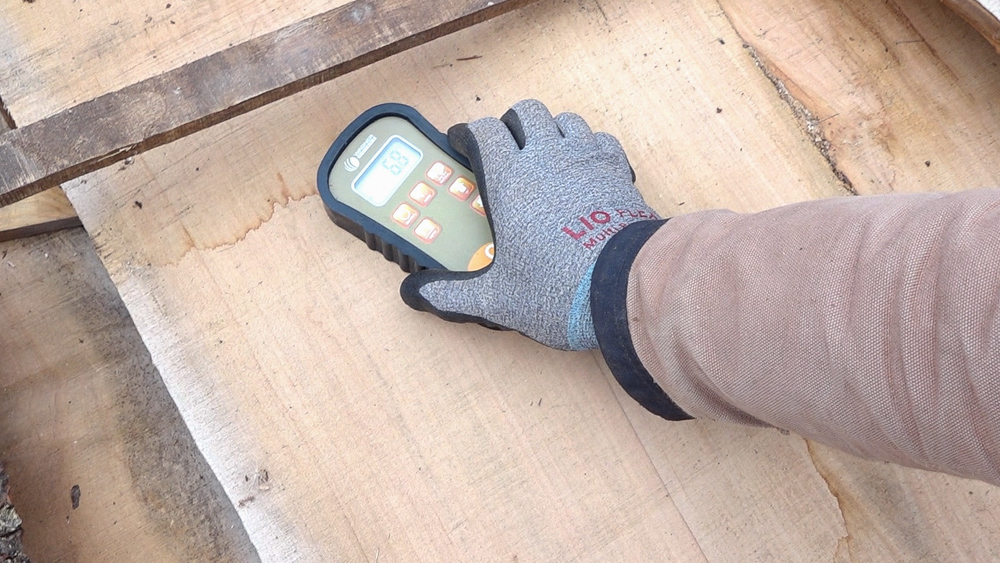
Let’s check the moisture on these maple burls. I’d say we’re pretty good. I wouldn’t want to go too much lower with those, and it looks like they dried pretty nice too. They came in at about 25% moisture, and they have been in the kiln for 7 days, but that translates to closer to 5 days of actual drying because the first day is essentially a wasted day and we are pulling them out a little early today.
We are going to get a moisture reading on these before they go in, and then we’ll start throwing them in there to dry. Reading comes out at 14-20.
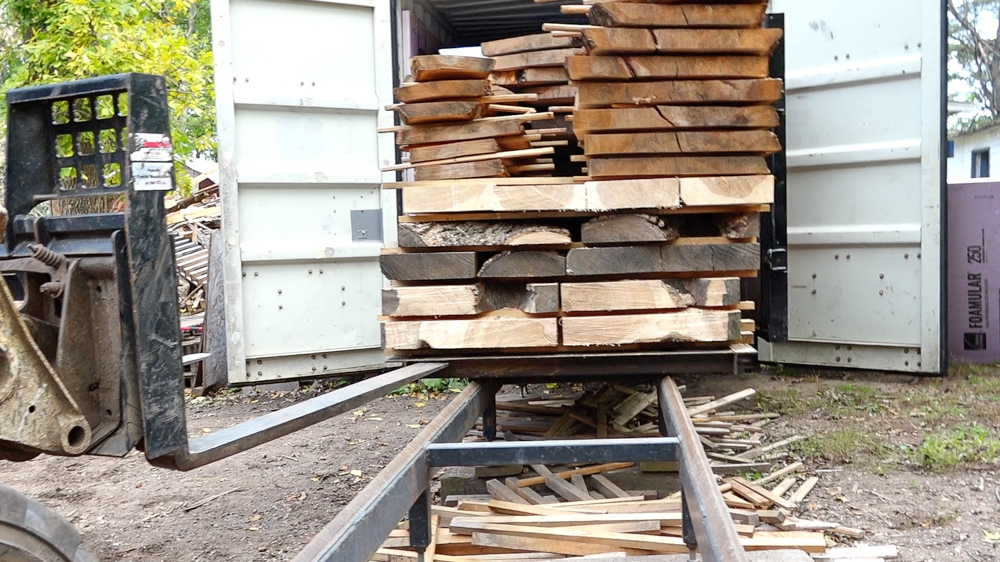
Now it’s stacked, and we’re going to push it in. For this maple, I think it’ll take 4-5 days to get it dry. So Matt will come back when it’s ready and we will take a look at it.
The cost to run the kiln is about 400-500 a month. If you can get anywhere from 2,000-4,000 board feet through it in a month, it’s really not much at all.

Matt Cremona: One of the awesome things about the vacuum kilns is that they’re able to dry things a lot faster than any type of conventional drying, including a conventional kiln, DH kiln, or a solar kiln, or even just air drying. Those all have a certain speed limit that you really can’t exceed or else you’ll degrade the quality of the wood. But with vacuum kilns, you can go quite a bit faster without any degradation because of the magic of lowering that boiling point. My slabs will probably be done in a few days, so we’re going to head over there next week and unload and take a look at those. This big walnut crotch log was too big for Matt’s saw, so it came home with me.
I’m back! It’s been a bit longer than we planned, and these have been sitting outside for 2 or 3 weeks now. We are going to take a quick look at the moisture content and see where things are at. These slabs were in there for a little over four weeks because Matt was trying to dry some bigger, chunkier pieces of wood.
We’re down to six-seven percent, which is pretty good for this time of year, as we jumped into the dry winter months.
Last time we talked a bit about the business side of having the Kiln and its impact on your business. The gist of it is that it’s really allowed you to produce products quicker and get things out of the door quicker, because the dry time goes down, but you’re not sacrificing drying quality.
Matt Ruben: Right away, I found out that once I had kiln-dried wood that I would need more capacity. I actually wish I had bought the bigger model of the iDry, but I didn’t really know at the time. The payback on it is pretty reasonable, depending on how much volume you want to do. For me, it’s tough to keep up with the demand. Towards the middle of this past summer, I was basically pre-selling slabs wet. Ultimately, I just wish I had more volume.
Matt Cremona: Thank you so much, Matt, for taking the time and showing us around and telling us about your business. I know I really enjoyed hearing about it all, and I get to geek out and see what everybody else is doing out in the world! Also big thank you to iDry for making this possible.
Please feel free to leave a comment and I’ll be happy to answer any questions you might have. Until next time, happy woodworking!
Check out Ruben Custom Sawmill https://www.rubencustomsawmill.com/
Welcome to my shop! This is a quick update to let you know what I’ve been up to. This big chunky thing is the leg

Welcome back to the home renovation. This time I’m going to be working on the kitchen island. Here is a small model of the island.

Welcome back to our home renovation. Today I am going to be working on this wall. It needs some upper cabinets and the surround for