Home Addition & Renovation
Cabinetry and open seating
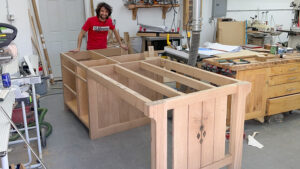
Welcome back to our home renovation and remodel. Today, I am hoping to have the island cabinetry built out, as well as getting the leg
Welcome back to the shop! I’m continuing on with the white oak island build. Last time I made the end panels for the cabinetry unit, and today I’m going to work on the leg assembly.
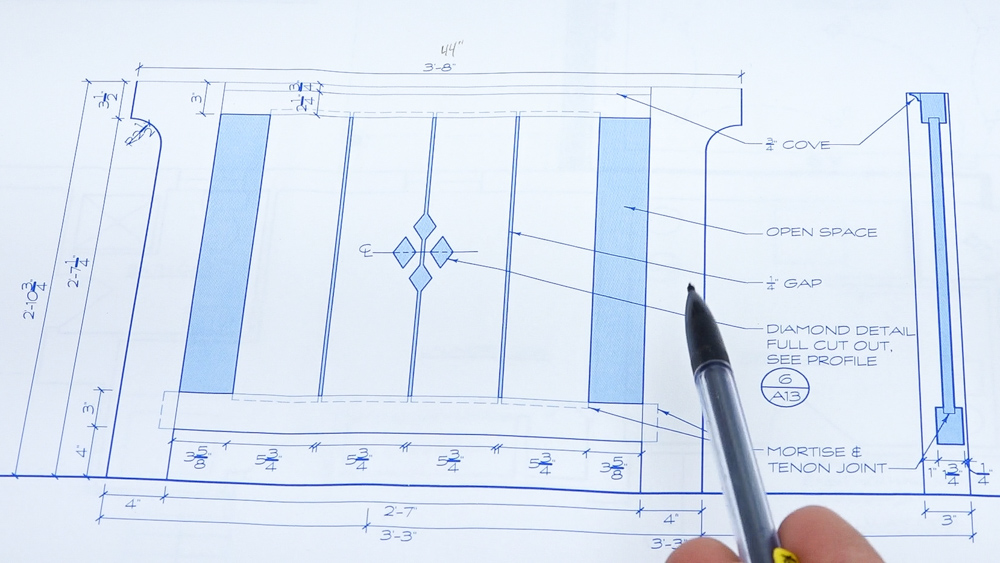
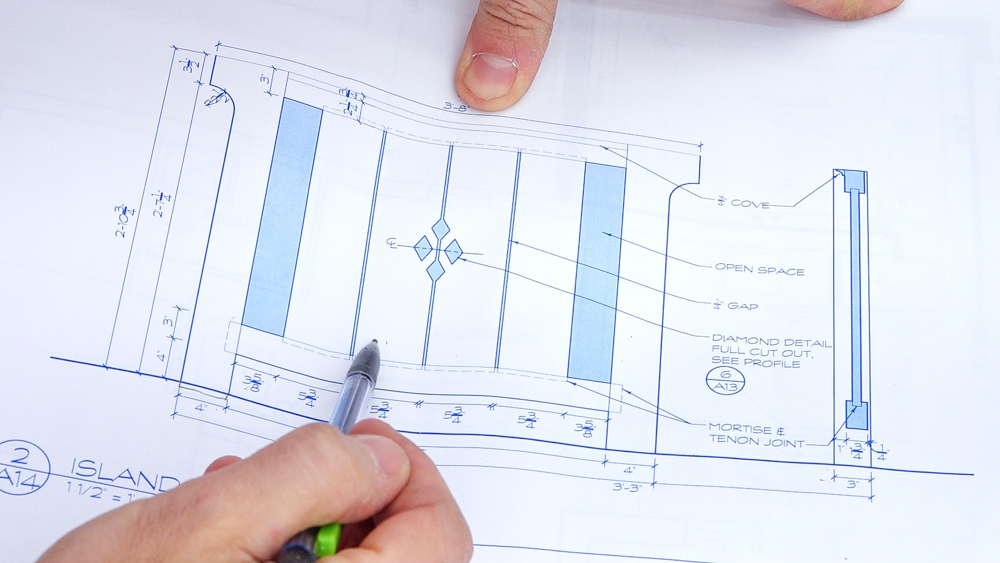
Here is the overall design of the leg assembly. There are chunky legs on either side and some rails with some slats. There is a diamond cut-out detail, which shows up throughout the kitchen in a few other places.
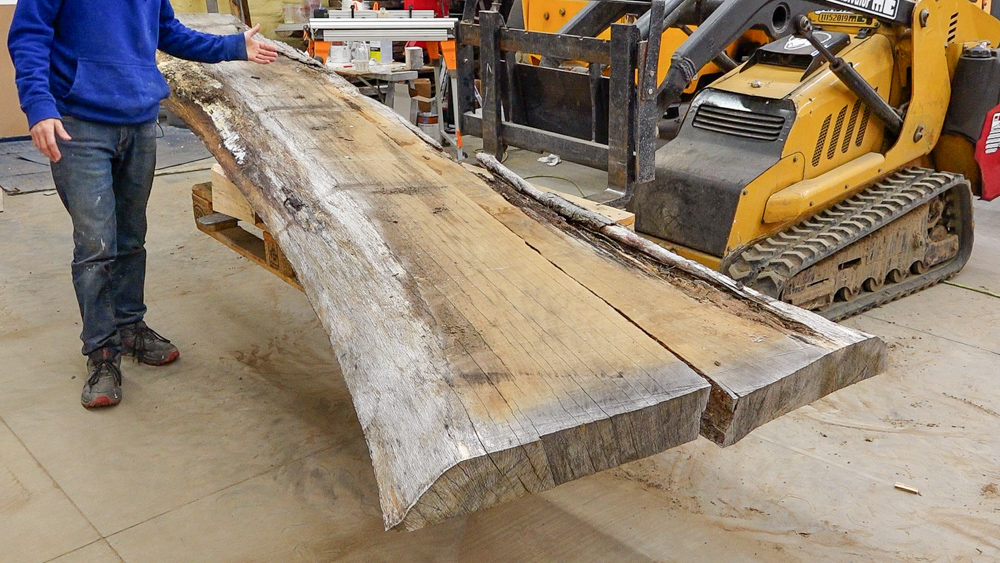
First I’m going to work on the uprights, so I need two pieces which are 6.5 inches wide and three inches thick. This is the only chunk of white oak that I have that is thick enough, and it came from the base of the same tree that I used for the end panels. I want to use the same wood throughout because this is the focal point of the room. However, we originally planned to use walnut for the island, but then changed our minds to the white oak, meaning that I haven’t been drying this wood for too long. This slab has been air-drying outside for 3.5 years and been in the barn for a month, and I already know this is not dry enough. I’m hoping it’s not super wet, but I’ll see when I get into it. If it is too wet, I’ll have to abandon this and it can be used for something else in the future.
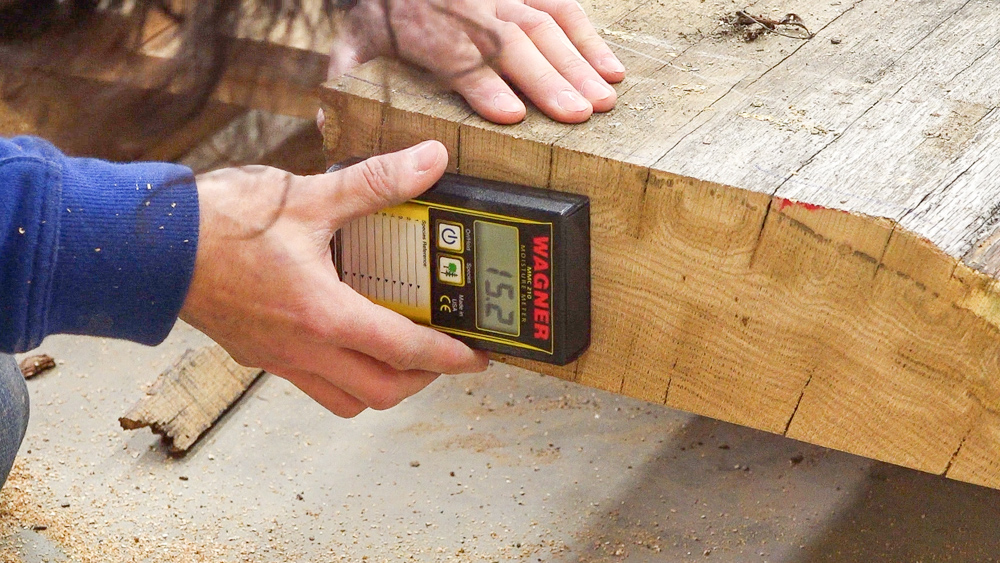
I cut into the slab so that I could get a reading at the core, and it’s measuring at 15%, which… I think means I’ll give it a try.
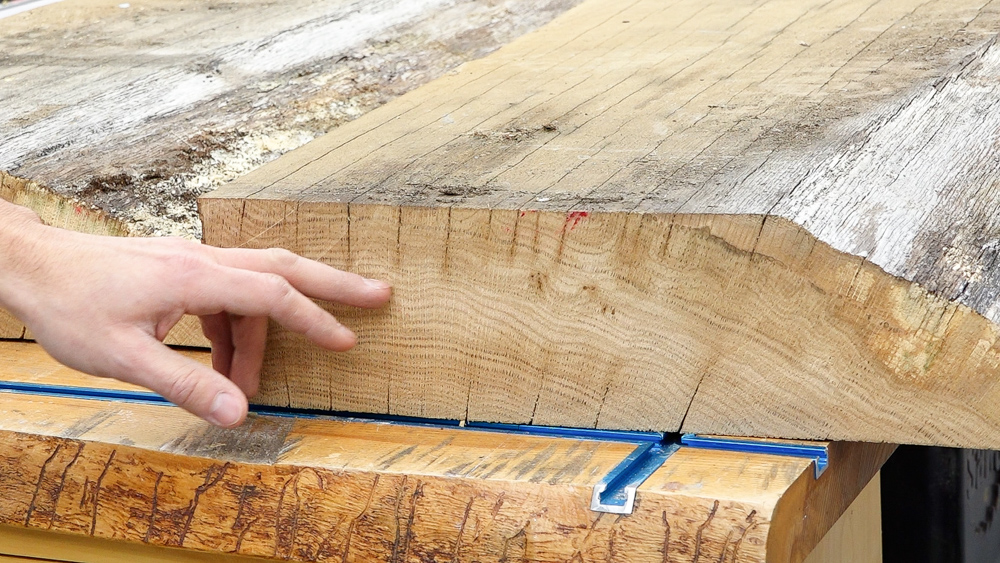
You can see all of these cracks and checks along the surface that come into the core area. That happened because this dried too fast. The surface was drying faster and shrinking, and the core won’t compress, so you end up with splits. I’ll fill a lot of that with epoxy, and a lot of it will probably be sheared away with surfacing. But this demonstrates a point I’ve often made: drying wood is not linear. A piece of wood that’s two inches thick doesn’t dry half as fast as a pieces of wood that’s one inch thick, it’s more like 2.5x as fast. Drying wood is exponential.
![]()
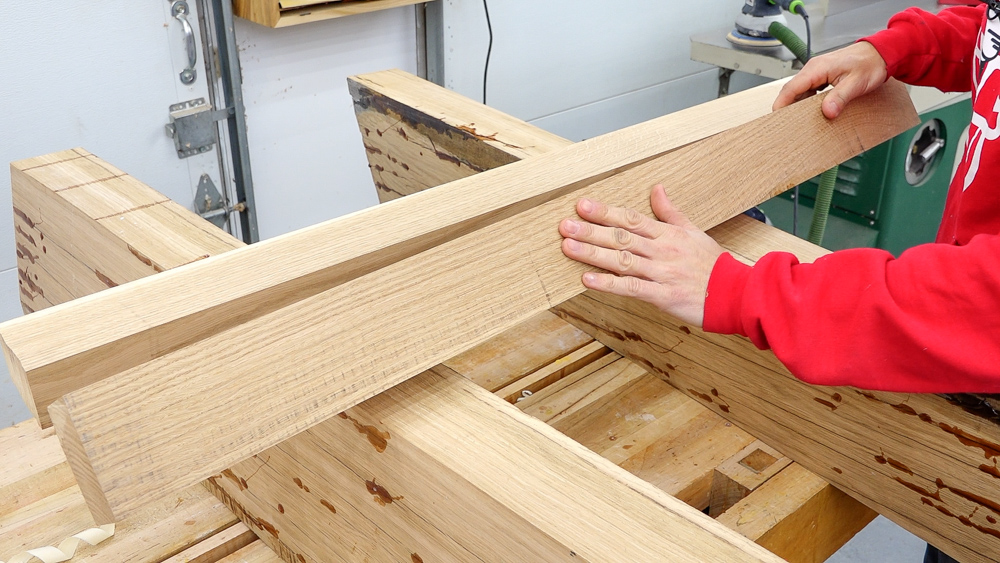
But I have a problem to deal with. Just like on the frame parts, I want to have more of a straight grain, rift-sawn look. Because this came from the outside of the tree, I’m in the plain-sawn area. If I took my leg blank right from the center, I’d have perfectly plain-sawn stock with cathedrals on the face and quarter-sawn stock on the edge. I’m not really looking for either of those looks. But
![]()
Because this is four inches thick and I only need three inches to finish, I can rotate my blank in the thickness and get those growth rings on more of a bias, which will result in more of a straight grain look.
![]()
So now I can get my blanks cut out. As I’m cutting through, I have been checking their moisture content, and they are reading more from 6-10%, which makes me feel even better about using this slab. They still have some drying to do, but they shouldn’t shrink up too much.
![]()
I’m at 3.75 inches thick, and I’m going to pause here because I expect these to distort a bit since I disturbed a lot of material on one side and not the other, and I haven’t jointed these flat yet. I’m going to get some epoxy on here and let these sit over the weekend.

In the meantime, I’m going to work on the two rails. I’m going to use some leftover stock from when I made the end panels. This has this sunburnt pattern coming out from this knot, which I actually want to include as a fun detail.
Here are the pieces of rail stock. I did adjust the grain by tilting it a little bit because the top edge of the bottom rail was a little bit too swirly.
Next I am going to figure out what to do with these slats in the middle. I want some sort of symmetry in the grain because of the symmetry of the diamond detail. I am going to bookmatch the two center slats and then the two outside slats will be continuous grain.
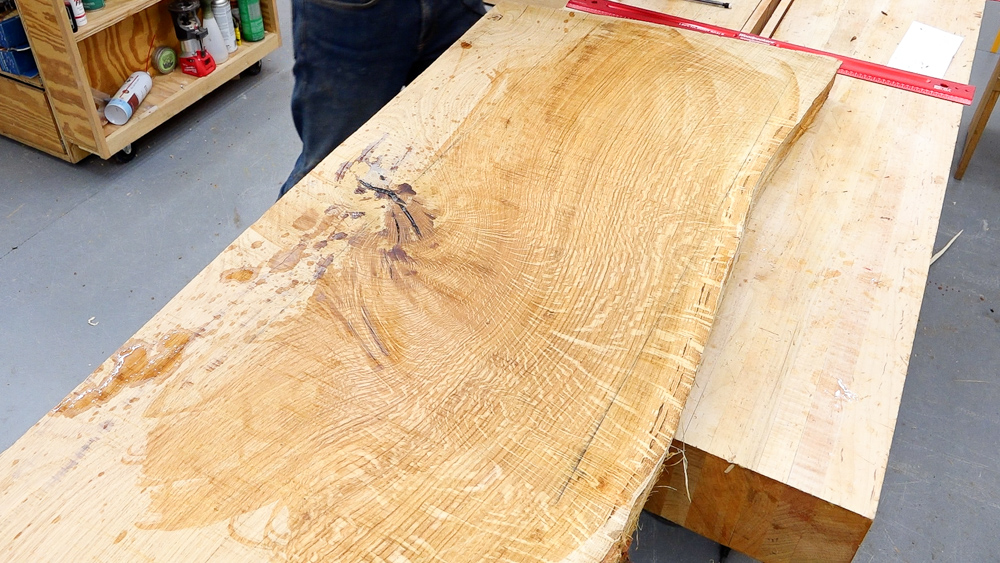
I have this slab in my off cuts, and I’m deliberating over whether or not I want to use this slab or find another one to work with. It’s hard, because the show faces of the slats are in the center of the board, so I have to do some visualizing based on the grain to get an idea of what they might look like. I gave this slab a quick sanding, and I’ve been putting some mineral spirits on to get an idea of what it’s going to look like. In this section there is some smaller, narrow ray fleck as well as some figure from the knot. I’m going to get this cut up, and I’ll see how it looks.
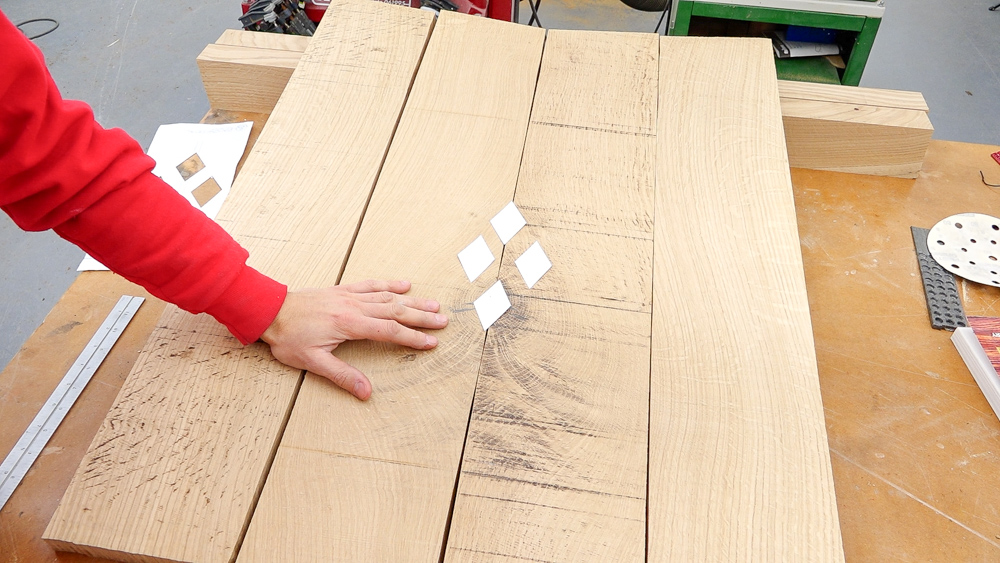
Here’s an idea of how this might look with that diamond cut-out. It’s ok… I think it might work. The only way I could make this work and not look weird would be to put that knot inside of one of the diamonds and cut it out. I still don’t know if this is quite the look I’m going for. But I’m going to start working with it and see where it ends up.
![]()
So now I can actually start making something. I’m going to mill down my legs, cut them to length, and then cut the mortises into the to receive the rails.
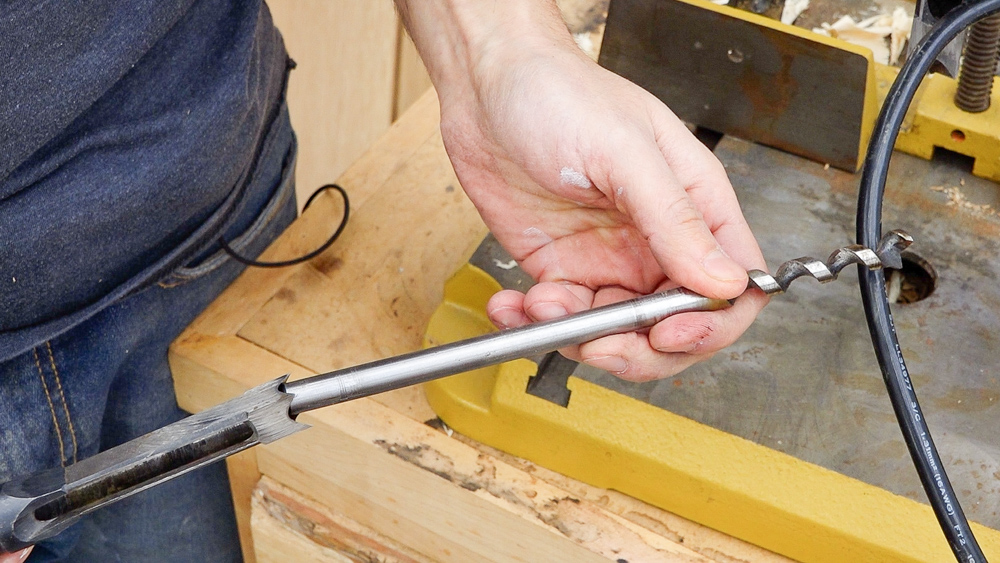
I used the mortiser to cut mortises in a video, and I didn’t realize a lot of people hadn’t seen one before. So I thought I could answer some questions that some people had. The mortiser is two pieces: an auger and a chisel. These work in tandem to do two operations at once: drilling a bunch of holes and chopping it all nice and even. The auger is set ahead of the end of the bit, which allows the hole to be drilled ahead of the chisel squaring it up. But my workpiece is too big to fit in the mortiser. It does come with a riser, but I don’t want to deal with it, so I’m going to cut these mortises with the router.
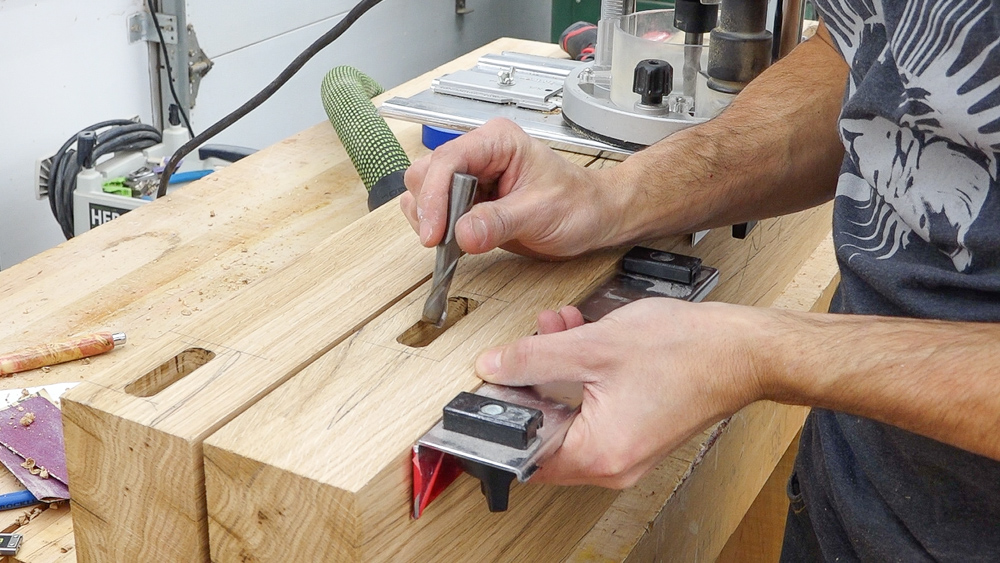
So here are the mortises all cut. Something I do for the setup is put my bit on the far side of the fence. That way if the fence pulls away from the workpiece, that just pulls the bit into the middle of the material that gets removed, rather than into the piece itself.
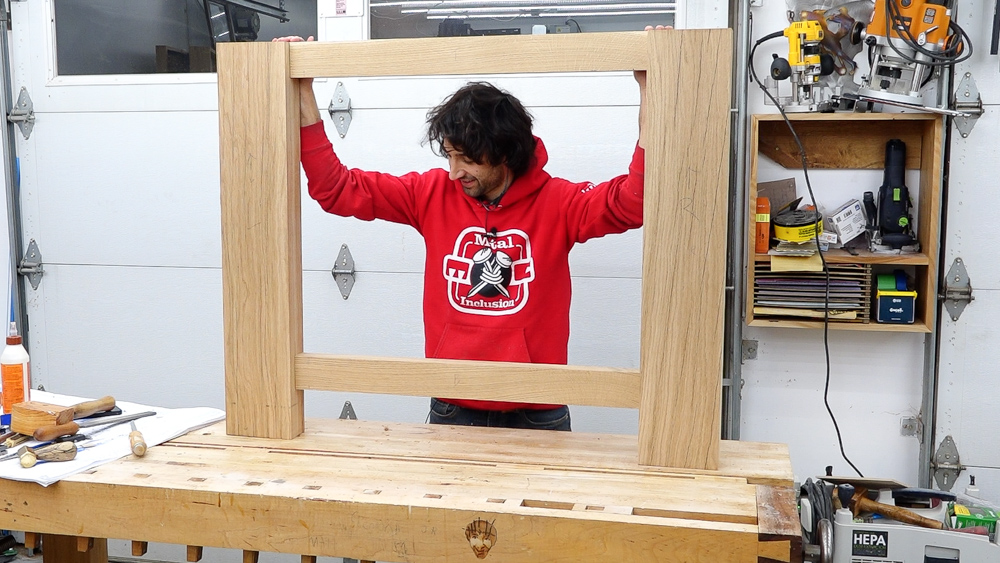
Here’s the frame, which is chunky! Now time to deal with the slats.

And here’s the dry assembly. It’s looking pretty good! I’m going to make the radius detail on the legs, and then make a decision on the slats and the diamonds.
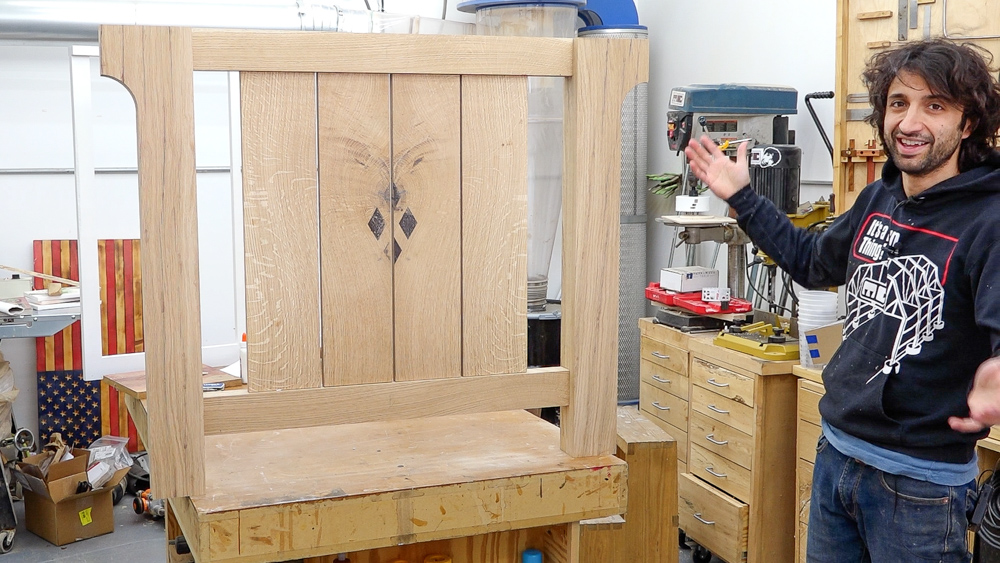
With the legs cut down and shaped, it gives a much lighter look and feel. Now I finally have to work on the diamonds, after lots of procrastinating.
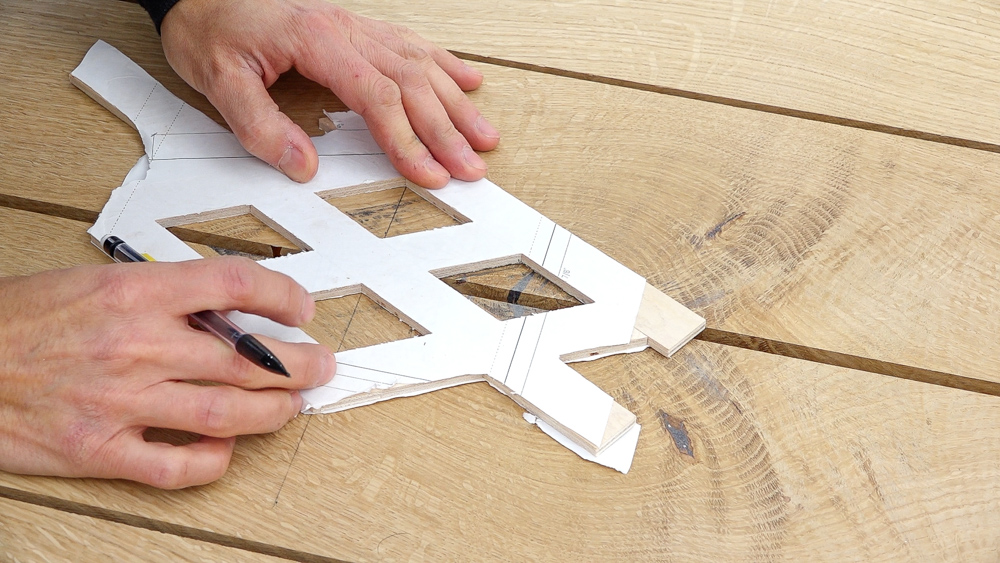
I made a template, which will work as a router template as well. I’m trying to get the top diamond centered on that knot. This grain pattern with these diamonds is definitely growing on me, so I think this is going to work out pretty well.

Those cutouts still need some cleanup, but I wanted to put it together and get a feel for it. And I actually really like this! It’s not what I had in mind originally, but I like that the grain loops around and the knot being part of that top diamond. The cutouts look so cool in person, and provide a lot of depth. It’s definitely coming together!
Thank you as always for joining, I greatly appreciate it! If you have any questions or comments on the island leg, please feel free to leave me a comment. As always, I’d be happy to answer any questions you might have. And until next time, happy woodworking!
Welcome back to our home renovation and remodel. Today, I am hoping to have the island cabinetry built out, as well as getting the leg

Welcome to my shop! This is a quick update to let you know what I’ve been up to. This big chunky thing is the leg

Welcome back to the home renovation. This time I’m going to be working on the kitchen island. Here is a small model of the island.