
Kitchen Island, Barn Power – March 2024 Update
Welcome to my shop! This is a quick update to let you know what I’ve been up to. This big chunky thing is the leg
Making three waterfall table. One simple version from ash, one with a epoxy river from elm crotch, and one with a glass river also from elm crotch. All three feature trapezoidal bases, one wood and two steel.
 The Wood Whisperer Guild is an online community centered around high quality instructional videos that walk you step by step through a project. Projects come with detailed plans and cut lists and there are many member benefits like live demos, access to our Facebook community, and some pretty nice industry discounts. There are many projects to choose from and you can save money by bundling multiple projects together. If you’re not ready to purchase a project and become a member, there is also a free picture frame project which will give you a feel for The Guild.
This project summary comes from the Waterfall River Table project that I produced in The Guild. There are 17 instructional videos (321 min) showing the step by step process for making your own live edge waterfall table.
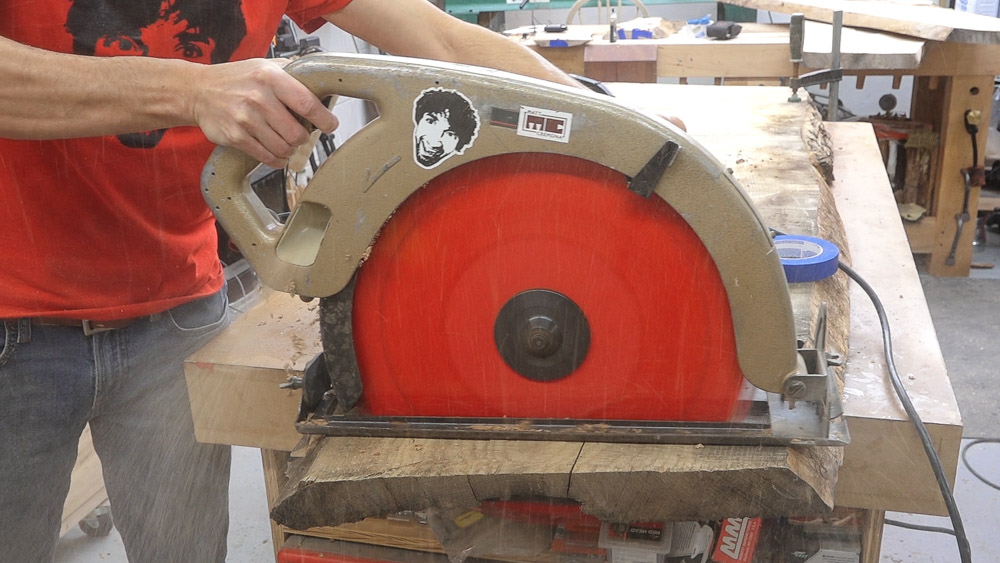
I’ll get started by trimming the ends to remove the damaged material.
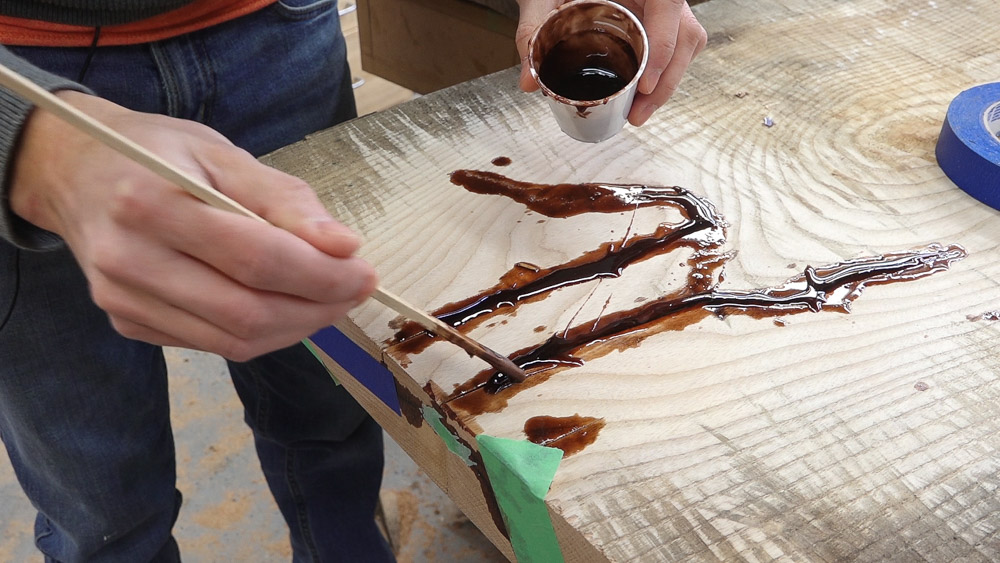
Before surfacing, I’ll do an initial fill of epoxy. I’ve applied masking tape to the under side and ends of the slab and I’m filling from the bottom side. I’ll do two fills at this orientation. The first will be pretty light. It will flow down and contact the tape further sealing the crack. Once that set, I can pour a much heavier fill, completely filling the cracks without worrying about the epoxy seeping past the tape. Once that’s cured, I can flip the slab over and fill and areas were the epoxy didn’t flow to and fill any areas that don’t run all the way through the slab.
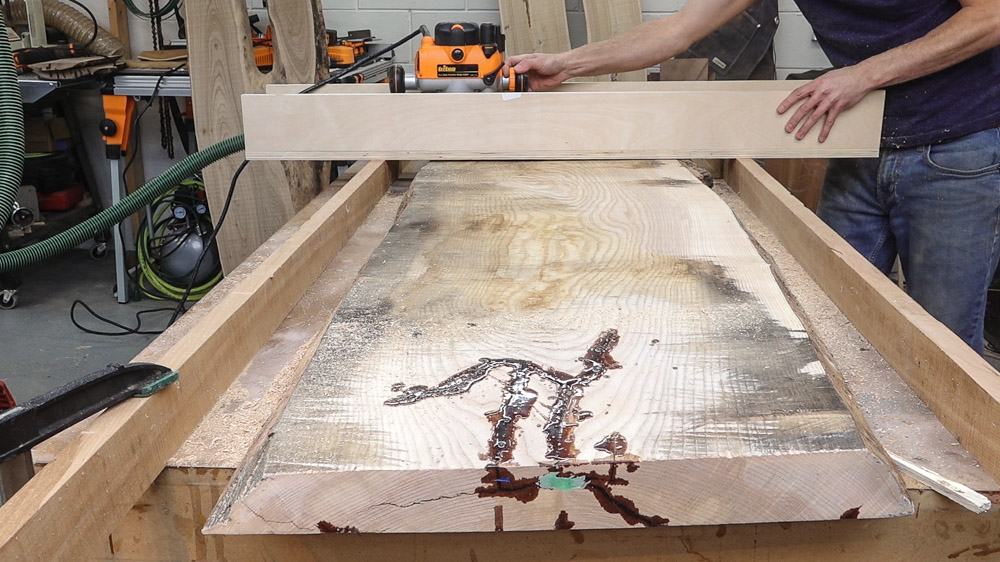
Next up is flattening and surfacing. The slab sits on my flat assembly table and is shimmed to keep it from rocking. This slab has a bit of twist that the router sled will remove. I’ll make passes over the slab with the router to remove the high spots and keep lowering the bit until I’ve covered the entire surface. Once that side is done, the slab can be flipped and the process repeated. I stopped a bit before the entire surface was cleaned up so I could include some saw marks towards the edge of the slab as a reminder of this slab’s back story.
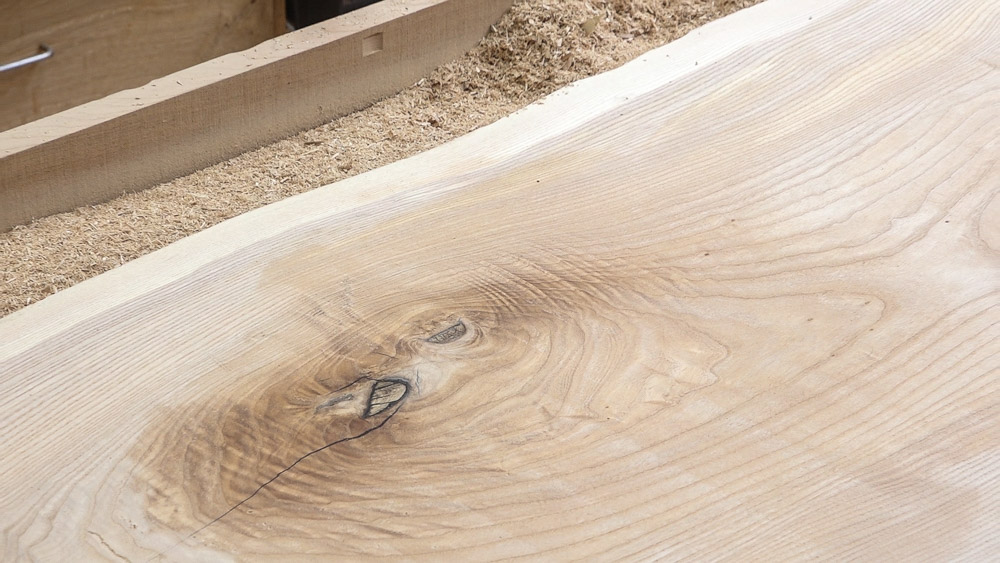
After a quick sanding to remove the milling marks, some mineral spirits helps give a preview of the grain.
I’ll clean up the epoxy from the ends and do a little touchup work on the surface.
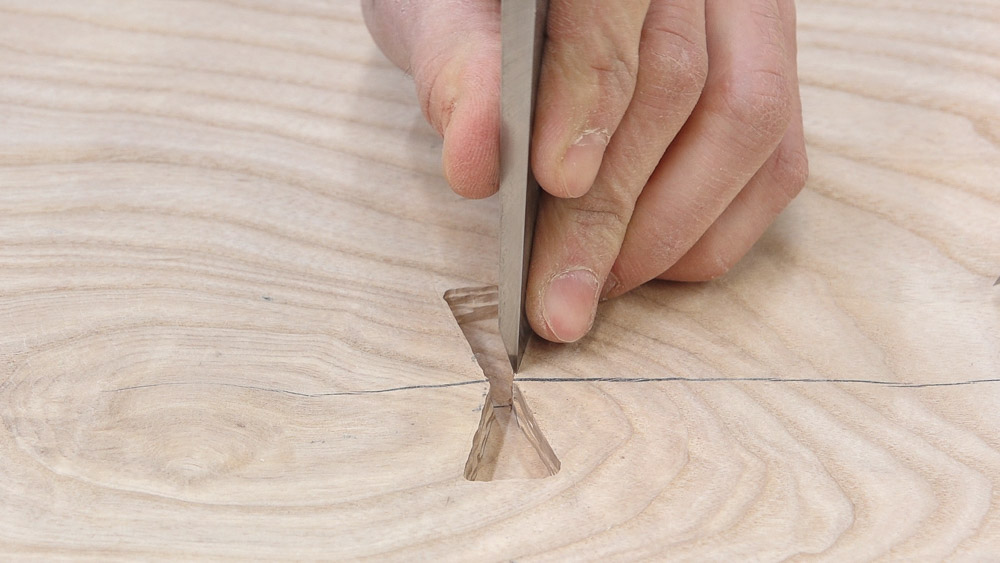
Next I’ll add some decorative butterflies to the crack which will be in the leg of the table. I had an offcut from the highboy that had some crotch figure in it and used that to create the butterflies. I’ll lay out the shape that I want on each and cut them out. The little one was a little to small to cut on the bandsaw so I did it with a saw and a chisel. The butterflies get stuck down where I want them to go with carpet tape and their shape is traced onto the slab with a knife. A router is used to remove the bulk of the waste and the final clean up back to the lines can be taken care of with some chisel work. I’ll knock off the bottom edges of the butterflies, apply glue to the mortises, and hammer the butterflies in.
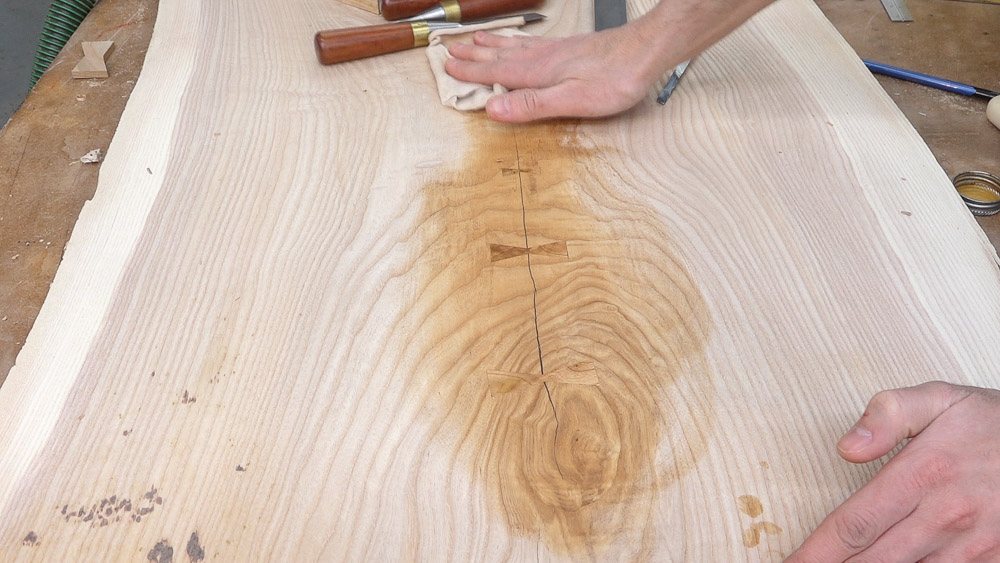
After the glue dries and they’re flushed up, here’s how they look.
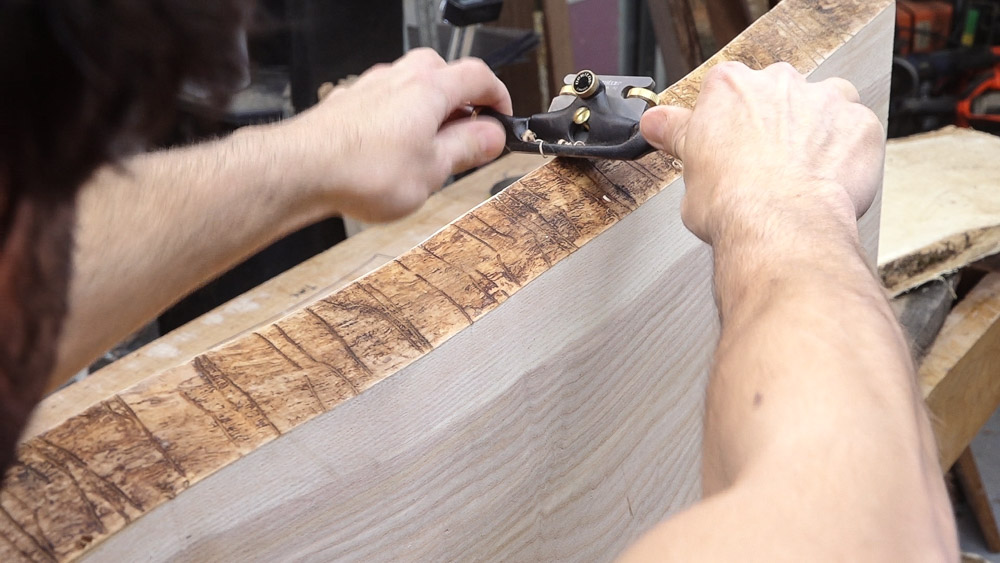
Next is a little prep work on the live edge. I’ll remove the residual bark and sand the edge smooth. The top edge is sharp and fragile, so I’ll knock the edge off with a spokeshave and blend it with some handsanding.
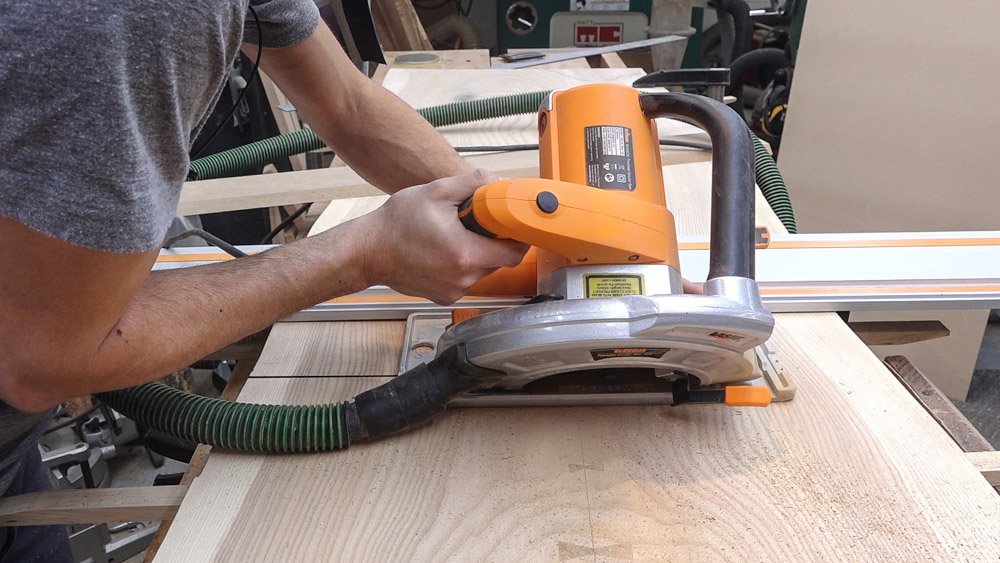
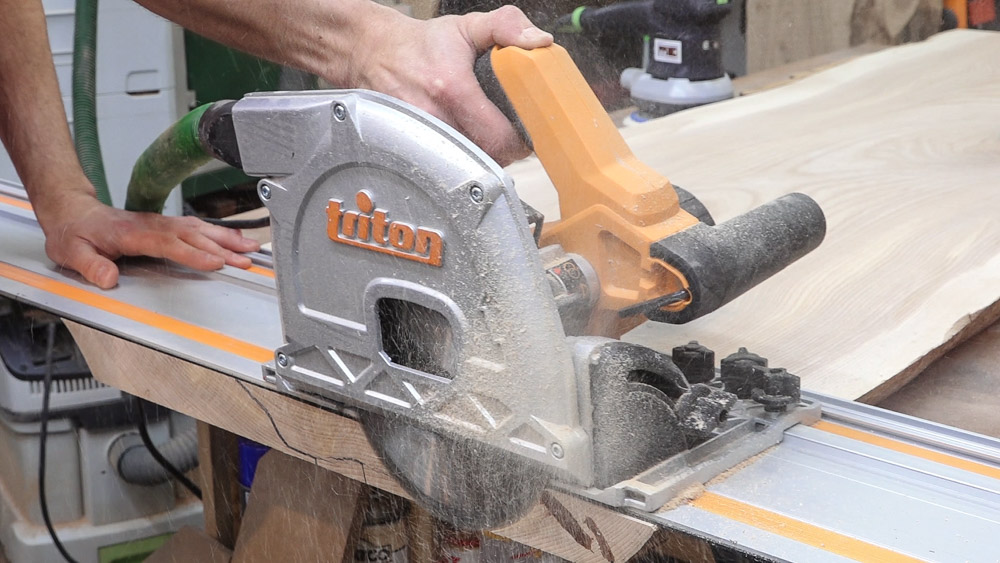
On to the waterfall joint. I’m cutting this one with a circular saw and straight edge. The straight edge just happens to be a track saw track.
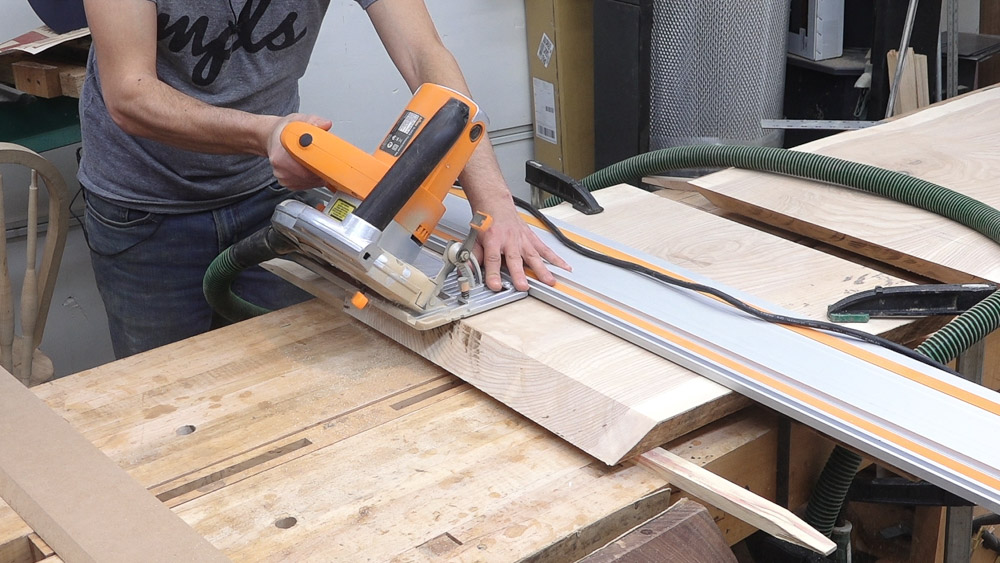
Next I’ll make the second cut to remove the wedge of waste. This cut needs to be aligned perfectly so the blade cuts along the existing angled cut right next to the surface of the slab and parallel to that first cut.
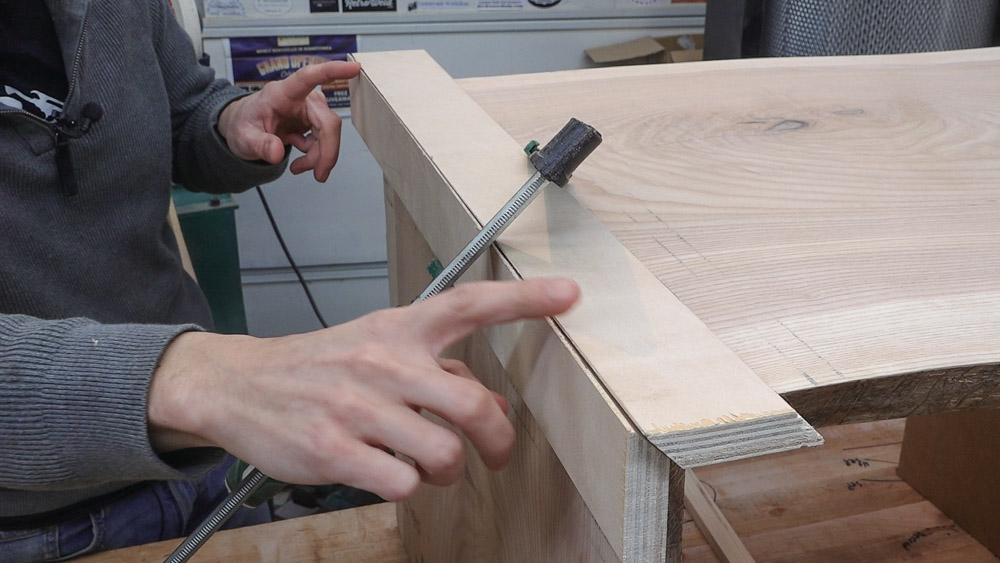
To make checking the fit easier, I’ll attach the clamping cauls now. These ones extend to the cut to give the router I’ll be using to cut mortises a bit of extra support and to protect the end of the slab. Clamping the two parts together, I can see that the cuts meet up nicely in the middle but are open on the ends.
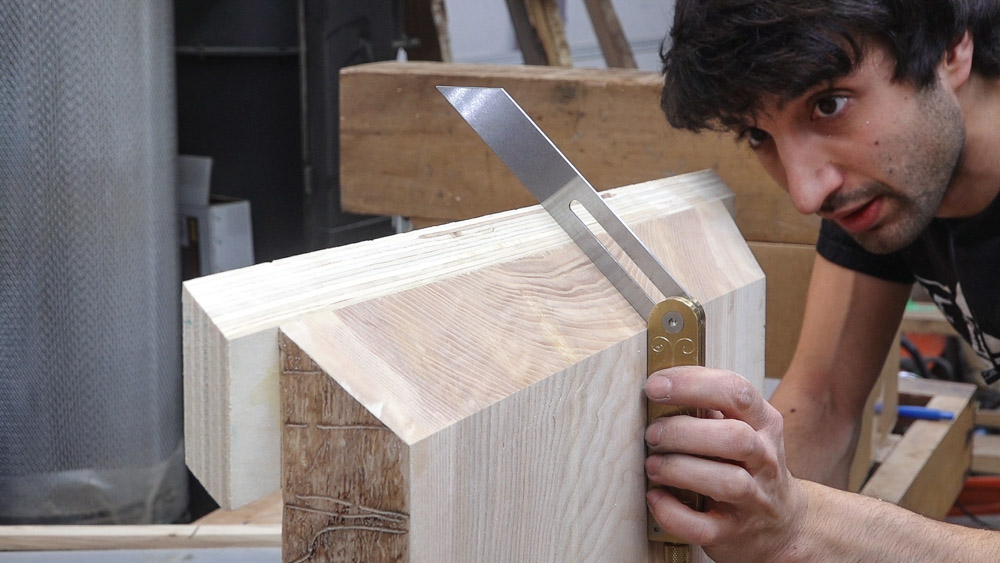
That can be corrected with a handplane and I’ll check the cut as I go to make sure it is flat. I’ll also verify that the angle is the same along the length.
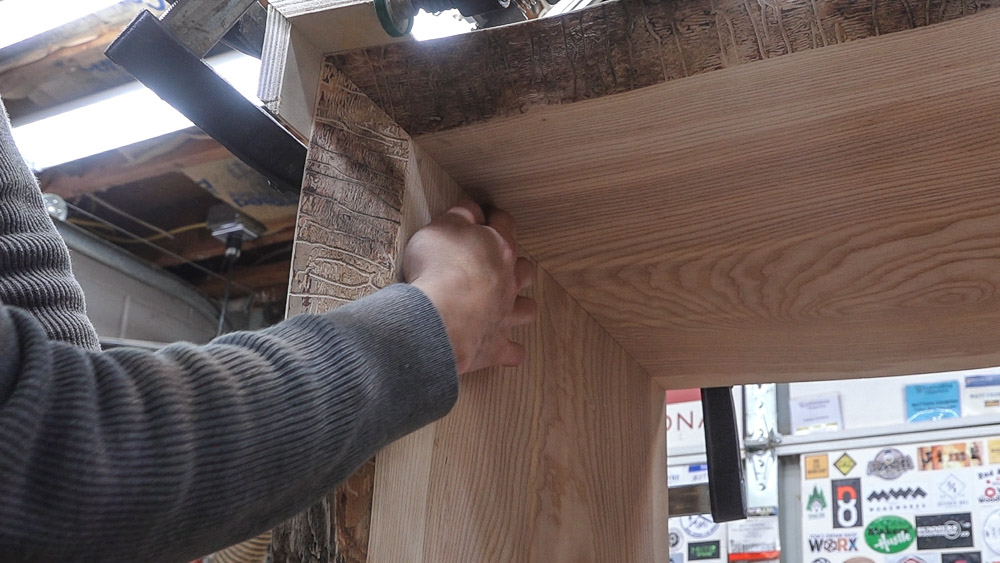
After tweaking both sides, the two parts come together perfectly with no gap along the top, sides, or bottom.
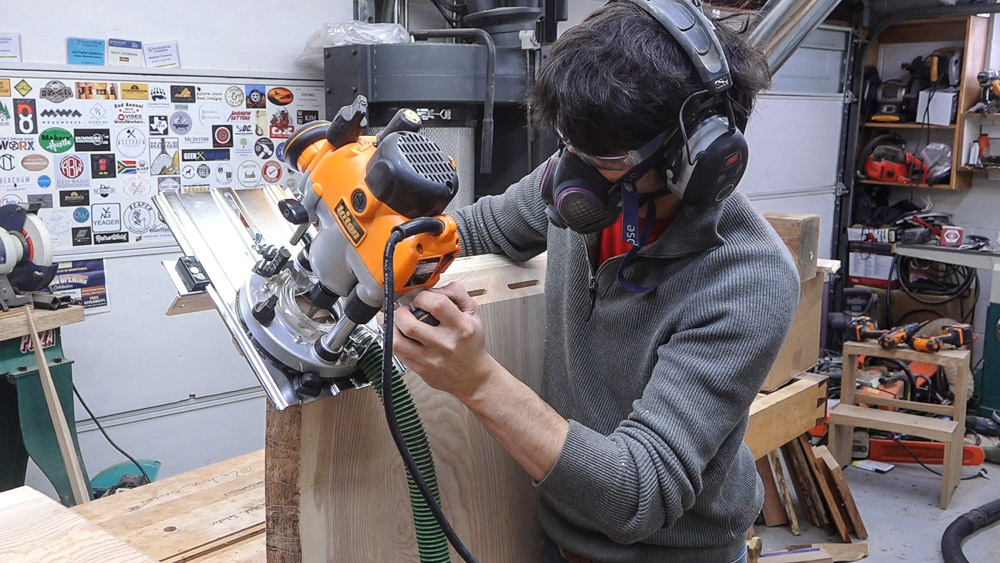
On this table, I’ll use the router with an edge guide to cut mortises for floating tenons which will reinforce the joint.
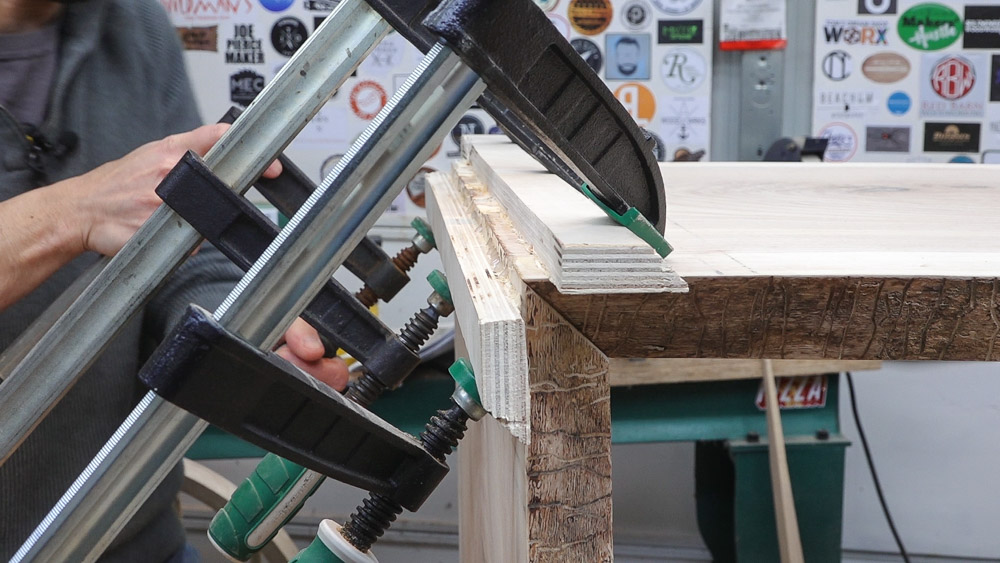
To get ready for the glue up, the extra bit of the cauls can be cut away so the grain of the slab is visible to make sure the left to right alignment is correct. I’m using epoxy to glue the two parts together which will give me all the working time I could possibly need to get this together and make sure the grain is aligned as it travels across the joint.
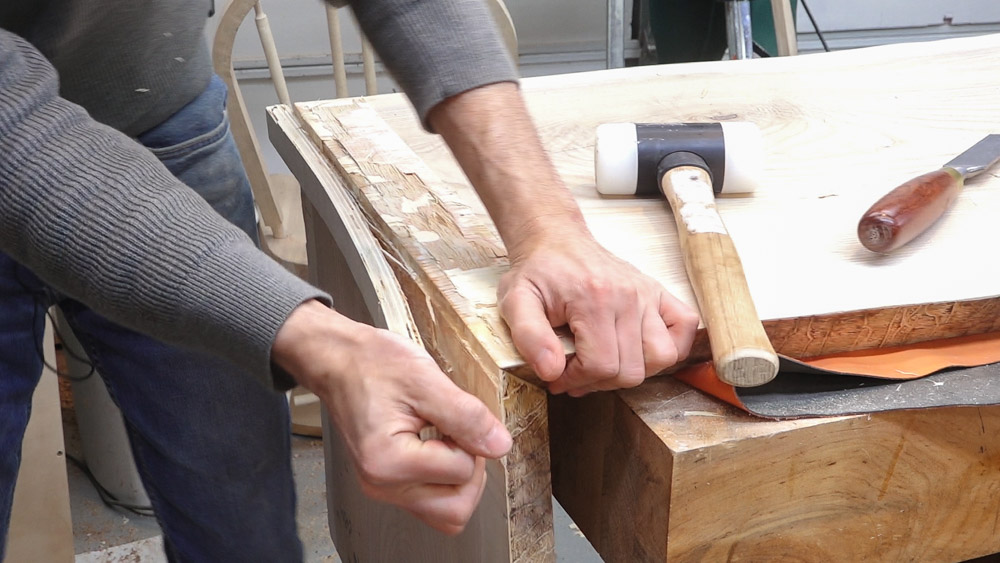
Once the epoxy sets, the rest of the cauls can be removed by splitting down one of the plys. The remaining veneers are quickly chewed through by the sander as I do the final surface prep and get the table ready for finish.
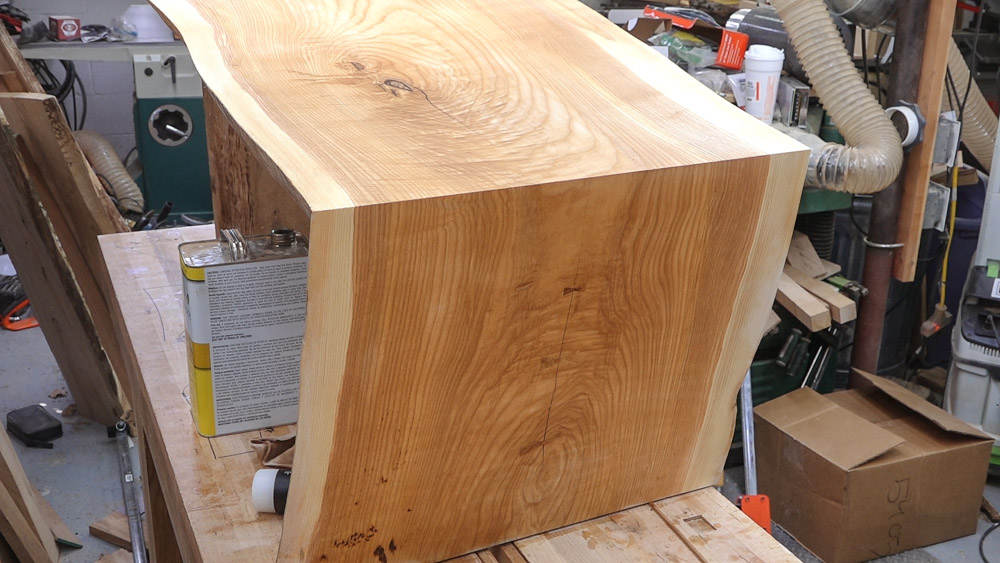
One last check with some mineral spirits to look for any tearout or glue residue I may have missed.
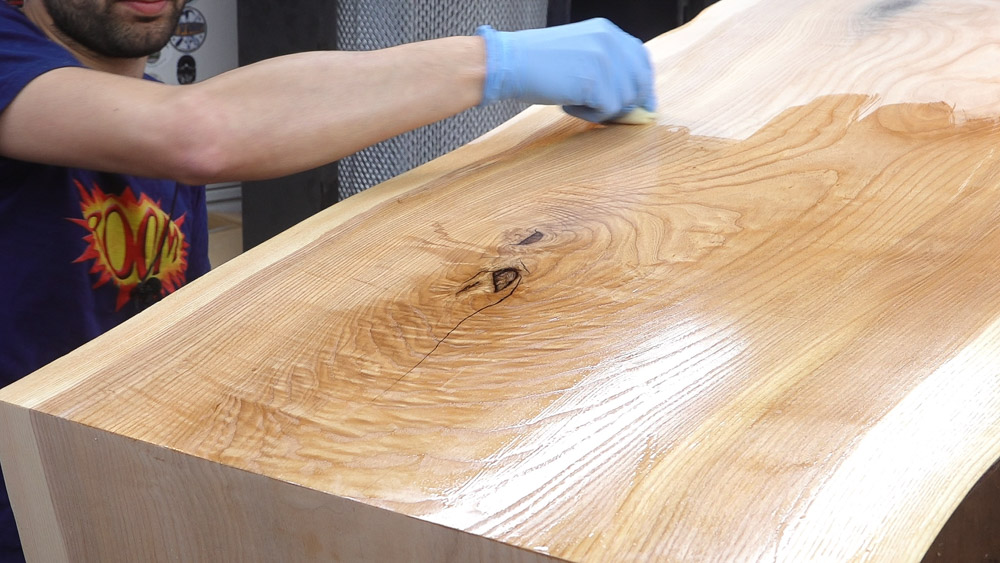
For a finish, I’m using my usual 5 coats of Arm-r-Seal sanding between coats with 600 grit sandpaper.
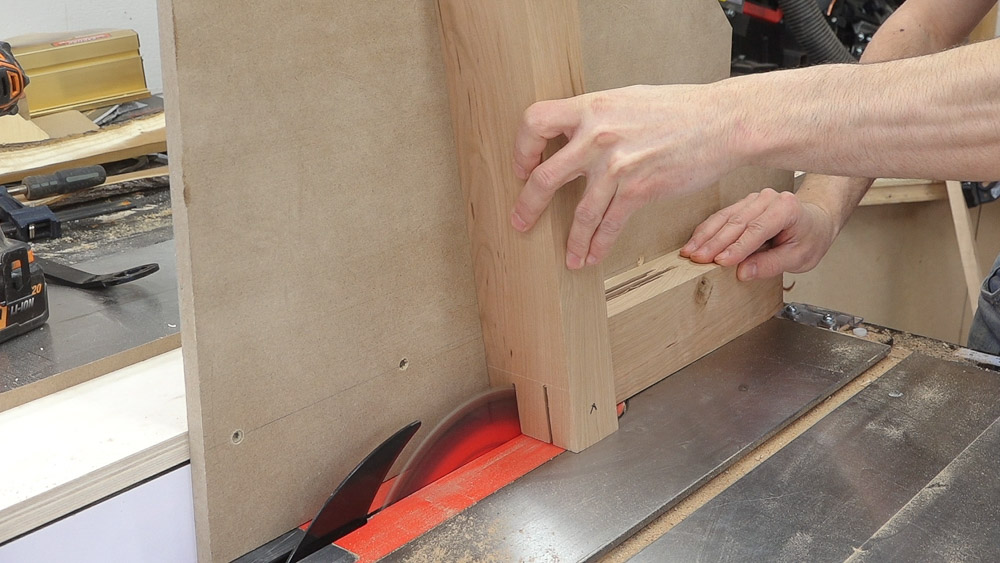
Time to make a real base for this table. I’m getting the stock for it from this reject cherry slab that I’ve had for years. I decided on the overall trapezoidal shape and drew a full scale image of it on my assembly table. I can use this drawing to get all the final lengths of each part and the angle of the splay. Joinery on this base will be bridle joints. I’ll layout and scribe the shoulders of each joint and use the table saw to cut the walls of each part and remove the bulk of the waste. At the bench, I’ll clean up back to the shoulder lines of each part.
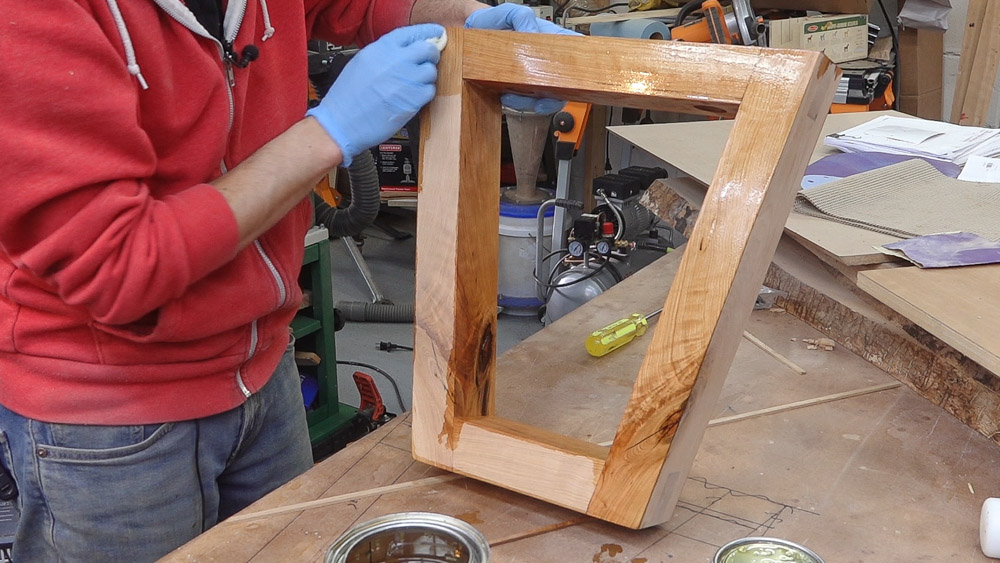
For the glue up on this, I’ll use cauls to align the clamping force. Once the glue sets, the cauls can be removed, the whole base finished prepped, and finish can be applied. I’ll attach the base with counterbored socket head cap screws.
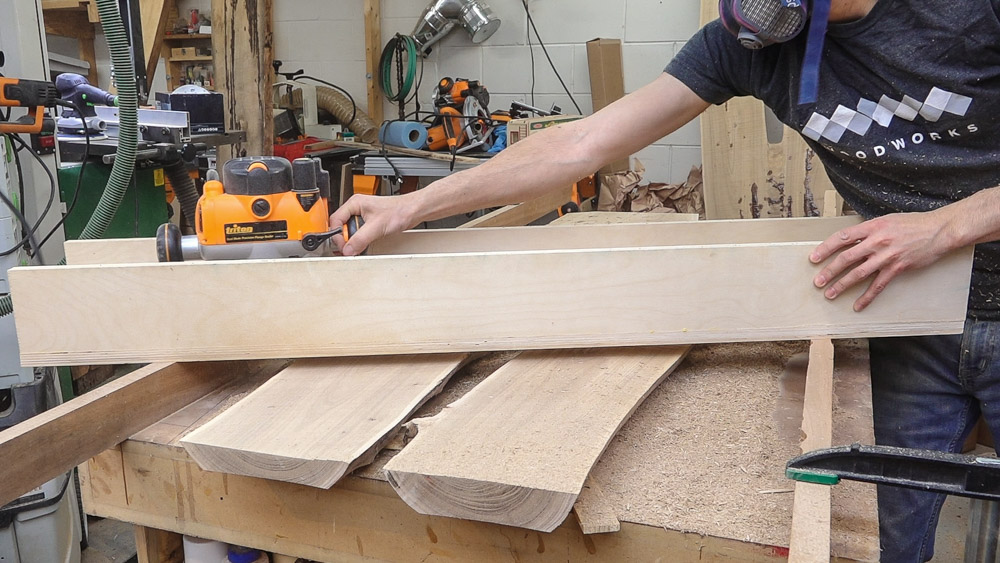
Now on to the resin river waterfall table. The process for this one is similar to the first. After the initial defect filling with epoxy, the slab can be flattened on the assembly table with the router sled. These crotch sections developed a fair amount of warp as I’d expect from an area of the tree with a good amount of stress so I did end up loosing a good amount of thickness.
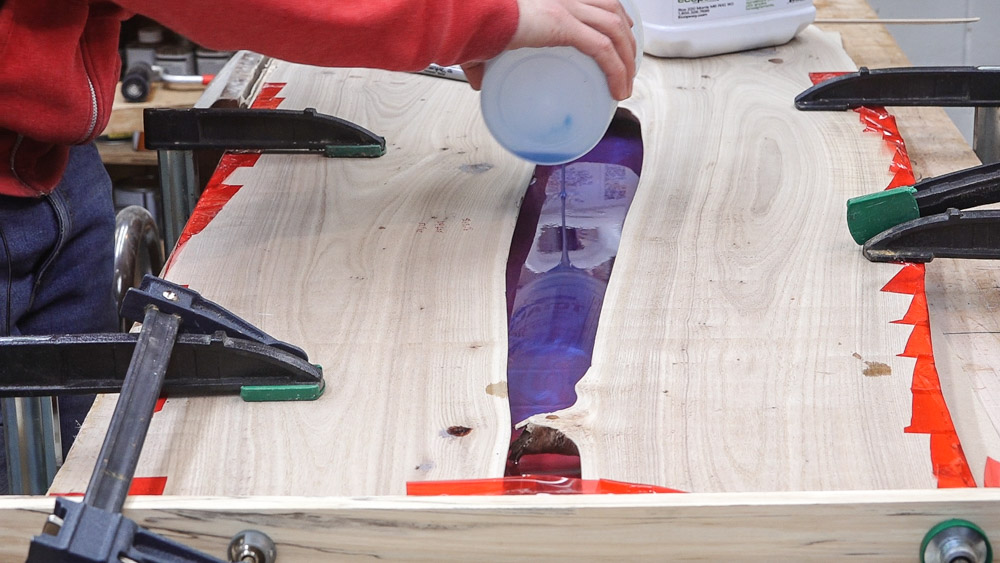
With the sufacing out of the way, next I can focus on the epoxy pour. I used sheathing tape to create a form between the two limbs and clamp the slab down to the bench. I’m doing the fill in two pours. This first one will be thin and will just serve to further create a barrier up against the tape so will have much less concern about the epoxy leaking out. I add a couple of metallic pigments, mix it up, and put the cup in a vacuum chamber to pull the air bubbles out. I’ll pour that in and let it sit for about a day until it’s fairly well gelled up and then started on the main pour. The epoxy I’m using for this river is Epoxy’s liquid plastic. I’m mixing it at a 2:1 ratio for a harder cure. The pigments I’m using are equal parts of pearl ex true blue and turquoise.
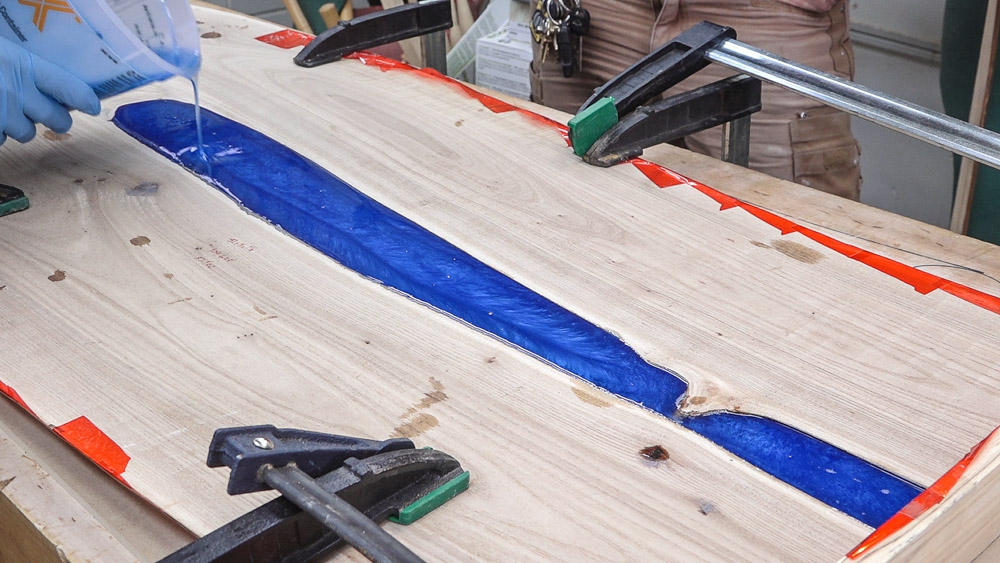
On to the main pour. Again, the air is pulled out in the vacuum chamber and then it’s time to pour. The biggest advantage of using a product like this is it’s long set time. This allows you to do thick pours without having to worry about heat buildup that could cause curing issues. Over the next day I’ll watch for any bubbles that rise out of the epoxy and pop them with a torch. After about 4 days the epoxy has cured and I can remove the tape.
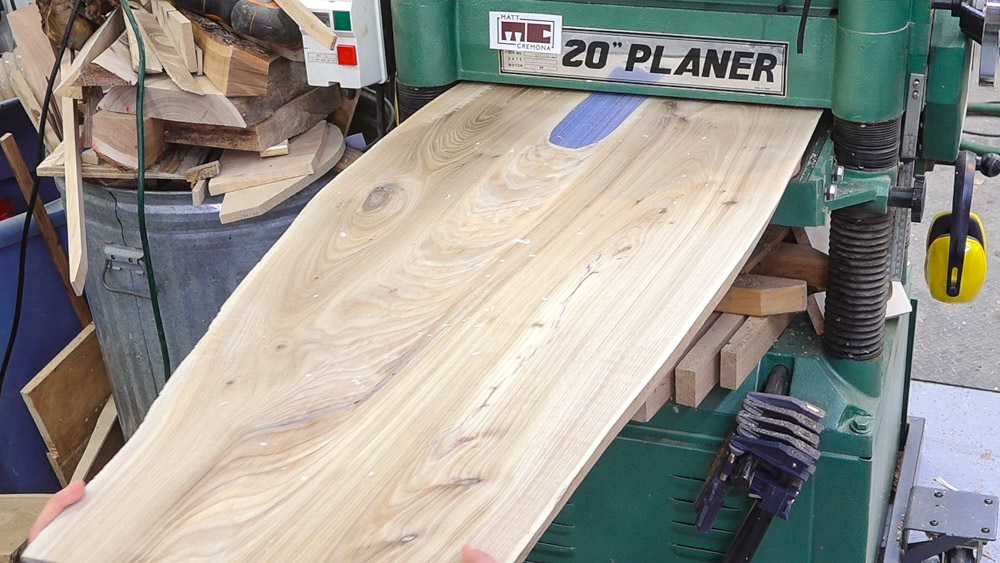
As the epoxy went through it’s final cure, it shrunk below the surface of the slab so I ran the whole thing through the planer to flush everything up.
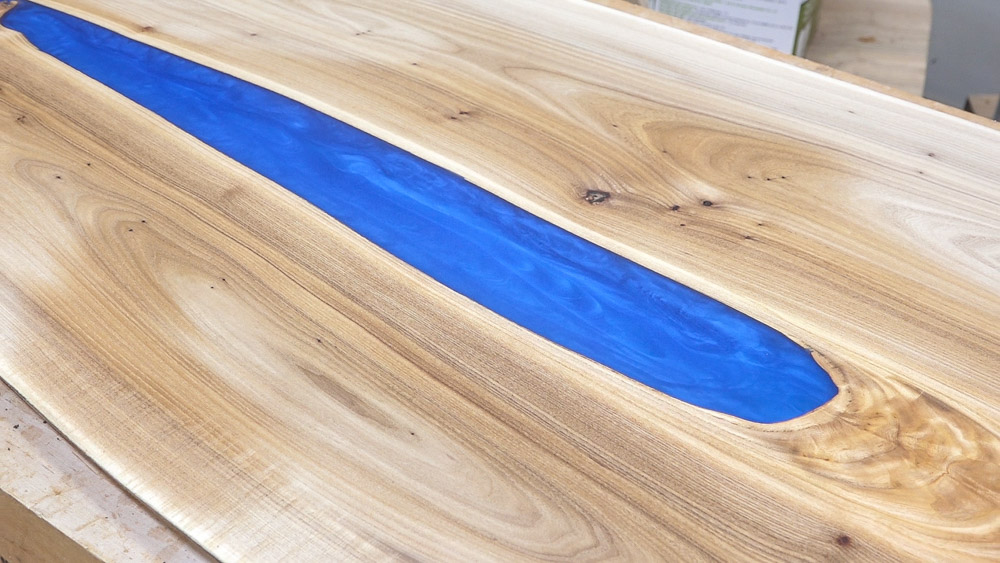
And here’s how the slab and the epoxy look with some mineral spirits applied.
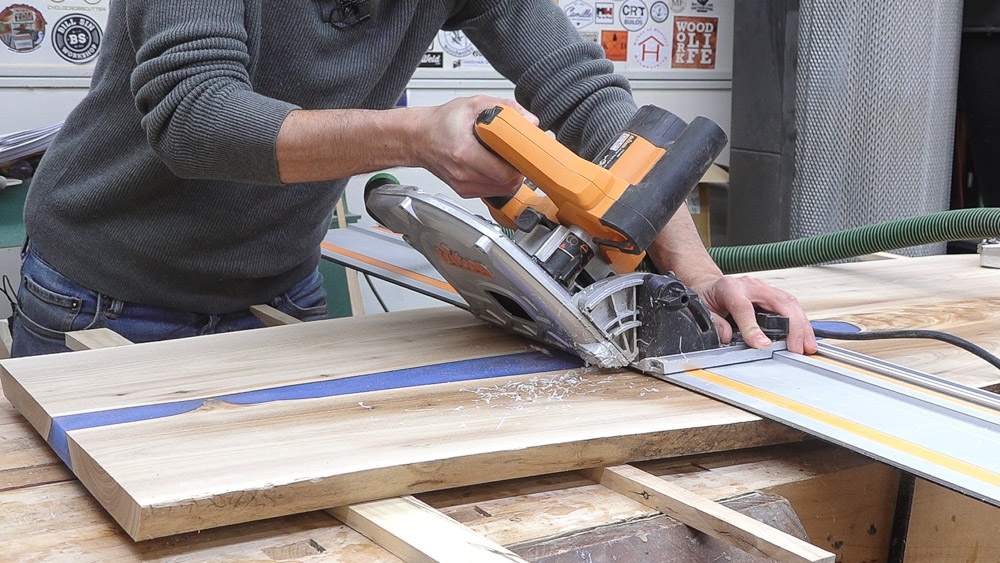
Now it’s on to the waterfall joint. This time I’m using a track saw to make the process a bit easier. The cut was pretty darn good right off the saw but I gave it a few passes with the plane just to further clean things up.
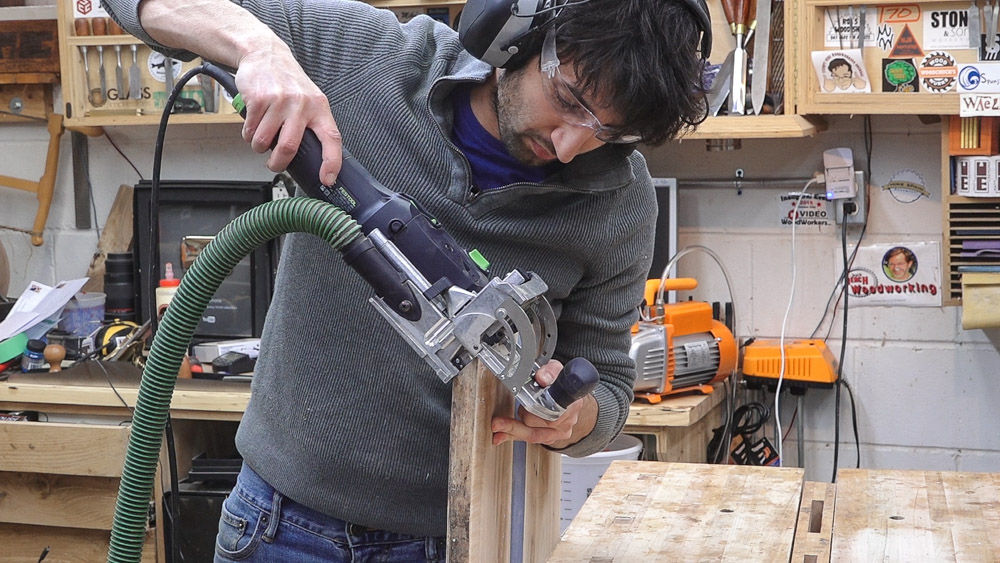
The reinforcement on this waterfall joint is done with the domino – again just an easier method.
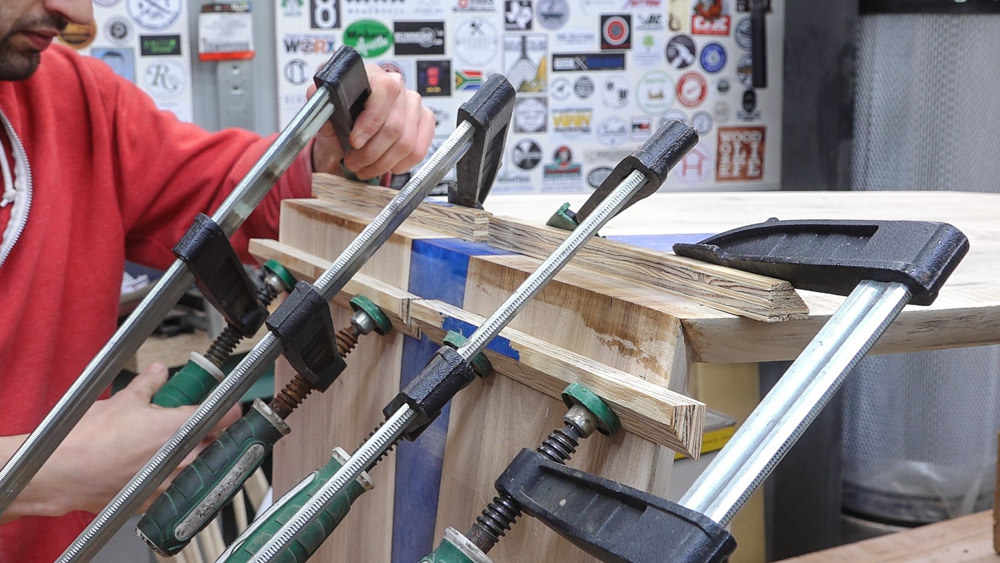
Next, I can attach the clamping cauls and get the two parts glued together.
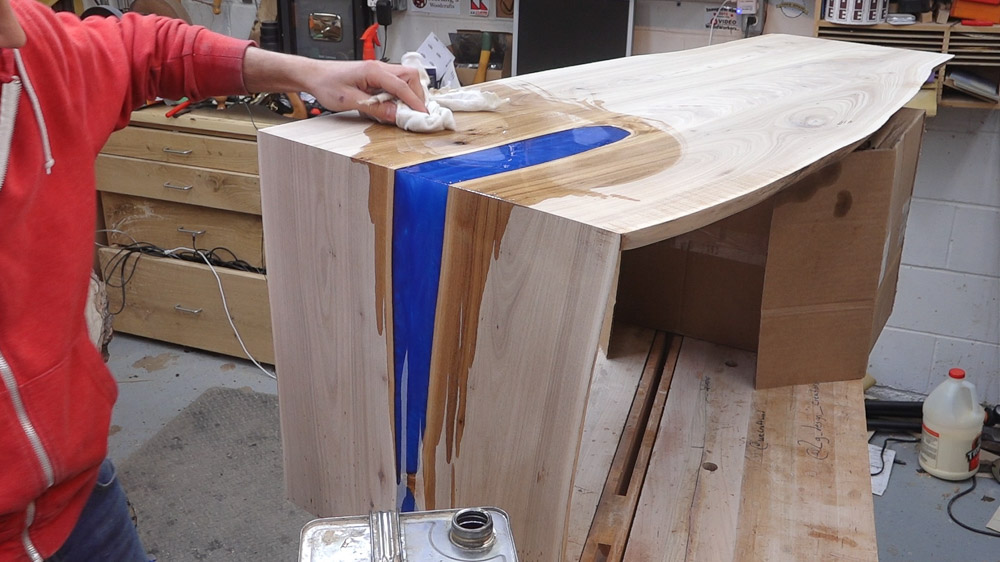
I’ll remove the cauls and double check things with some mineral spirits.
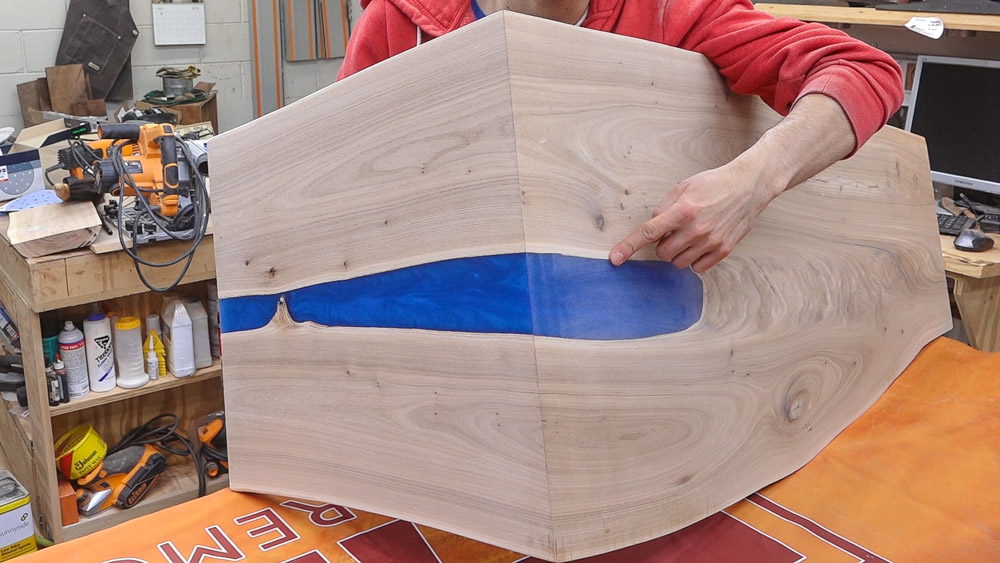
Next I’ll polish the epoxy to bring back it’s luster. I’ve sanded the wood to 180 grit and I’ll take the epoxy up to 1000 grit working through the grits and cleaning off the surface after each grit. After polishing on left and before on the right.
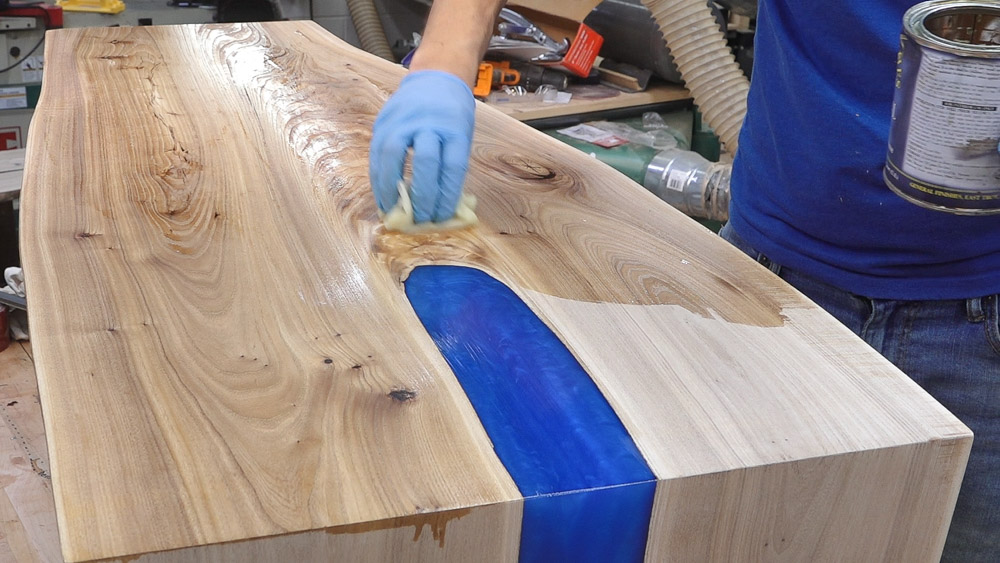
And lastly it’s time to get some finish on this one!
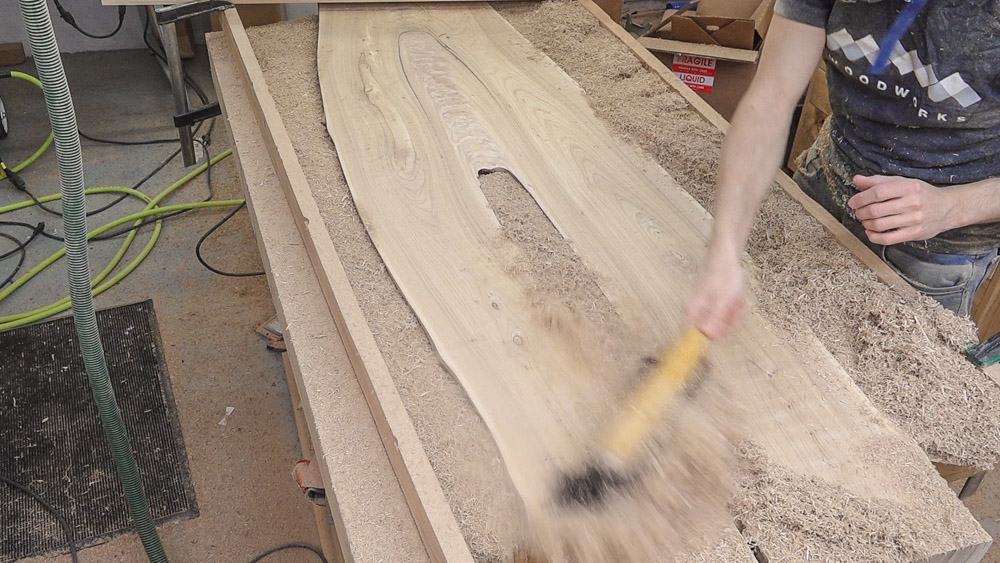
Next up is the glass river table and this one is going to go pretty closely to the last one. A big difference on this one is I didn’t fully surface both sides. I surfaced the top side and didn’t fully clean up the underside so I could preserve some of the thickness.
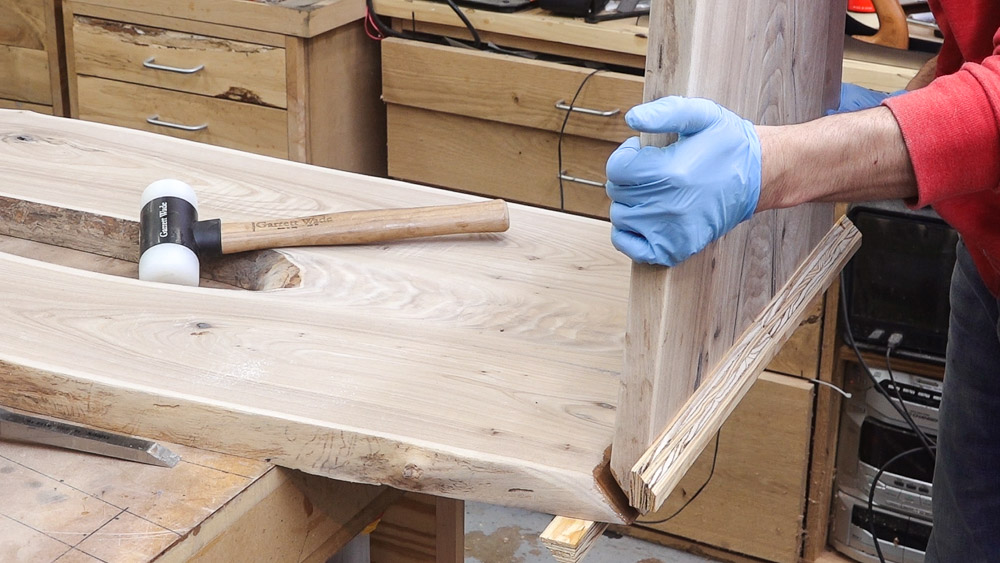
Again cauls to align the clamping force, epoxy and dominos to join the waterfall.
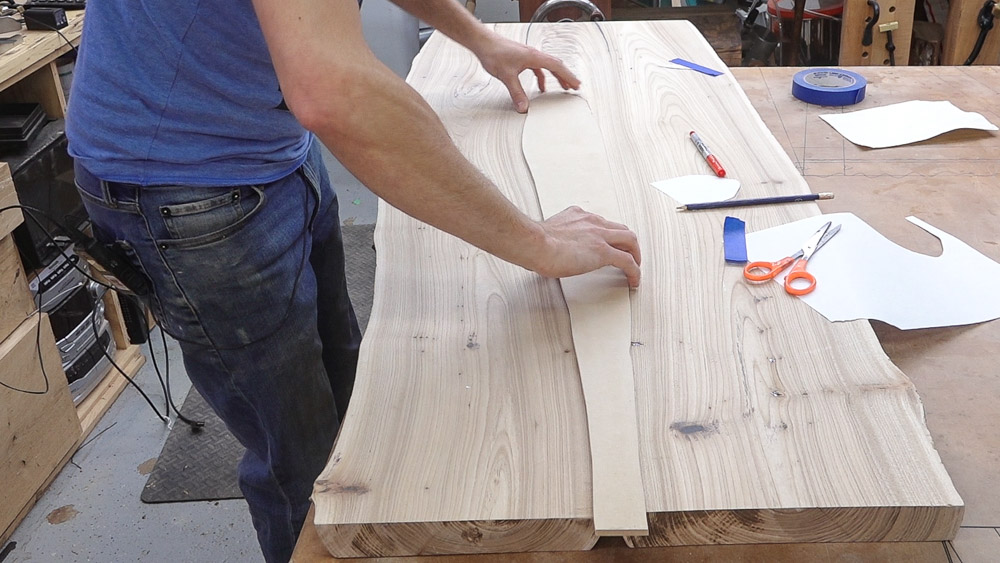
Now that this thing is glued up into an L, I can work on coming up with a shape for the glass. I’m creating a pattern that follows the grain of the wood out of mdf. Once I have the shape finalized, I can take the template to a glass shop and have them cut a matching piece of glass that can be inlayed into the table.
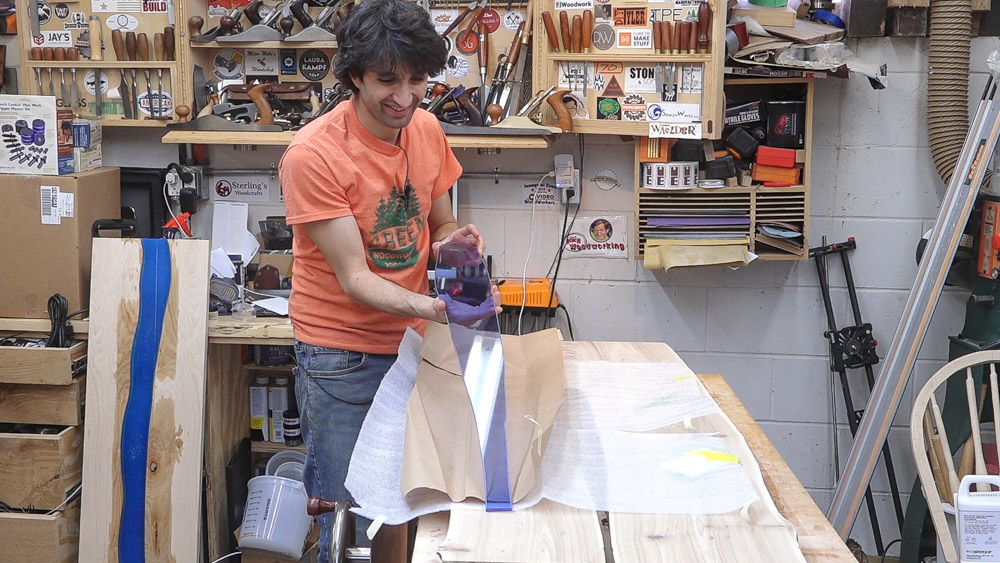
A couple weeks later, that piece of mdf has been transformed into a piece of glass and I can get started on the inlay.
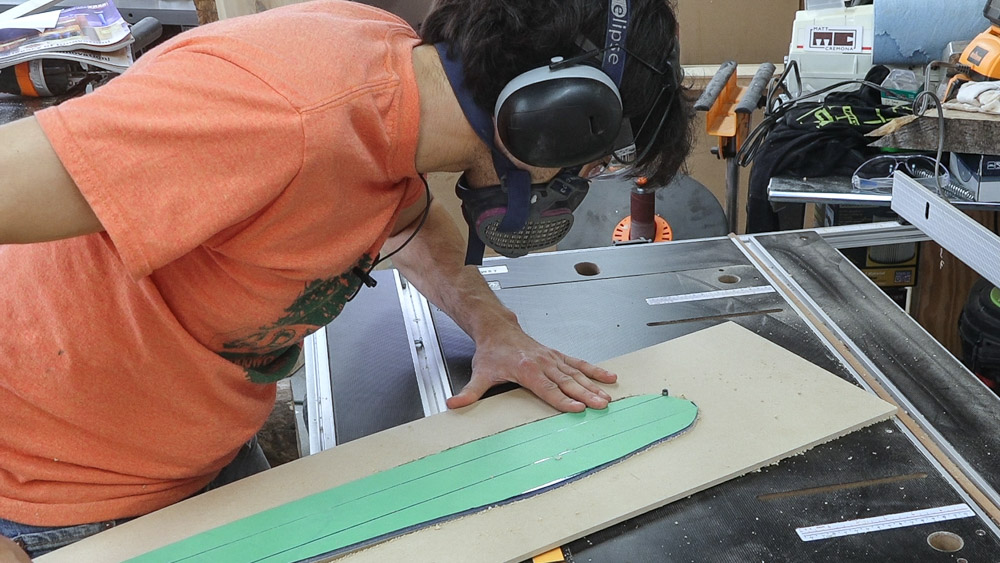
I’ll start working on my inlay template by routing around the perimeter of the glass. Since the glass was handcut, I’m using the glass instead of the mdf template in case there are any discrepancies.
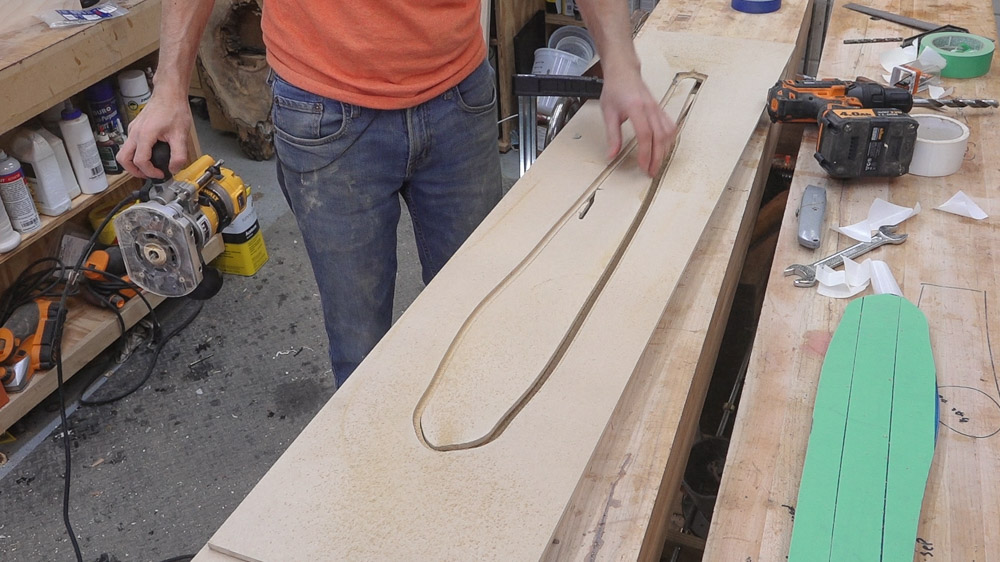
To make the inlay process easier, I’ll take the templates a step further and make perfectly sized negative template. This will make it easier to position the glass in exactly the right spot and I can test the fit with the glass to make sure everything fits correctly.
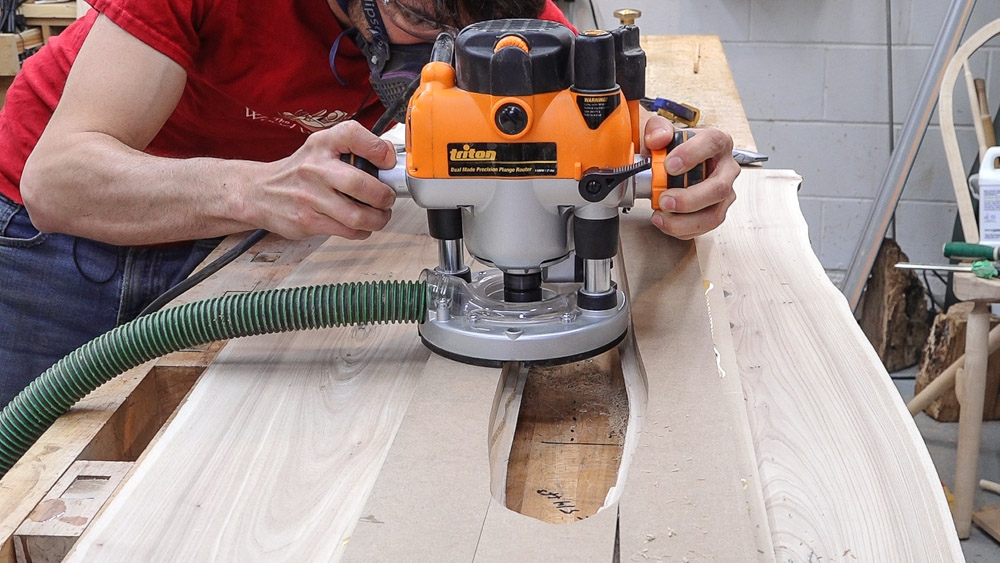
I had to tweak the negative template a bit to get the fit perfect but once it was perfect, I could stick the template down to the slab in exactly the right position and route the rabbet that the glass will sit in with a pattern bit.
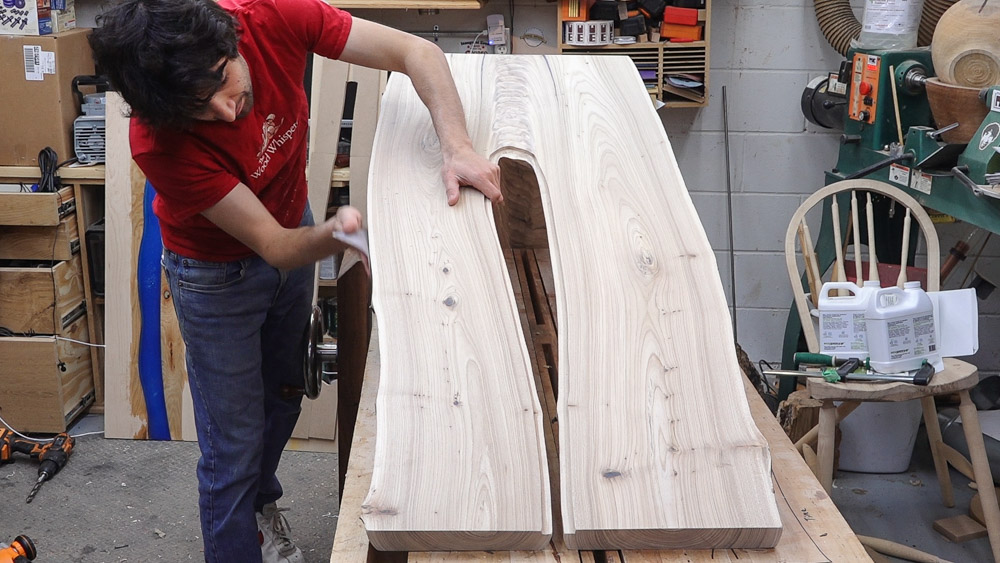
A little finesse work and this table is ready for finish.
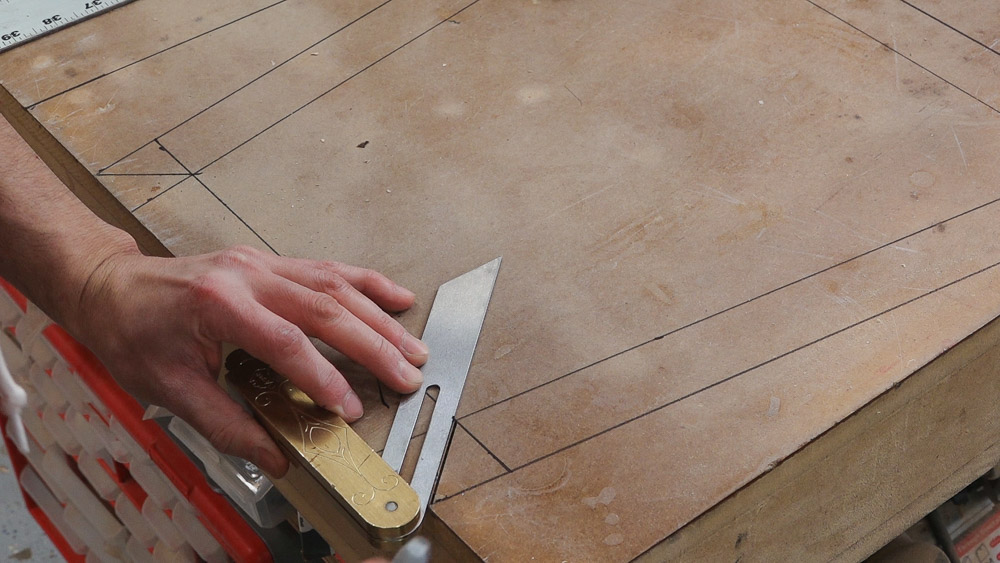
Now these two crotch table need bases. These ones will be made from steel and have a similar trapezoidal shape. I’ll again draw a full sized image of what I’m after and since this base will have mitered corners, the drawing also make it easy to bisect the overall angle so I can pick up the miter angle with a bevel gauge and stranfer that to my saw.
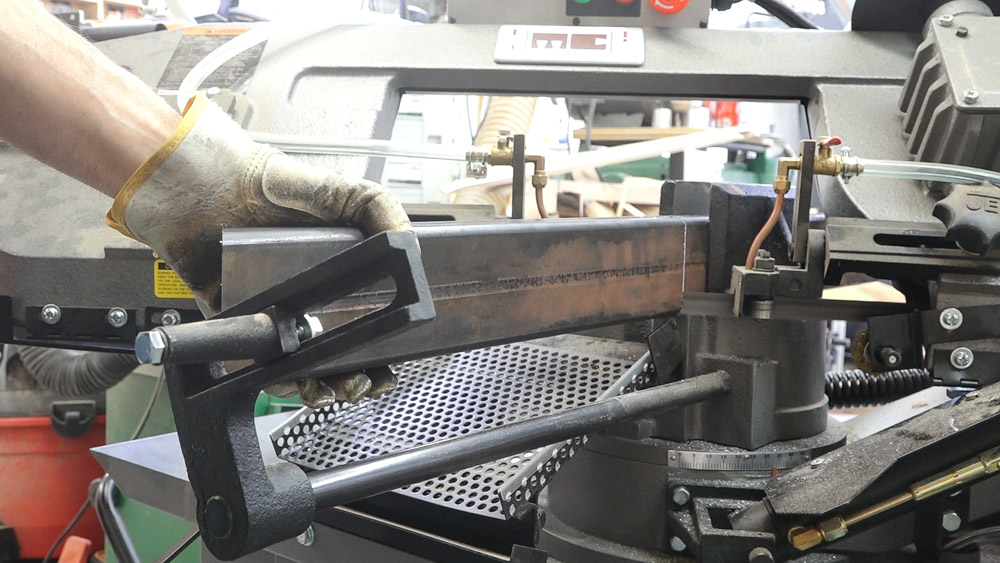
I’ll make all the cuts on the bandsaw for both bases.
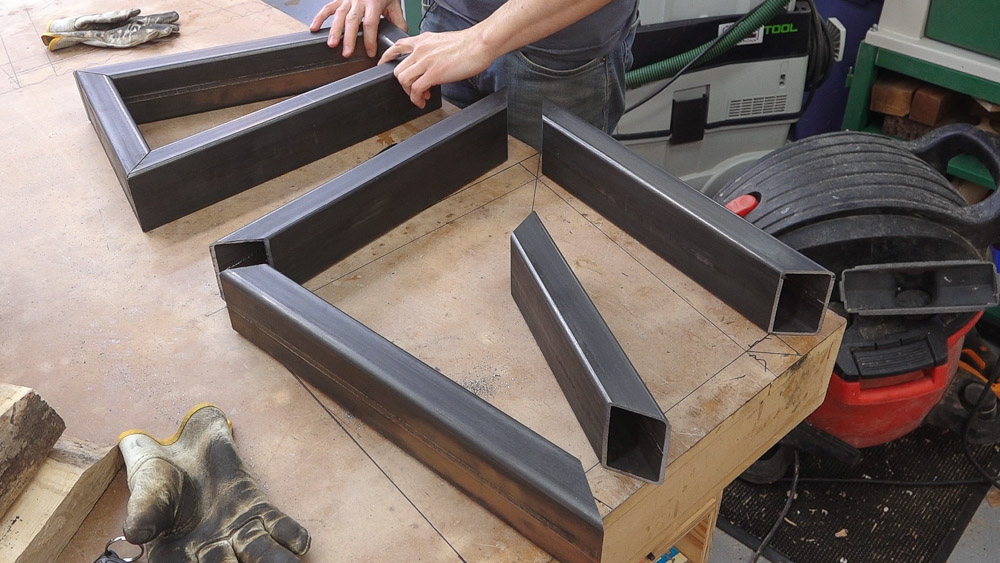
The base for the epoxy river table is narrower so the length of the top and bottom pieces are shorter but the side pieces are the same.
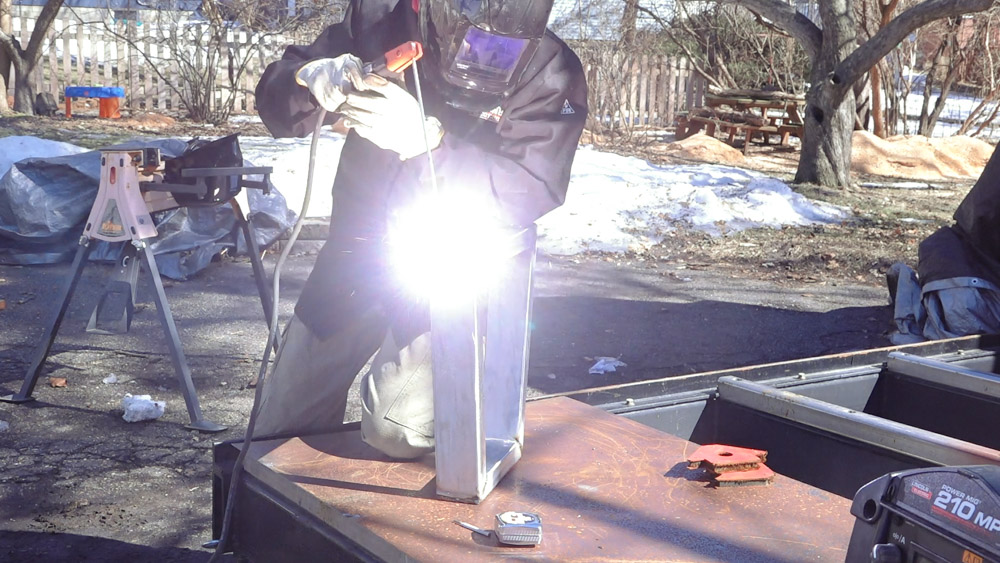
I’ll drill the mounting holes through the top and clean off all the mill scale before welding them together. I grind the welds flush and then it’s time for finish.
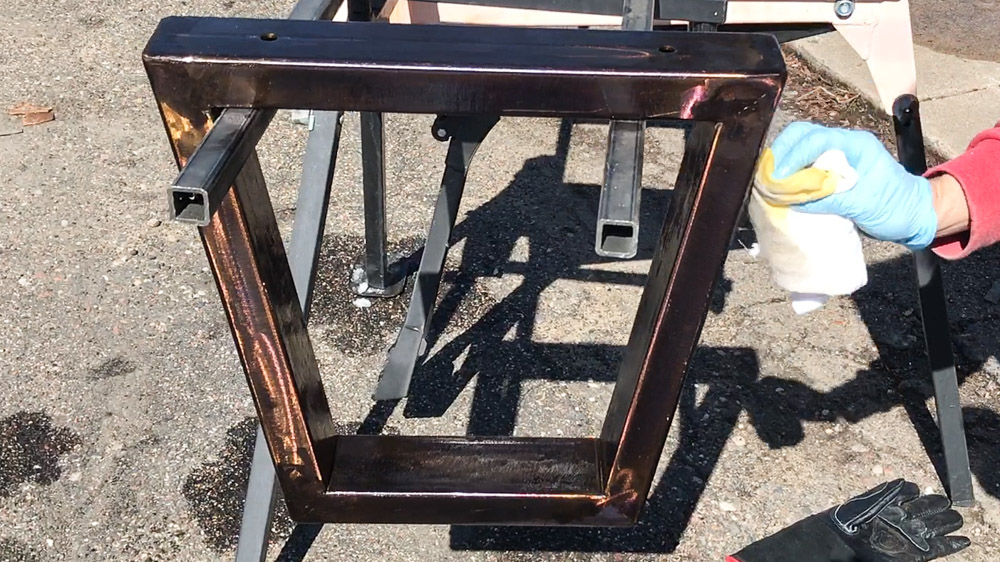
On the bigger one I’m doing a baked on boiled linseed oil finish. The base sat in my oven for about an hour at 550 degrees before I quickly pulled it out and wiped blo onto the surface. This gives it an almost bronze look.
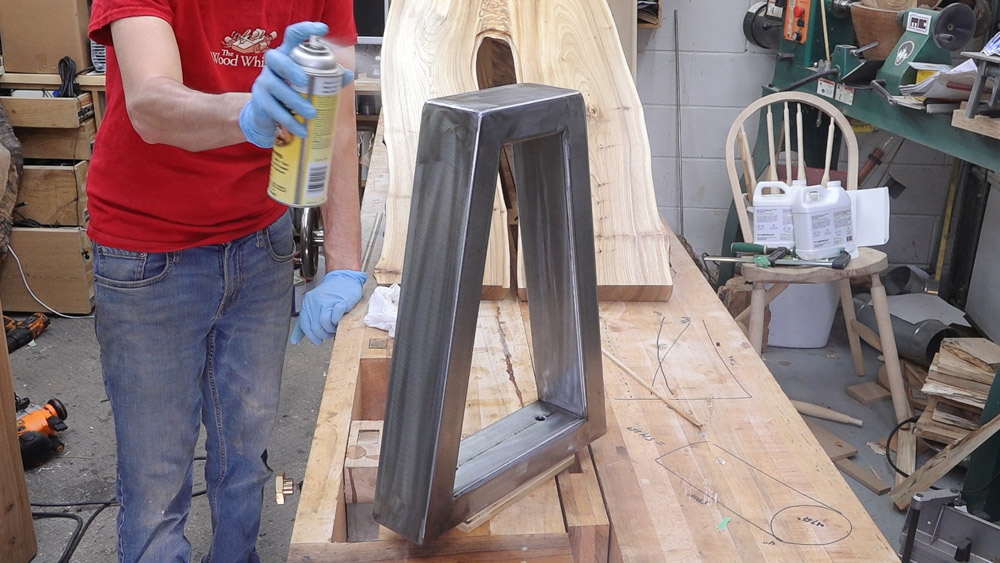
The other one I wanted to leave a just a bright brushed steel type look so I cleaned it off and applied a few coats of shellac.


| Picking Up and Slabbing the Ash Log:
Slabbing the Crotchs:
Installing Butterflies:
|
Flattening with a Router:
Filling Defects With Epoxy:
|
Ecopoxy Liquid Plastic: https://amzn.to/2JH5ezw
Pearl Ex True Blue: https://amzn.to/2G9fOyi
Pearl Ex Turquoise: https://amzn.to/2GRm8KA
Sheathing Tape: https://amzn.to/2GbIsyL
West System Epoxy Resin (Gallon): http://amzn.to/25TYH7y
West System Epoxy Slow Hardener (Quart): http://amzn.to/25TYKAr
West System Metering Pumps: http://amzn.to/1qicuEr
Finish: http://amzn.to/2FFWlVG
Vacuum Chamber: https://amzn.to/2IM6MUM
Router: http://amzn.to/2hXj5AC
Router Table: http://amzn.to/2sbcLLt
Table Saw: http://amzn.to/2hXj5AC
Bandsaw: http://amzn.to/2HISAf0
Metal Bandsaw: http://amzn.to/2shAUUX
Dust Mask: http://amzn.to/2y8dl1m
Hearing Protection: http://amzn.to/2yQ0sa3
Triton Track Saw: http://amzn.to/2f2P85l
More stuff on my Amazon page: https://www.amazon.com/shop/matthewcremona
[Amazon links are affiliate links]


Welcome to my shop! This is a quick update to let you know what I’ve been up to. This big chunky thing is the leg

Welcome back to the home renovation. This time I’m going to be working on the kitchen island. Here is a small model of the island.

Welcome back to our home renovation. Today I am going to be working on this wall. It needs some upper cabinets and the surround for
4 Responses
Matt,
I was wondering if you accepted commissions. Would love to see you make a computer desk like the waterfall table. Would love to see some red oak like you describe with lots of movement.
Can you give me an estimate as to the finish cost. I will come to pick it up ( probably next spring )..
Regards,
Leonard
Hi Leonard,
I do not do commission work. Thanks for thinking of me though!