
Kitchen Island, Barn Power – March 2024 Update
Welcome to my shop! This is a quick update to let you know what I’ve been up to. This big chunky thing is the leg
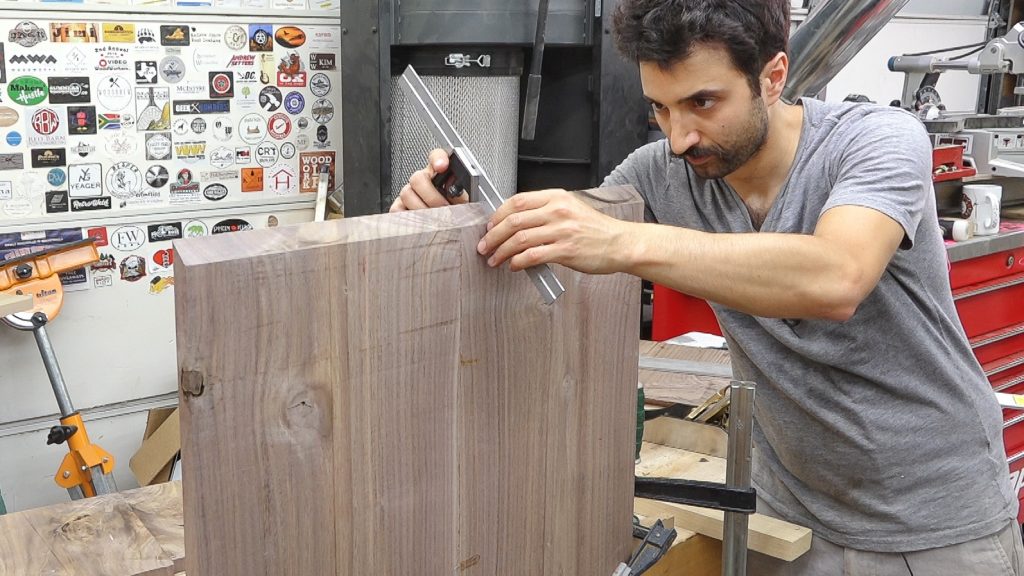
To start things off, I’ll make the panel which will become the sides and top. While that’s sitting in the clamps, I’ll prep the material for the secondary panels. Only the front edge of these are going to be seen so I can throw some sappy stuff together and just edge it with something nicer. Now I’ll start on the waterfall joints that will make the grain appear to flower over the top and down the sides. The first cut separates the side from the top and the second cut removes the remaining waste. Accuracy is super important for this because you want to remove as little material as possible. The more material removed, the more obvious the joint is. After the cuts are made, I’ll verify each and tweak them as necessary. The cuts need to be flat, 45 degrees to the face, and 90 to the edge. The more spot on these joints are, the easier the rest of the case will come together.
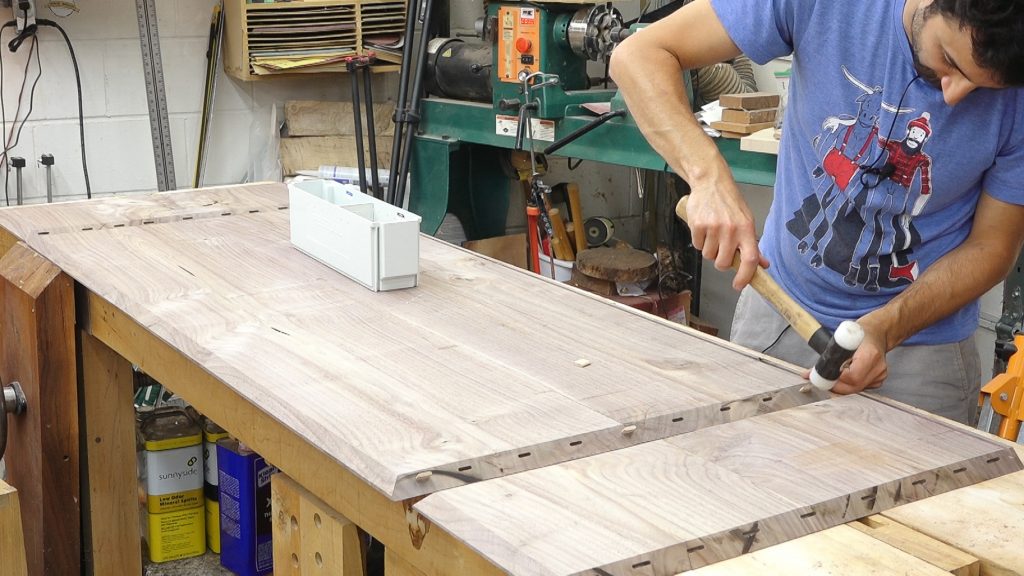
Once I’m happy with the cuts, I’ll head over to the table saw and cut the grooves for the back panels. I’ll add the bevel chamfer detail to the front edge and I’ll also make the mating bevel cut on the bottom of each side. All of the miter joints in this project are reinforced with floating tenons ala the domino. In preparation for glue up and to aid in a final check, I’ll glue on the plywood clamping cauls. These cauls allow for clamping pressure to be applied across the joint helping everything close up nicely. With everything coming together really well, I can move forward with getting these parts glued up. I used epoxy so I would have as much working time as I could possibly need. A quick double check and some squeeze up clean up before leaving this alone to cure. Since they’re no longer needed, I can have a little destructive fun and remove the cauls. I’ll split them along the ply closest to the face veneer and the remainder is removed as I’m cleaning up the joint. If you’ve ever accidentally sanded through the face veneer of plywood, you know how quickly that bit of veneer is chewed through by the sander. This leaves me with a very crisp and tight joint. I’ll use a bit of mineral spirits to check for any glue residue and to get an idea of how this waterfall will look.
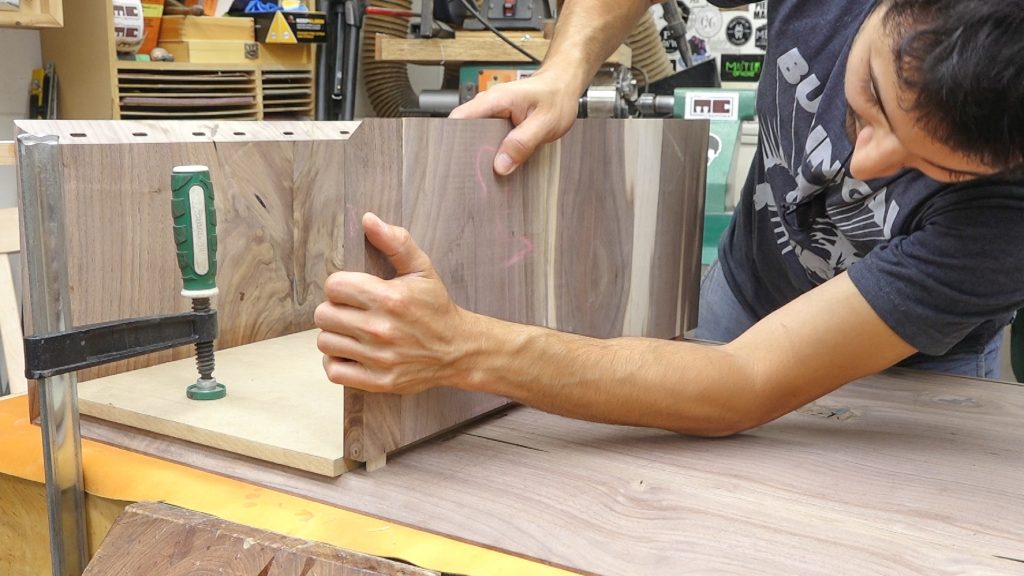
Continuing on with the case construction, I’ll add the vertical components which will frame out the drawer cavities. These have their front edge bevel removed and then I can rough cut them to length. I’ll verify that the cuts are nice and square and make any tweaks as necessary. I’ll cut a 45 degree bevel on one end to get it to exactly the same height as the case side. With all the cuts on these tall dividers complete, they can be joined to the case. Dominos again using a piece of mdf with parallel edges to place the divider parallel to the side of the case. Epoxy again as my slow setting adhesive of choice, some clamps, and a square to check for well square. While that cures, I’ll make some stock for the back panels. These will be ¼” thick captive panels and I’ll go ahead and finish them now. Next I can run through the process of making the sides of the middle drawer compartment. The process is the same for these guys as the ones we just added and they just get glued to the taller dividers.
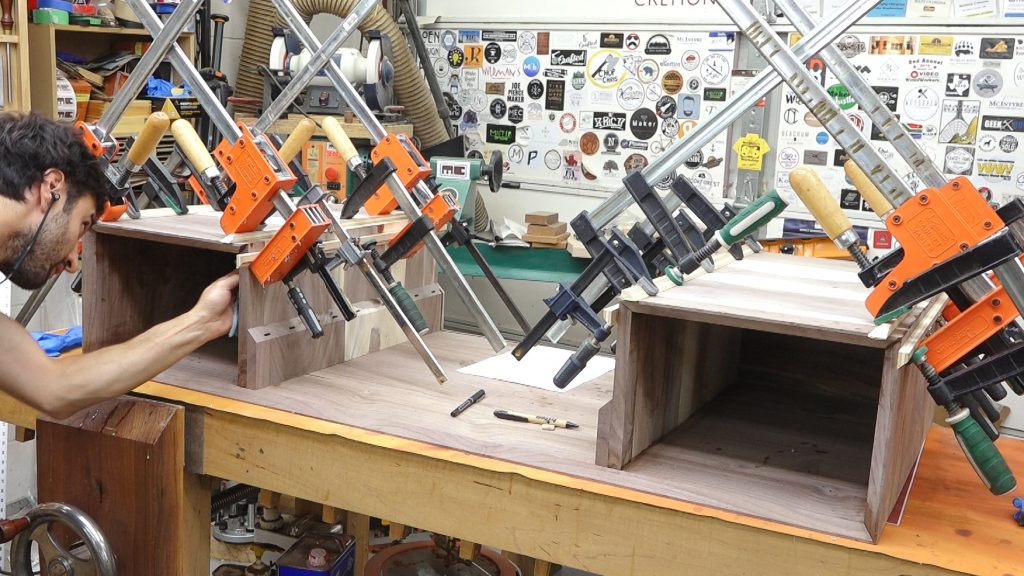
Now for some bottoms. Again checking for accuracy as I go. I’ll make the bevel cuts on each end so it fits between the vertical components. Some dominos and cauls and we’re just about ready for another glue up. Before I forget, I’ll cut and install the back panels. To get the panels to drop in with the protruding dominos, I’ll use some clamps to pull the verticals over a bit widening the top enough for the dominos to drop in. A bajillion clamps on the cauls and these case bottoms are all set. Next I’ll add in the center compartment bottom. Similarly, the case needs to be flexed a bit to allow the dominos to go in. This time I’ll bend the top by clamping it across a block of wood. Once the joinery is seated, I can remove the block so the case is sitting flat on the bench again and add a few clamps.
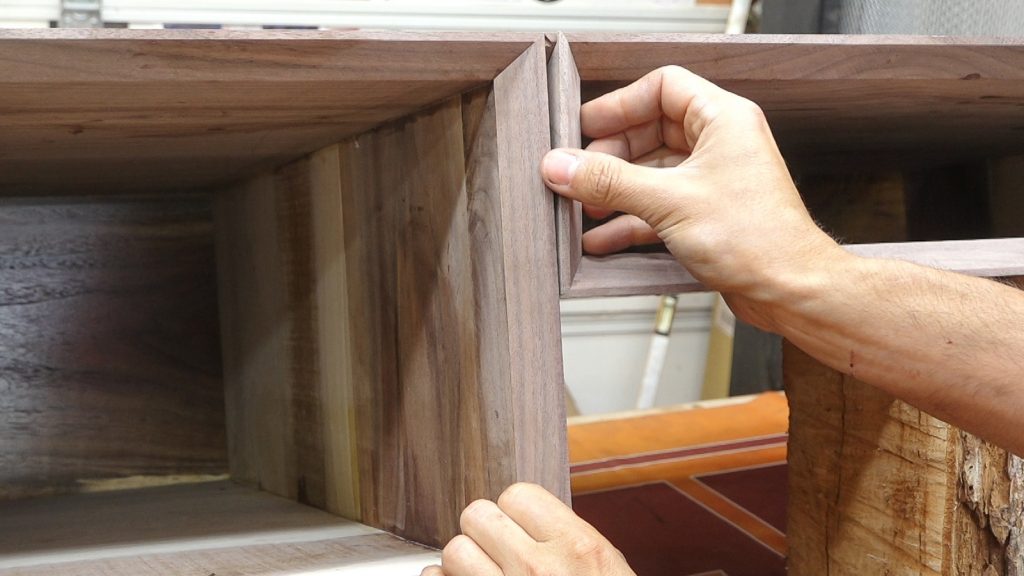
I can have some fun again removing the cauls and then finish up the last details of the case which are going to be the vertical moldings that complete the front façade. I’ll transfer the center of the two dividers up onto the top. I’ll then lay out a 45 degree line to the left and right of that point to create a 90 degree V. I’ll use some chisels to carve this area away leaving an almost unnoticeable flat at the peak of the v so I don’t cut through the top. This little recess will give my moldings a place to nest into. Now on to the moldings. These are a coped molding so I’ll start by making a 45 degree cut then I can turn the stock and start coping away the waste. This will leave me with a little pointy ear which fit into the v notch in the case. With that top detail done, I can mark and cut the miter on the other end. I’ll do the same to create the other set of the pair and with these moldings installed, it gives the illusion that the drawer cavities are completely wrapped up into the top. A little glue and these complete the work on the case.
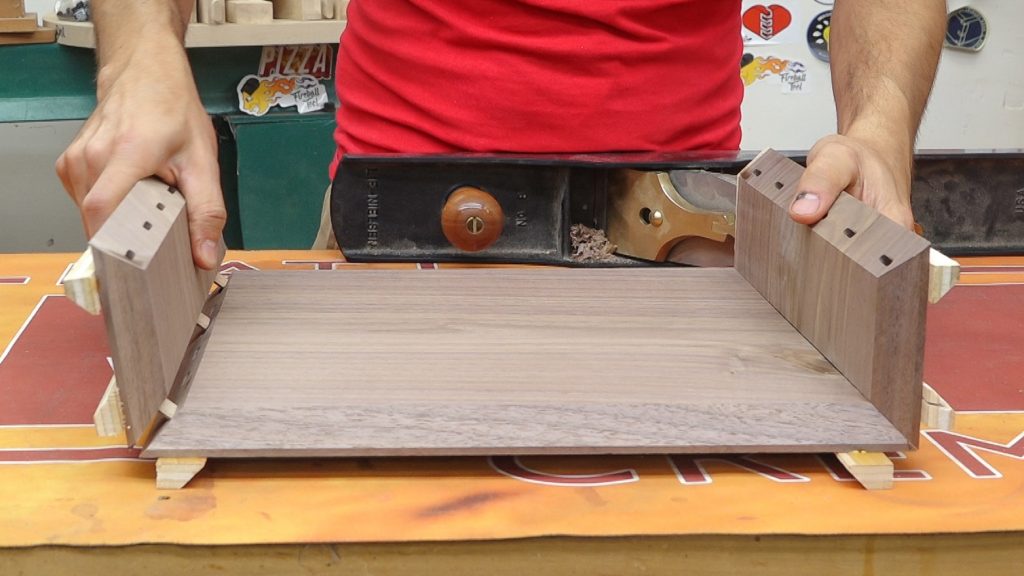
The case might be done but next I’m going to make the little drawer boxes that sit on top of the desk area. These are essentially just mini versions of the case – the joinery and construction is exactly the same. The workpieces are smaller though so I can use my dedicated bevel cut sled to make the initial cuts. Similarly to the case, the top and sides are waterfalled. I’ll do those first and then cut the bottom to fit.
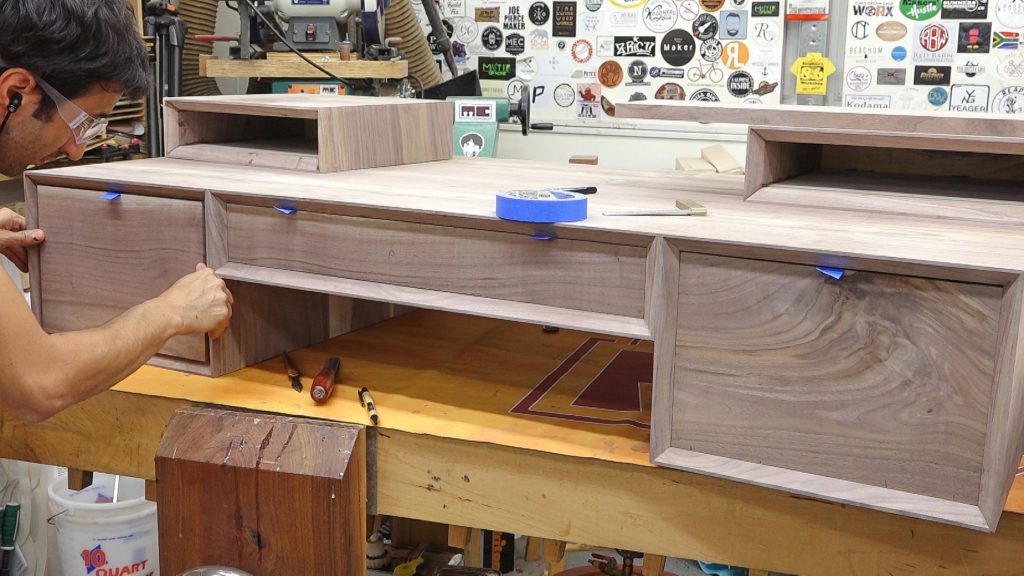
Next I can start working on the 5 drawers. I still have all the stock for the drawer boxes in rough sawn form so I’ll run through the process to get the stock I need for the sides, backs, and bottoms milled up and resawn. I’ll set that stock aside for a bit and work on cutting the drawer fronts to fit the openings. I’ll start with a square cut and check it against the opening. I’ll adjust the cut angle with some shims until the cut matches the opening with no gaps. Once I have one end, I can repeat the process on the other; cutting a bit long, finding the angle, and then cutting to final length. I’m going for a drawer front that fits perfectly to the width. When I clean up the dovetails later, that will remove a small amount of material and make these drawers a nice piston fit. Once I have all the fronts taken care of, I can finish up the stock for the drawer. Ripping it to width and crosscutting it to length. While I’m at it, I’ll also make the groove which will hold the bottom.
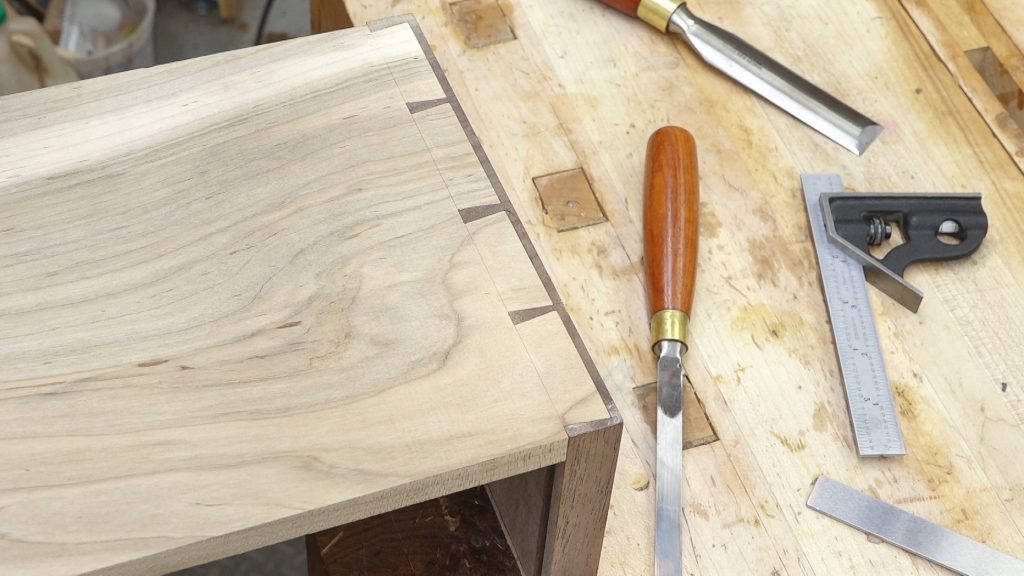
Now we can start on some joinery. The front of the drawer will be joined with half blind dovetails. I’ll cut the tails at the bandsaw with a taper jig that matches my desired tail angle, flipping the board after each cut to create a symmetrical layout. I’ll clean up a bit of the waste at the bandsaw and head back to the bench to work back to the scribe line with some chisels. Now I can transfer the layout to the drawer front. Over at the drill press I can hog out the bulk of the waste with a forstner bit and back at the bench, I’ll start working back to the lines. And that’s one complete – 9 more like this to go.
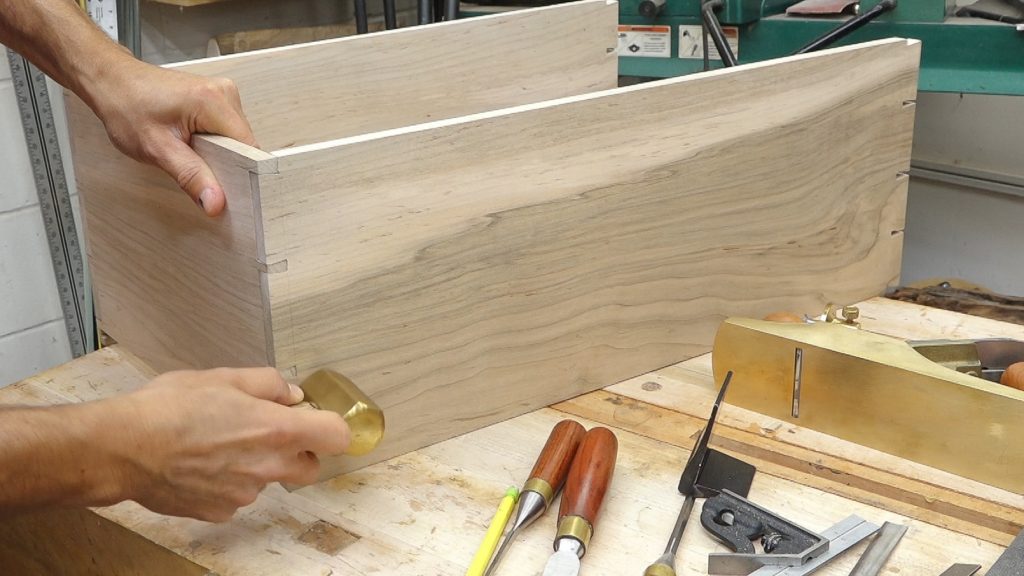
Now for the drawer backs. These will be joined with through dovetails which I’ll cut pins first. I’ll lay out some pattern and saw along the lines. I’ll use the bandsaw to start the waste removal. Then I can use the table saw to remove the waste back to the scribe line. This step saves a lot of chopping time at the bench. I’m just left with a bit of material against each pin and a little clean up work to take care of. Now I can place the drawer back between the sides of the assembled drawer and transfer the layout. I’ll saw along the lines and use the bandsaw and table saw again to remove most of the waste. That just leaves me with a bit of clean up work to do. I’ll also adjust any saw cuts that were slightly off. And that takes care of the drawer joinery.
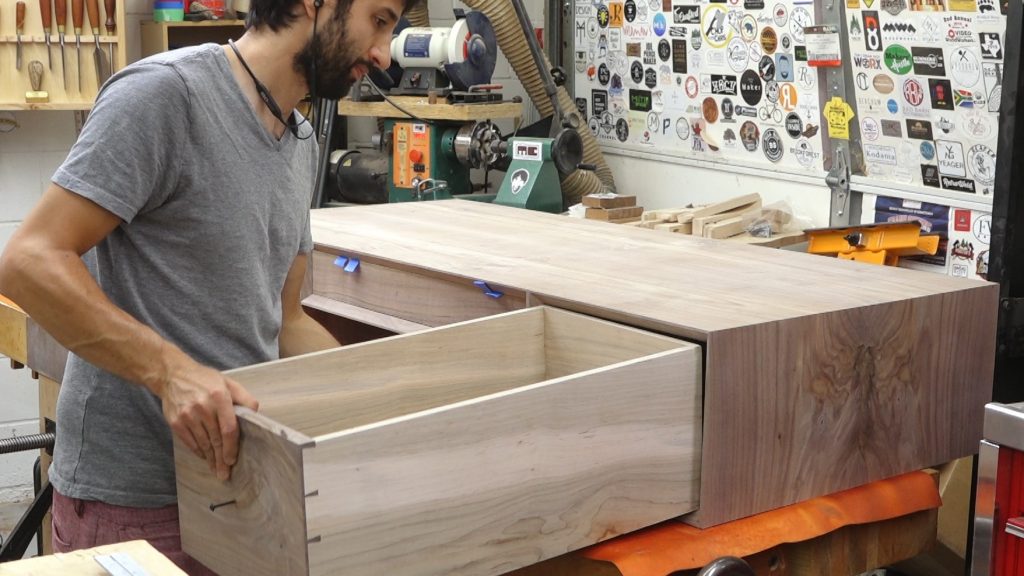
Lets glue these up next. I’ll get the glue applied and the drawer reassembled and then use the case as a clamping form so I can rack the drawer so the drawer front ends up parallel to the front of the case. Once the glue sets, I can pull the drawer and flush up the joinery. Next I’ll work on adding the bottoms. This starts by gluing up the panel which will be sliced into the individual bottoms. I cut the bottoms sequentially so not only are the drawer fronts continuous grain, so are the bottoms – because why not? Three sides of the bottoms are beveled and then bottoms can be slid into place. The bottoms will serve as the stop so I’ll adjust them until the drawer stops at just the right point. Lastly, I’ll cut a slot at the back so the bottom can be screwed to the drawer back.
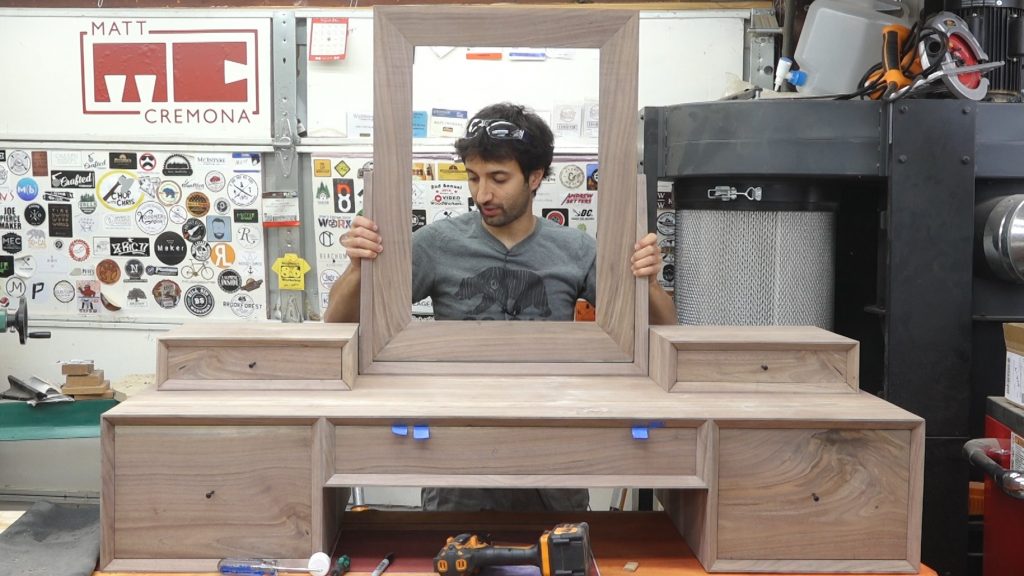
Next I’ll start on the mirror and its stand. This was easily the most fun part of the project for me. I had some ideas in my head but went into this section flying by the seat of my pants. Just working through the design as I went which is how I really like to work. I got the stock prepped and started with the stand. To start tying it into the rest of the piece, I used miter joinery similar to how the case is joined. Next I decided to taper the uprights along the front and back. And if we’re going to taper these in width, we might as well taper then in thickness too. A quick planer sled and a few passes and these upright get thinner as they rise. To further tie things together, I’ll add the chamfer detail to the base piece. I’ll add the dominos so I can transfer the chamfer to the uprights. I wanted these to taper as well. I drew some guide lines and then it was a matter of connecting the lines with a plane. Lastly, I drill a counter sunk and through hole for a socket head cap screw which will later attach the mirror. And there’s the stand. Next up is the mirror frame. This just starts as a simple mitered frame joined with dominos. I added a large bevel to the front and cut the groove for the mirror in the back. I used cauls for the mirror glue up so I could get good pressure along the full length of the miter. With the mirror glued up, I can attach it to the frame. I’ll drill and tap a hole for the screw. The tension of this screw can be adjusted so the mirror will sit at whatever angle the use moves it to.
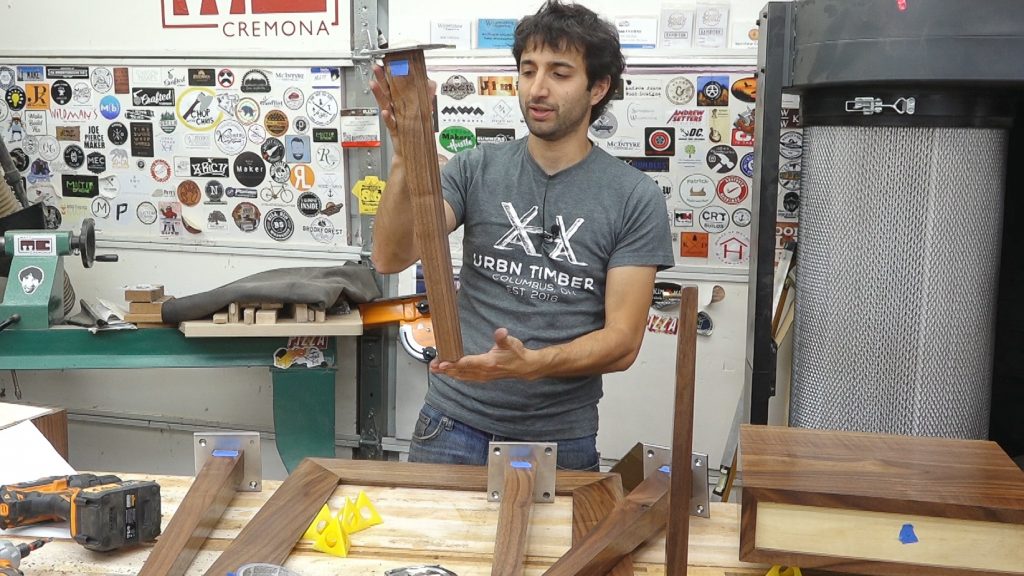
The last bit of the construction is to add the legs. These have a compound splay so I made sure to mark each leg well so I wouldn’t make a mis-cut. With the blade tipped and the miter gauge swung, the two parallel cuts can be made on each leg. Next I’ll add a taper to the inside faces of each leg. And that’s the legs. Now for some way to attach them. I’m making some mounting plates from stainless steel because I like challenging materials apparently. I’ll lay out a pair of 4 holes – the outer holes will attach the plate to the case and the inner holes will attach the leg to the plate. The holes are countersunk on opposite faces. I’ll give them a quick clean up and then mount them to the legs with the 4 middle holes. Now the legs are ready to go on once we get the case finished.
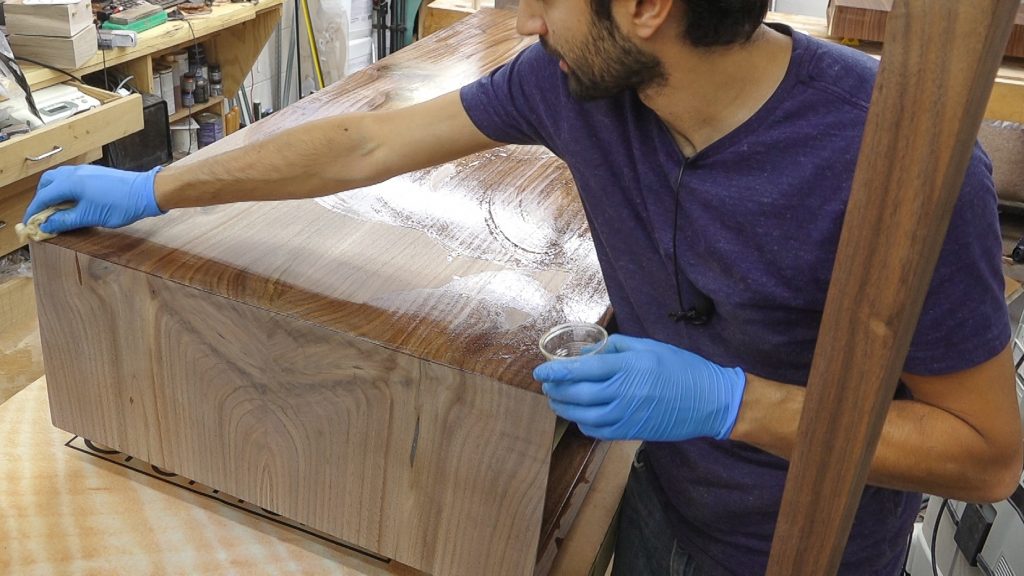
I’ve been pretty good about finish prepping as I go on this project so there’s only a little bit of detail work and finish sanding to do. I’ll wipe on a bit of mineral spirits to make sure I didn’t miss anything before proceeding with applying the finish. As is common with me, I’m using a wiping varnish. Since this dressing vanity is going to be used as an actual dressing vanity, I wanted a decent amount of protection as it needs to be able to withstand makeup, nail polish, and that lovely nail polish remover. I applied 5 coats over the course of a couple days giving everything a light sanding between coats. The 5th coat goes on super light so it tacks quickly which greatly reduces the amount of dust that can settle in the finish. A few days later, I gave everything a very light sanding with 1000grit paper to remove any nibs I could feel.
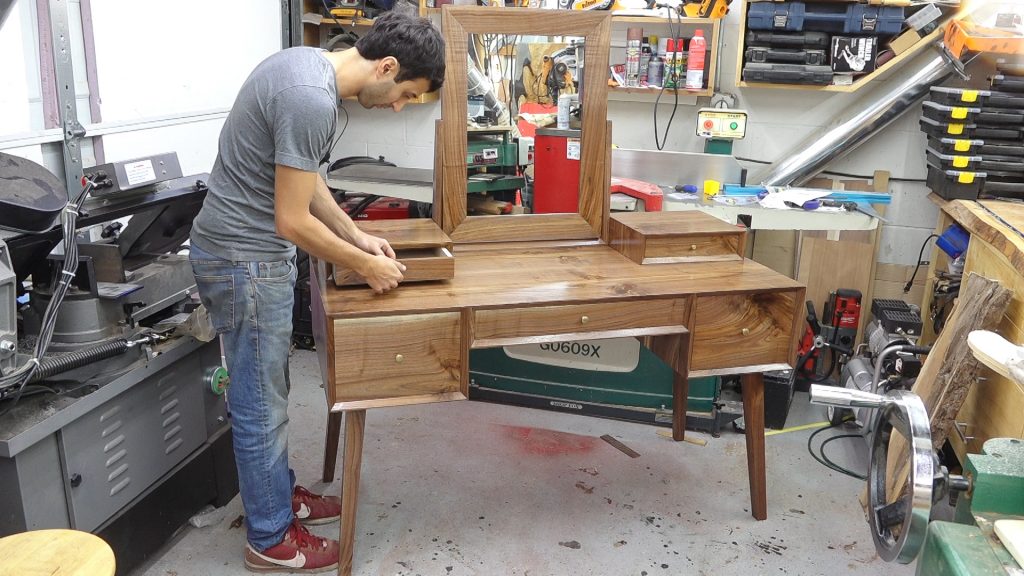
Now for the final assembly. The legs are mounted to the case via tapped holes and bolts. Next up, I’ll reassemble the drawers and add some wax to their bottoms and to the openings. I’ll cut a mirror to fit the frame and drop in a backer. For a bit of hardware, I’ll attach the components together with some brass plates I made. Lastly I’ll install these desk knobs from Horton Brasses.
PRODUCTS USED
[Affiliate links]
Triton Track Saw: http://amzn.to/2f2P85l
Triton Jig Saw: https://amzn.to/2PedA0a
Table Saw: http://amzn.to/2hXj5AC
Bandsaw: http://amzn.to/2HISAf0
Finish: https://amzn.to/2xo0Wsn
Dust Mask: http://amzn.to/2y8dl1m
Hearing Protection: http://amzn.to/2yQ0sa3
West System Epoxy Resin (Gallon): http://amzn.to/25TYH7y
West System Epoxy Slow Hardener (Quart): http://amzn.to/25TYKAr
West System Metering Pumps: http://amzn.to/1qicuEr
Push Blocks: http://amzn.to/2yQD24r
Vertical Featherboard: http://bit.ly/vertfeatherboard
3/4″ Knob – https://bit.ly/34Knob
1/2″ Knob – http://bit.ly/12-Knob
More stuff on my Amazon page: https://www.amazon.com/shop/matthewcremona


Welcome to my shop! This is a quick update to let you know what I’ve been up to. This big chunky thing is the leg

Welcome back to the home renovation. This time I’m going to be working on the kitchen island. Here is a small model of the island.

Welcome back to our home renovation. Today I am going to be working on this wall. It needs some upper cabinets and the surround for
3 Responses
Good stuff!!
Would love to build the highboy how do I go about getting plans
You can find the class here: https://thewoodwhispererguild.com/product/queen-anne-highboy/
Thanks!