
Matt's Weekly Shop Update
Kitchen Island, Barn Power – March 2024 Update
Welcome to my shop! This is a quick update to let you know what I’ve been up to. This big chunky thing is the leg
Scott Grove was in town and stopped in for a few hours to show us how to do a radial veneer pattern as well as teach us a bit of the basics of veneering.
Thank you to Certainly Wood for providing the veneer for this demo: https://www.certainlywood.com/index.php
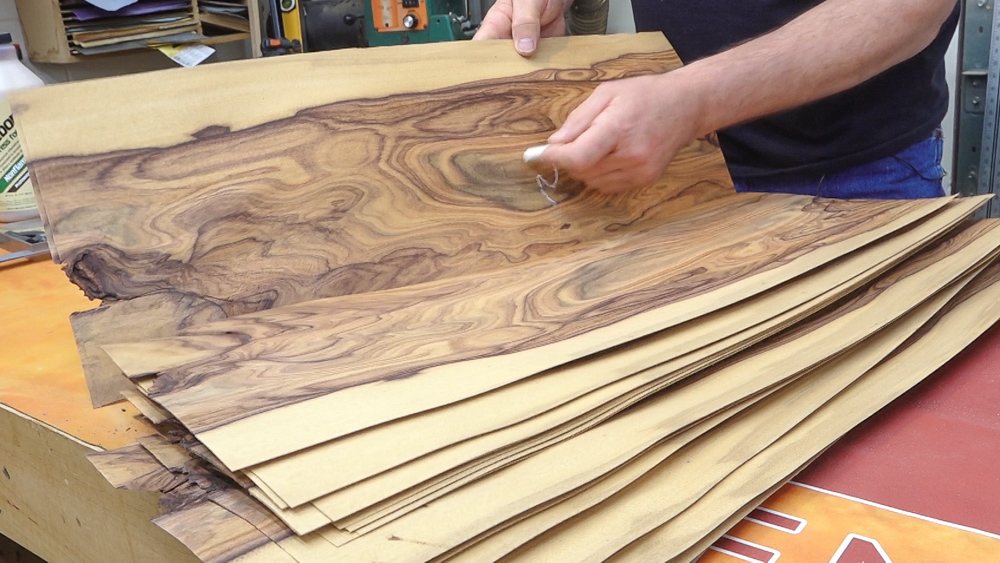
Before getting started, Scott goes through the pack of veneer to inspect and number each sheet. He’s looking for any sheets where the knife may have skipped resulting in one sheet being too thin and one of the adjacent sheets being too thick.

To determine the cut location of the radial wedges, Scott uses mirrors angled at 45 degrees to preview the pattern. The mirrors can be moved and pivoted to adjust the pattern. Once the position is set, the wedge shape is marked out.
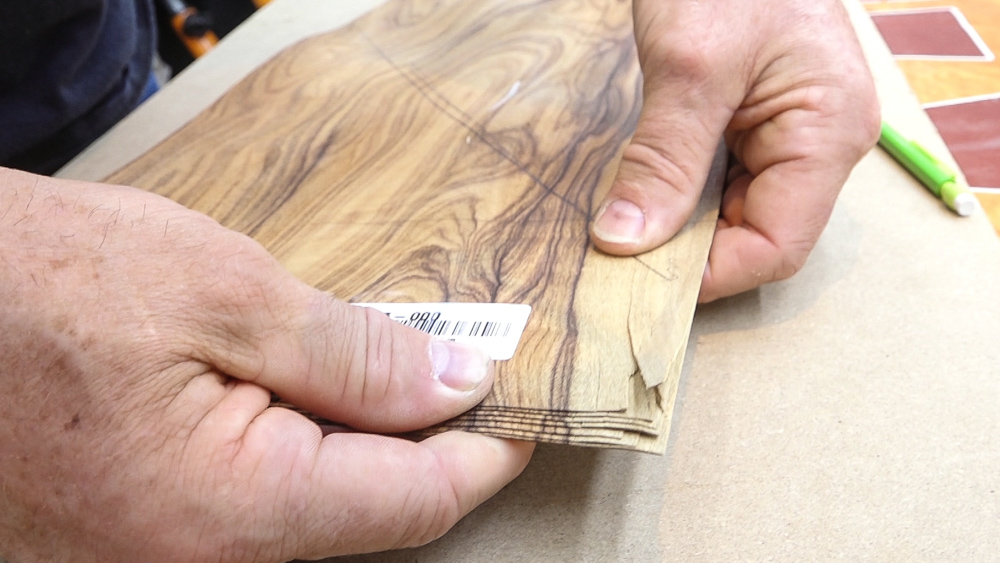
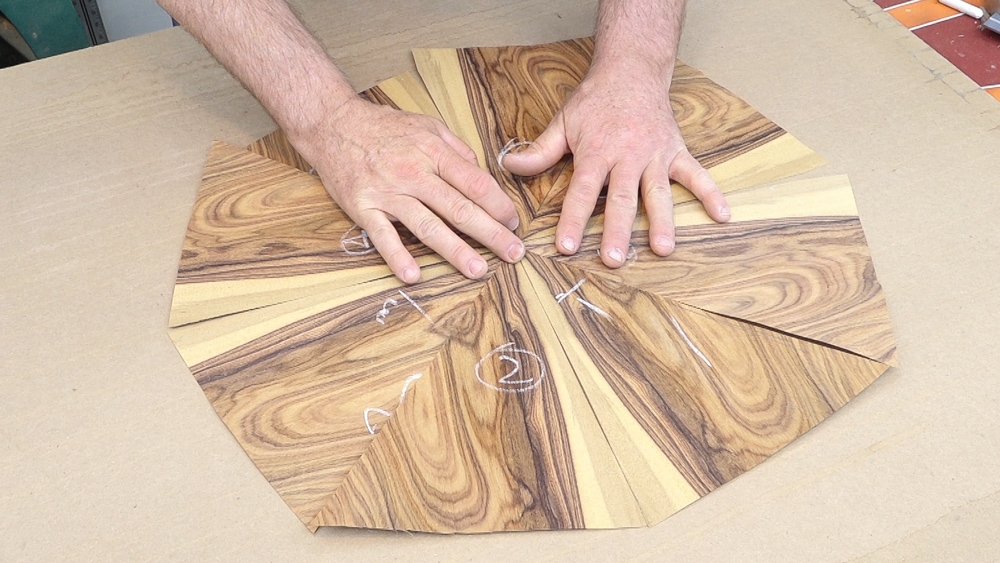
Since wood is organic, it’s common for the grain to shift between sheets. Scott goes through and aligns the grain so the point of the wedges will be uniform.
With the sheets held together, Scott makes the first cut with a knife.
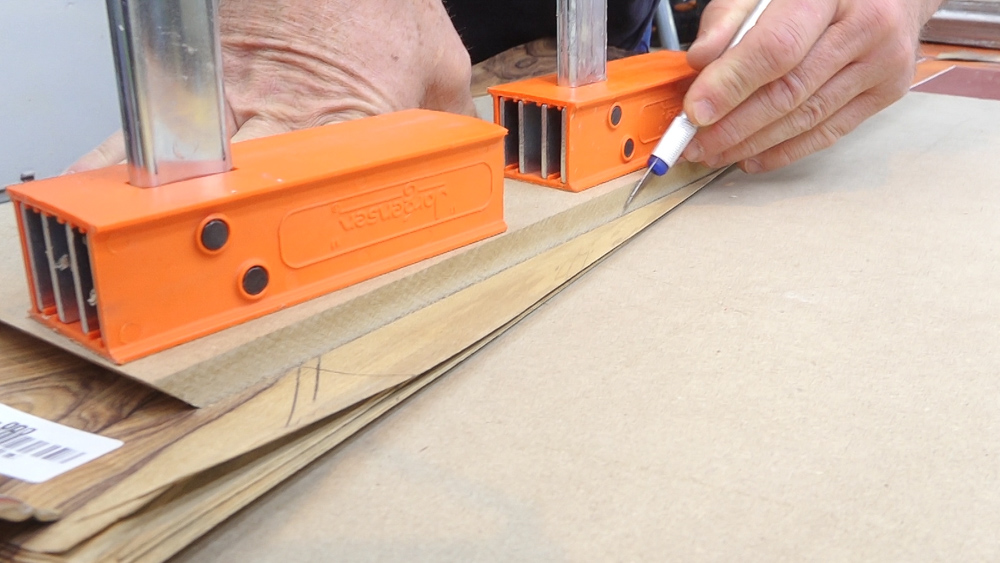
To cut the wedges perfectly, a straight edge is stuck down to a base to act as a fence and a wedge template is used to guide the knife to make the wedge cut. The template is cut to be a bit over 45 degrees.
If the wedges are arranged sequentially, the first and last seam likely wont match up very well.
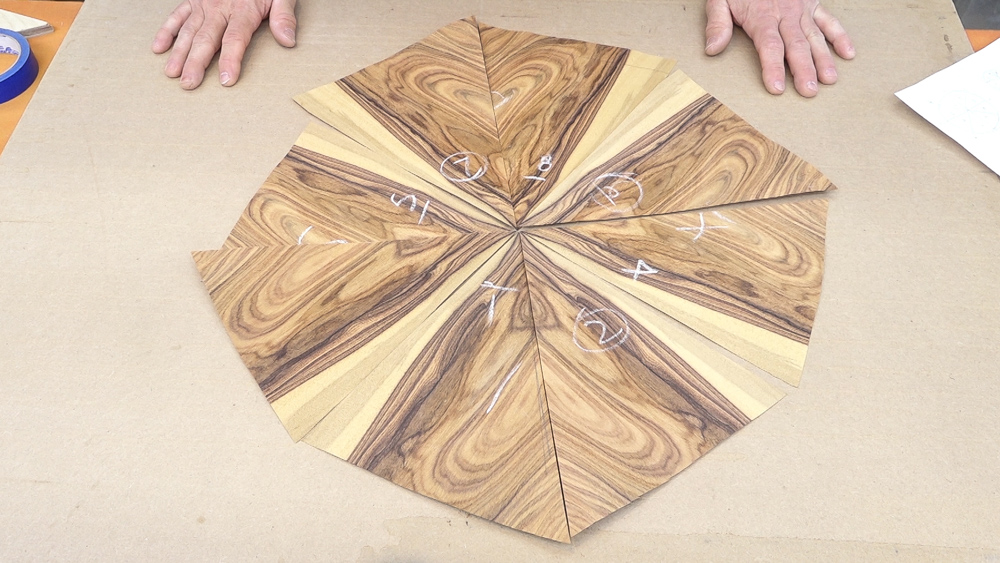
To help prevent having one drastically different seam, the pieces are mixed up a bit. This will distribute the error so no seam will be perfect but there also won’t be one seam that is drastically different than the others.
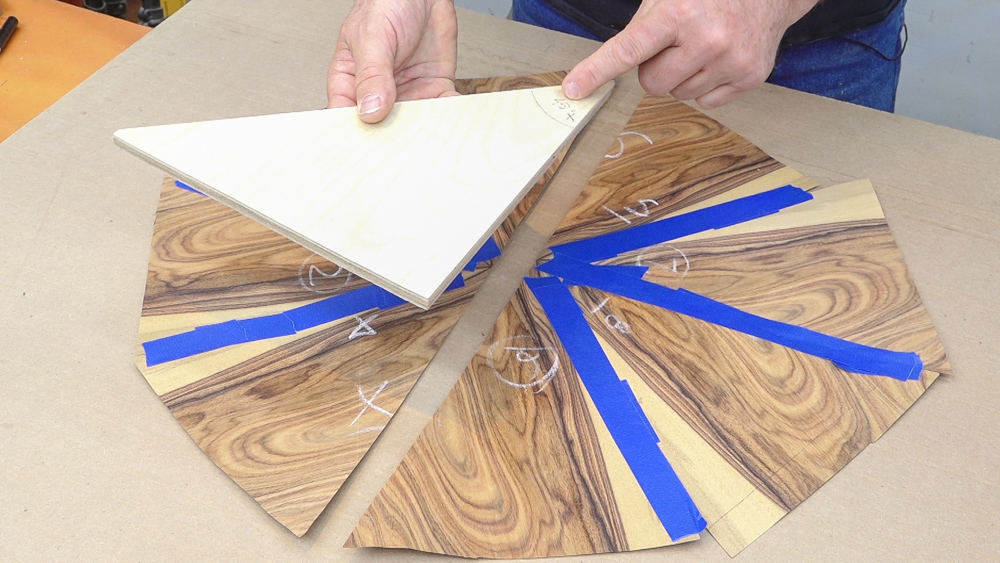
The wedges are taped together in two parts which allows for some adjustment before assembling the entire radial veneer. Since the wedges are cut to a little over 45 degrees each, the resulting semicircle is a little greater than 180 degrees. The edge which will be joined together can be trimmed to be straight with a knife and straight edge. Being a little over 180 degrees and trimming is a better position to be in than being under 180 degrees and having a gap.
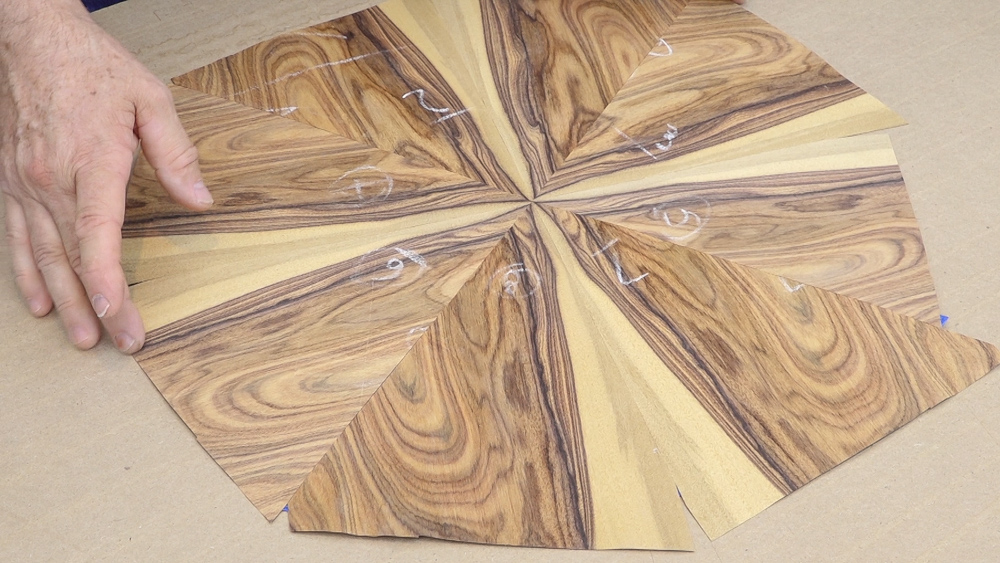
The two trimmed halves can be joined together with masking tape and the radial veneer is ready for pressing.
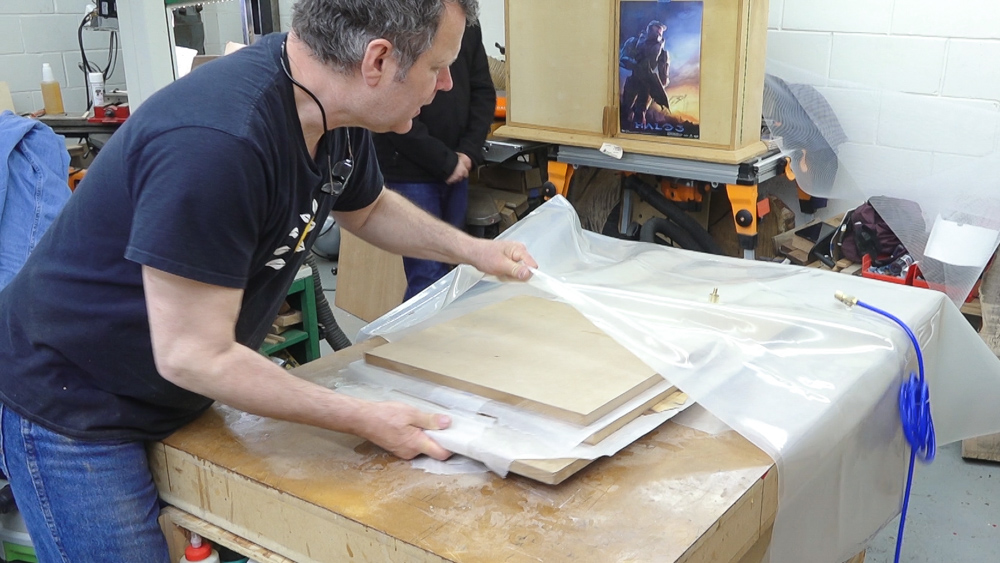
To press the veneer, Scott is using a vacuum bag which uses a vacuum pump to pull the air from the bag. The result is atmospheric clamping that evenly applies pressure to the veneer stack. Scott uses Titebond’s Cold Press Veneer glue for this. It has a longer open time than regular yellow glue and is less viscous so it can be rolled on easier.
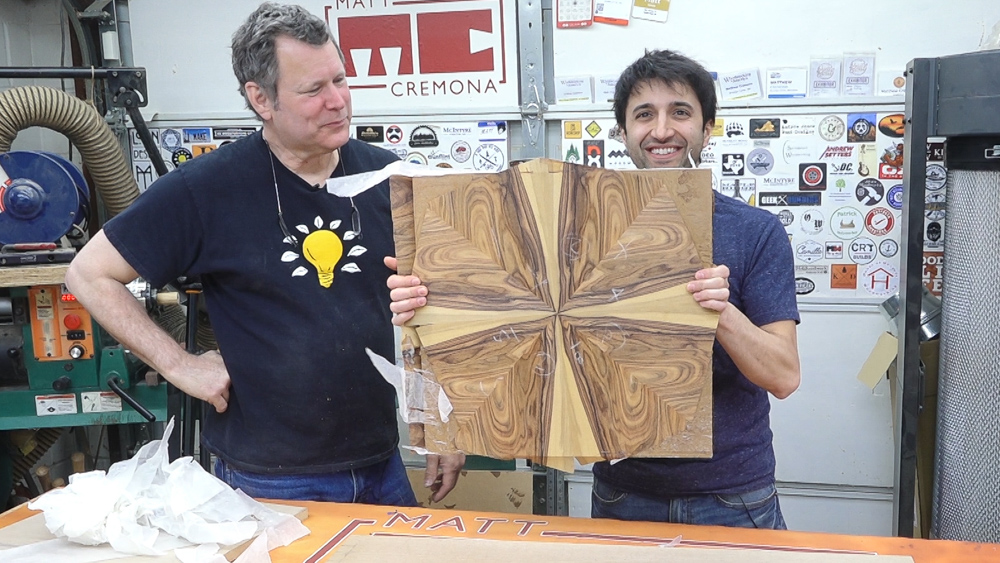
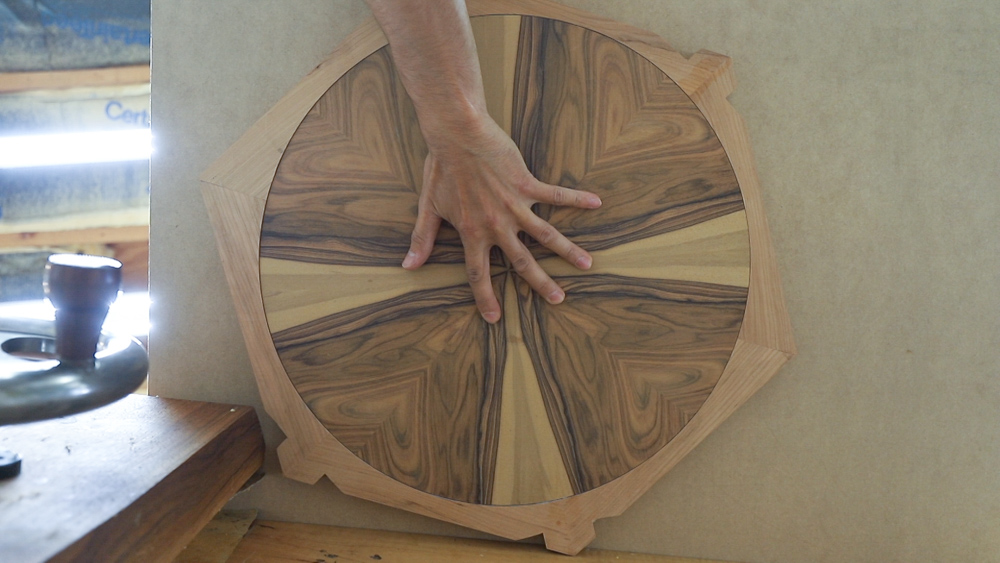
We pulled the veneered sample out of the press and here’s the result! Some veneer and a bit of knife work results in this pretty incredible pattern.
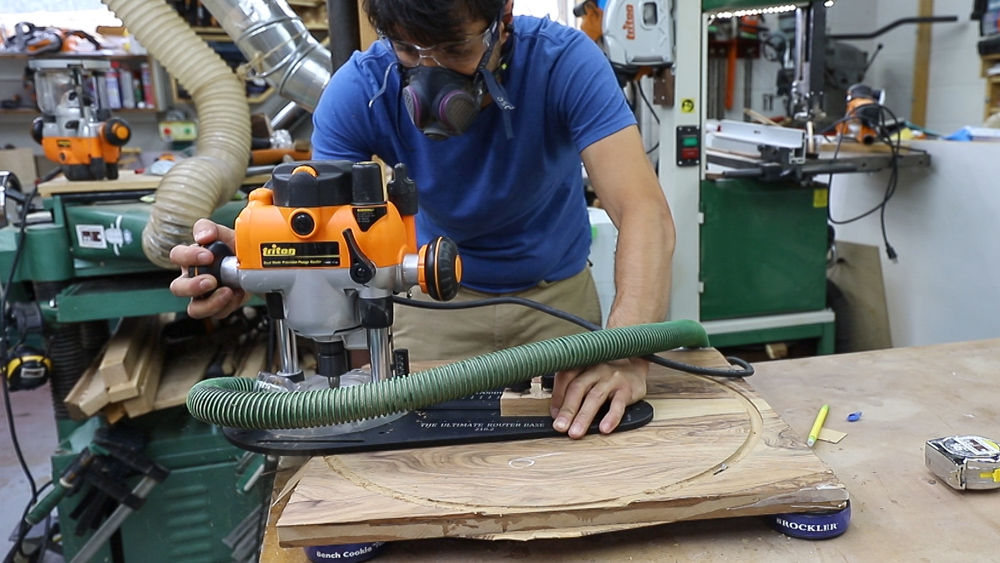
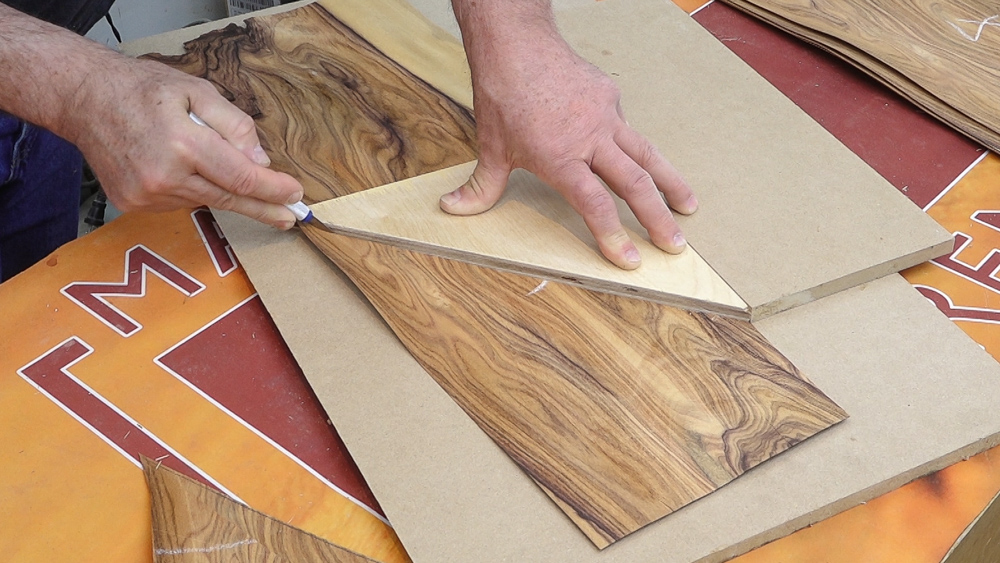
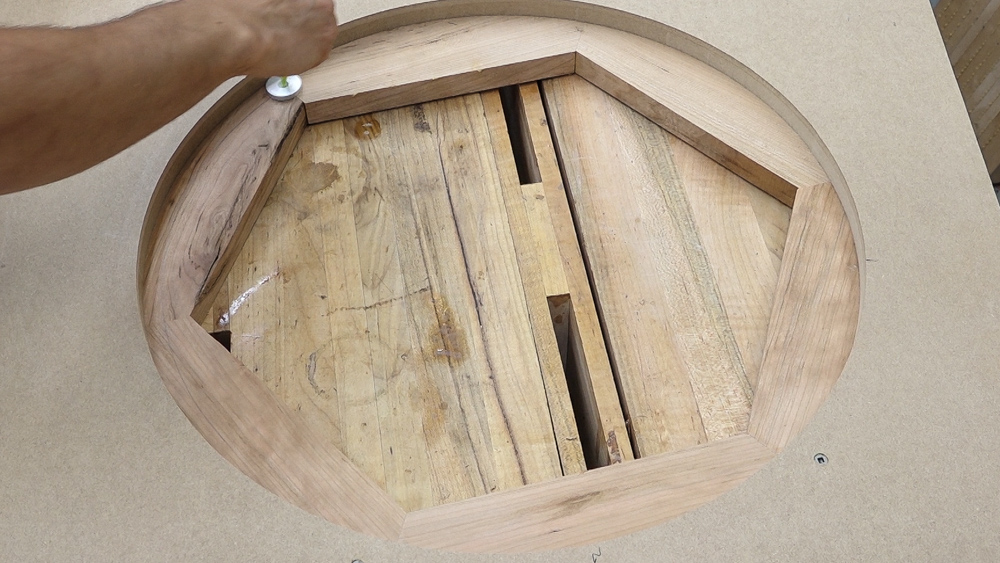
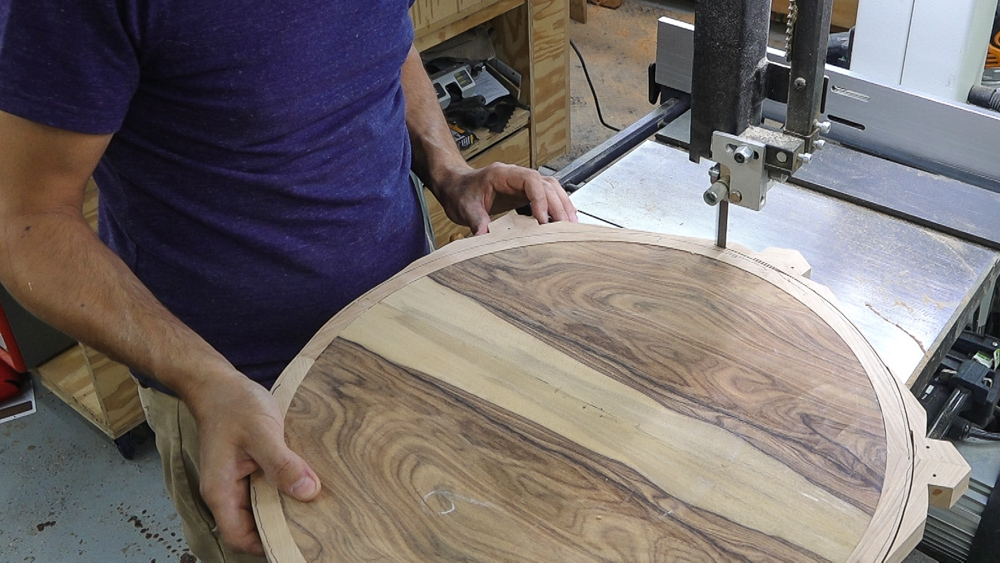
That was as far as Scott and I got that day so I’ll finishing up the example from here. First thing is to cut the field into a circle. I’m using Scott’s Ultimate Router Base as a trammel to cut the circle. I make a roughing pass, stepping through the thickness and once I’m all the way through, I’ll bump the trammel in a hair and make a clean up pass in one go.
Lets run through the process of adding a solid wood edge to this thing. Using a ½” diameter pattern bit I’ll route around the radial veneer table top or whatever this might be to create a template that is ½” bigger. The most important thing here is to keep the router bit bearing pressed against the workpiece. As I’m going around, I’m pulling on the router base handle to keep the bit tight to the workpiece. The outer perimeter is what we’re after so if the bit pulls away, we’ll gouge the reference area of our template. I’ll just go around once so I don’t risk the bit wandering on multiple passes. The remaining waste can be cut away with a jig saw and flush trimmed.
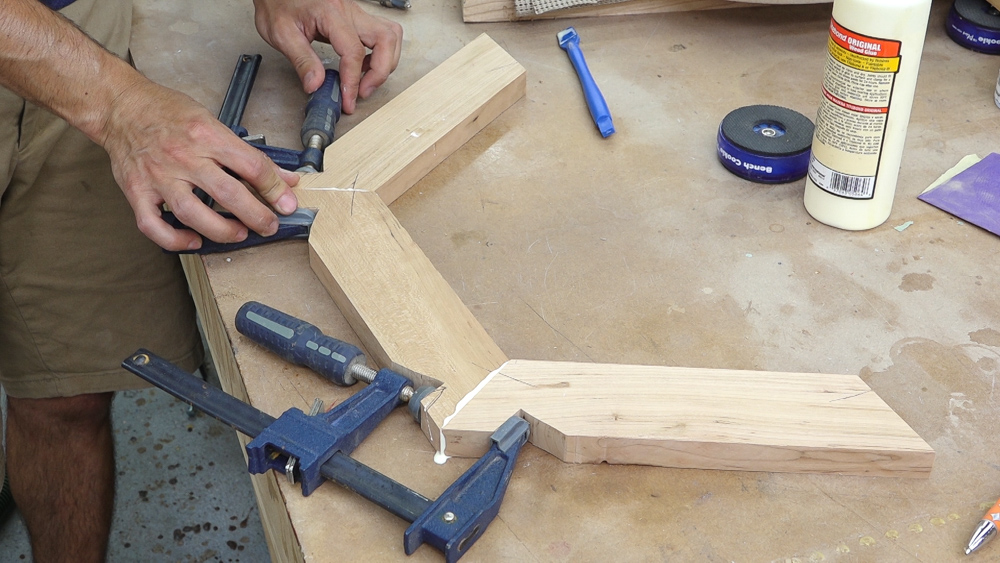
With the template ready, I can start working on the edging stock. It will be made up of segments. I’m going with a 6 segment ring just to shake things up a bit since the radial veneer is 8 segments. I’ll assemble the ring in two halves so I’ll cut some clamping areas into the waste near the corner and get those assembled. Once the glue sets, the segments can be screwed to the template.
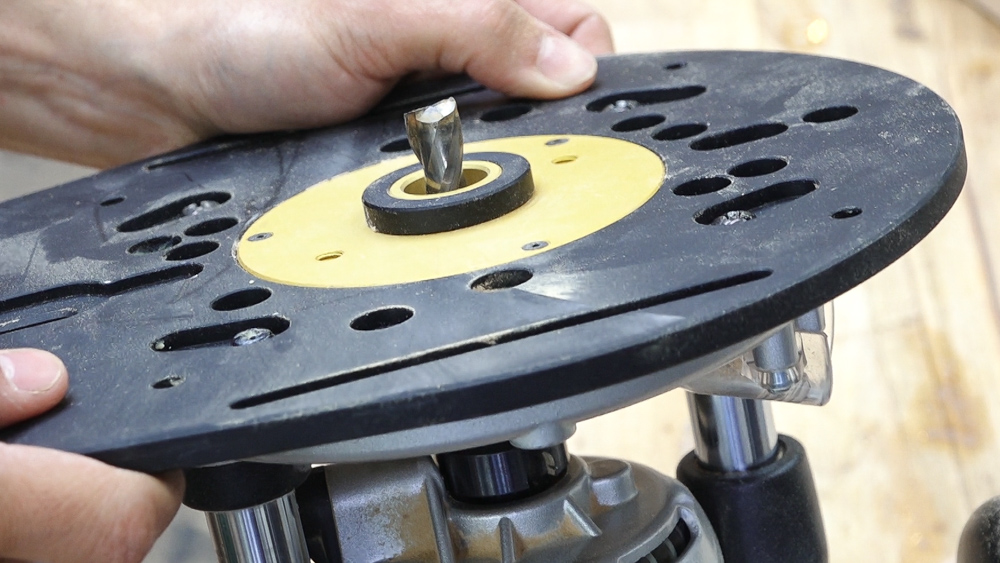
This 1” disc comes with the router base and makes it easy to draw the cut path of the router. This allows us to draw a cut line and remove the bulk of the waste first before routing.
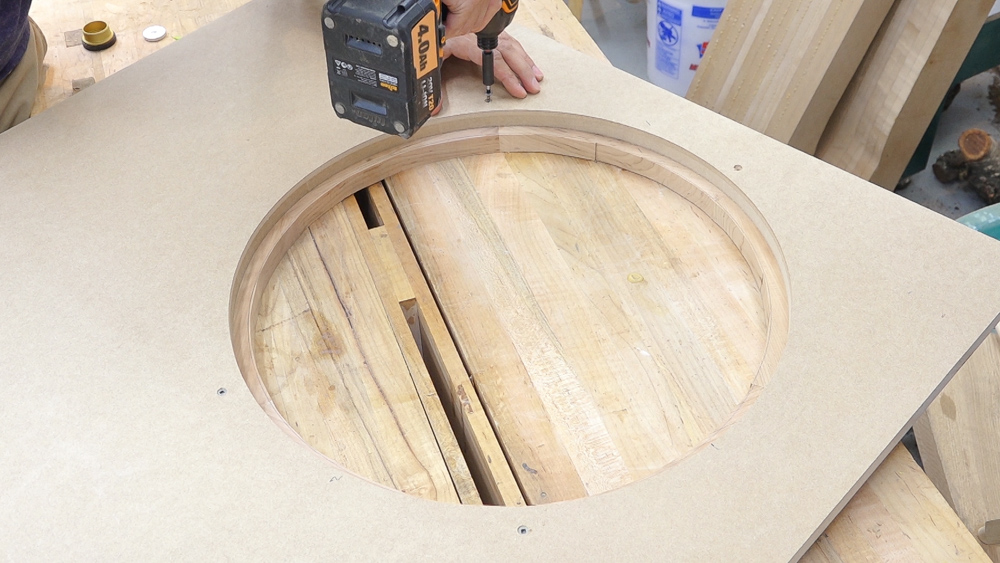
The half rings are trimmed and reattached to the template. And now we can route them to perfectly match the veneer thing.
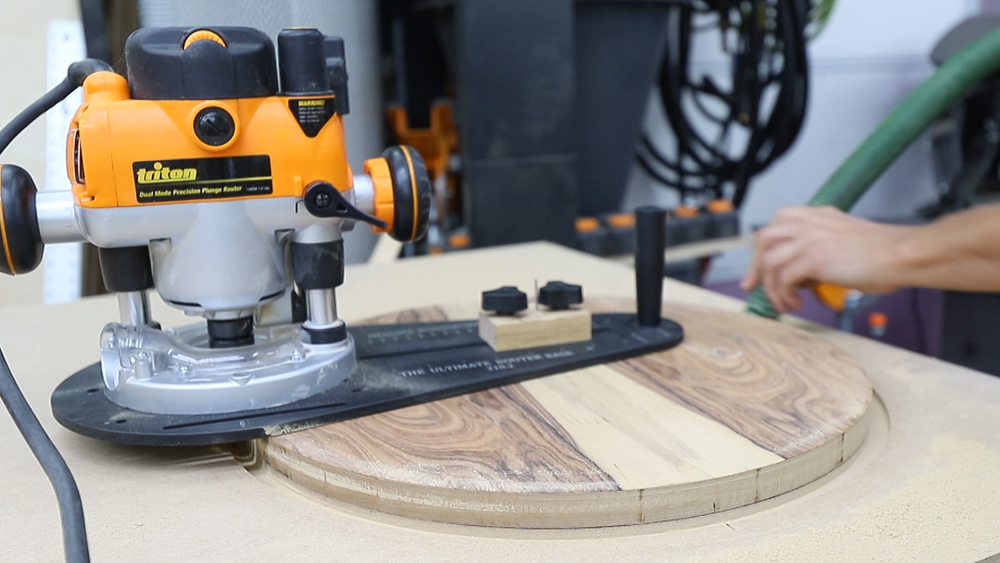
This is a ½” router bit and a 1.5” guide bushing. The offset between the bushing and the edge of the router bit is ½” – Exactly how much bigger our template is than the veneered circle.
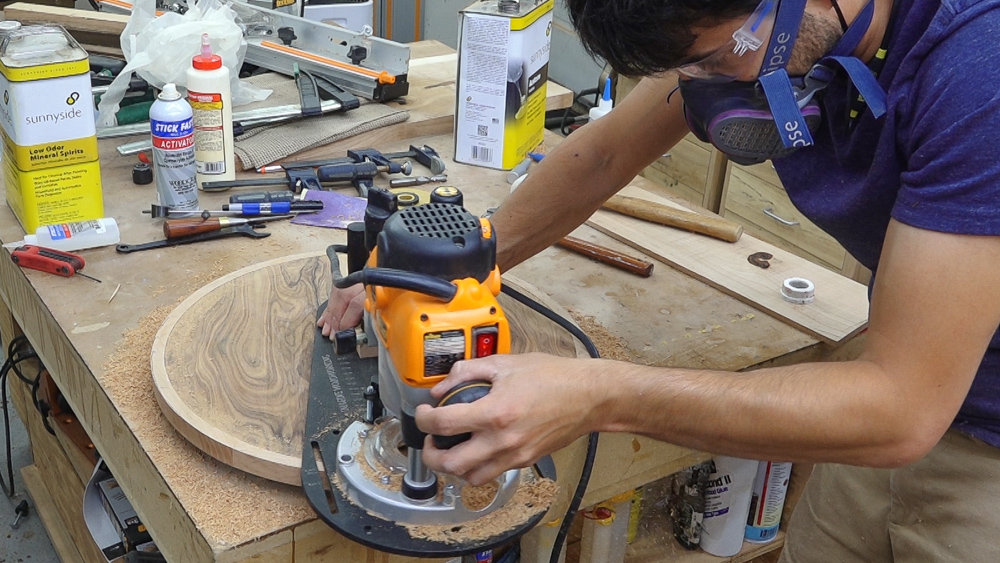
All we have to do now is route around the template with the bushing riding along the template. Once this is cut, the banding can be glued to the veneered field.
The glue is set up so I’ll get this thing out of the clamps and cut the banding to final size. I’m going for a ½” wide band so I’ll use a compass to roughly mark the width and trim it at the bandsaw.
Then it’s back to the trammel using the same center point in the veneer to trim the banding to final size. I’ll again do a roughing pass in a couple steps and then a clean up pass with the trammel radius reduced just a bit.
Scott’s Website: https://imaginegrove.com/
Ultimate Router Base: https://imaginewoodworking.com/products/the-ultimate-router-base
Use coupon code “matt” to save $25 on the Ultimate Router Base
Scott’s Book on Hardwood Edging: https://imaginewoodworking.com/products/hardwood-edging-and-inlay-for-curved-tables
My Waterfall Table Class: https://thewoodwhispererguild.com/product/waterfall-glass-resin-tables/
Triton Router: https://amzn.to/2YEOlOm
Triton Jig Saw: https://amzn.to/33wgaXJ
MiterSet: http://miterset.myshopify.com/?aff=10
Titebond Cold Press Glue: https://amzn.to/33sZqAT
1/2″ Pattern Bit: https://amzn.to/2YZxCkf
1/2″ Spiral Bit: https://amzn.to/2H1JJac
Hearing Protection: https://amzn.to/31uSf9i
Dust Mask: https://amzn.to/2H49Xsz
Welcome to my shop! This is a quick update to let you know what I’ve been up to. This big chunky thing is the leg

Welcome back to the home renovation. This time I’m going to be working on the kitchen island. Here is a small model of the island.

Welcome back to our home renovation. Today I am going to be working on this wall. It needs some upper cabinets and the surround for