
Matt's Weekly Shop Update
Kitchen Island, Barn Power – March 2024 Update
Welcome to my shop! This is a quick update to let you know what I’ve been up to. This big chunky thing is the leg
I’ve been working on the serpentine chest of drawers for a bit too long, and I’m looking for a quick side project to knock out while I mentally get back into the serpentine chest. So for a little bit of fun, I am going to do something fairly quick but still productive — a good combination.

In front of our house, we have this bench that came with the house. It could use some new slats and is actually already missing one slat. My plan is to make some new slats for this bench. The slats on here are about four feet long, about 5/8 of an inch thick, and about 2 1/2 inches wide.
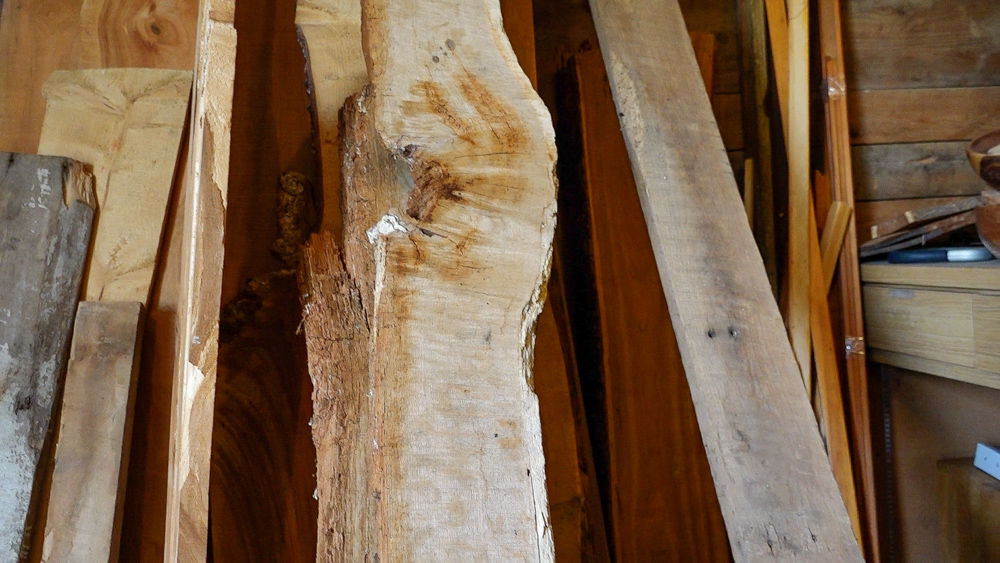
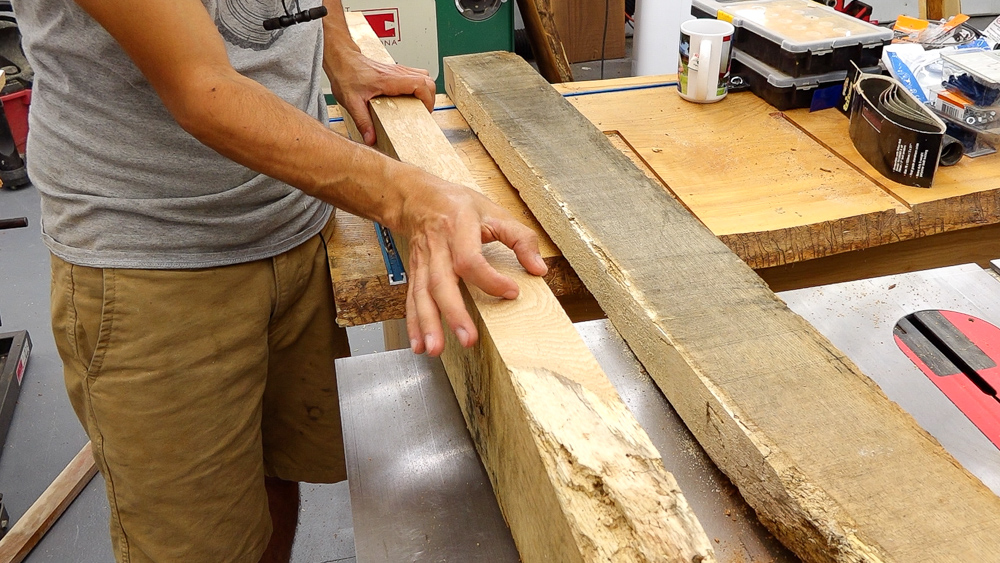
First, I am going to find some stock for this. I keep a collection of boards out in my barn, and I have two white oak pieces which will work pretty nicely for this. I should be able to get all the slats out of these two pieces because I can resaw them into a few slats. These pieces happen to be quarter-sawn because they were from towards the center of a rotted out log.
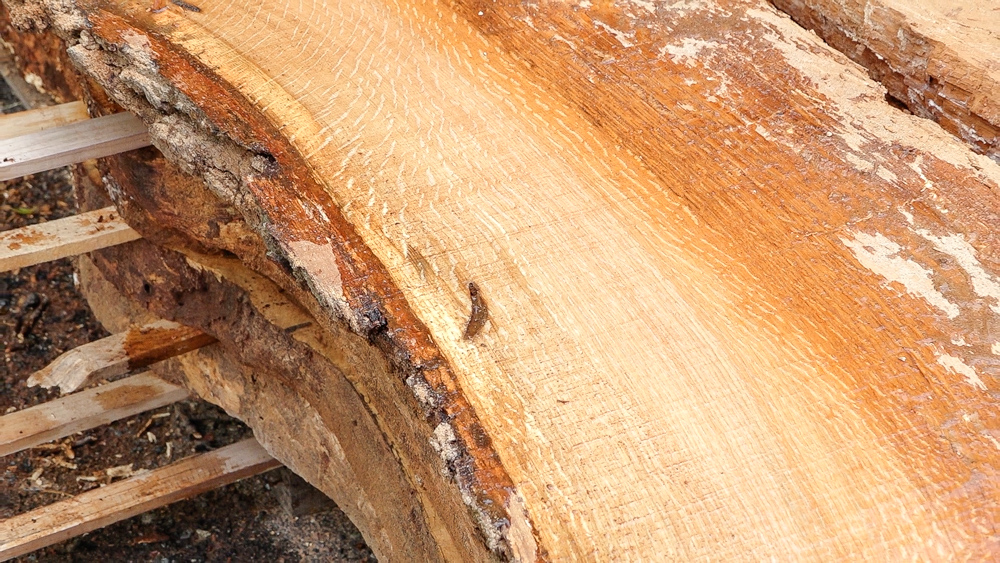
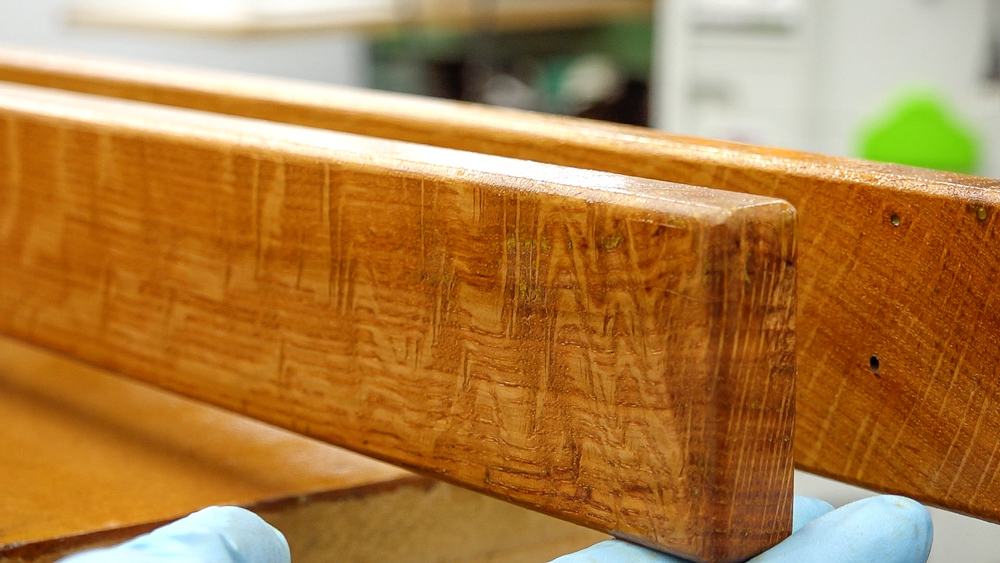
This side of the white oak pieces has some pretty heavy ray fleck from that quarter-saw. It looks like a tiger with all of that ray fleck.
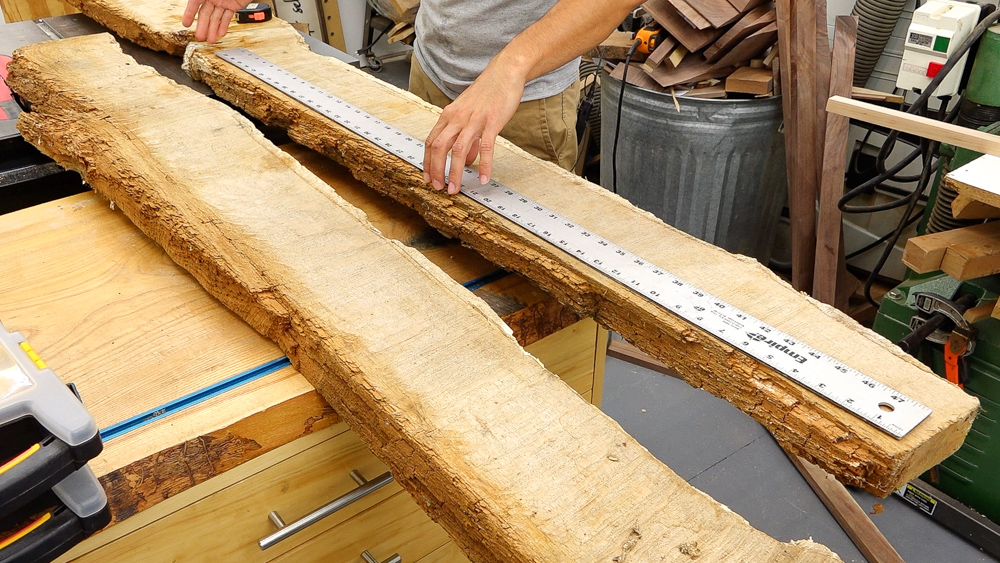
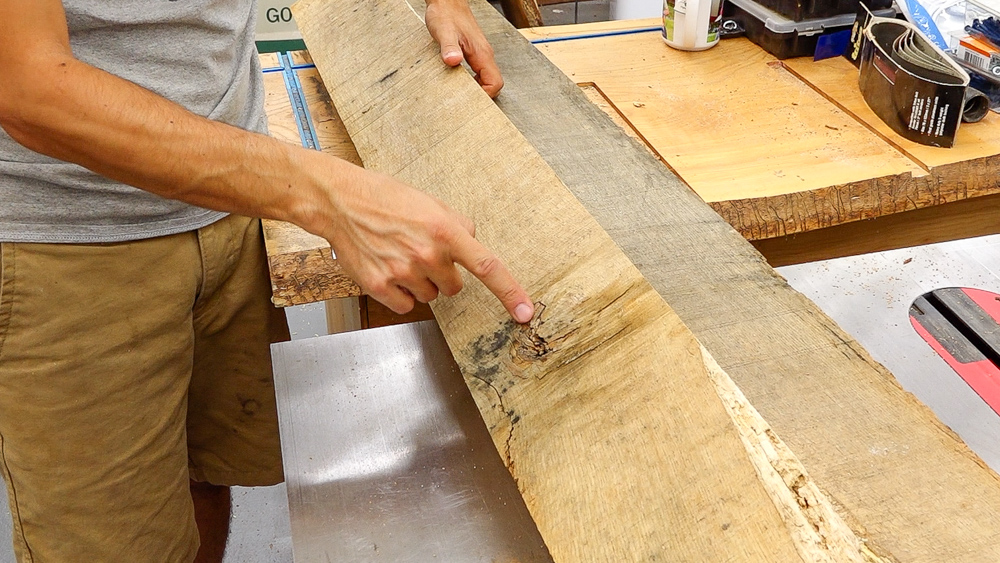
It might be a little bit tight to get all my slats out of these two pieces. These pieces are a little over 2 1/4 inches thick, so in theory I should be able to get three slats out of the thickness. If I get 100% yield, one piece will produce six slats. Potentially, I can produce 12 slats between both pieces. This ruler is the size of a slat, 2 inches by 48 inches. When I flip the ruler over to check measurements, I’m getting kind of close to the rot, so we will see if I can get all 12 slats out of these. But I only need 7, so I’m not too worried about it.
So with that rough idea in mind, I’ll make my quick cross cuts to separate the two big chunks, and then draw a straight edge on either side to rip them to the rough width. After that, I’ll see about resawing them.
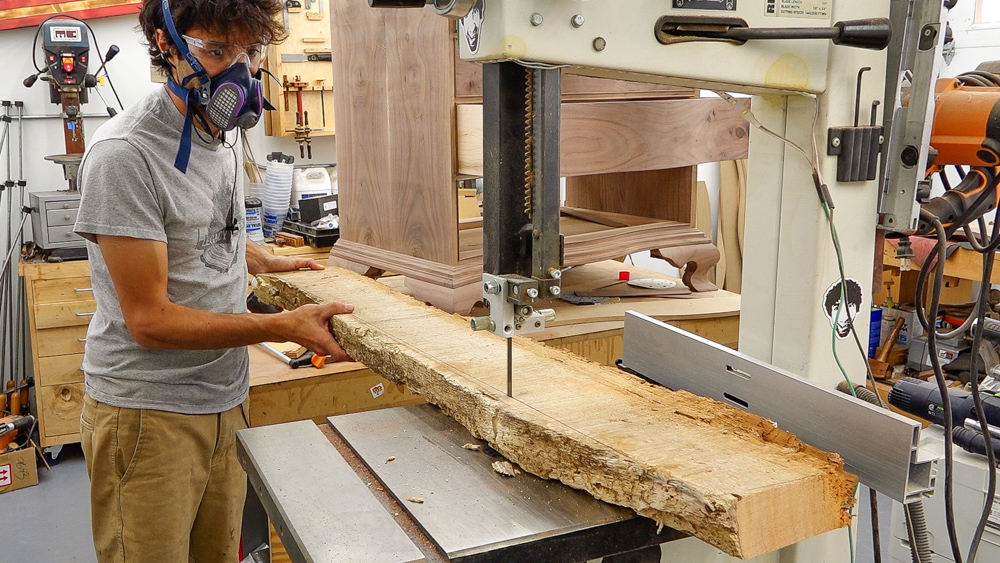
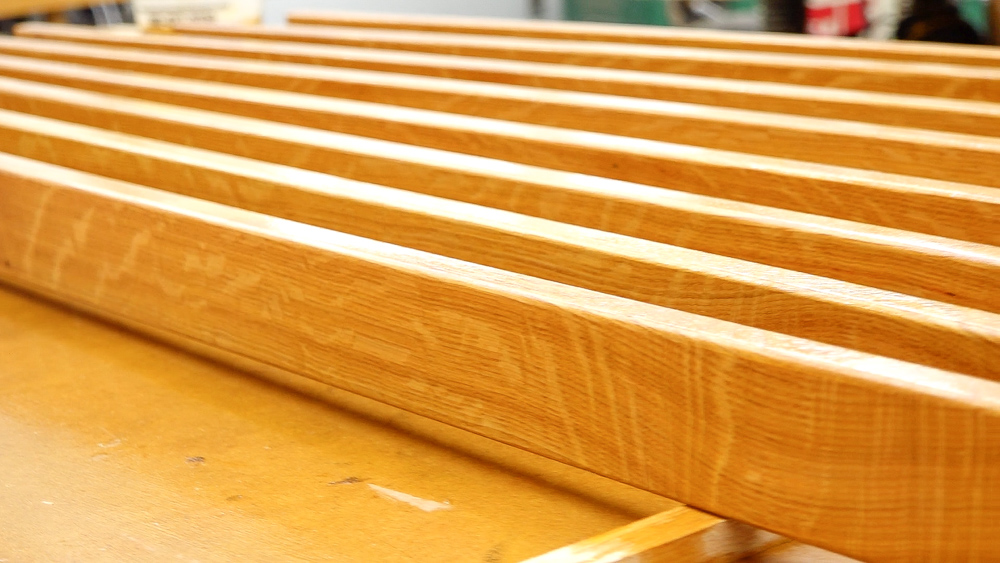
Here are the rough blocks. I’m going to resaw these first and then rip them into the individual strips versus trying to rip a blank out of here and then rip those into all the strips. That way, as I’m heading through the block, if the rot starts to disappear as I get further through it, I’ll have more width to work with.
Another thing I could do is rip the strips off the edge, but I’m feeling a little crazy, and I want to have the quartersawn look in the slats, because it seems ridiculous for a bench. That means this will be a bit more work, but it’s not the best quality wood anyway. For instance, this piece pictured above likely won’t produce any slats on the bottom face, and I’ll probably only get one or two layers out of it.
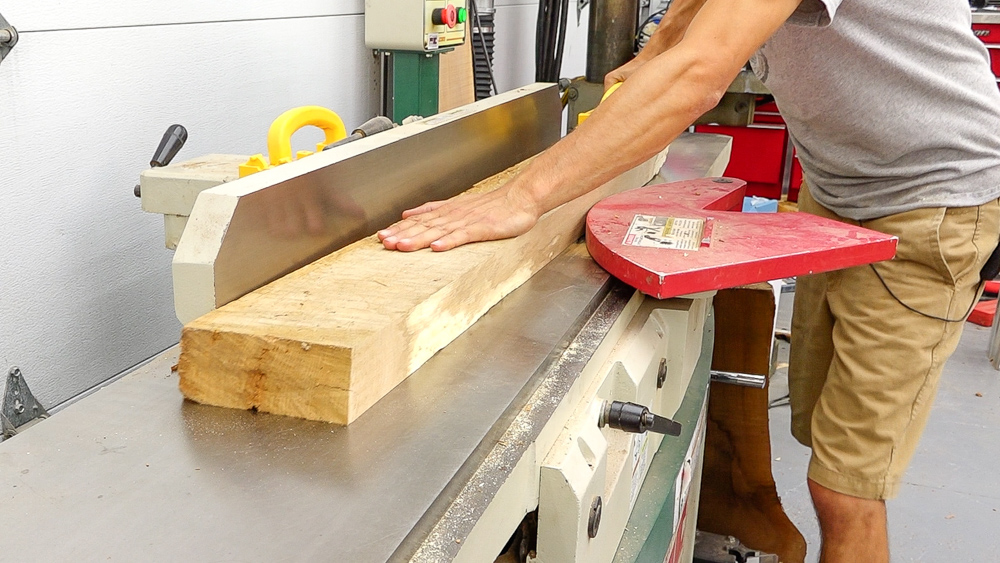
Next I will give this a quick skim over the jointer to clean up both faces. After that, I’ll head over to the bandsaw and start resawing.
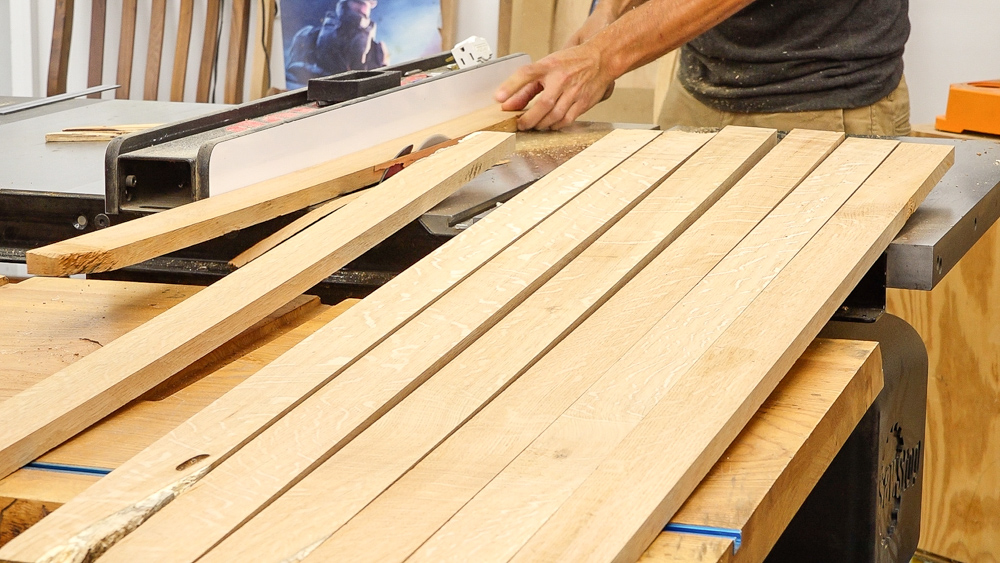
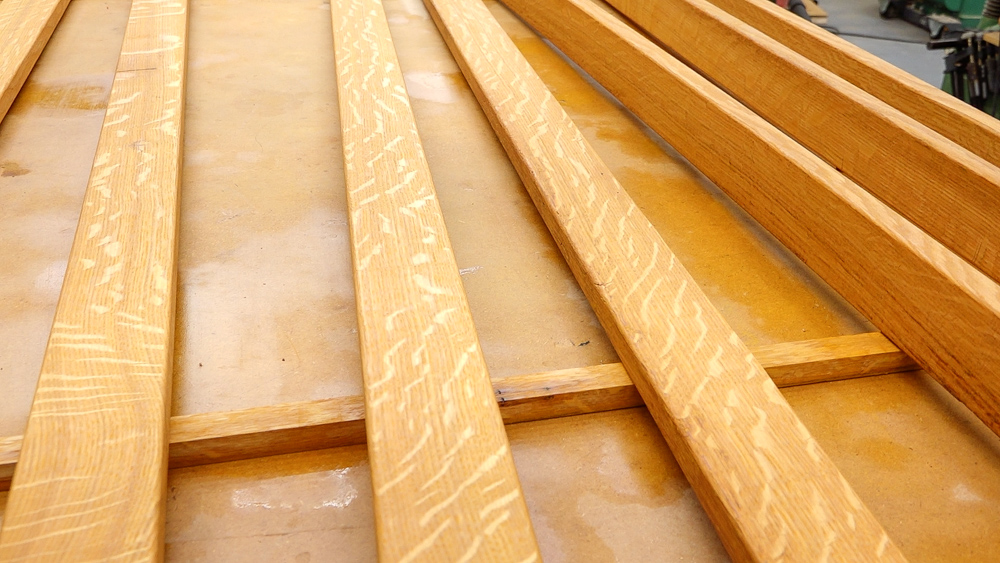
I ended up with eight strips. So I will go ahead and finish these up. I’ll get them cut to length, do some sanding, and then a little edge profile.
I’m going to do a very simple 1/8-inch round over on all sides and the ends to soften things up. And that’s basically it for the woodworking.
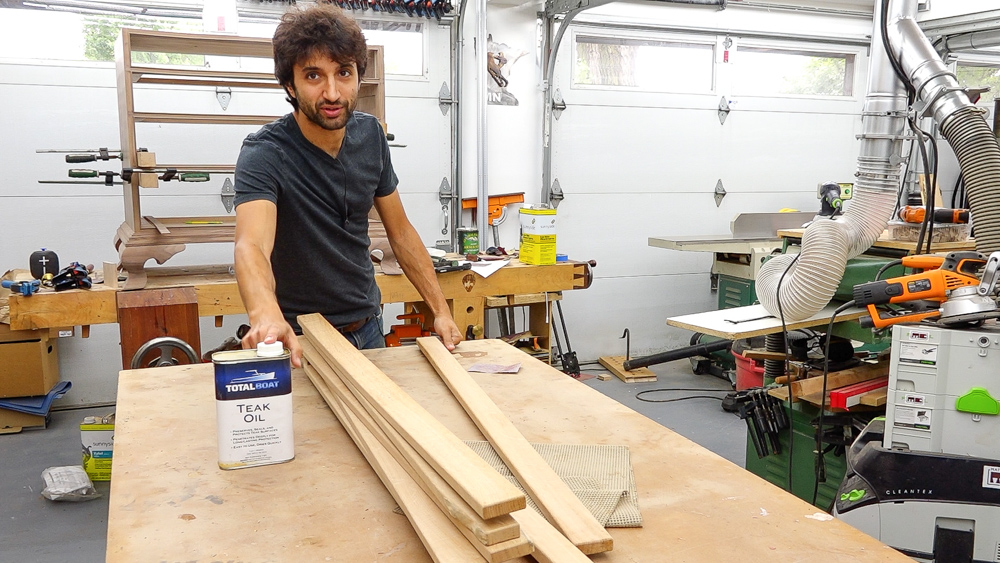
I’m going to use TotalBoat’s teak oil as finish for these slats. When it comes to outdoor finishes, there’s two ways to go. You can go with a finish that is going to require more frequent maintenance, but will be very easy maintenance when you have to do it. Or you can apply a finish that doesn’t require a lot of maintenance, but when you do have to actually refinish it, it’s a lot more work. The way I decide which way to go is how complicated the project is in the refinishing phase. If there’s a lot of inside corners, for example, refinishing that project will be a longer process, one that I personally don’t look forward to and will probably never actually do, meaning the finish will fail and the project will ultimately look bad. On the other side, if it’s something that you can slap on a new coat of oil every season, that’s probably a better option for a more complicated project. So for this project, I am going to use a teak oil just because it’s a little easier and I know that I will actually brush on a coat of this every year rather than refinishing each individual slat.
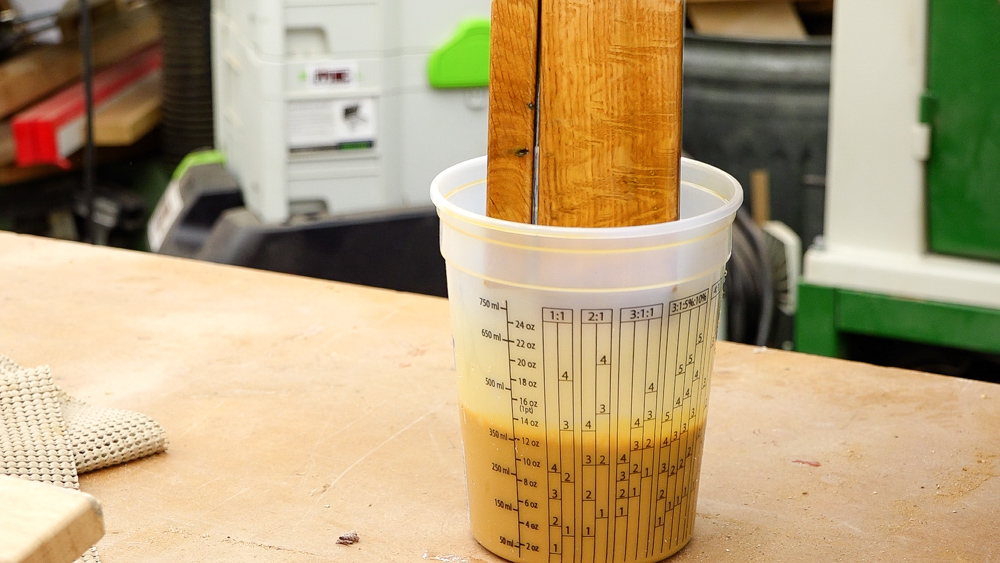
So let’s get some finish on these things and see how they’re going to look. Another thing you’ll see with wood that’s part of an outdoor project, the area that’s going to suffer the most amount of wear will be the end grain. To avoid this, you can coat the ends of all your boards with an epoxy, which will seal those end fibers and keep them from absorbing and releasing water, which causes them to crack and split. I’m going to soak the ends of these boards in a teak oil to make sure I get a lot of penetration into the ends.
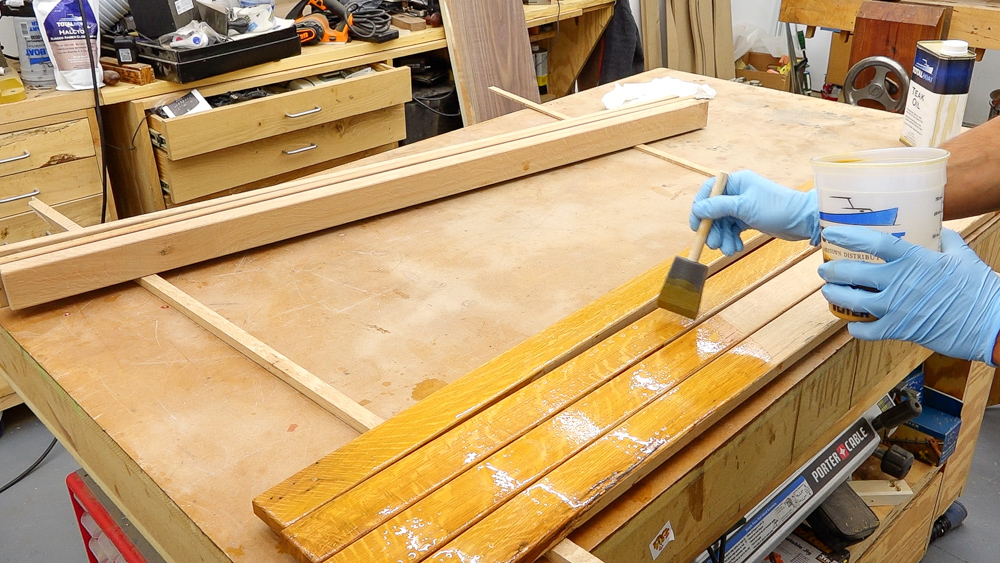
Another nice thing about this finishing technique is it doesn’t really require much skill. All you have to do is flood the surface and let the wood drink up whatever it wants to.
I’ll let them sit overnight and see how they look the next day. I did put this coat on fairly heavy, so we’ll see if they need a second coat. Given how thirsty the wood was, a second coat is probably not a bad idea.
I think this one is my favorite because it’s got this crazy squiggly grain. They are still looking a little dry, so I’m going to give them another lighter coat. I don’t need a whole lot of build, I just want to make sure it has as much oil as it could possibly take at this step.
That made a really nice difference. The finish is a little more uniform now, and there’s probably about as much oil on there as it’ll take. I did have to wipe down some of the excess oil after about half an hour, but these are looking pretty good.

Next let’s go tear down the old bench and get these ridiculous things installed. I’m going to reuse all of the hardware because I liked the patina the bench. This bench was definitely painted red at some point, and whoever painted the slats got some paint on the metal pieces of the castings. I think the patina on the cast pieces is going to match nicely with the fun patina on these bolts.
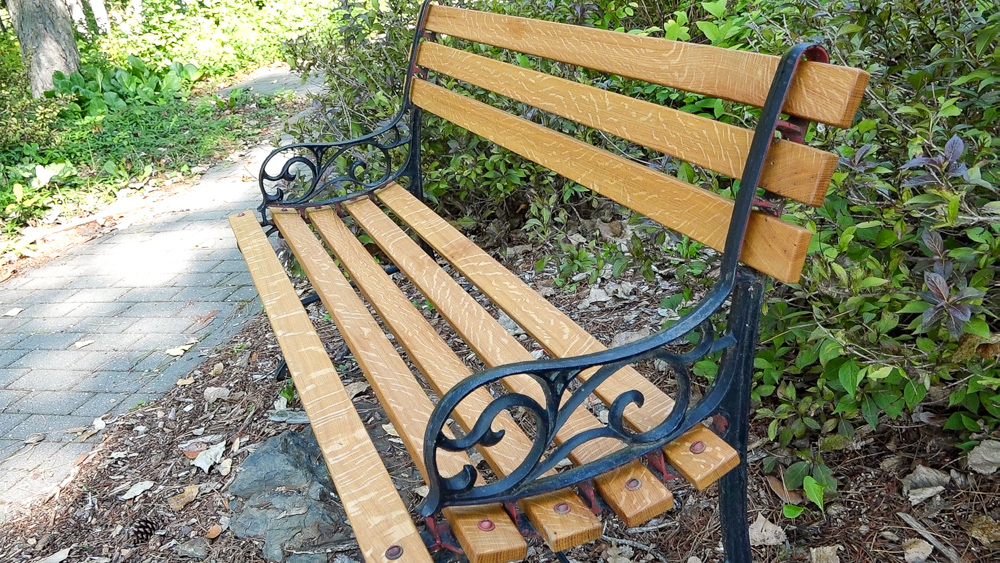
It’s crazy how much nicer it looks now. I really like this patina look against the white oak. It’s a little drastic right now, but as the wood ages, it’ll mellow out a bit, and it’ll blend together a bit better. You can see the ray fleck, which is nice.
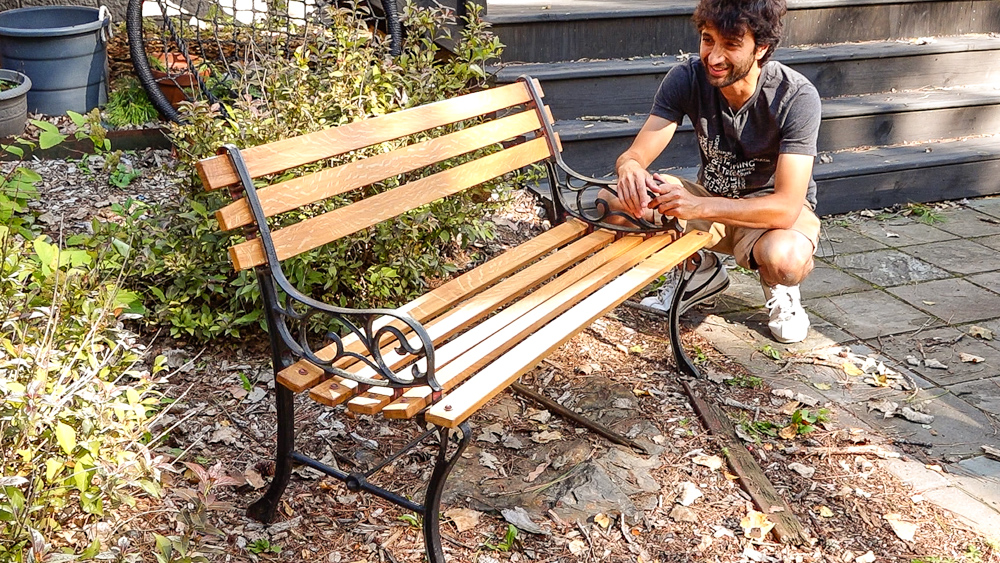
This bench will look much better as people pull up to the house now, compared to the bench that was falling apart. And it is actually pretty comfortable. One of the things to keep in mind when you’re doing a bench with slats is that you don’t want the slats to be too thick, because that will make them really stiff. You want them to have some flexibility so that when you sit down, it conforms to your body better and makes it a lot more comfortable. Incidentally, it turns out I cannot count because I thought seven slats were required for this. I made an eighth one, just as an extra, but it turns out I do need eight slats for this bench. So that’s going to do it for this one. If you have any questions or comments on the bench or anything back in the shop, please feel free to leave me a comment.
Products Used
Triton Jig Saw: https://amzn.to/2PedA0a
Push Blocks: http://amzn.to/2yQD24r
Router: http://amzn.to/2hXj5AC
Bandsaw: http://amzn.to/2HISAf0
Combo Square: https://amzn.to/3bdqbhh
Table Saw Blade: https://amzn.to/3pBN2sa
https://www.totalboat.com/product/teak-oil/
10% off your first purchase from totalboat.com with coupon code Cremona
Welcome to my shop! This is a quick update to let you know what I’ve been up to. This big chunky thing is the leg

Welcome back to the home renovation. This time I’m going to be working on the kitchen island. Here is a small model of the island.

Welcome back to our home renovation. Today I am going to be working on this wall. It needs some upper cabinets and the surround for