
Matt's Weekly Shop Update
Kitchen Island, Barn Power – March 2024 Update
Welcome to my shop! This is a quick update to let you know what I’ve been up to. This big chunky thing is the leg
Welcome to my shop, and welcome back to my series on building this serpentine chest of drawers.
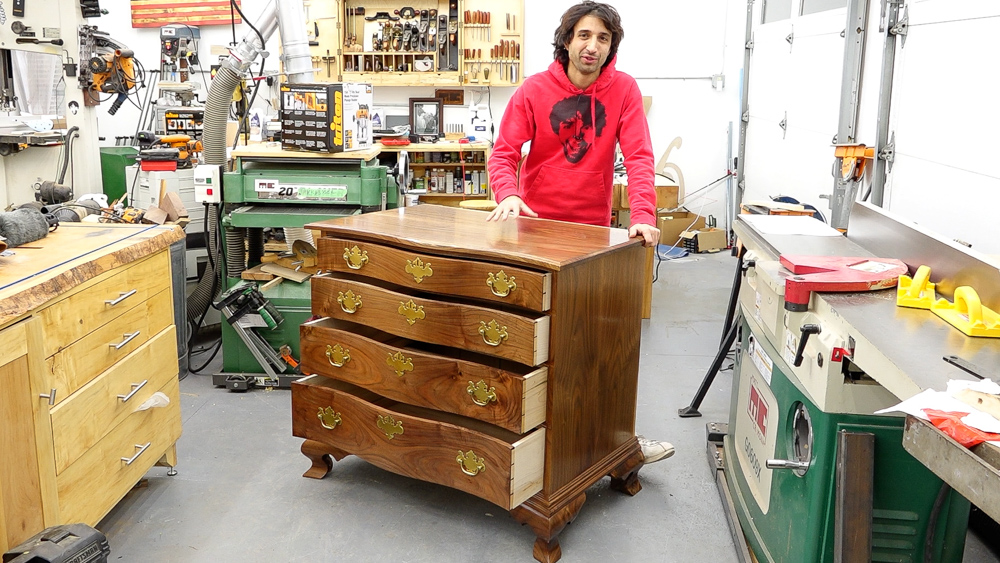
Last time we finished up the casework, got the serpent profile cut in the front, and added the bead detail, which frames out all the drawer-openings. This time we’re going to make these serpentine drawers, complete with angled dovetailed joinery.
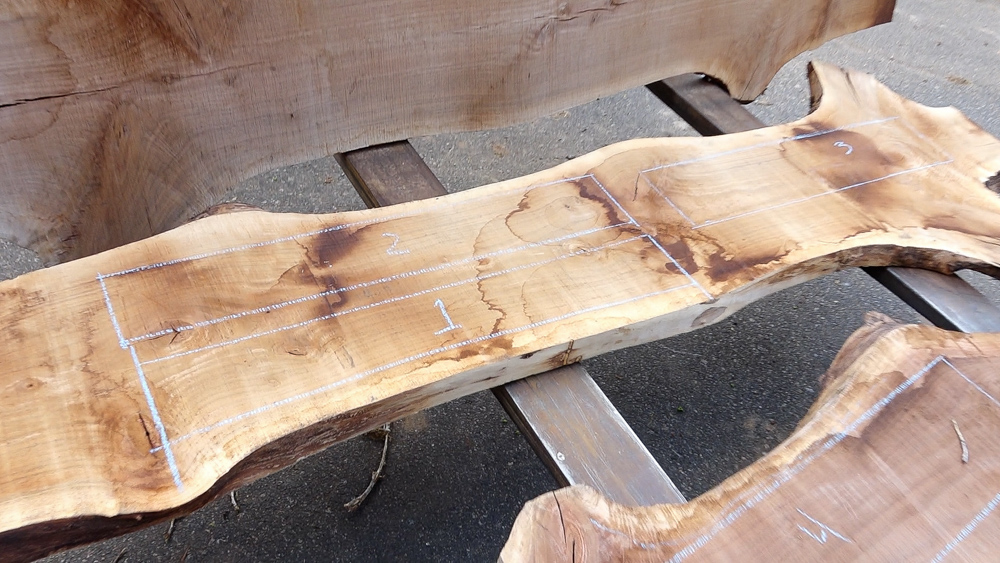
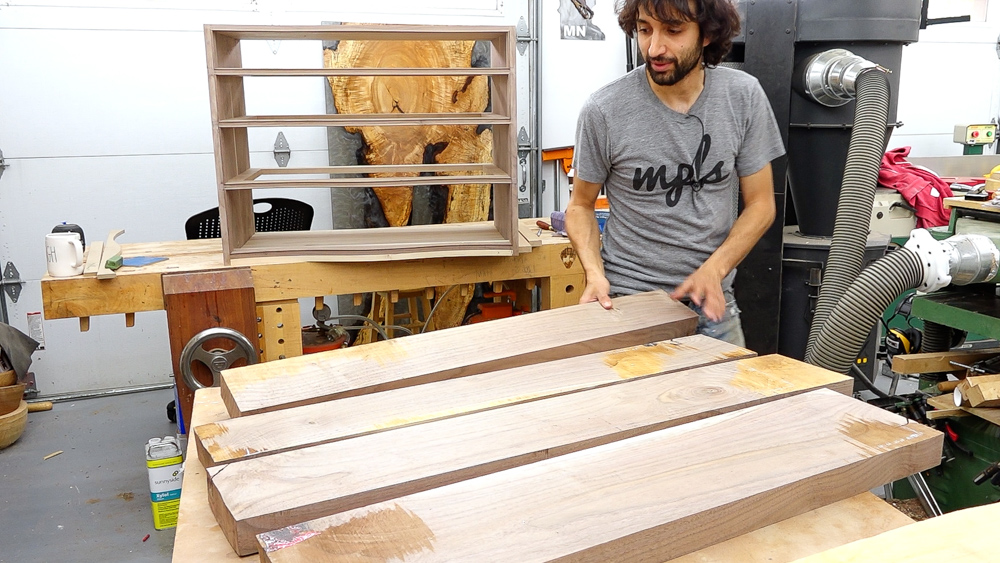
Let’s jump back, look at some wood, and cut up some slabs. I just laid out my 4 drawer-fronts on this slab. A few things to think about with these particular drawer-fronts. One of the more unique and interesting considerations with these fronts is the fact that we’re going to be cutting a curve into them. So what’s going on on the face of this slab is not what’s going to be in the actual finished piece for the low spot of that curve. Because of this, we want to pay attention to what’s going on on the underside as well. I have already flipped these slabs around to make sure that the backside is going to be what I want. I’m trying to avoid larger defects, but I want to incorporate some figure as well. I am also avoiding sapwood, because that’s not really a look I’m going for in this piece.
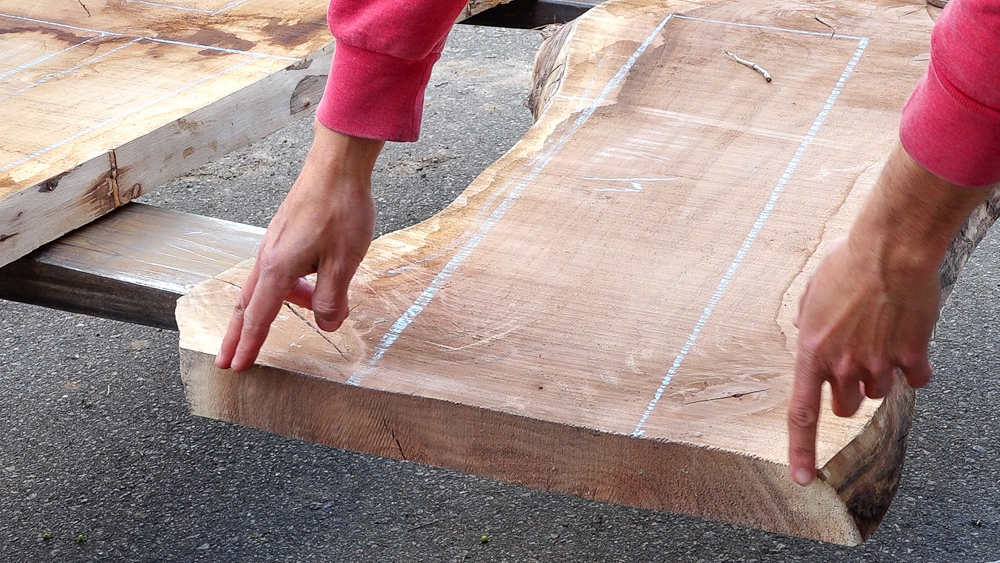
I have my sap-lines marked out, so I can follow them. When it comes to sap, you can see I’m laying out my drawer fronts on the narrow side of the board, or the sappier side, which was towards the outside of the log. This way, as you come straight down, you’re going to go into more hardwood and avoid getting any sapwood in there. If I laid it out the other way, as you come down from where you think the edge of the sapwood is, you can have sapwood in the back side of the board. So laying it out this way allows you to make sure that eliminating sapwood on this face eliminates sapwood completely.
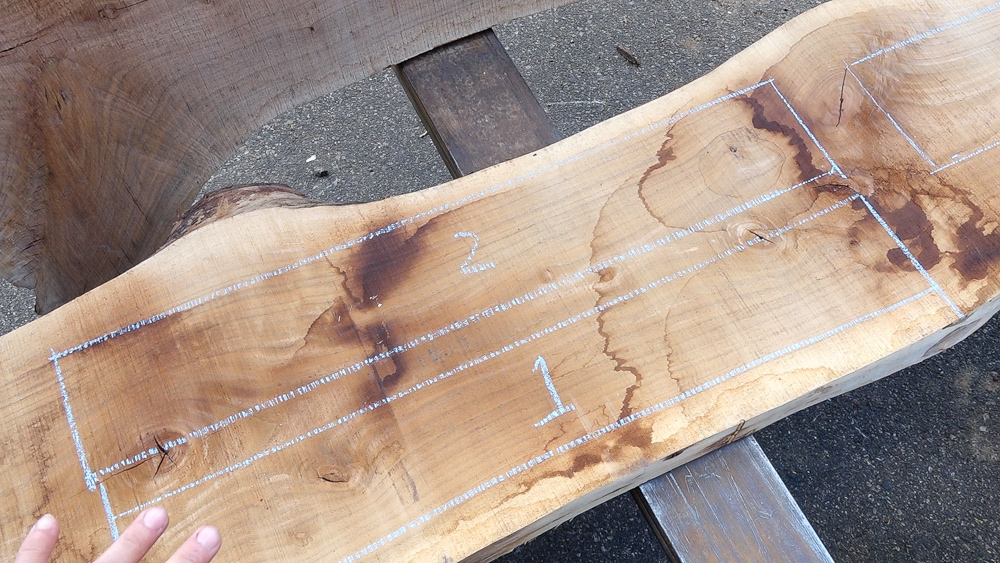
These are fairly straight-grained, so it’s going to be a more uniform, clean look to the front façade of the drawer-fronts. However, I do have some little hints of figure here and there.

There’s a little bit of crotch-figure on the corner of number 3, and a knot on the other corner of 3, which should produce some more figure as we go down into the actual wood that’s there.
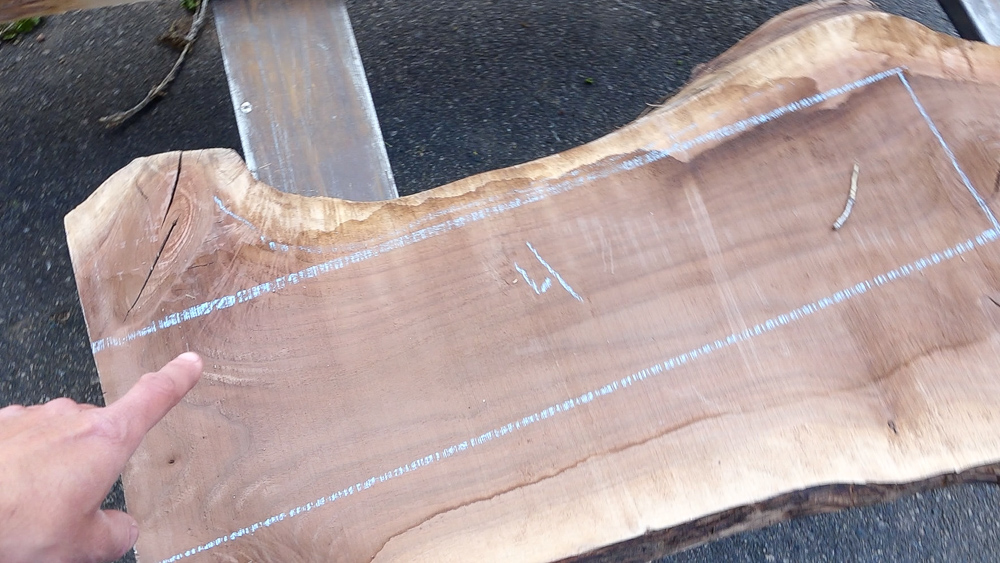
Similarly, over here there’s a little bit of figure here for drawer-front number 4, but for the most part, it’s really straight.
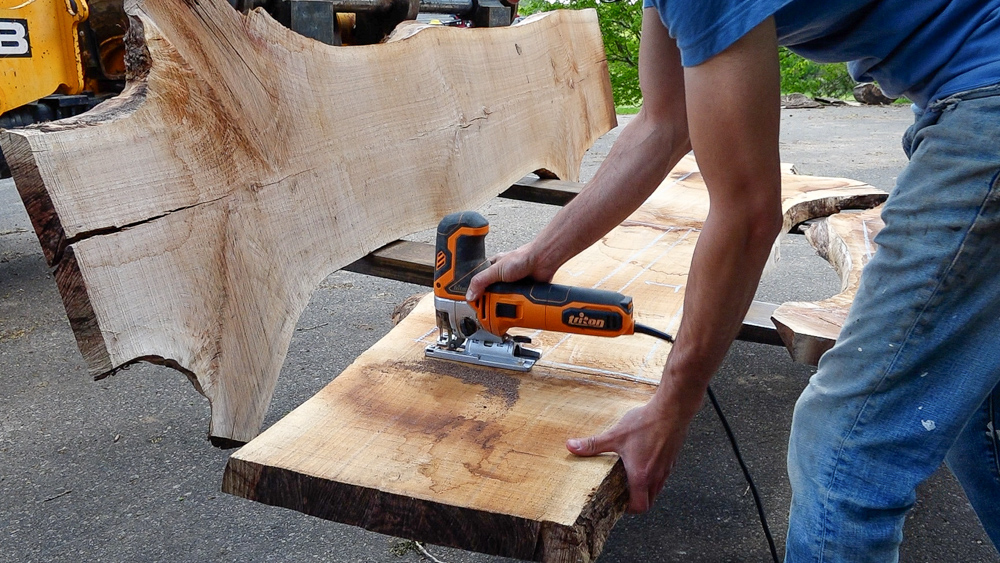
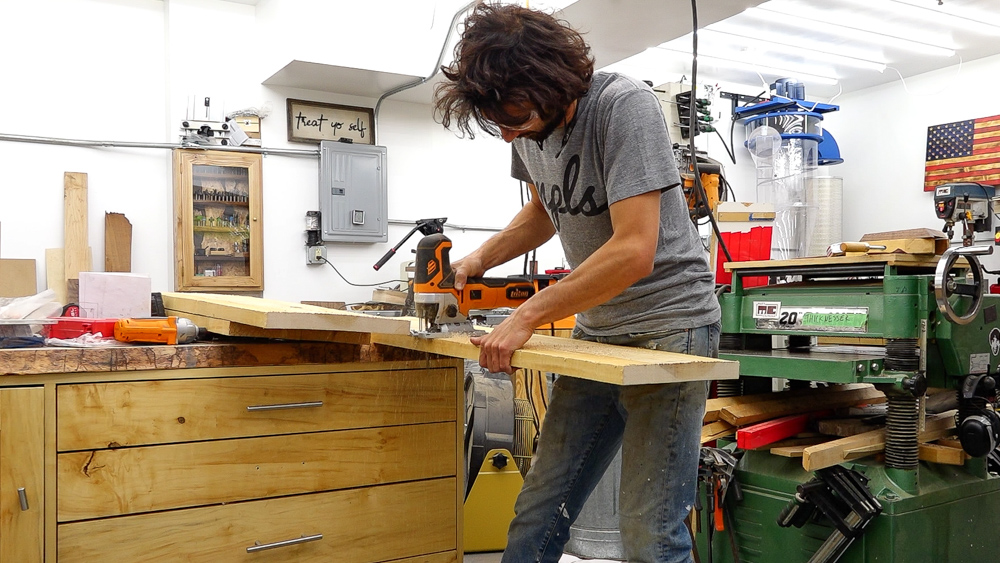
I’m going to chop these up and get them rough-milled. The nice thing about this, as far as the rough-milling goes, I’m going to be conservative. If I don’t fully clean up the faces, it’s not really a huge deal, because they’re going to get sawn anyway. So the faces that we see at this stage are not the faces that we’re going to see in the final piece. Any rough-sawn mill-marks are being removed when we do the sawing of the curves.
We want to have a decent starting point, so things are uniform and squared-up and flat.
While I’m breaking down this material, I just want to say a big thank you to Triton Tools, for continuing to sponsor the channel. If you aren’t aware, they’ve been sponsor for 6 years now, and we’ve produced, actually, a lot of content over on their channel. I will leave you a link to their YouTube channel. There are several videos I’ve done over there, with some quick tips, as well as actual full projects and trips where I’ve gone places to build things. One of my favorite videos over there happens to be the first one we ever shot together, which is a video where I walk around, look at trees and how they’re growing, and envision what the figure is going to be like inside of that tree if it was sawn into lumber.
If you’re on Facebook or Instagram, you can also follow their pages. One of the great things about their social media pages that I really appreciate is the fact that every week they share projects that other people in the community are working on. If you want to see what other people are up to, Triton is a great page to follow. You can find them over there @triton_tools. Thank you Triton, once again.
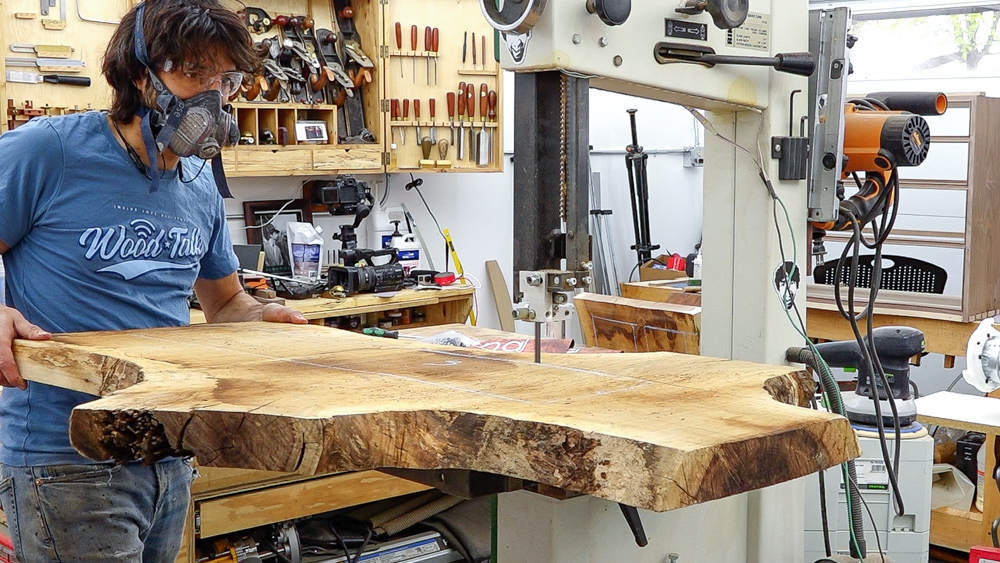
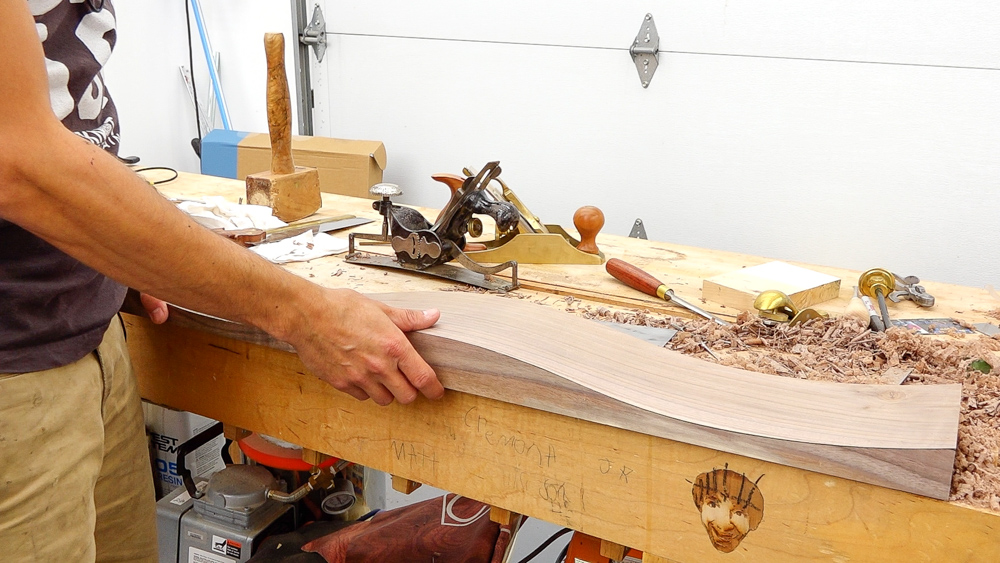
Here are the drawer fronts all rough-milled. I’m going to let these sit for a few days. It’s Friday, so I’ll let these sit until at least Monday. That will let me see if they’re going to move around a lot. It’s kind of a weird situation, because we’re going to be sawing a curve into the thickness of these, so it doesn’t need to be super-flat, but it needs to maintain the curve that gets cut in it, otherwise it’s going to look a little off. The beading will help with that, but you don’t want these things to warp a lot once you have that curve in there. So I want to get a good feeling of whether or not these are going to have stress in them and want to move around after those curves are cut. If I leave them here to sit for a few days, let them acclimate, and if they move a lot, then I’ll probably grab a replacement part.
Now I will also break down the drawer-box materials. I’m going to go through my scrap-pile from cutting the pieces for the case top and bottom. That way, again, that stuff can sit for a few days, while the drawer-fronts are sitting, and then I’ll have drawer-fronts which have rested and drawer-sides and backs that have rested as well. Then I can do the curves on the drawer-fronts, and start joining some complete drawers together next week.
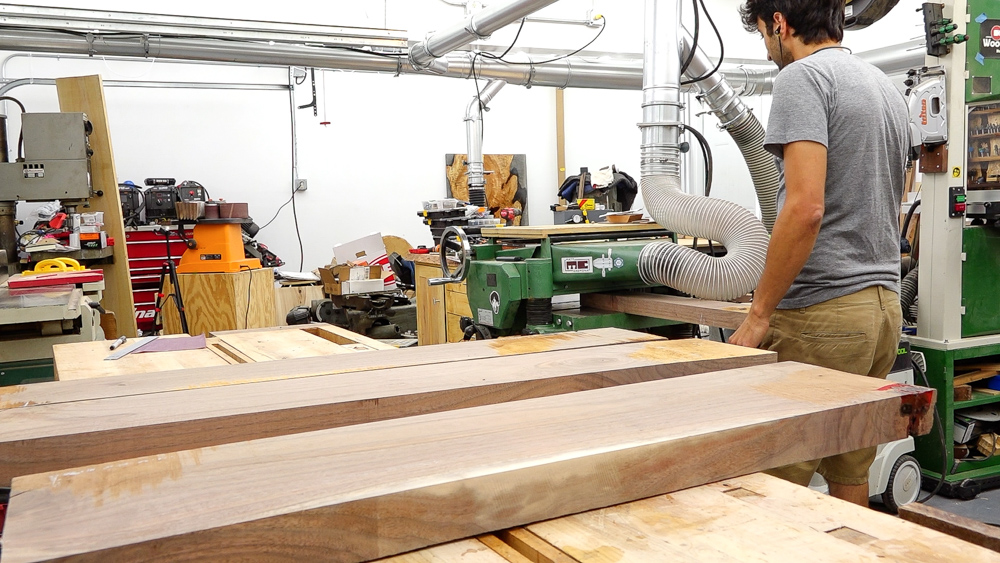
These have been sitting around for a while now, and they’re still nice and flat. I’m going to do a few skim-passes through the planer, just to remove some of the low spots. I don’t want to go too crazy with this, because I’d rather have too much material that I could then shape away than not have enough material. So a few passes through the planer, and then we’ll start roughly fitting them to the case.
I’ll go through and rip them to width, and then I’ll start working on cutting them down to length.
As always with the inset drawers, I’ll find the angle that matches perfectly for the case, which is probably not exactly square. Once I have one end cut to that correct angle, I can work on the other end. The process is just a little bit different. I find the angle first, and then cut it to that perfect length using that angle. All I do to make these adjustments is shim the fence, keep track of where I’m putting my shims and how many shims I have, so that I can repeat those cuts.
That way, the drawer-front will fit perfectly to the opening, and it makes fitting the drawer a lot easier.

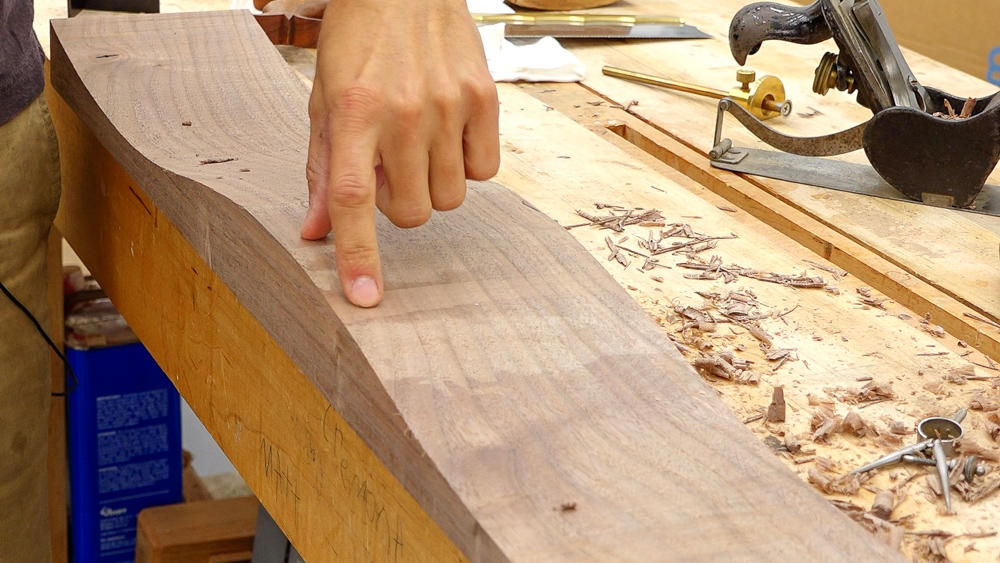
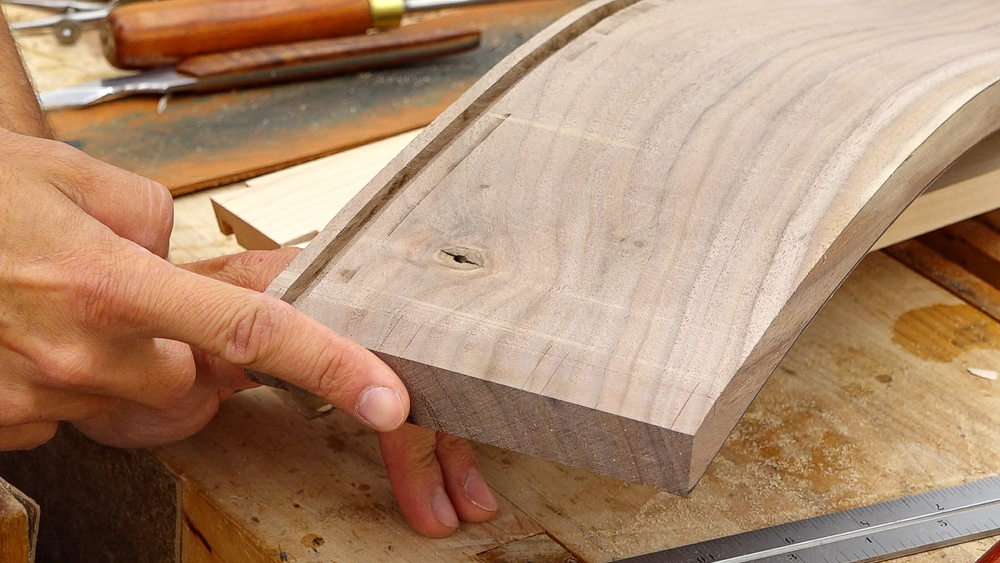
I have the template from the bottom of the case. This is from the area behind the bead, and I’m going to use this as my layout-tool to get the curves on here. I’ve already messed around with the layout for this, so I know that the curve is going to be 5/8 inch from the front edge. On my template, I have some layout lines which indicate the boundary of the drawer-opening. With that, I can mark up the actual curvature on the drawer. A nice thing about this is that bead detail on the front of the case is going to mask any imperfections in the curvature. So if things aren’t super-perfect, it’s not really going to be all that noticeable, which is a nice bonus.

With the lines drawn out, it’s just a simple matter of going through the bandsaw, taking my time, and cutting along the line to produce the curvature for the front face of the drawer.
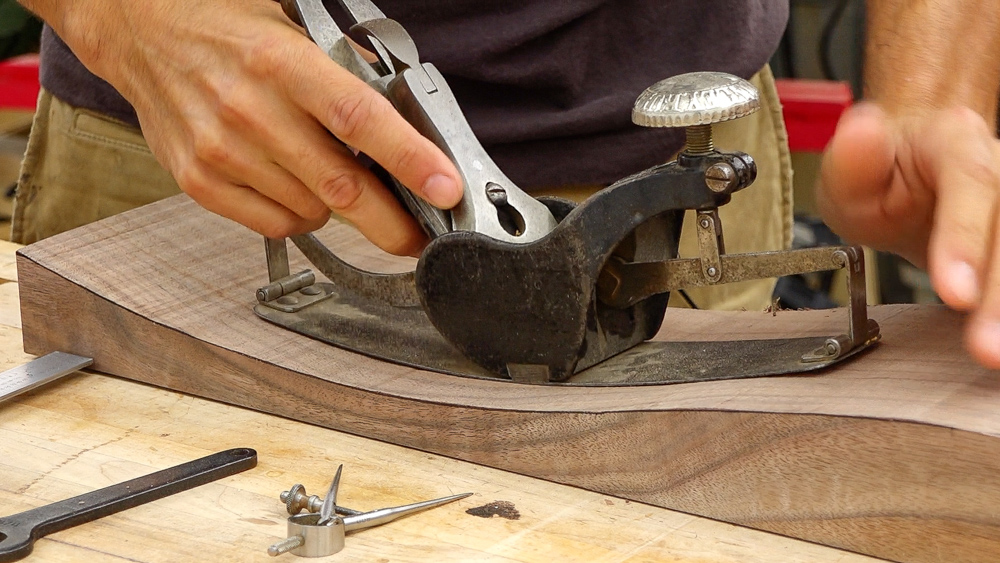
Now we have a little bit of clean-up work to do to finalize this curve and fair it out. I did get pretty close to the line with the bandsaw, so I don’t have a whole lot of clean-up work to do. We’re mostly cleaning up the saw-marks, fairing things out, and then blending into the flat area to get rid of it. I’m going to use the compass-plane for this. This plane is not something that gets used super often, but for projects like this, this is the perfect tool for the job. The nice thing with this plane is that you can adjust the sole to whatever radius you’re trying to go for, and then it’s on autopilot, you don’t have to think about anything. You just feed the plane through, and it will make a nice, graceful curve.
The only thing to consider with this is that we are going downhill, but then the curve goes uphill, so I have to work down from both directions into the valley. But other than that, this is so easy it feels like cheating.
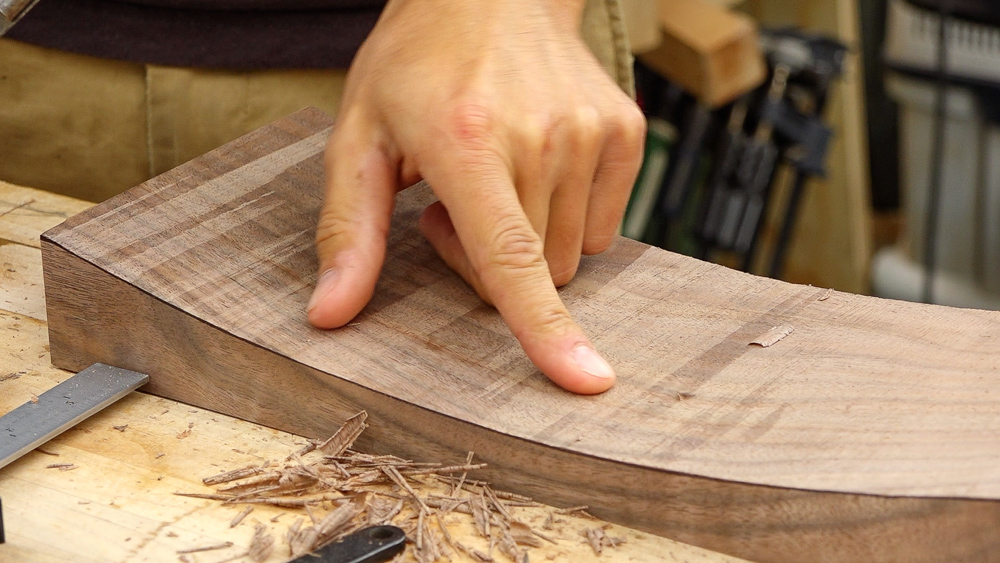
Now I’m going to blend this convex area. There’s a high spot and a low spot, so I have to feather these all together.

Then I’ll use the magic card-scraper to blend this all together. There’s a lot of tear-out areas towards the bottom of that valley, where the compass-plane came in from both sides, and the card-scraper will clean it up pretty quickly.
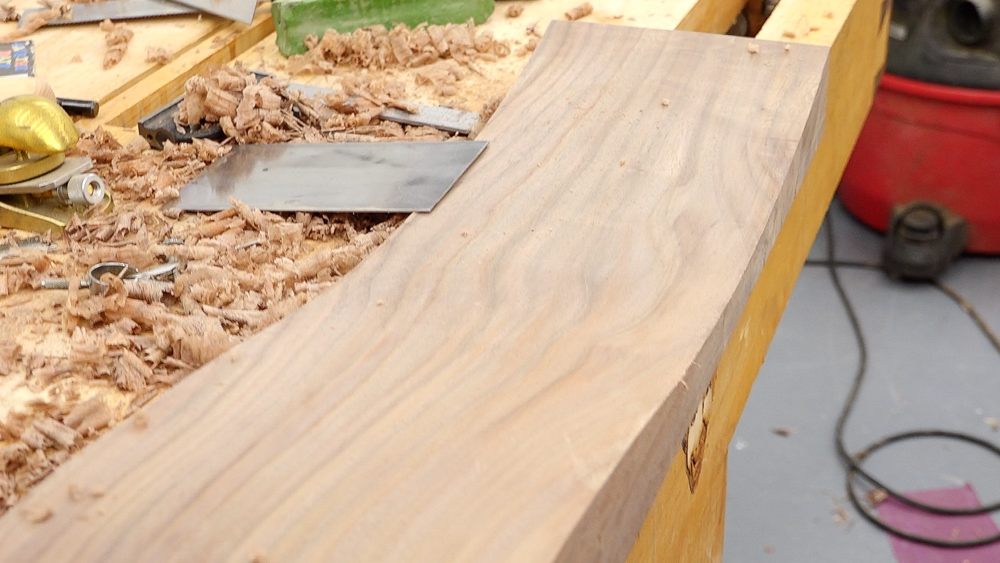
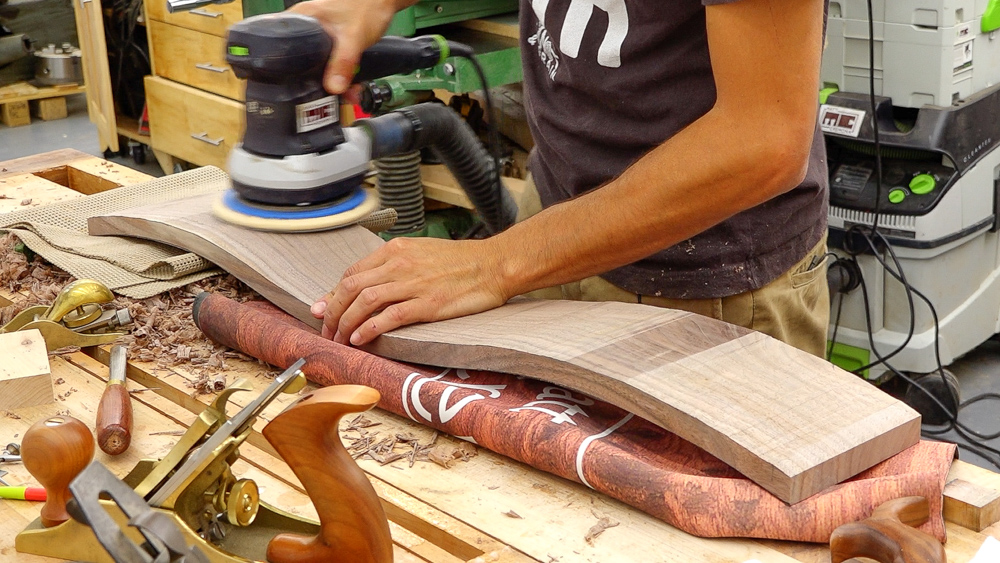
So this side is good to go! You can see the surface finish isn’t super-great, but for a rough-smoothing operation, definitely good enough. It needs a little finish-sanding, and that side’s done. I’m going to do the same thing on the other side now.
Now the initial shaping on this drawer front is done, but this does need to be finish-sanded, because it is very rough. The rough burr with the card-scraper doesn’t really leave that nice of a finish on there, but it is tear-out free. We’ll have to do a little more sanding than you would if you had a nice, fine burr on here, but it’s not that big of a deal.
Next, let’s get the inside taken care of as well. I have a divider set to the final thickness of the drawer, which is roughly what it is down at the valley of the curve. I can use this to scribe a cut-line parallel to the outside face.
I’m going to make a quick stop at the table-saw to make a little flat area which will make it easier for the dovetails to seat. Instead of the dovetails following the curve perfectly, it’ll be at an angle, just like we did for the case. Just a little tiny trick to hopefully make the dovetailing process just a little bit easier.
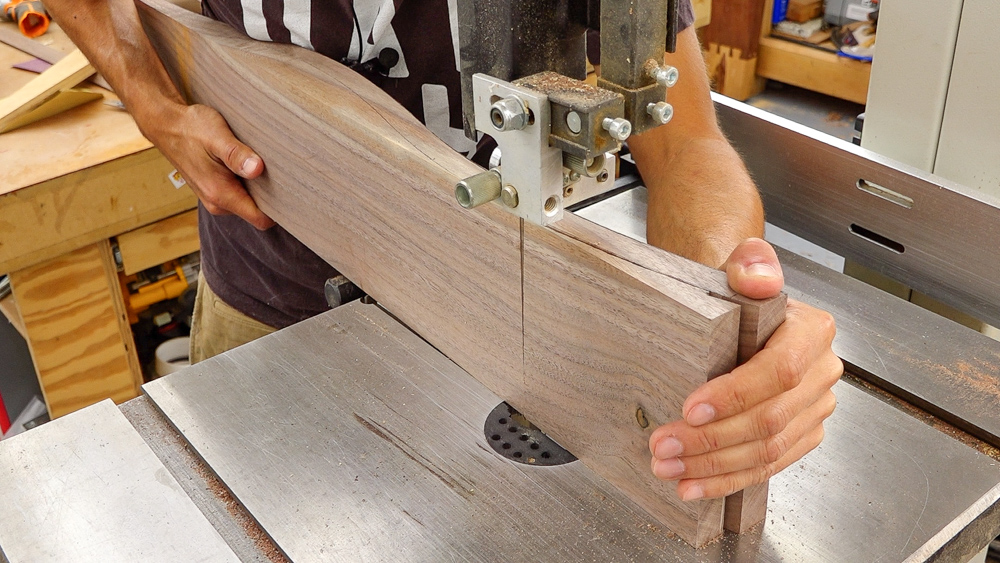
Then we’ll take this to the bandsaw, and cut along the new cut-line for the inside of the drawer.
The inside curve is cut, so now I have a little bit of clean-up work to do. This doesn’t need to be anywhere near as perfect as the outside because this is really never going to be seen. I’m going to do a lot of this work with a sander, just to clean up the rough saw-marks, and maybe a little bit of card-scraping after that. The only thing with this is that I want to avoid the areas that I cut with the table-saw, because that is the reference-area for my dovetails.
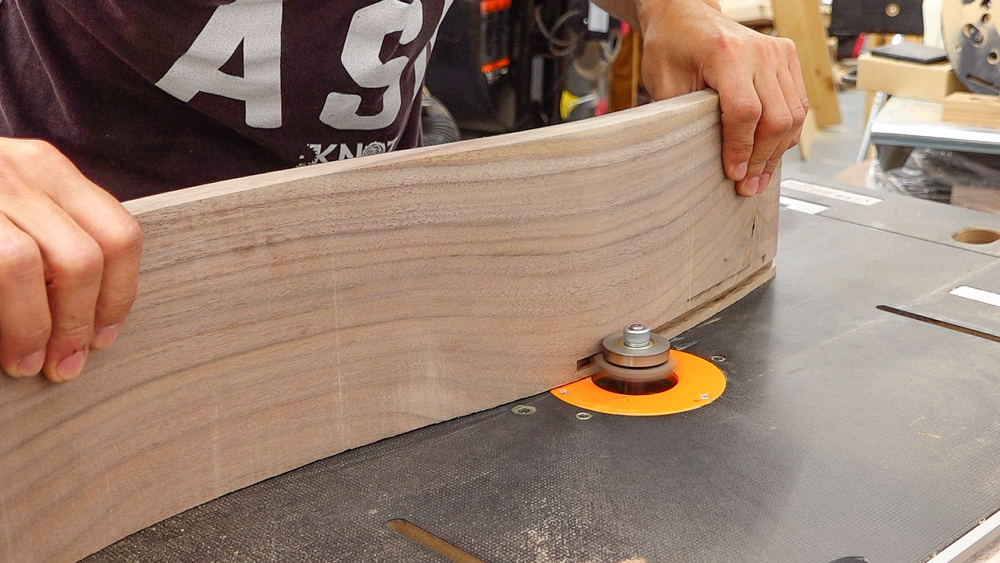
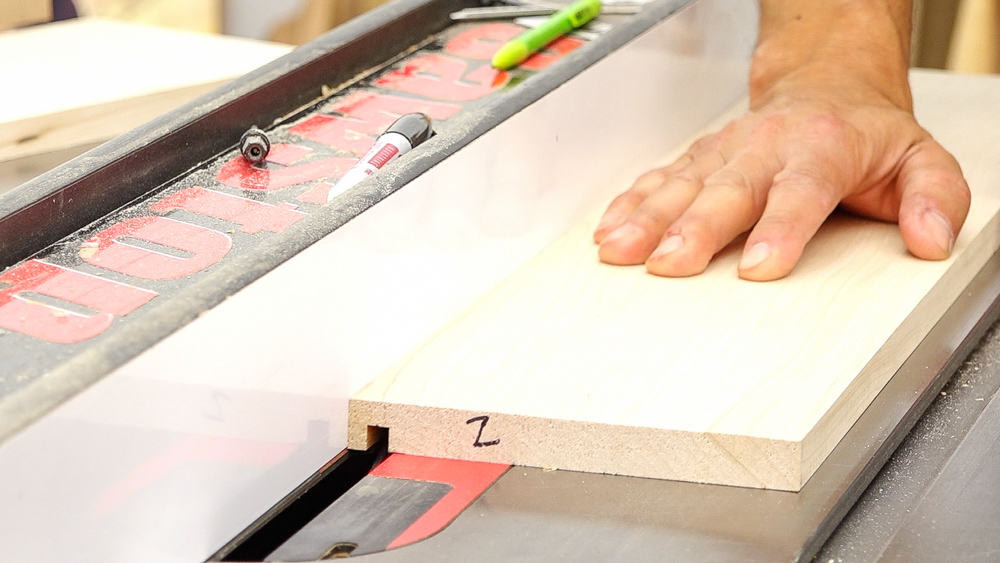
Next thing for this is going to be the groove for the bottom, and I’ll cut that over here with this slot-cutter. This cutter is set up with this bearing, so I’m going to be cutting a 1/4-inch-deep groove and this is a 1/4 inch-wide cutter, so it’s going to cut a 1/4 by 1/4 groove into the drawer-front. All I have to do is run this thing on edge through the bit, and that’ll give me a nice groove for the drawer-bottom that follows the curvature of the entire drawer. Only thing to worry about here is that the bottom-side is down.
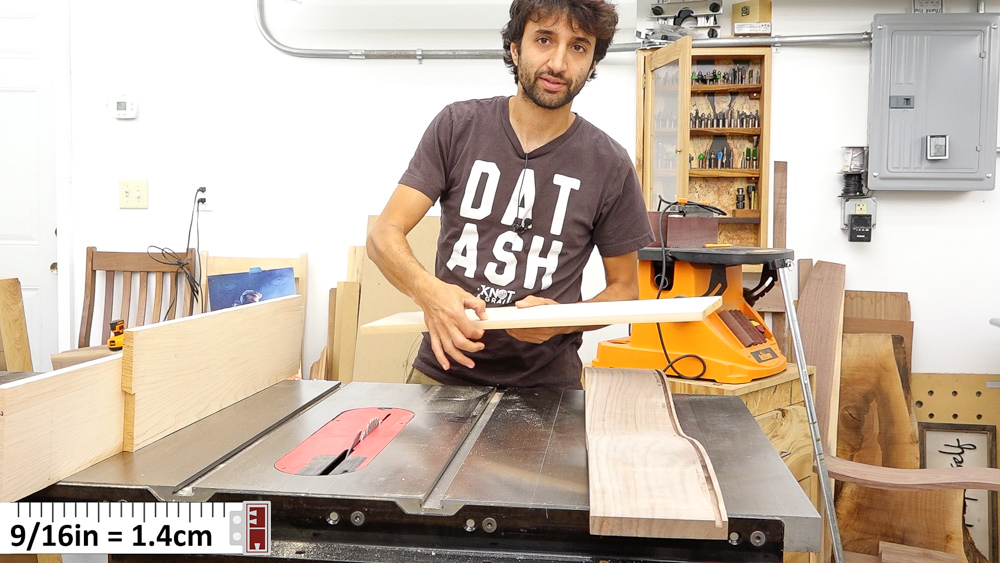
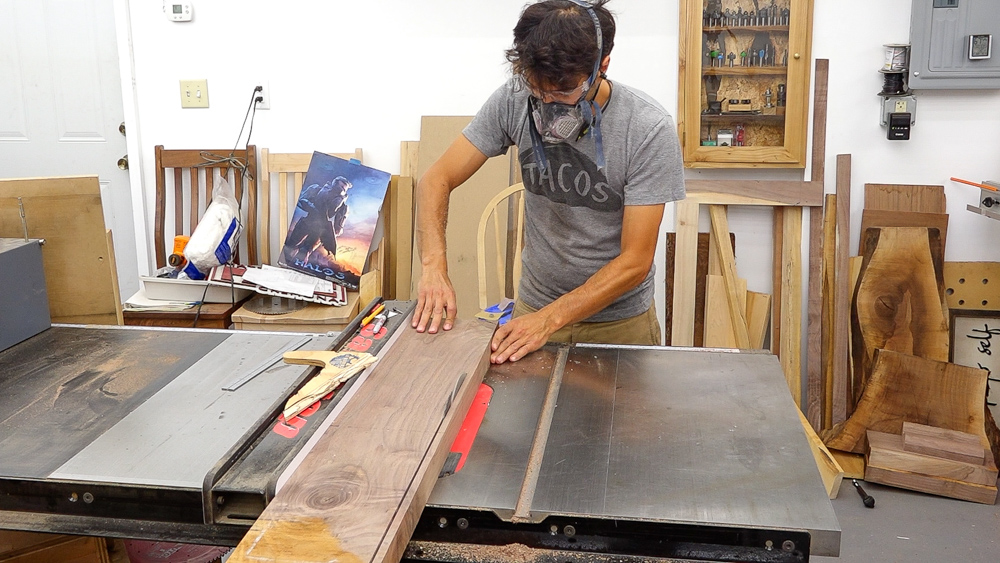
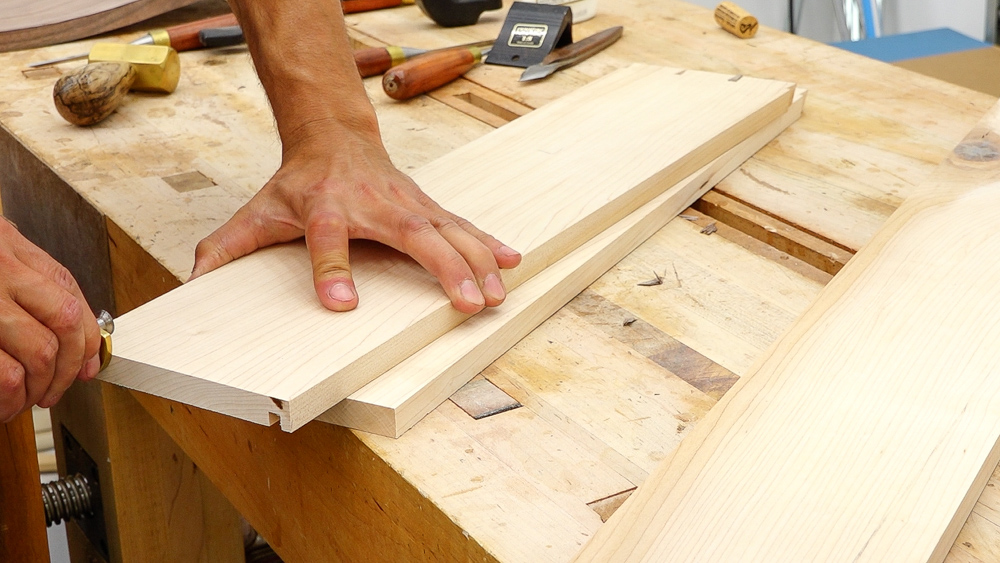
Now we can move on to the drawer-sides, and that’s all going to happen here with the table-saw. This is the stock that we prepped earlier, which ended up being down to 9/16″. That’s just the magic number that I went with; it doesn’t make a difference.
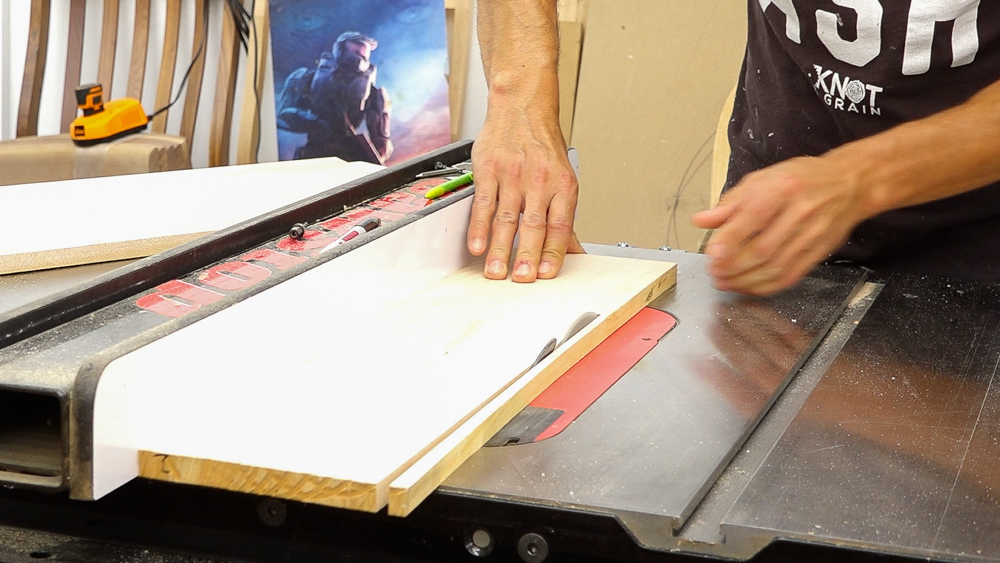
So we’ll rip the sides to width, and that’s going to be just a little bit shorter than the width of the drawer-front.
Then we cut the matching groove in the drawer-sides for that drawer-bottom. After doing that, we can cut the back down to final width.
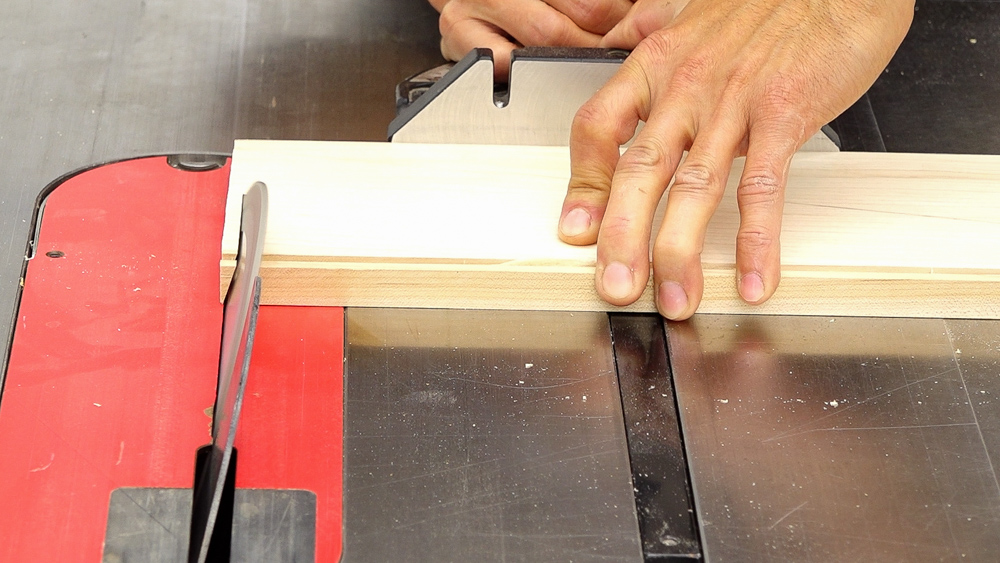
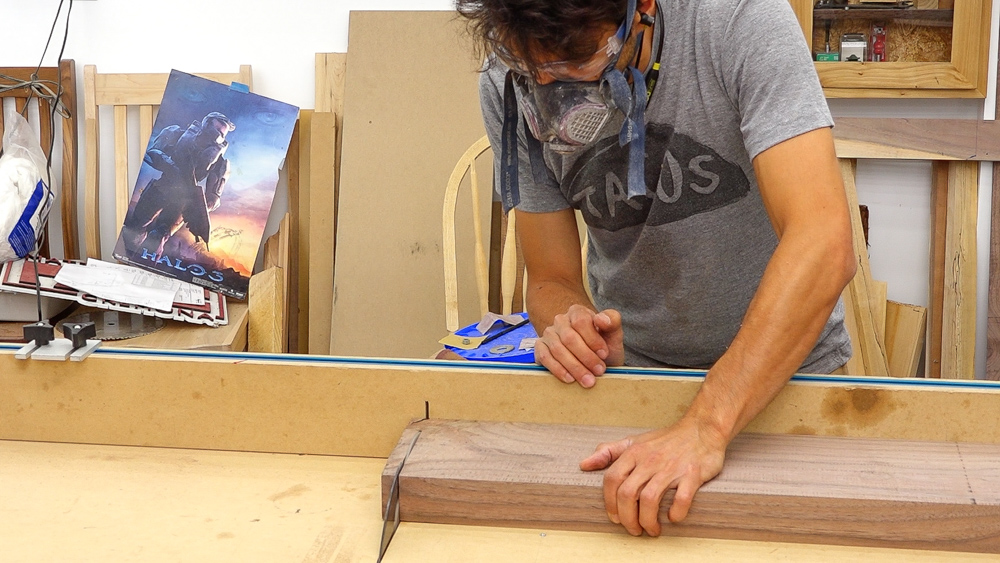
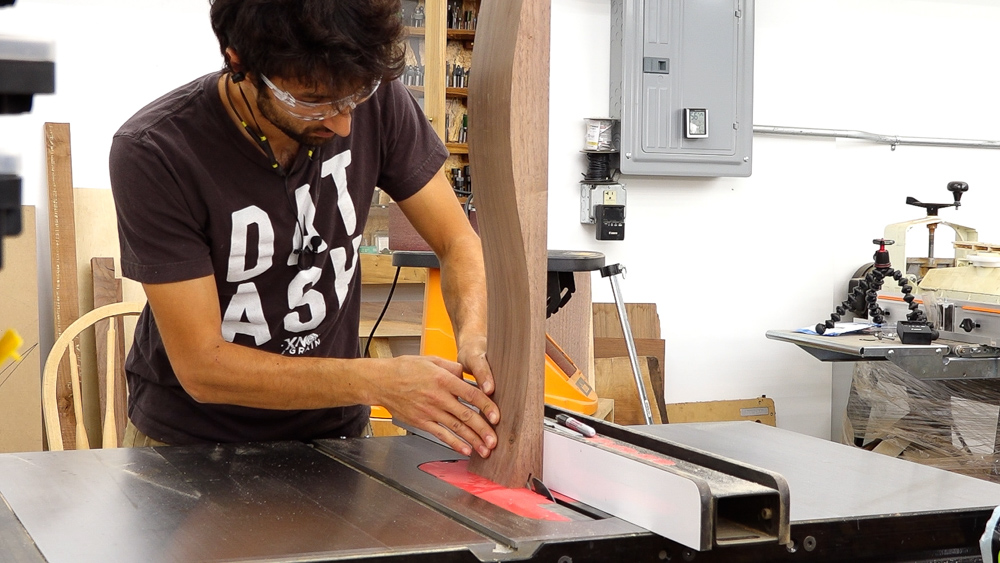
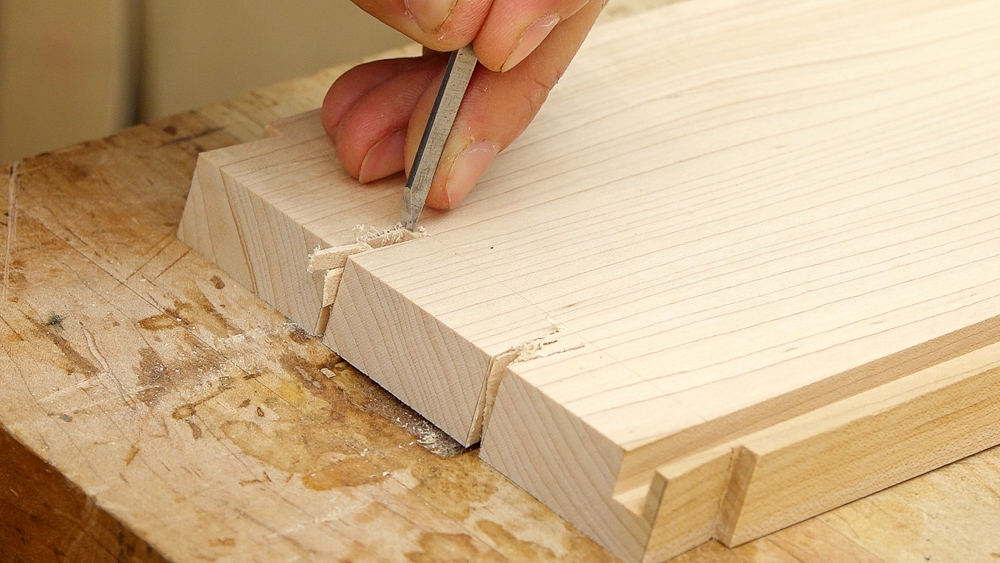
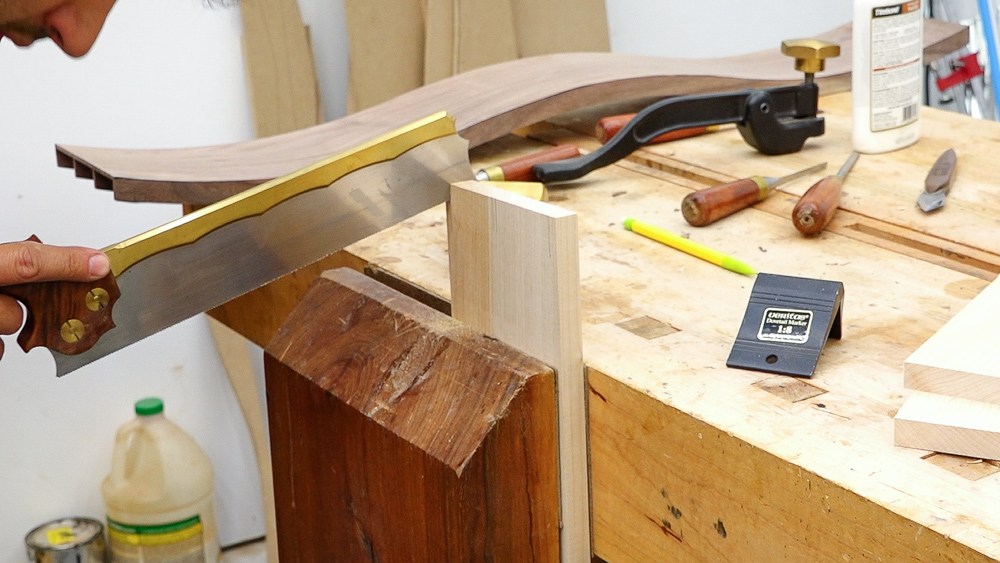
Before heading over to the bench to cut the dovetails, we’ll cut the bevel onto the ends of the drawer-fronts. That’s going to be the same angle we used earlier for making that little flat area on the drawer-front.

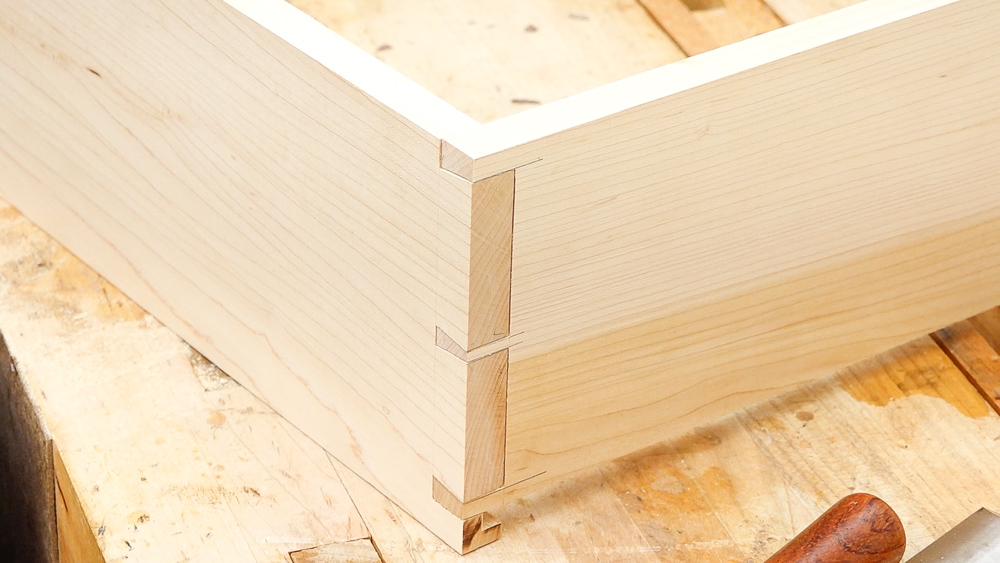
Okay, let’s get started on some tails. This is a little different than the half-blinds we did on the case, because we’ve got this fun angle to contend with. Marking is going to be a little bit more challenging, because you can’t just go straight down. What I like to do is mark the ends, and then connect the two lines on the face with a straight-edge. I’m just making sure I get some good contact here at the edge, so I can transfer that line across onto the face with a knife. This allows me to reference the angle, which is already existing, on the end of the board.
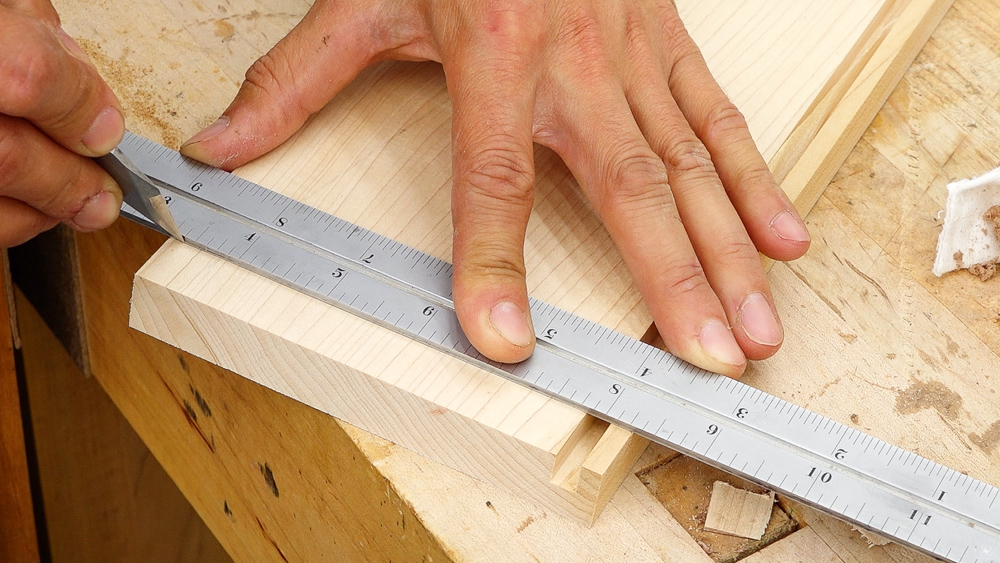
I’ve made my knife-line on the top and bottom, and now I can just connect them with the straight-edge on both sides of the board.
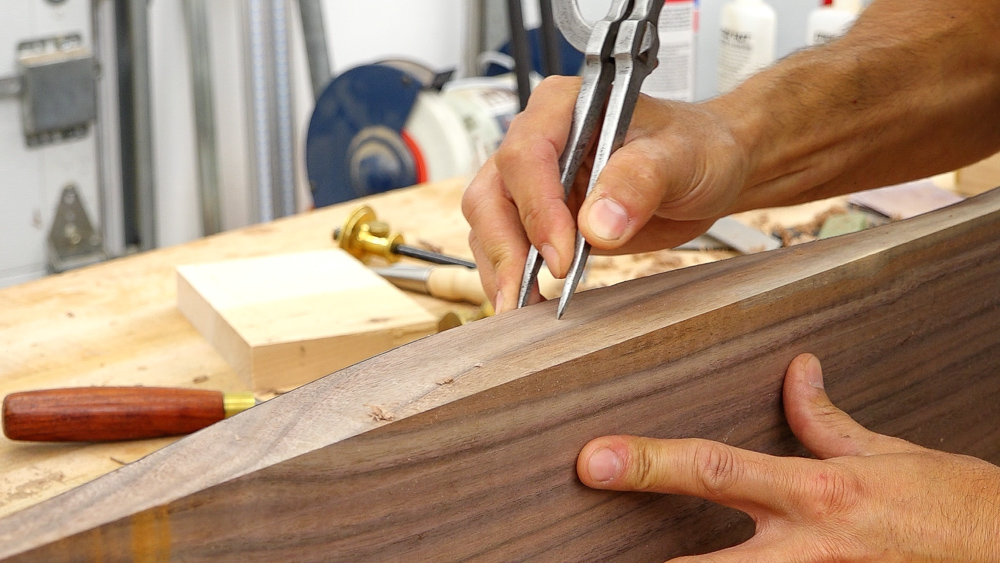
To lay out our tails, the only big thing is to make sure that groove ends up inside of that first tail. I’m going to start by laying out the ends of the first tails, and I’m thinking I’ll put 3 tails into this board. I want them evenly-spaced, so I’m going to use my dividers to figure out where to set those. Then I can eyeball to the left and right the amount that I want from my pin.
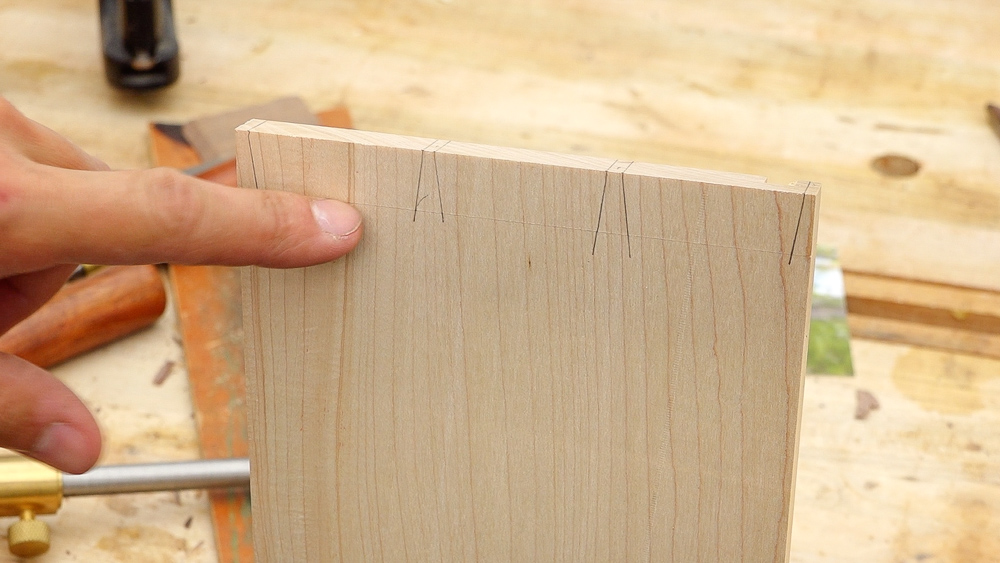
There is my evenly-spaced set of three dovetails. Now I’m going to start cutting. As always, the most important thing on the tails is the line across the top needs to stay square. What the angle coming down ends up at doesn’t really matter. The squareness of the cut to the face, is what matters on the tail-board.
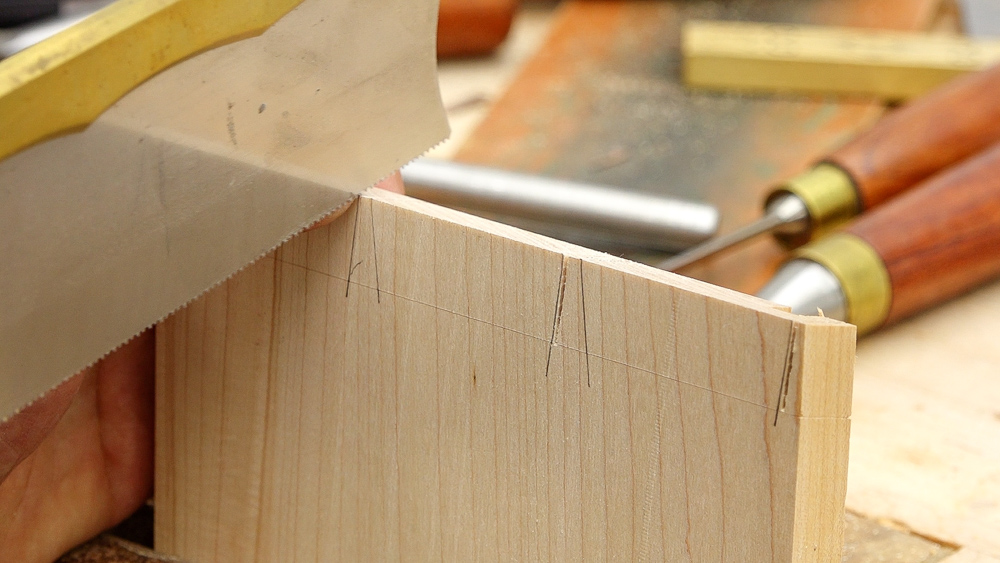
So, I’ll take my time, follow my lines, and get down to the scribe-lines. Now, I’m certainly no expert at hand-sawing, but my biggest tip is don’t force the saw. You should not be pushing down with the saw, the weight of the saw should be all it needs to get through all this wood. As I’m sawing, I’m focusing on pushing the saw forward, and I’m not really applying any downward pressure onto the saw.
With our tails all sawn out, it’s just like most anything: removing all the waste from between the tails to make room for all the pins.

Now on to the more challenging part of this. First thing we need is the length of the tails, just like we would with a square dovetail. The marking-gauge is set from before, when I laid out those tails.
![]()
Then I’ll lay in the depth. Just like any other dovetail joint, I have the tail sitting here on the line, and everything looks good. I can go around and trace all these tails onto the drawer-front. Then I can transfer these down the face, like usual. When I cut the actual sockets, that process is going to be very similar to any other half-blind that I normally do.
The only difference is mentally, wrapping our minds around what’s going on inside of here. So the back wall is going to be parallel to this face. It’s not necessarily square to this face; it’s at a little bit of an angle, and it’s going to slope towards the front. It’s some weird geometry to think about at first, but once you wrap your mind around it, it’s not too bad.
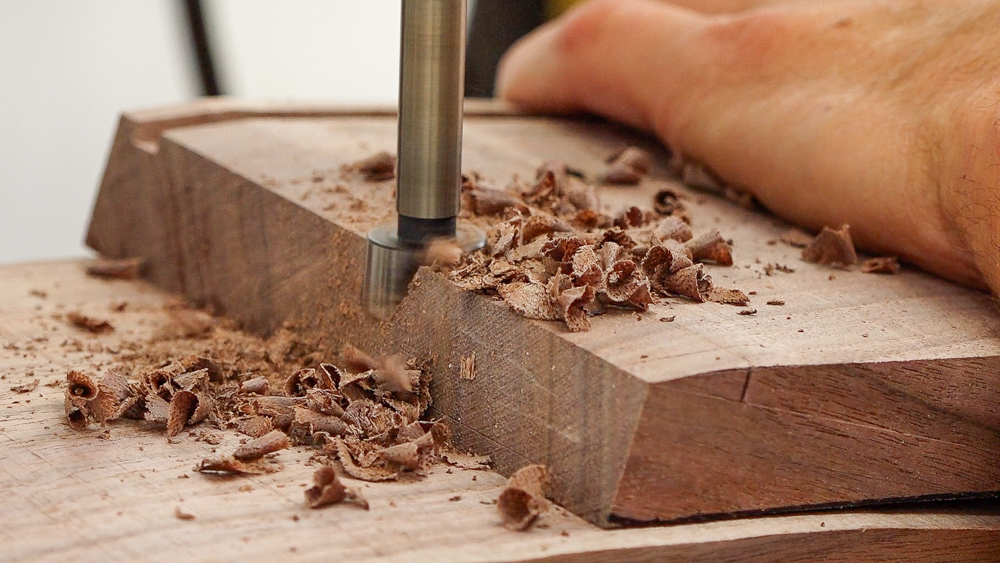
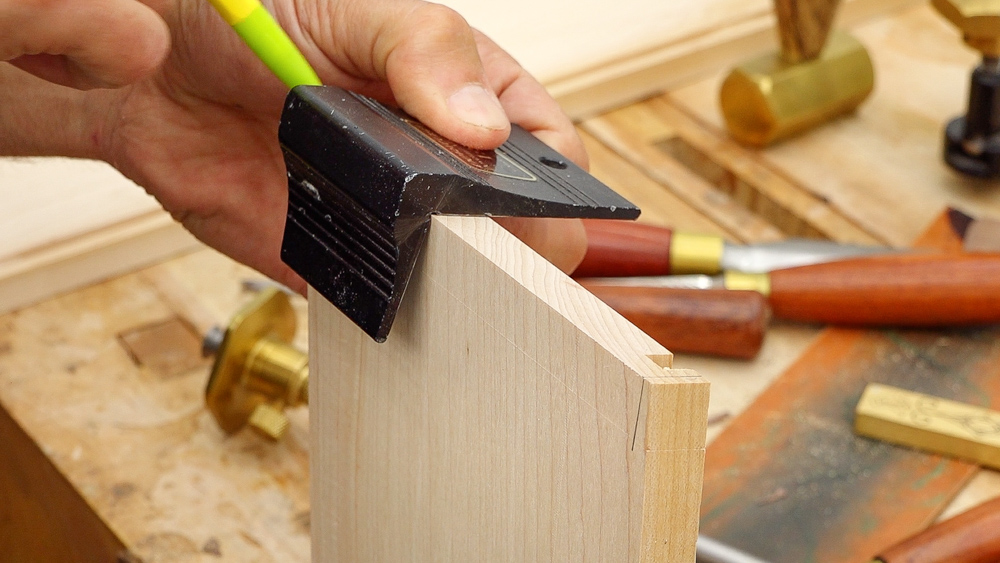
I’m going to head over to the drill-press and remove the bulk of the waste. I will use the off-cut from cutting the curve in it to get the drill-press square to where it needs to be. Essentially, square to the little flat area we cut at the table-saw, and then remove the bulk of the waste that way.
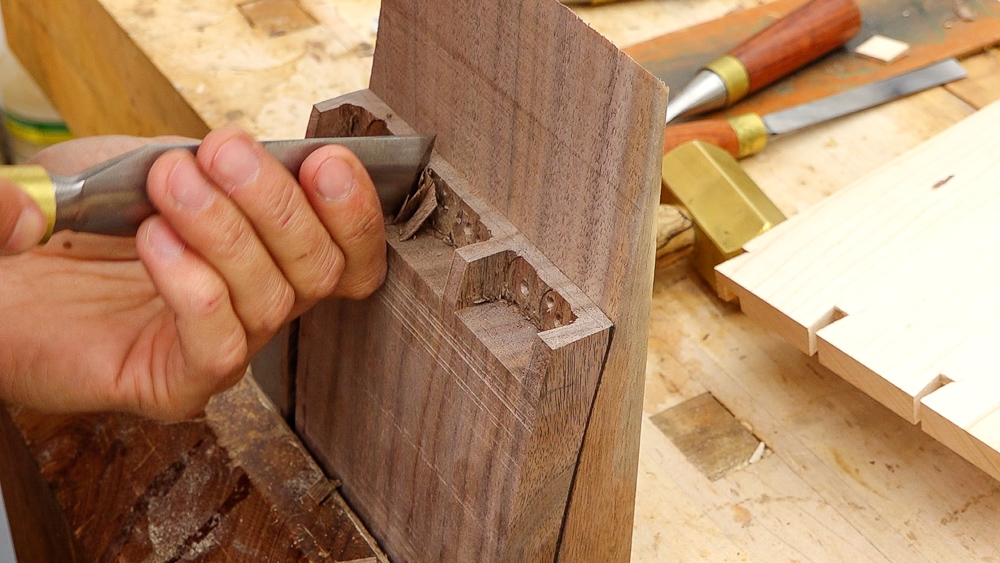
Back at the bench, we’ll use the off-cut again to support the workpiece, and chop away the majority of the waste, just like I would do with a normal, square dovetail joint. Then we can go up into the vice, and then pare back the pin-walls to establish that nice, clean socket. Hopefully, the dovetail will fit in there. I’ve got the sockets all ready to go, and it looks like it will fit.

One thing I’m going to do that I don’t normally do, because I know things are not as perfect as they would be if this was a square dovetail joint, is to start undercutting and relieving material, on the tailboard. First I’m going to do the end-grain, so I’m going to go to the table-saw, tip the blade further, and just chop off essentially the bottom part of the tail.
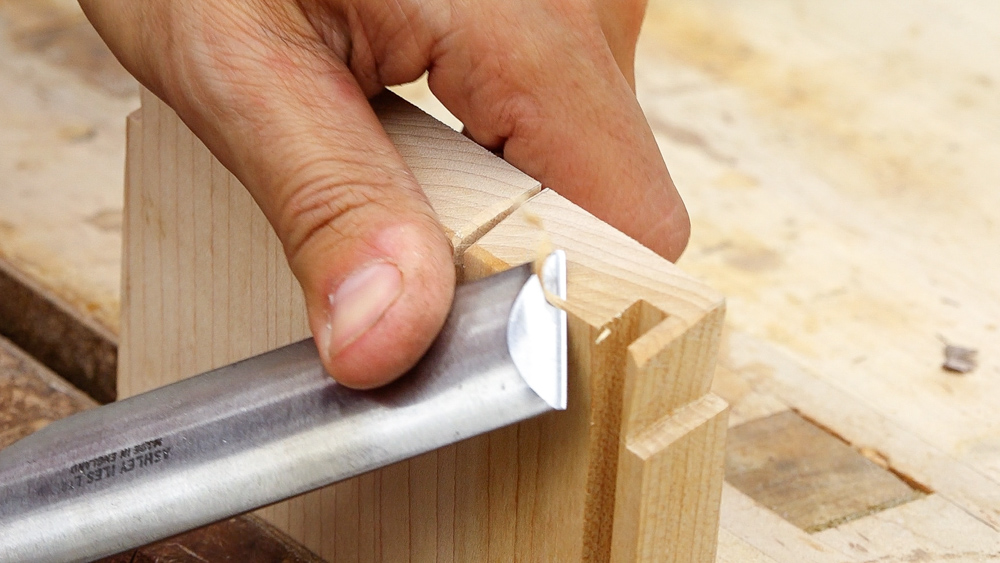
Back at the bench, I will round over all the corners and the edges, just to make sure that if there’s any material that’s not perfect down on the bottom of sockets, the tail-board will fully seat, and not hang up on something.
Then we can get these pieces put together.
Next we can add the back to the drawer, and this is always nice, because it’s a lot faster. These through-dovetails, compared to the half-blinds in the front, are much faster. The drawer-back is cut to be a little bit shorter than the width of the drawer-opening, so that we end up with a little bit of taper on the drawer, which makes it operate a little bit easier, as it goes in and out of the opening. So, I’m going to cut these pins.
We’re laying out from the back of the drawer, so, this’ll be the face you will not see when you open the drawer. I’m going to draw my pin-layout randomly, which is nice, because this drawer-back will only go back together in one orientation. After drawing the pins, I can cut them really quickly. Again, angle doesn’t matter, but plumbness does. After those cuts, I can hop over to the bandsaw and the table-saw to remove all this waste.
![]()
Normally on a square-type drawer, I’ll put the sides and the front together, and use that as a clamping-jig to do this transferring, but it is a little bit awkward with the serpentine front to get everything lined up. I find it’s easy enough to stand this up on here and transfer the pin-locations onto the tailboard.

We’ll finish the layout, saw the tails, and clean up the waste. Again, for this I’m going to use the power-saws to help clean things up.
It is almost disgusting how much more streamlined that process is compared to the half-blinds.
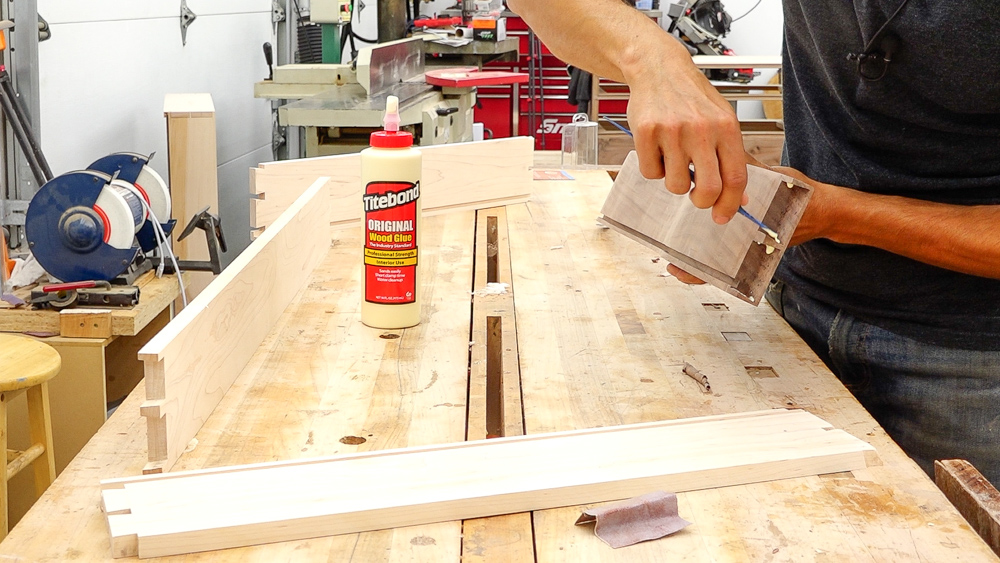
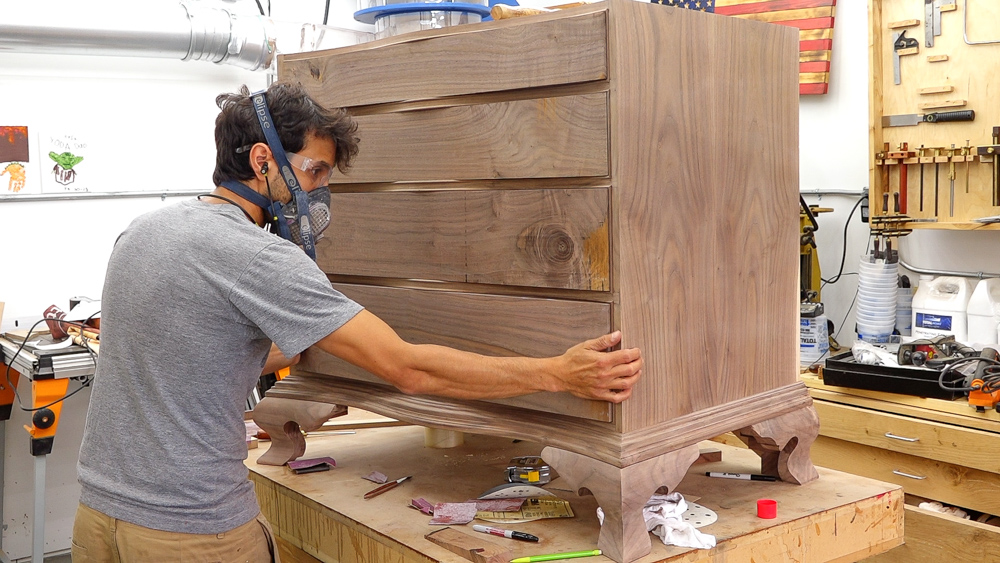
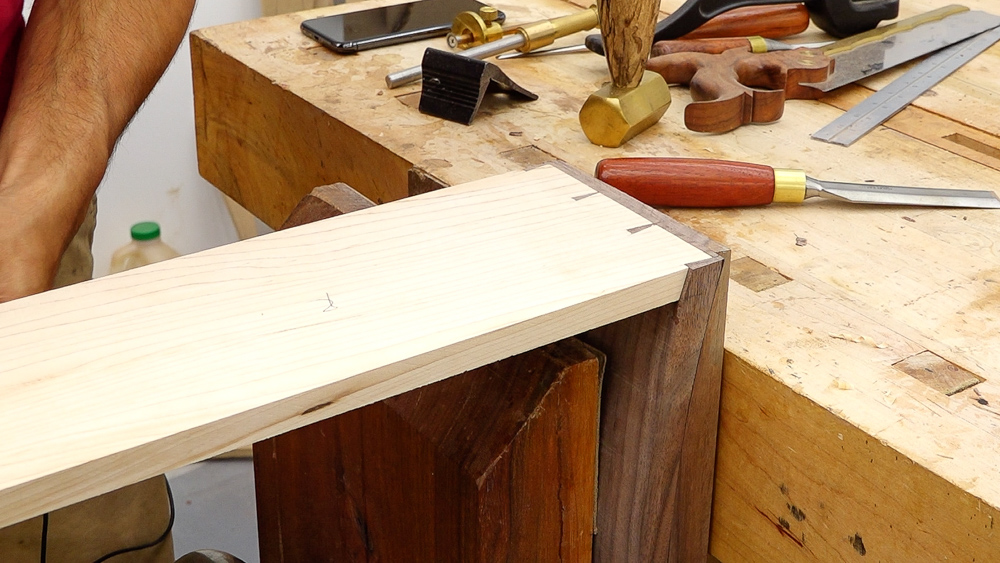
With all this drawer construction complete, now I can do the glue-up and start getting them fit to their openings. At this point, all of the internal services have been surface-prepped. I also gave the outside of the drawer-front a nice surface-prep. The outside’ll get surface-prepped, after we flush up all the parts, and after everything is glued together.
With all the joints fully seated, we can bring this thing over to the case, and use that as a clamping-device to hold this in alignment as the glue sets.
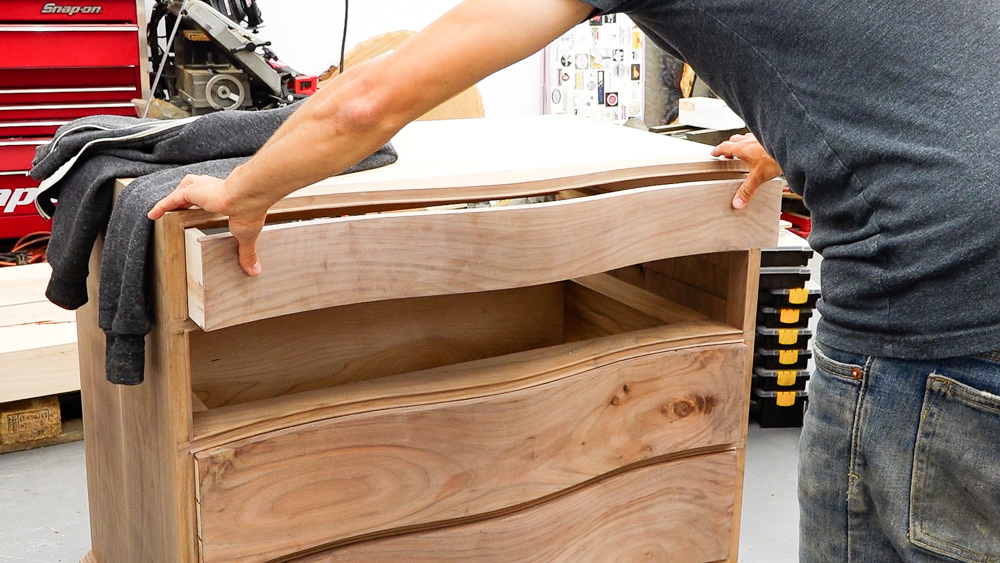
The glue has set on this drawer now, and it is time to get this thing fit to the opening so it actually operates nice and smoothly. From the glue-up, we know it gets a little tight towards the end, which means we have to remove some material on here, but we also have to flush up the joinery.

The nice thing about this process is, I’m going to go ahead and flush up that joinery with the sander, and then that should, in theory, get it pretty darn close to perfect.
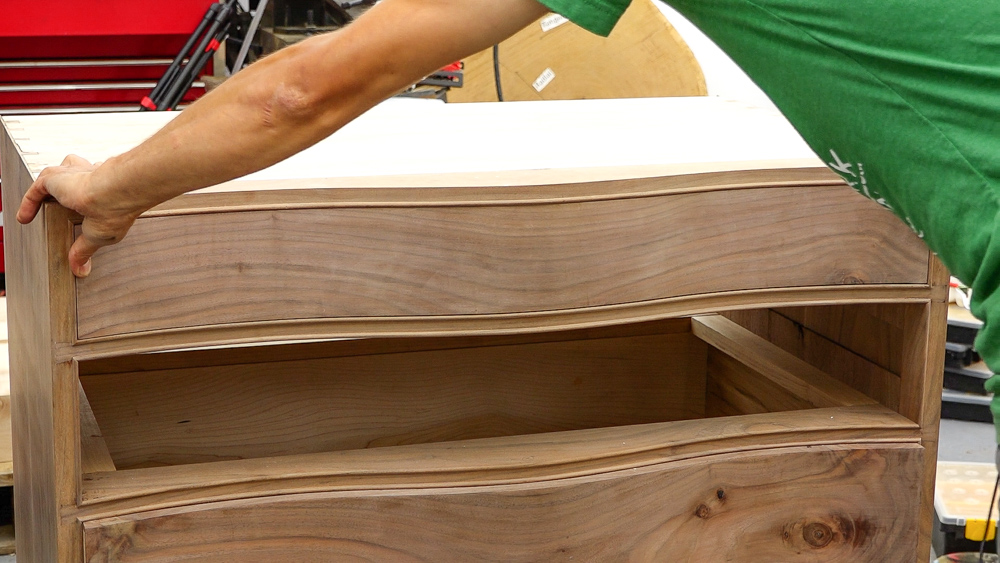
It’s a little tight, still, but not too bad. It goes into the opening, and it’s just a little bit tight. I still have uneven gaps around the four sides, but that’s as far as I’ll take this drawer. I’m going to do the other three drawers, and then when they’re all at this stage, I’ll come back and set all the gaps.
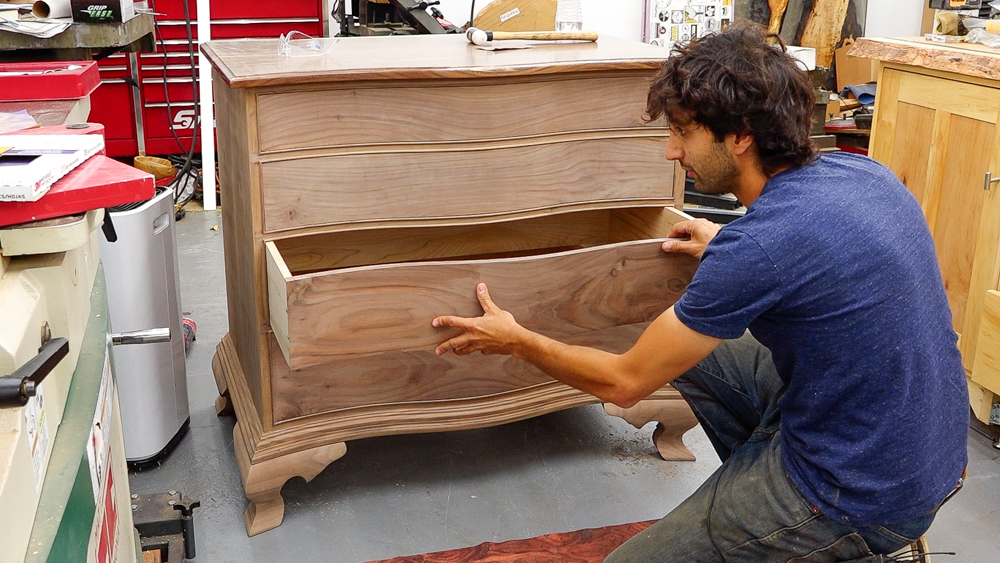
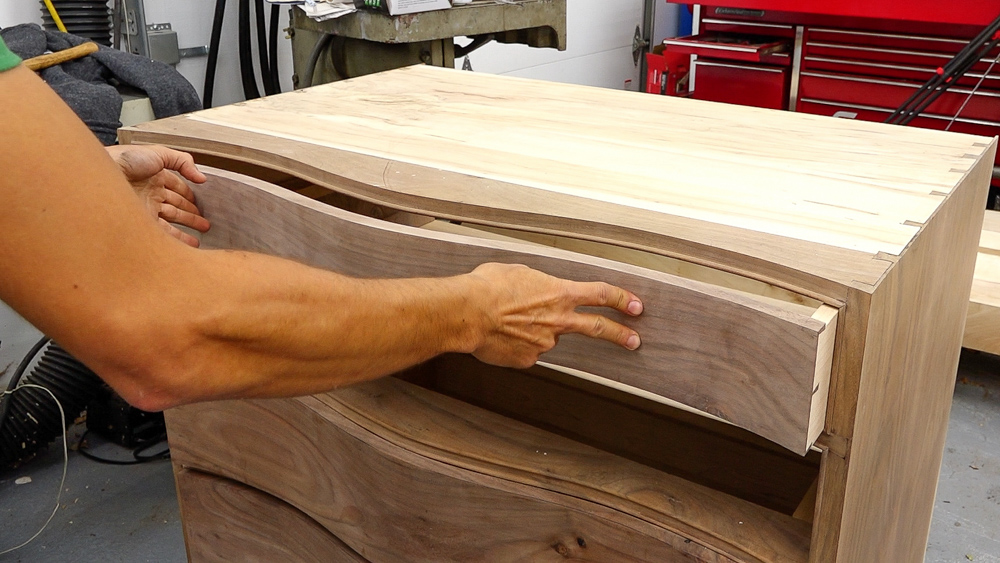
After a fair amount of back-and-forth, I have my gap set, and my fit’s looking pretty good. At this point, we don’t need the drawers to slide super-nicely, because the inside isn’t waxed yet. We just want to make sure that they move freely, and they don’t bind. I don’t necessarily have my gaps set uniformly, that’s not the look that I go for. I tend to have a tighter gap on the sides, than on the top and bottom. The top and bottom are just your expansion-gaps. In the sides, I tend to have a tighter look on those, versus an even, larger gap, around the entire perimeter of the drawer.
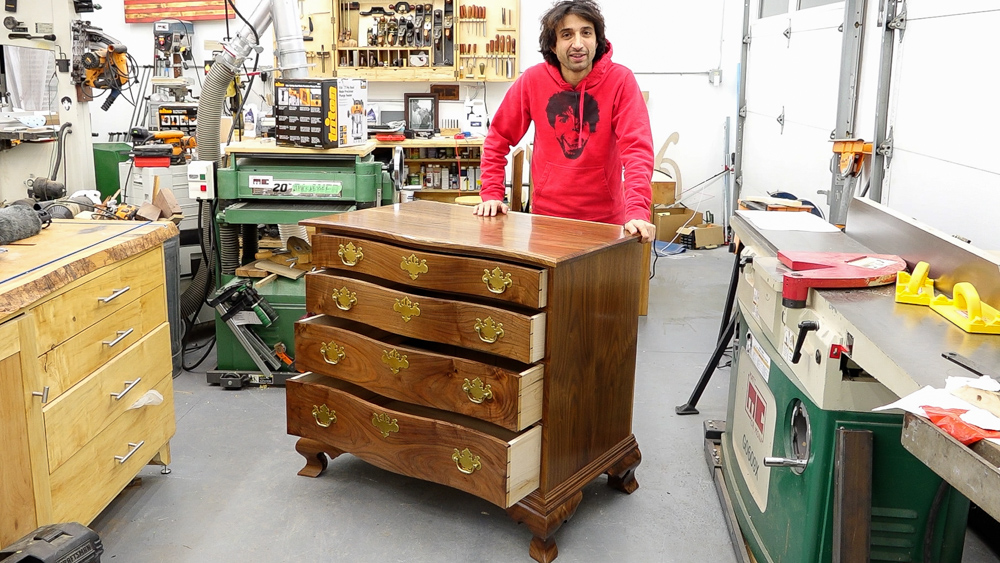
So that takes care of the drawers! I will tell you what: making serpentine drawers with angled dovetails is significantly more work than making a flat-front drawer. By a long shot. Very cool and very rewarding, but very different.
Again, if you like a little more in-depth instructional content like this, definitely check out my classes over in the Guild. I have over 150 videos spread out over 9 classes over there.
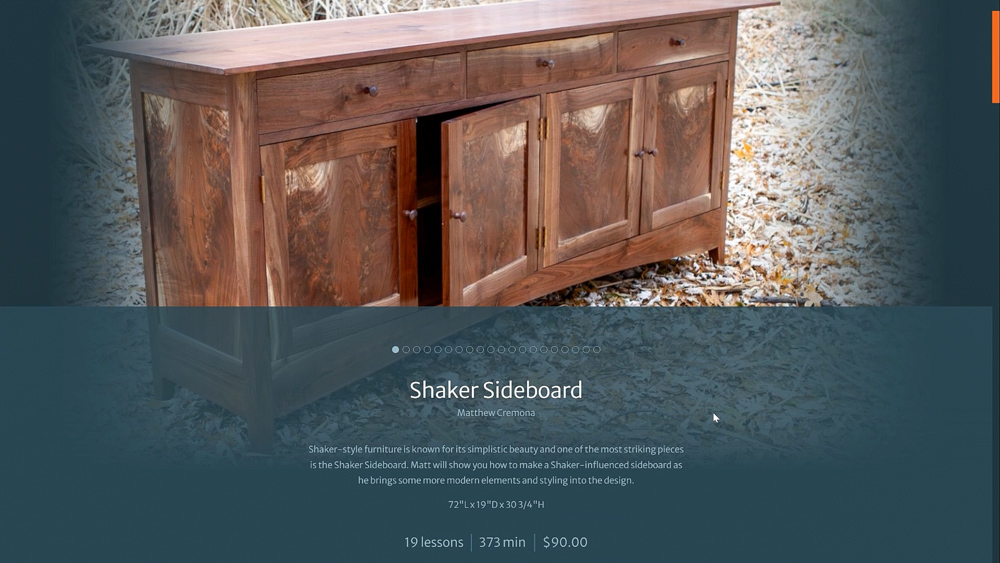
This time we’re going to highlight the sideboard. So not only is the Shaker Sideboard a great introduction to frame-and-panel Shaker-style furniture, it’s also a great way to hone your skill-set with inset doors and drawers. Just like in this project, we spent some time fitting those drawers to the openings, so you have nice even reveals all the way round, and those drawers operate really evenly and smoothly. You have to take it a step further, when you get to the doors, because, not only do you have a door that needs to have a consistent gap around the entirety of it, it needs to have the exact same gap as its pair-door, right next to it, and those doors need to line up perfectly, so they look like they’re perfectly in there. That one is a really good fundamentals class as well.
Again, if you want to make your own serpentine chest of drawers like this guy, I do have a full set of plans available, that you can check out as well. That is going to do it for this one. Next time we’re going to put this whole thing on to this base, which again, matches that serpentine profile. So we have a nice serpentine transition-area, and we have serpentine bracket, ogee bracket-feet.
Thank you, as always, for joining me. I greatly appreciate it. If you have any questions or comments on the serpentine chest of drawers, or anything in the shop, please feel free to leave me a comment. As always, I’d be happy to answer any questions you might have, and, until next time, happy woodworking!
PRODUCTS USED
[Affiliate links]
Triton TRA Router: https://amzn.to/32IHRRJ
Triton MOF Router: https://amzn.to/2ZPXhCn
Triton Jigsaw: https://amzn.to/2PedA0a
Triton SuperJaws: https://amzn.to/3xQpYLT
Triton Oscillating Sander: https://amzn.to/3xQqvxn
Triton Track Saw: http://amzn.to/2f2P85l
Finish: https://amzn.to/2xo0Wsn
Dust Mask: http://amzn.to/2y8dl1m
Hearing Protection: http://amzn.to/2yQ0sa3
Push Blocks: http://amzn.to/2yQD24r
More stuff on my Amazon page: https://www.amazon.com/shop/matthewcremona
Welcome to my shop! This is a quick update to let you know what I’ve been up to. This big chunky thing is the leg

Welcome back to the home renovation. This time I’m going to be working on the kitchen island. Here is a small model of the island.

Welcome back to our home renovation. Today I am going to be working on this wall. It needs some upper cabinets and the surround for