
Matt's Weekly Shop Update
Kitchen Island, Barn Power – March 2024 Update
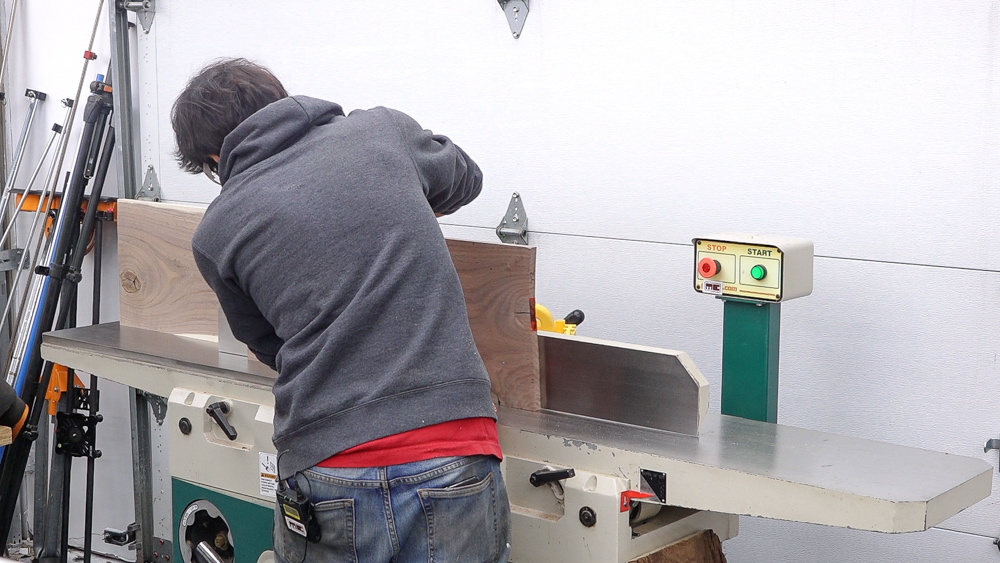
Welcome to my shop! This is a quick update to let you know what I’ve been up to. This big chunky thing is the leg
Welcome to my shop, and welcome to my series on building this serpentine chest of drawers!
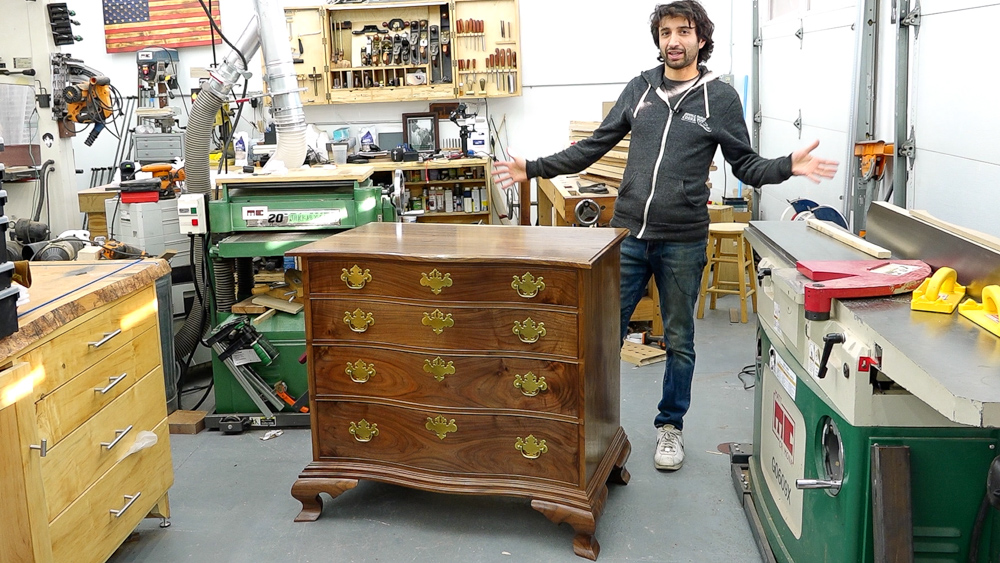
This is built just like any other chest of drawers, except for this crazy S-curve on the front, which definitely complicates things a little bit. Before we get started, I want to say a big thank you to Triton Tools for sponsoring this build and continuing to support the channel as they have over the last several years. Throughout the series, I’ll be telling you about some of their products, but for now, we’re going to hop back into the design.
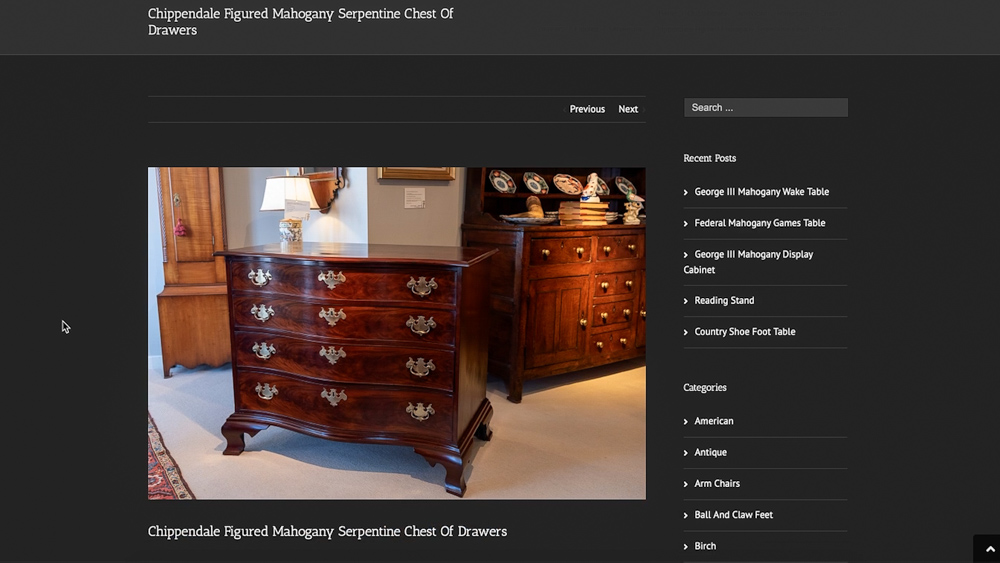
Let’s go all the way back to the beginning. After some time on either Google or Pinterest, I found this serpentine chest, which I really liked as the foundation to what I had in mind. There’s a few details here that speak to me.
One was that the corner does not have a 45 degree angle flat area, which you see on a lot of serpentine cabinets. Most will have a corner detail, and I don’t really care for that. I really want to have a nice, crisp look where it looks like a normal chest of drawers, but the whole side is bent and curved. I like the pointiness of the corner on this serpentine chest, especially here on the top. So that’s the starting point for what I’m trying to do here.
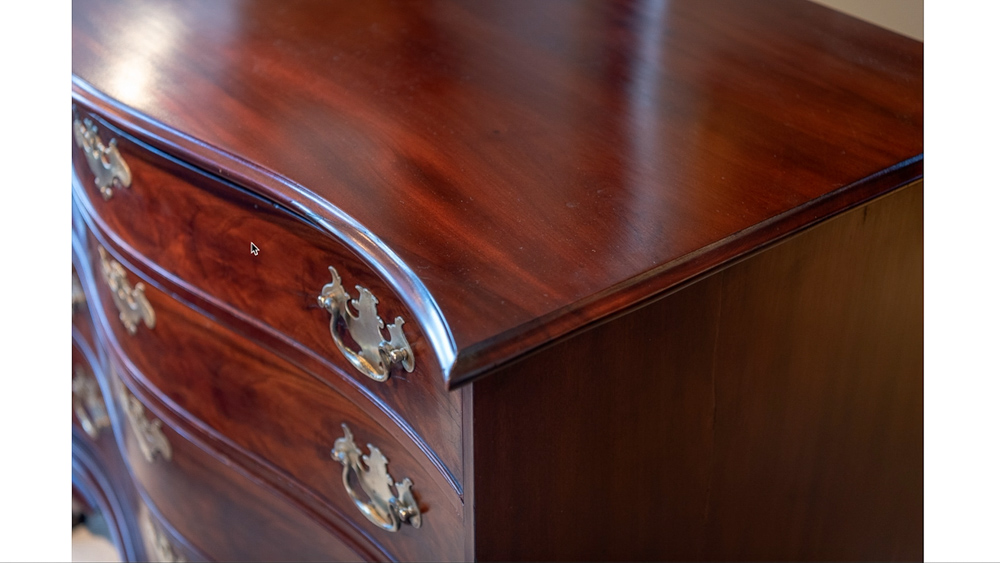
There’s a few details that I will be changing. The drawers themselves have a cock beading, and I’m going to try and move the beading detail to the dividers and leave the drawer fronts flush. The cock beading is going be a great detail if you’re doing a veneered front, because that cock beading gets applied to all of the sides so you can’t see the seam between the base material and your veneer layer. The way I want to do it, the drawer fronts are going to be sawn out of solid stock, and I think having the bead detail on the dividers would be an interesting look. The rationale for having the bead on there is to give you some tolerance in case there’s any issues with the alignment of the curvature of all the drawers and dividers. If the curves are off a little bit and things aren’t perfectly flush, you can’t tell because there is a bead detail which interferes with the flat facade of the front of the cabinet.

From the front, if you didn’t have the curvature, it would look like a very standard chest of drawers, which I like. It is like a standard chest of drawers, but just elevated a little bit in complexity because the front is not flat.
This website helpfully has the overall dimensions so we can use those to figure out a plan for the overall size of the case. Let’s talk about the depth first. The deepest part of the case is either going to be the top or down on the ogee bracket feet. The case on the website is 23 and a half inches, so I think we’re going to aim for an overall depth of 24 inches. To figure out the actual depth of the case side, that’s just going to be the top minus the overhang. So if I have an inch and a half overhang, the depth of the actual case is going to be 22 and a half inches. With these dimensions, these are just estimates because the lumber can change things.
Now for the overall width of the case, the one on the website is 41 inches. I think a standard 36 inch wide case is going to be the easiest. By the time we have the overhangs, it’ll be closer to 40 inches, so it should be around the same size.
The last measurement is the overall height, which gives us an opportunity to figure out what our drawer graduations will be. The overall height on the one online is 34 inches. Take six inches off for the feet, leaving 28 inches. From there, divide out the material used up for the dividers and the top. There are four dividers plus the top, which are all three-quarter, so that’s four and a half inches. So subtracting the six inches for the feet and the four and a half inches from the dividers and top, we are left with 23 and a half inches to divide up into four graduated drawers.
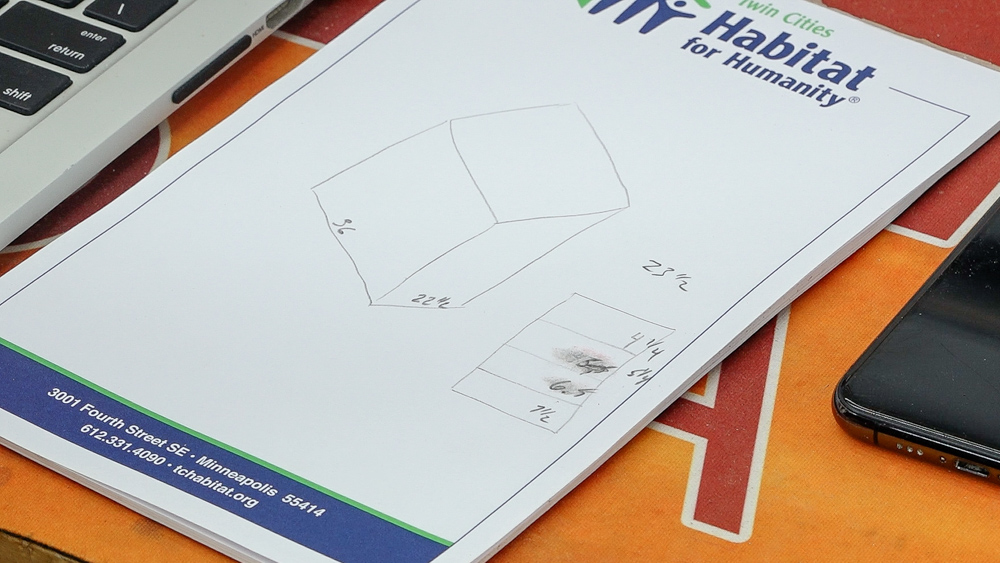
After a bit of math, we have a seven and a half inch bottom drawer, a six and a half inch second from the bottom, five and a quarter drawer, and then a four and a quarter drawer. One other detail to figure out is the overall height of the case side. To figure that out, take the 23 and a half inches, add in all the dividers, and the case side is 28 inches tall. Something to note: the bottom is going to have a false divider, which will make the molding detail easier. That means there will be two dividers on the bottom.
With those numbers figured out, that’s the core of the entire project. From here, I can figure out the size of the panels that we need for the two sides, and the top and the bottom based on the joinery that I’m going to cut. The bottom will be the full width of the case because it will be a through dovetail joint, and the top is going to be held back a quarter of an inch from that width because it is going to be a half blind, and it’s going to give me an eighth of an inch of a step for the half line.
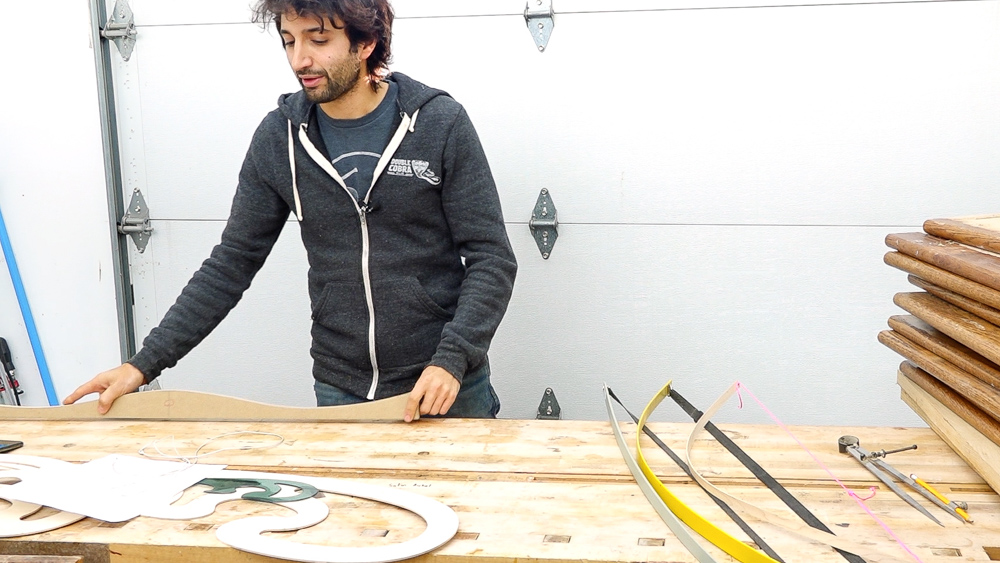
Now that we have an idea for the size of the box that we’re going to make, we have to come up with the actual shape for the box, which is that S-curve that goes in the front. I have this one here, which I came up with, and I’ll show you how I arrived at this in a little bit.
I thought, first, I would run through some very common curve drawing tools here in the shop to help lay out these things and make your work curvy.
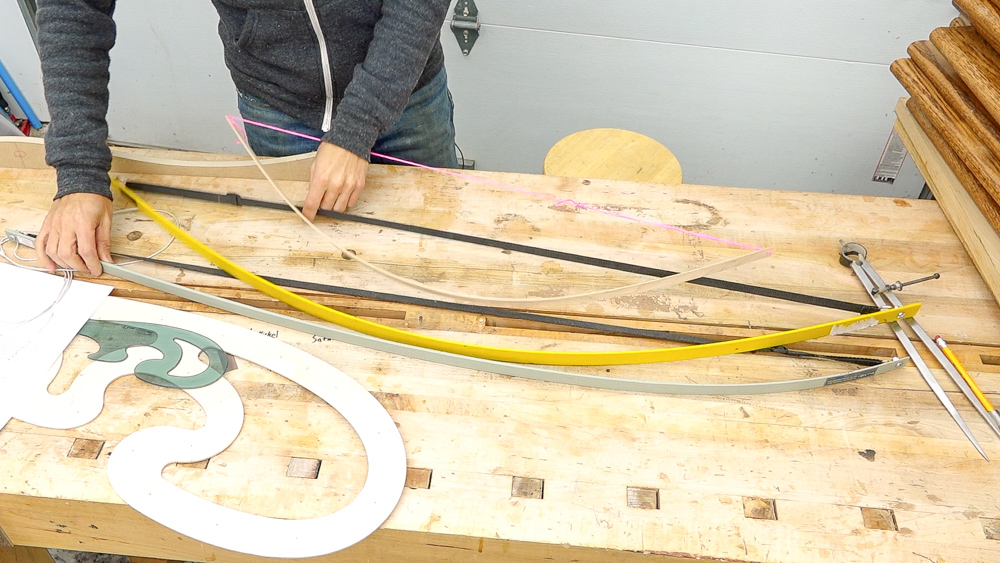
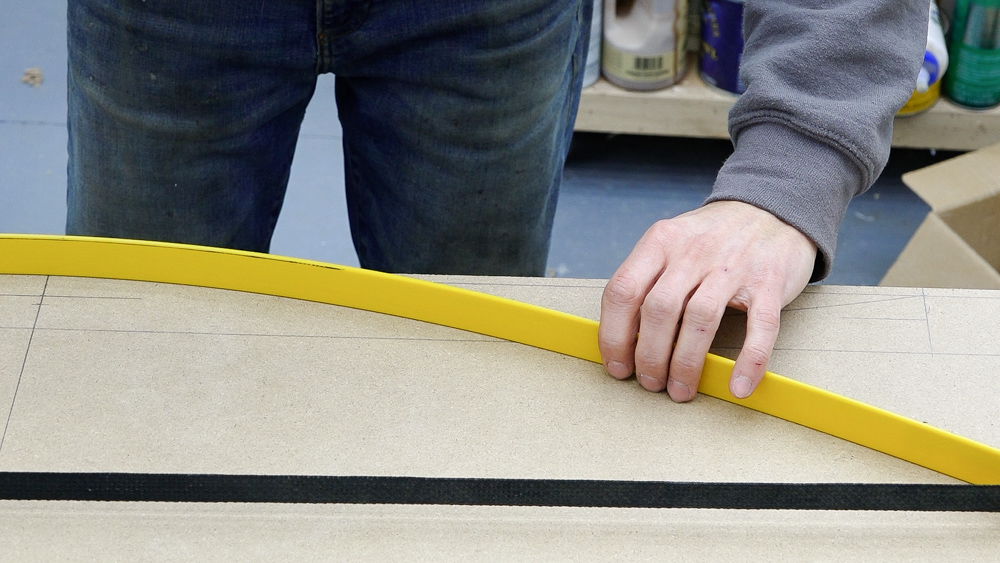
First up is a drawing bow, which is the first thing I grab when I need to draw a curve. A drawing bow is simply a flexible strip that has some way to flex it and keep it in whatever position you put it in. I have a couple here, the yellow one is symmetrical across its entire length, and the others are asymmetrical. With the asymmetrical bow, one end of the strip is thicker than the other so that gives you an asymmetrical arc when you draw it into a bow. A drawing bow is also a fairly simple shop project. You just need a strip of wood with a string. If you make a slip knot in the string you can adjust the amount of flex in the bow.
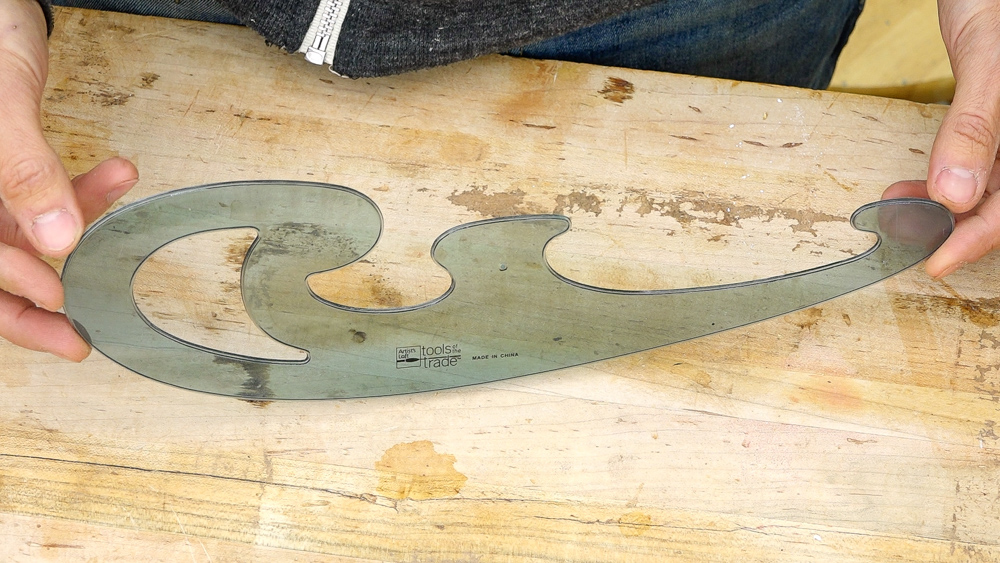
Next up is a French curve. These come in a variety of different shapes; this is just one of them. The idea here is you find a section of the curve that you like, and you incorporate that little bit of the curve into your work. These are commonly available as drafting supplies from art suppliers. This one is a good size for smaller projects, but for a piece of furniture, it’s on the small side.
For furniture, a much bigger French curve is more useful because you have a bigger template to work with.
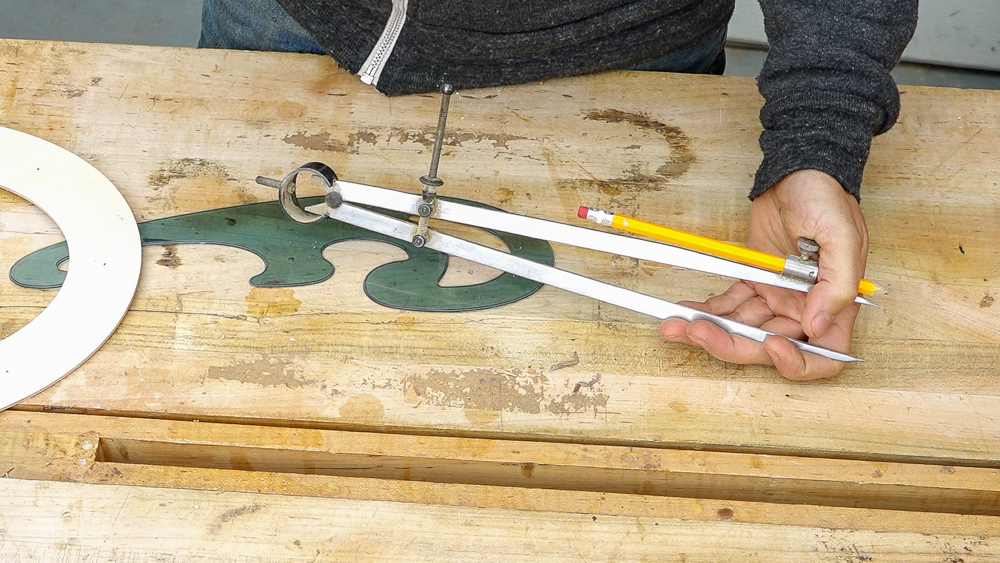
Last is a compass if you want to work in terms of true radii. This is the tool for perfect semicircles. The French curves and the drawing bows will give you arcs, but they won’t be consistent or even. A compass will give you an actual semicircle segment. If you want to go bigger than this, you could use a trammel. Now that we have our layout tools, we can use them to create a serpentine curve that we like, so let me walk you through my process.
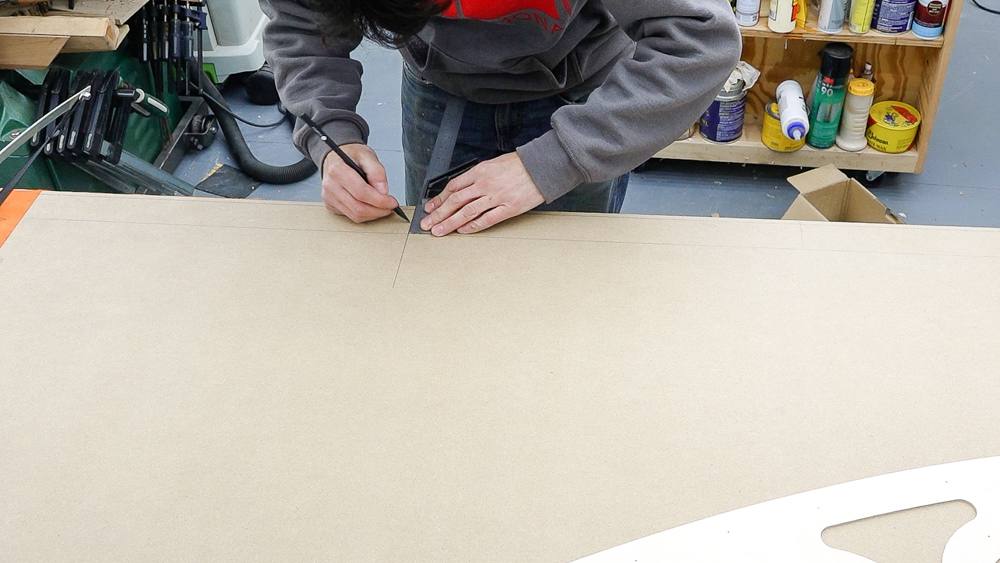
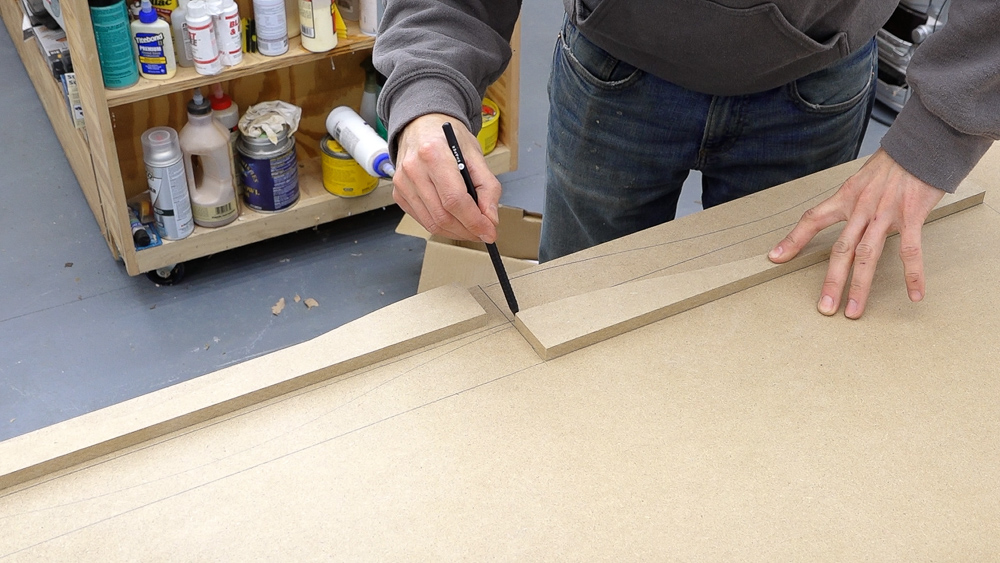
It starts off as a grid that will provide some guidelines for the curves. I’ll draw two lines, which will establish the thickness of the blanks that I’ll use for the drawer fronts, which are going to be two inches thick. I’ll lay out the extent of the case, which is 36 inches, and then mark the center line. I’ll next mark the finished thickness of the drawer front in the middle and the ends. This will reference from the front of the blanks. Then I’ll mark the finished thickness down in the areas which will be the valleys. These marks will ensure that the curve I come up with can actually produce a drawer front out of my two inch stock. With a finished thickness of three-quarter inches and a blank thickness of two inches, my serpentine curve can travel an inch and a quarter through the stock’s thickness.
Now I can start playing around with some curves. On this side, I’m using a symmetrical curve in the middle and an asymmetrical curve at the ends. The inflection point just needs a little bit of finessing. On the other side, I use a symmetrical curve for both.
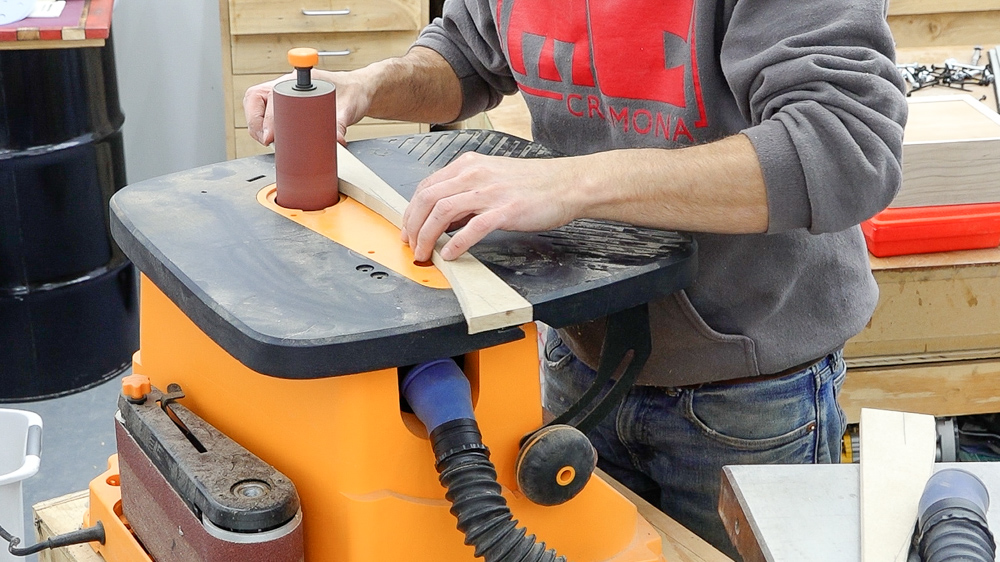
I’ll split them into two half templates and then start cutting them out to see which one will speak to me. Once I have the shape cut out of the bandsaw, I can start refining it with the Triton oscillating spindle and belt sander. An oscillating sander like this is extremely helpful for curved work, so we’ll be coming back to this tool many times, and we’ll take a closer look at it in the future.

This time I thought we could about the Triton SuperJaws. When Triton first came on as a sponsor, I was building my saw mill. That was five years ago, and I didn’t have a whole lot of room in the shop, so one of the first Triton products I had a lot of experience with was the SuperJaws. These created a really functional work area in the driveway for me. Anytime I needed them, they were there, ready to go. I can hold anything. I can clamp things. I can do all kinds of stuff and not be inside the actual shop.
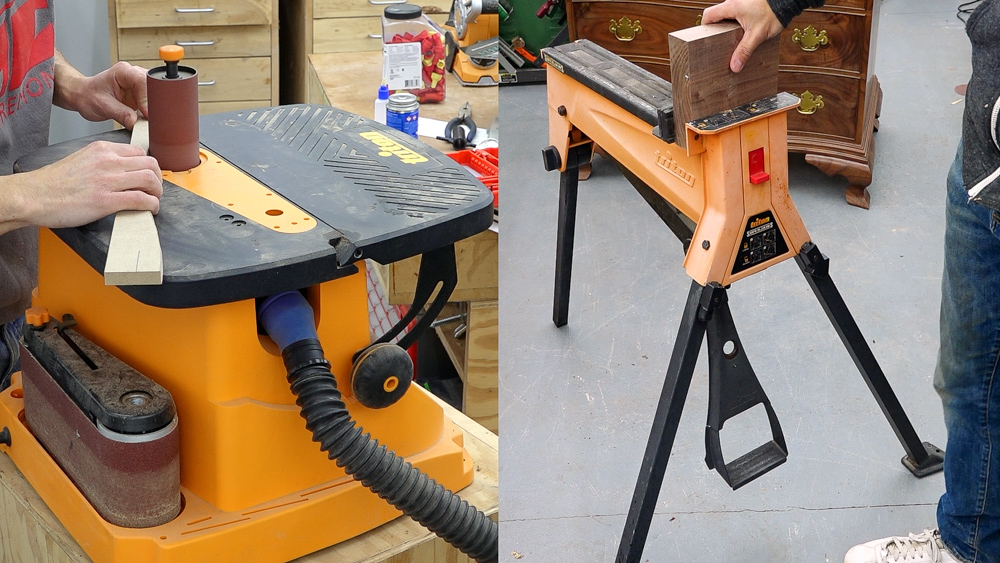
Most of the things I clamped were pretty small, but the jaw is reversible for clamping larger objects. If you want it to work on a door, for example, you can hold it in the jaws. Or if you wanted to create a large work surface, you could clamp a piece of plywood in the jaws and have a nice work surface wherever you are. And those are the SuperJaws, one of my favorite Triton products!
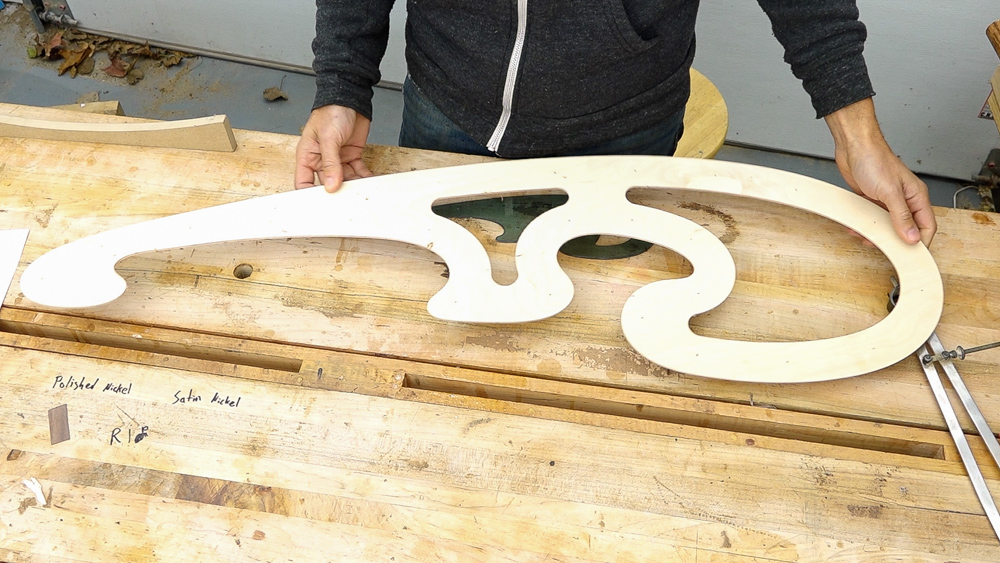
With those two half templates cut out, I can convert them to full templates. At this point I decided I liked the fully symmetrical curve better and didn’t bother to cut out the full template of the symmetrical and asymmetrical version.
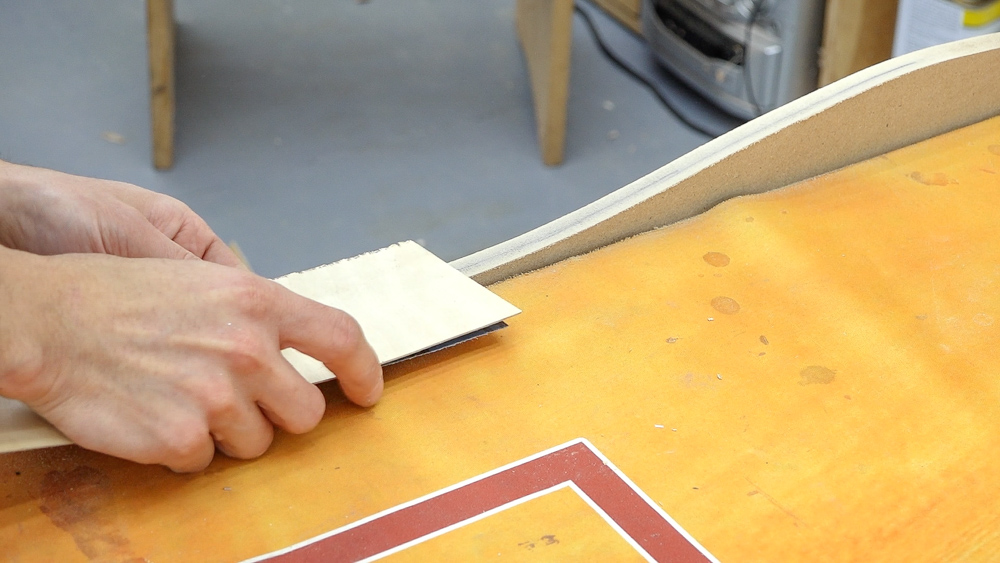
The last step to make my master template is to fair the curves and do the last little bit of finesse work. I’m using a marker to make tracking my progress easier. The marker will hang around in the low spots, making them very obvious. I’m also trying to keep the two sides of the template as close to the same as possible. I’ll establish left and right and use those throughout the project to mitigate the error. I thought it would be nice if the serpentine curve looks visually symmetrical left to right. Now we have a mostly fleshed out design, we can take a look at the lumber next.
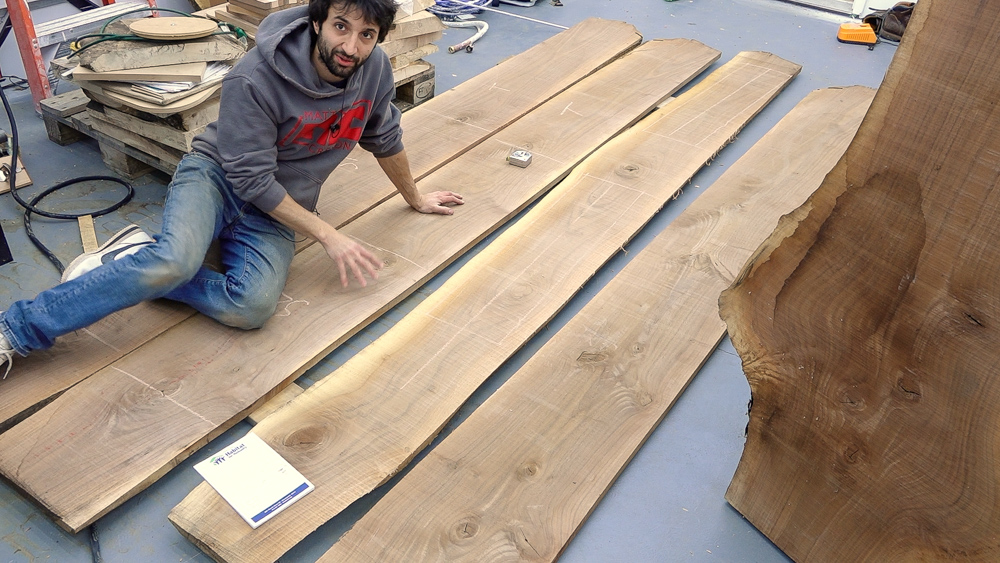
The primary material on this project will be walnut, and the secondary material will be maple. Before we talk about the boards I have laid out here, a little bit of the history.
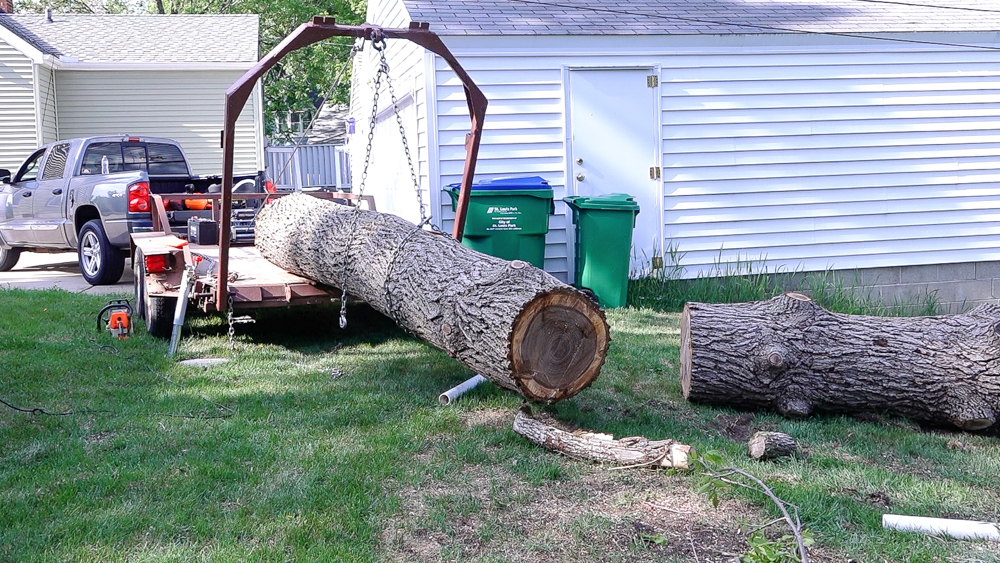
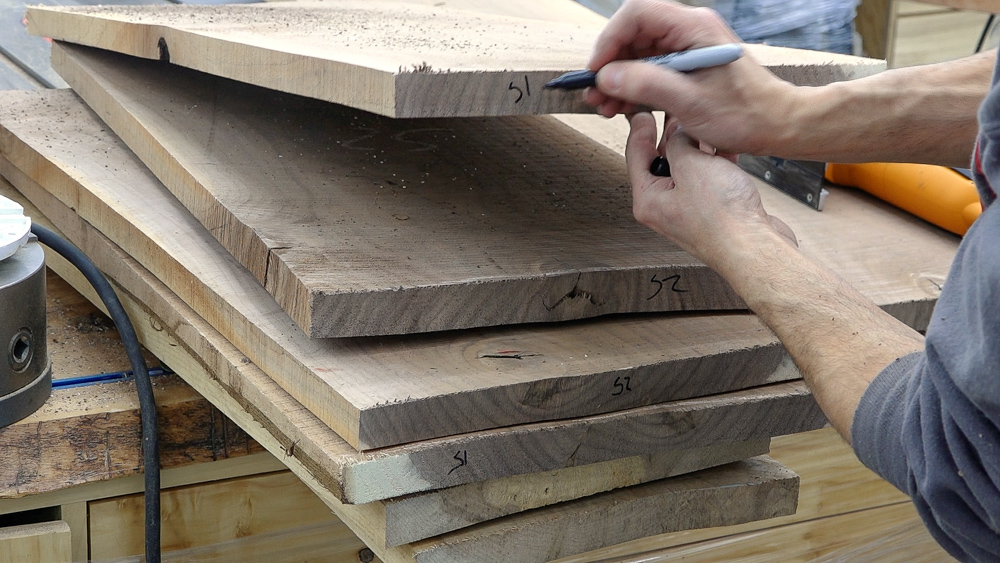
I picked up the log that these came from in a video a few years ago. That was a log that was laying down in a really tight access back yard. It was laying down a hill and there was a garage in the way. I picked it up, brought it home, and the sawing of that log happened in my series on turning a log into lumber. Part one, we focused on cutting boards out of logs, and that was the four core material that I’m using for this project. Part two was a little bit of a different approach to sawing, which is how to saw slabs for interesting figure and grains and shapes and things. I’ll be using those slabs for the drawer fronts because they’re thicker, a little over eight quarter. Part three of that series covered the stacking and drawing of this lumber.
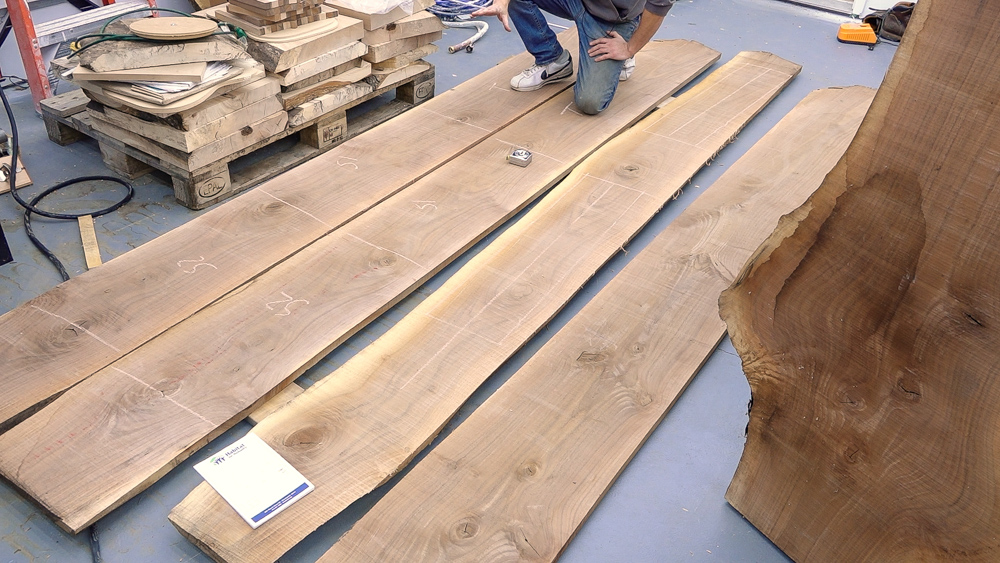
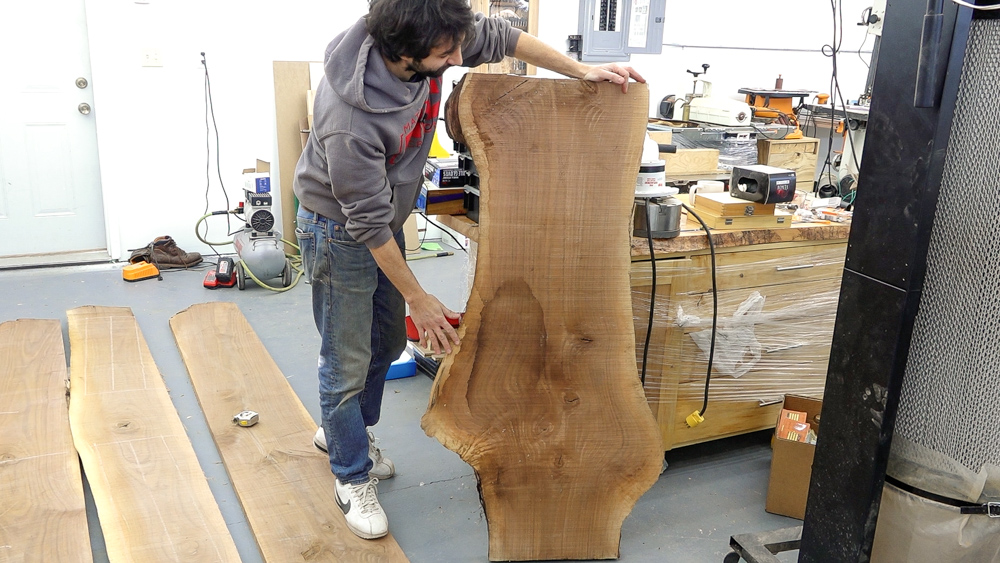
I have a pair of bookmatched boards, which gives me the material for the sides and the top. Those are really the only large primary visible panels in this project. Back and bottom can be secondary material, so we don’t have to worry about that too much. There’s not a whole lot of crazy things going on with these slabs. I’m trying to avoid sapwood because I’m trying to go for more of a traditional feel. I should have enough width here to remove this bit of sap in the middle, join those two together and have a nice panel for the sides. The top may not work out that way, but I’m not super worried about that.
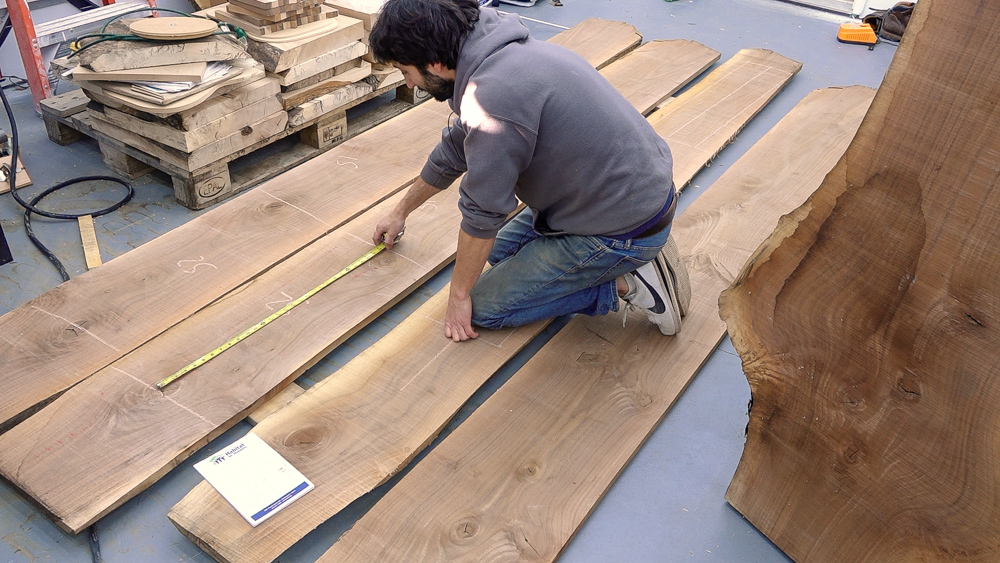
One little issue I am having, though, is that for the sides to be 28 inches, I am going to be into some knots, which I don’t really want on this piece. I’ll cut this a little bit long for now, and we’ll see where things end up. I have some flexibility because the bottom of the case will be covered by that molding down there, so I have about three-quarters of an inch of coverage on to whatever face. If that doesn’t work, the case will just shrink down a little bit, which isn’t a big deal either.
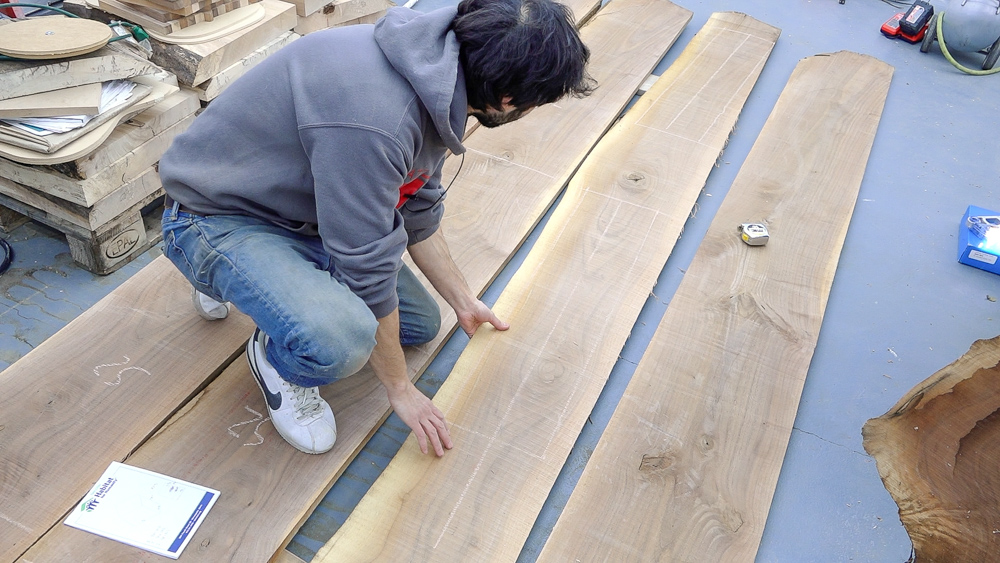
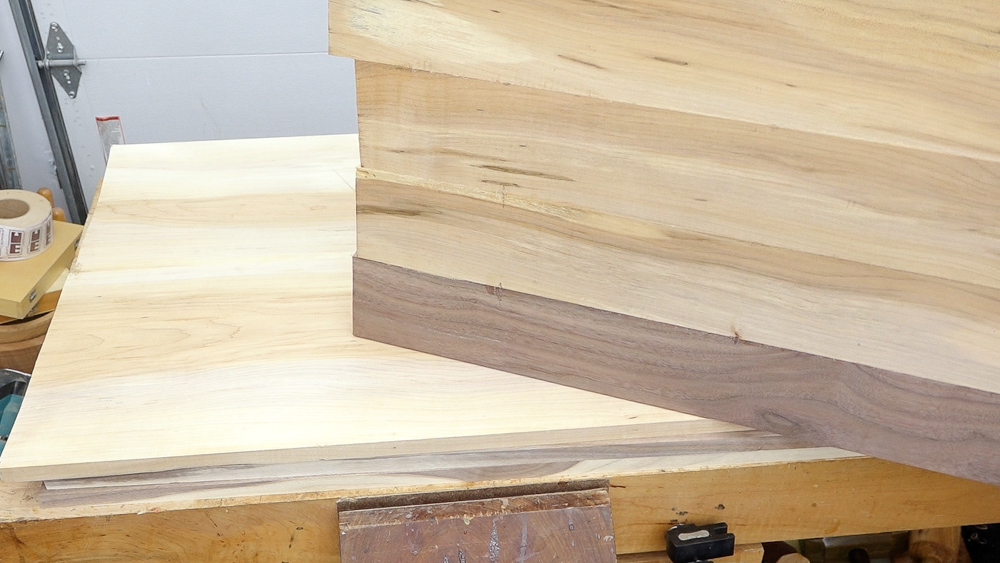
This is the board I will use for the divider stock. I’ll rip it into these strips here. This slab is from towards the outside log, and you can see it’s pretty narrow and sappy. That is perfect for this kind of stock, because I want that visible front edge to be a nice straight grain. If this is perfectly flat sawn, that edge will be quarter sawn and, therefore, straight. It could still be rift sawn, but I won’t have cathedrals in the front of the case so I’ll be able to have the focus on the drawer fronts themselves. I have these set up for the cut to run right through the pith area where the tree was actually growing, not parallel to the edge of the board. That’s going to give me a nice chunk of heartwood area, and there’ll be some sapwood towards the back, but that’ll be the inside of the case.
As I mentioned, the drawer fronts are going to come from the slab material. This is an off cut from the dressing vanity, but I have the rest of the slabs from that log. This will give us a lot of interesting things to play with and give us the thickness to cut that serpentine pattern into the drawer front. I’m not going to do the drawer layout right now, we can worry about that later when we get more towards that.
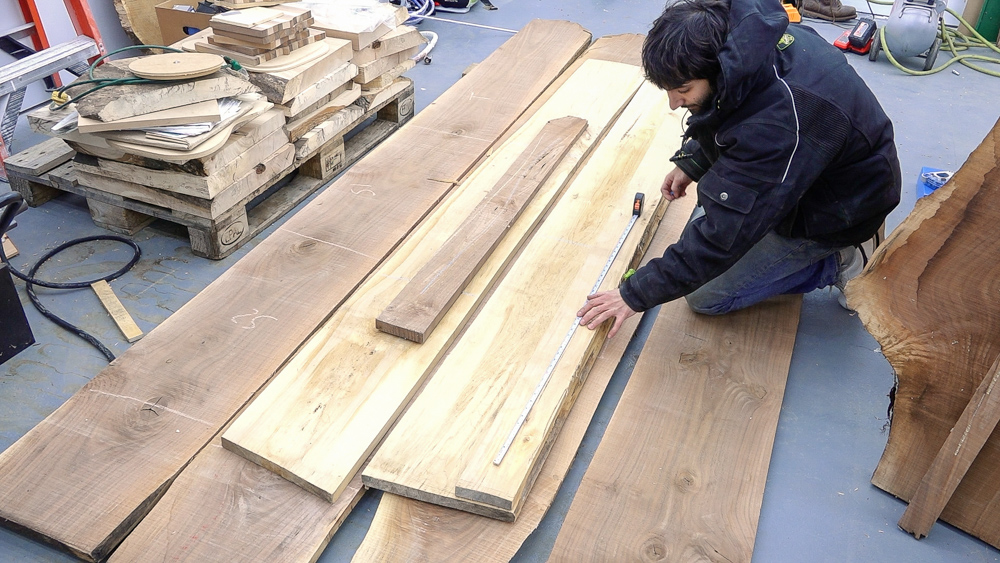
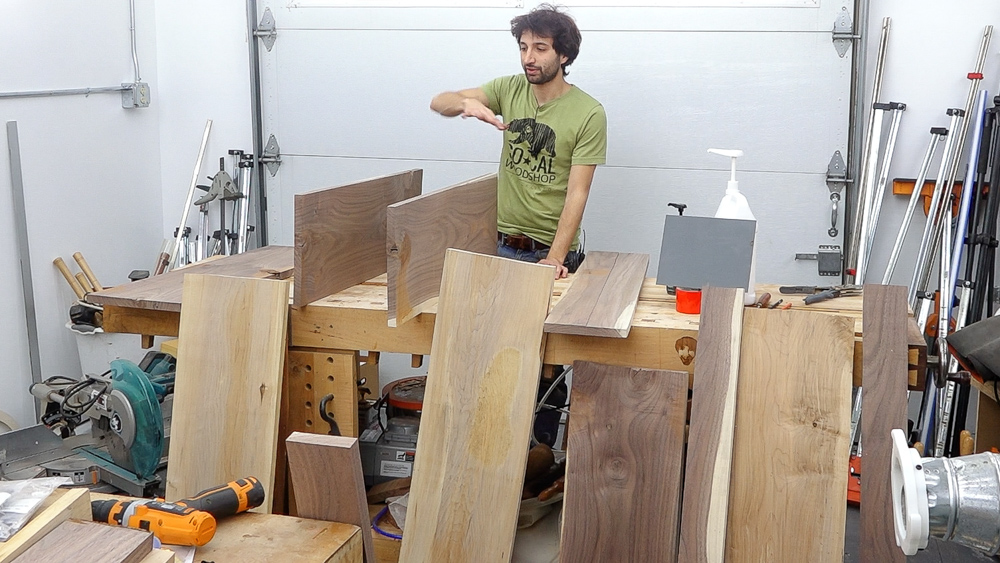
For now I just want to be make the case, which is the case sides, the case bottom and top, and then all the dividers. I’m going to grab the secondary material, get that laid out, and then it’s finally time to start chopping stuff up!
This layout is pretty simple because there’s not a whole lot of artistry to this, and the boards are plenty wide already. One of them has some rot, so I will work to eliminate that. I just need to get these measured, cut, then joined back together. There’s one small difference between the top and bottom. The top is going to be edged with some walnut because that is going to be exposed, and it will have a serpentine in it.
This will be the drawer runners that support the drawers, and run from the front to the back. These are about two feet long, and I will cut this up now and get it out of the way.
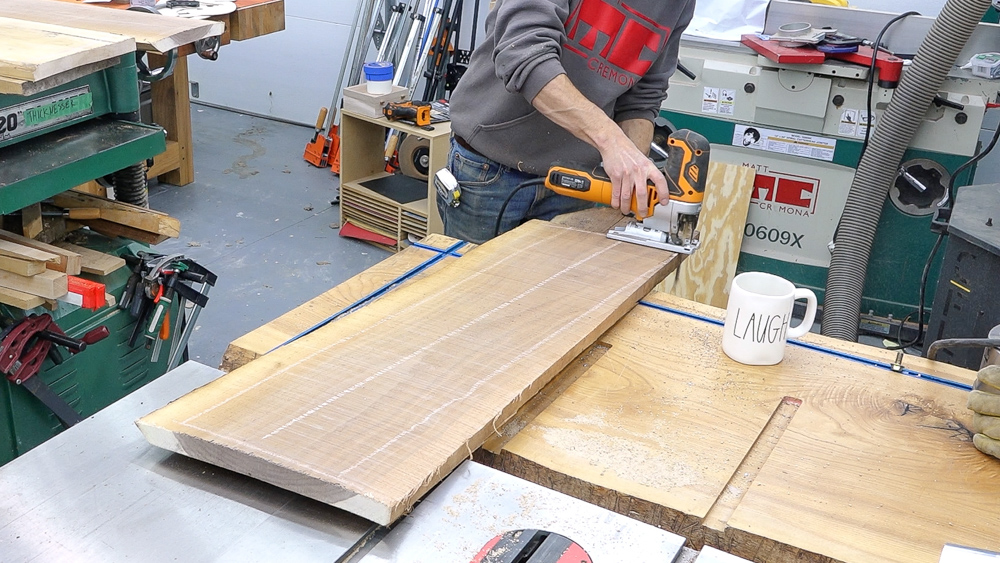
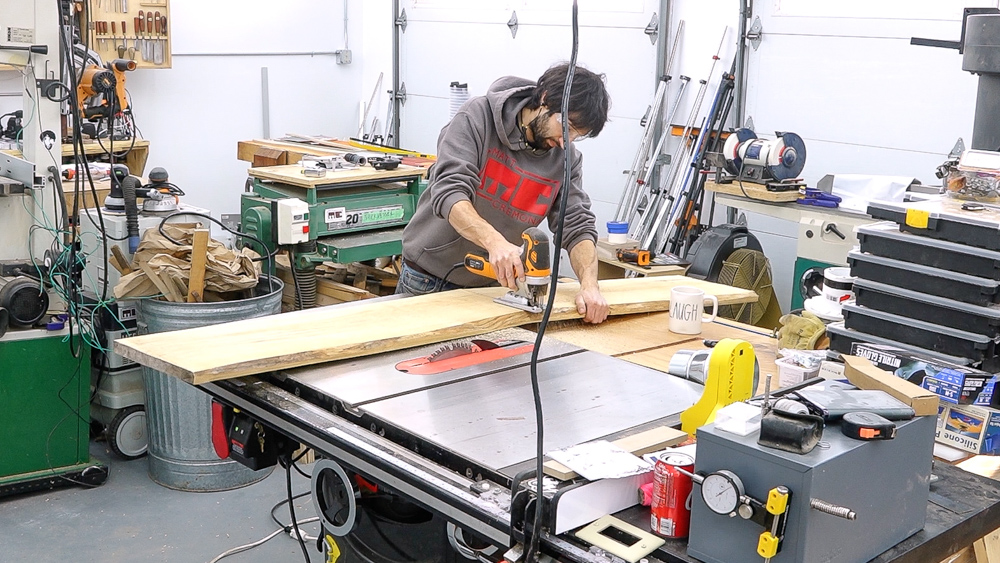
I’m going to start cutting these up and milling everything down. The only two boards I won’t mill up right away are the two boards for the top.
Everything else will be milled to rough dimension for now. I’ll let it rest for a few days, and then come back and make panels out of everything.
Everything is rough-milled. These are going to rest for a few days, which allows them to de-tension and distress and warp if they’re going to warp, before bringing them back into flat and bringing them down to final thickness.
While these are sitting around, I have them either leaning up against the bench or on edge. That allows air flow on all sides of the board so they can acclimate and readjust to their new environment. This is also when I do my epoxy fills. That way, when I do the final milling, the milling process cleans up the epoxy.
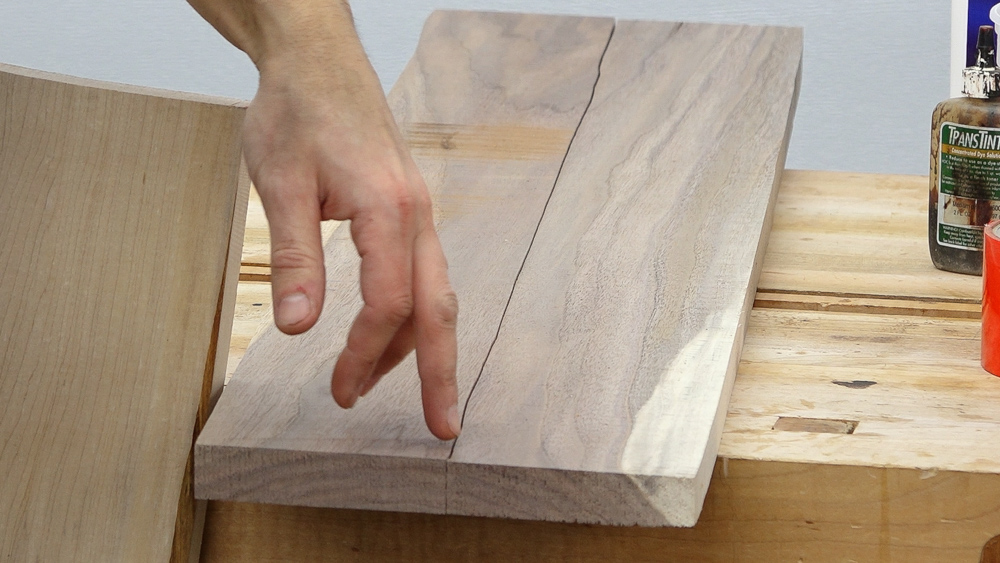
I thought I’d give you a little better view of the grain orientation on the dividers. This is the cut line, which is right down the center of the board, right where the growth rings come to their apex. Right here at the cut, the growth rings are pretty much flat and parallel to the face, but more importantly, they are perpendicular to the edge, so this edge is actually quarter sawn. For this project, I don’t really need quarter sawn grain, I just need straight grain. If you understand how the grain can present itself to the face, depending on the orientation of the growth rings, you can really play around with things and get things to work out exactly as you want.
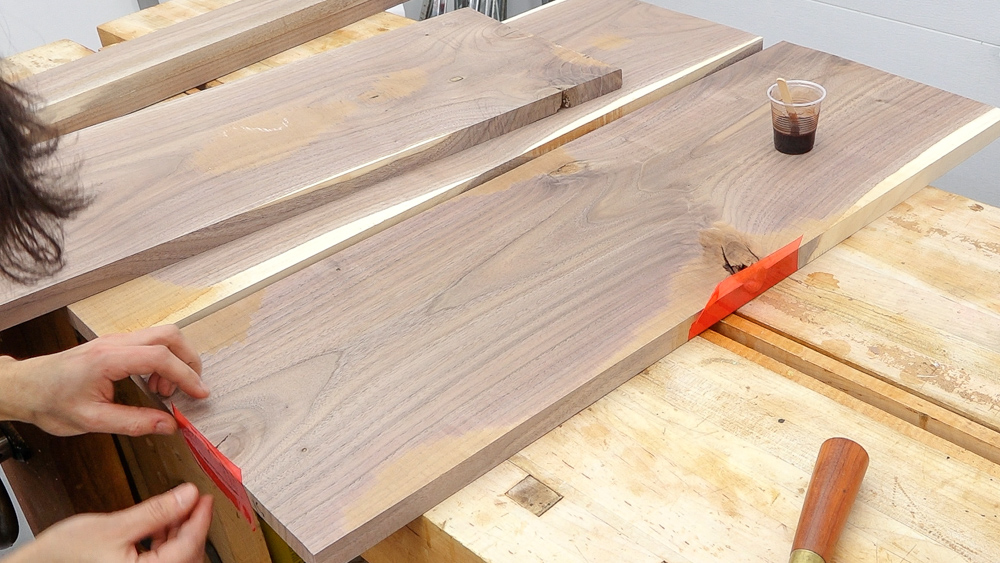
Now let’s take care of a few little defect fillings. On a lot of these, my defects don’t go all the way through, so I don’t have to do a whole lot of masking. To fill the defects, I’m going to use TotalBoat’s traditional 5:1 epoxy. I like to use a brown tint, which doesn’t accentuate the fact that there’s a defect. It just looks like there is a shadow line more than anything else. I’m using a slow set resin, which gives this epoxy plenty of time to flow down into all the nooks and crannies within that crack before starting to cure. It takes about 18 hours or so before you can plane these.

It is the next day, and the epoxy is all cured and ready to go. Now we can start making up the actual panels for this project. I’m going to set aside all of the divider stock, except for one, because we don’t need that right now. That one piece of the divider stock will be laminated to the front edge of the top. I’m going to make four panels: two sides, top and bottom because we’re just making a box. I’m going to go through the milling process again, to bring all these back into flat, plane them down to final thickness, and then start laying them out and prepping them for all of the edge jointing to get these ready for glue up.
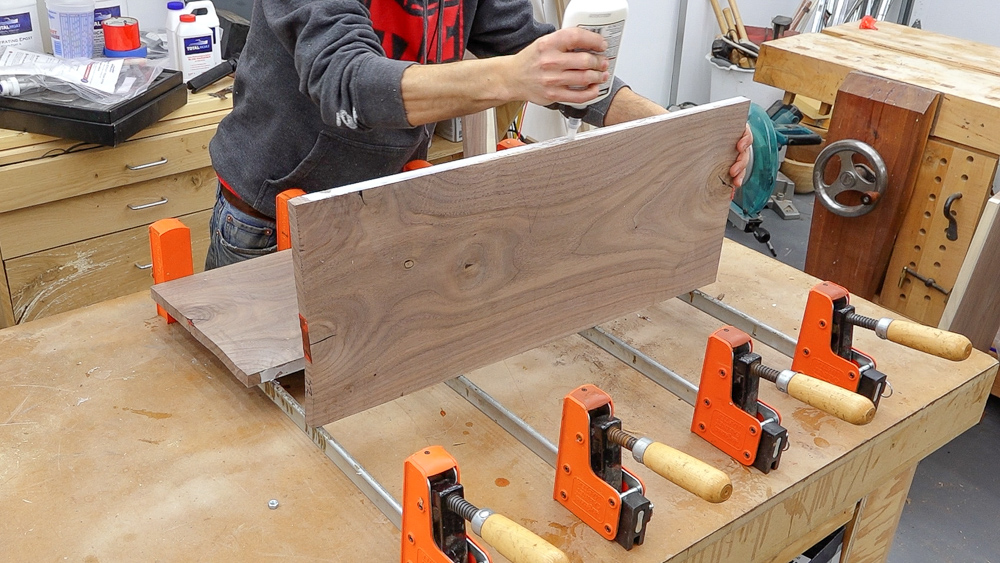
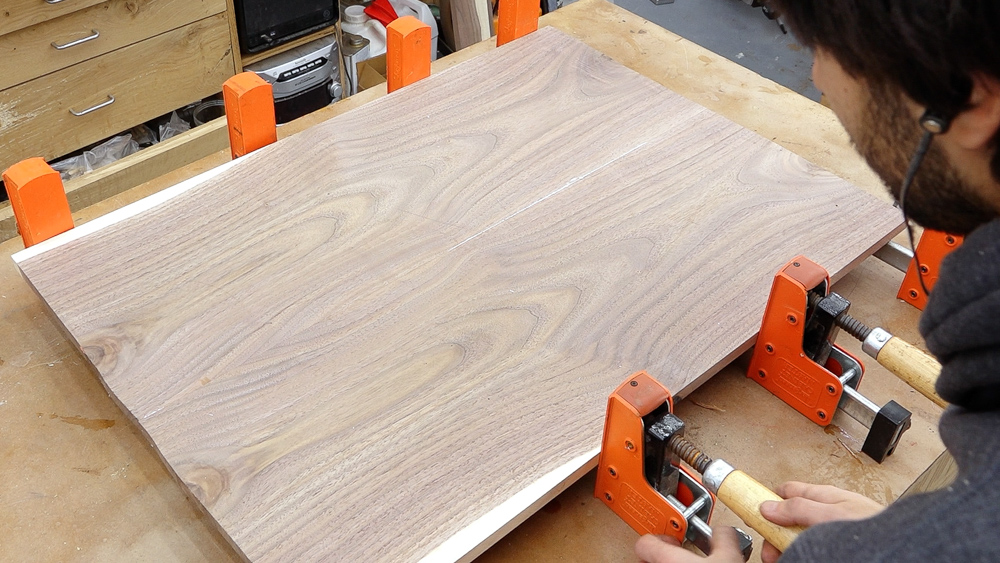
After some work to finalize these, we’re ready to glue them up into actual panels. This is where my obsession with having things nice and flat really pays off, because if you have flat work pieces, all your joinery is going to be a lot easier. There is no more fundamental furniture joint than this one right here: the edge joint panel glue up. This one causes people the most grief, but if you have boards that are flat, you can get the edges nice and straight. This process becomes almost effortless, and you don’t have to worry about the wood fighting you anymore. You can just work with the wood and enjoy it. Having these boards flat means they’ll sit nice and flat in the clamps, and I won’t have to put any cauls on anything.
One trick with this is when you’re doing your actual edge jointing, you can run opposite faces against the fence. That will cut a complementary angle onto the edge of the board. If your fence is not perfectly square, you can account for that this way. If you make a habit of doing things this way, it’ll eliminate errors and potential problems in your workflow and make things a lot easier.
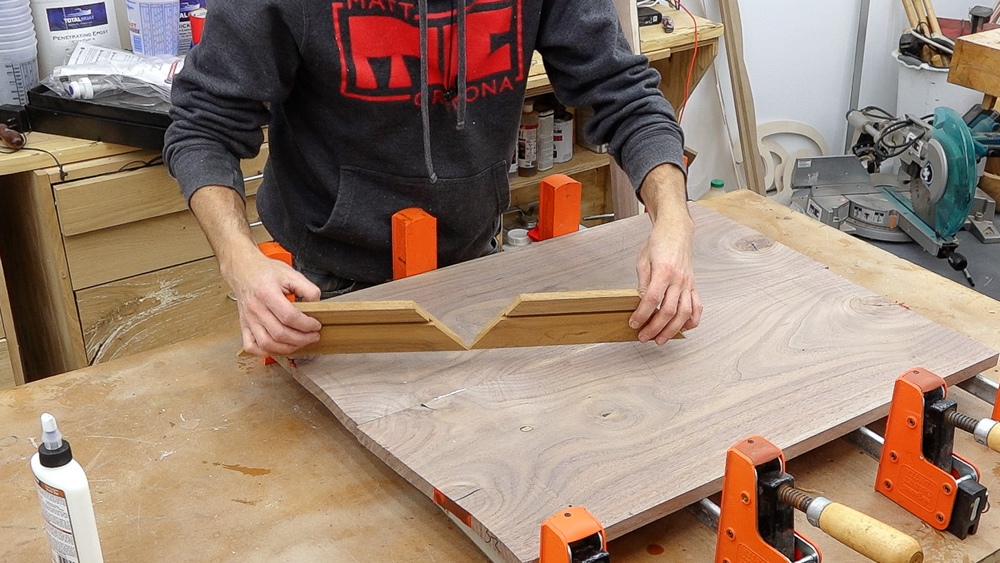
Here’s an example of a complementary angle. We’ve all seen a picture frame with 45 degree angles like this. If your fence was really out of square and you ran both boards with the same face against the fence, you’d end up with something like in the picture above. When you clamp the boards together and try to close that gap, your panel will have an angle in it.
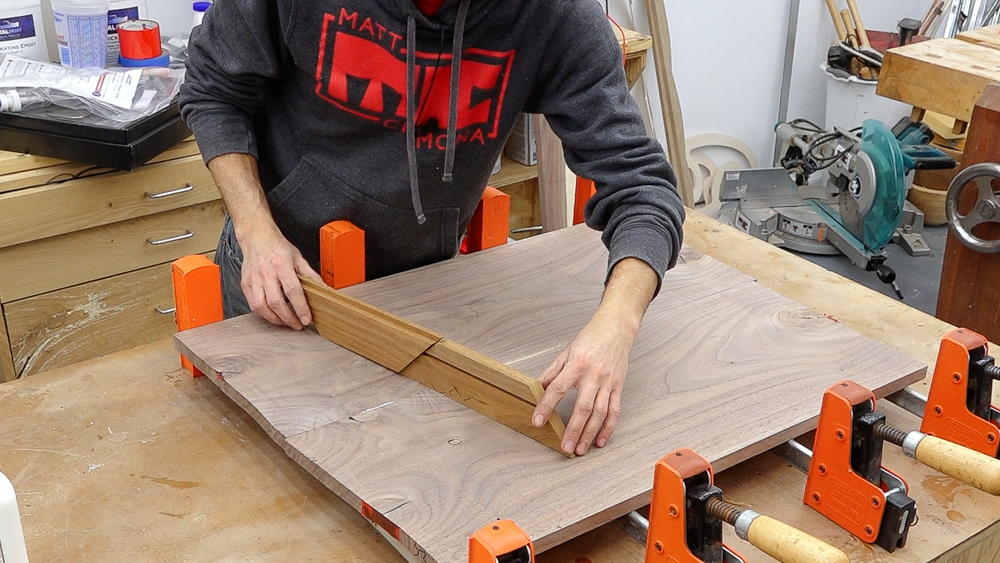
If you reverse that and you clamp them up this way, now they are complementary, the error is canceled out, and everything works nice and perfectly.
Another nice thing is that the edge joint for off the joints is nice and straight, so I don’t need a lot of pressure to close this up. The more pressure you have to apply, the more that pressure is going to tweak your panel out of square or out of flat, causing even more problems. All I have to do is hold the boards down to the clamp bodies and supply a light bit of pressure to fully close the gap.
The other thing I’m looking at on this panel is my alignment. Since I’m bookmatched, I want to make sure that the grain matches up nicely where it meets, and then leave it alone.
I have a few more panels to do. It should be pretty quick, and then that’ll be it for panels!
One last tip: if you’re going to have your panels sitting around for a bit before you can start cutting your joinery on them, stack them on a flat surface and keep something on top of them. This prevents air from getting at the surface of the panels and keeps them from warping.
I think that’s a pretty good stopping point for now. If you like these little more in depth videos, definitely check out my classes over in the Guild. I have 150 videos like this spread over nine classes. And if you want to take on the challenge of making your own serpentine chest of drawers, I have a full set of plans for this piece over on the website, which you can check out as well.
Thank you as always for joining me, I greatly appreciate it! If you have any questions or comments on the serpentine chest of drawers or anything in the shop, please feel free to leave me a comment. As always, I’d be happy to answer any questions you might have. Until next time, happy woodworking!
Welcome to my shop! This is a quick update to let you know what I’ve been up to. This big chunky thing is the leg

Welcome back to the home renovation. This time I’m going to be working on the kitchen island. Here is a small model of the island.

Welcome back to our home renovation. Today I am going to be working on this wall. It needs some upper cabinets and the surround for
2 Responses
Enjoyed your serpentine dresser video .
Thanks!