
Matt's Weekly Shop Update
Kitchen Island, Barn Power – March 2024 Update
Welcome to my shop! This is a quick update to let you know what I’ve been up to. This big chunky thing is the leg
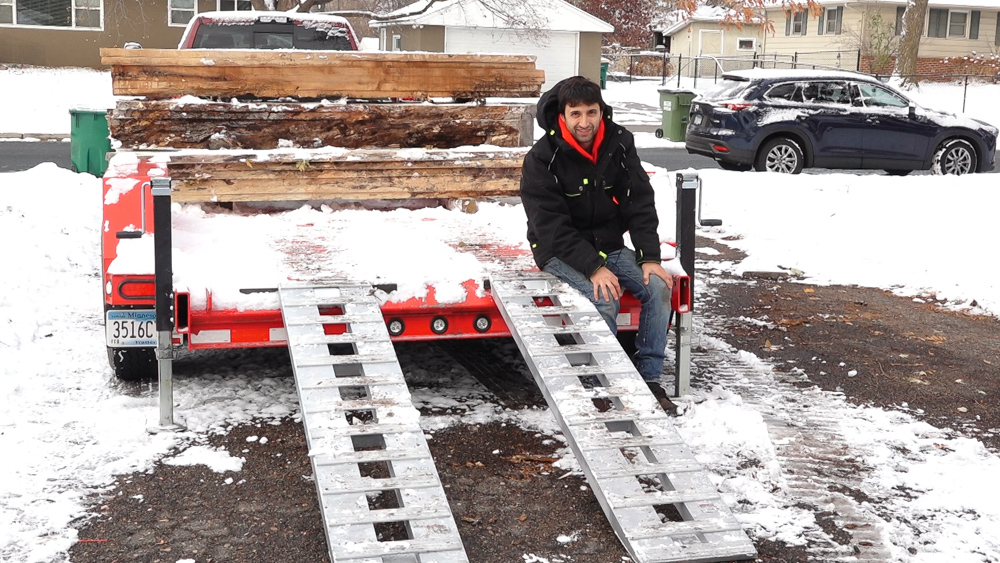
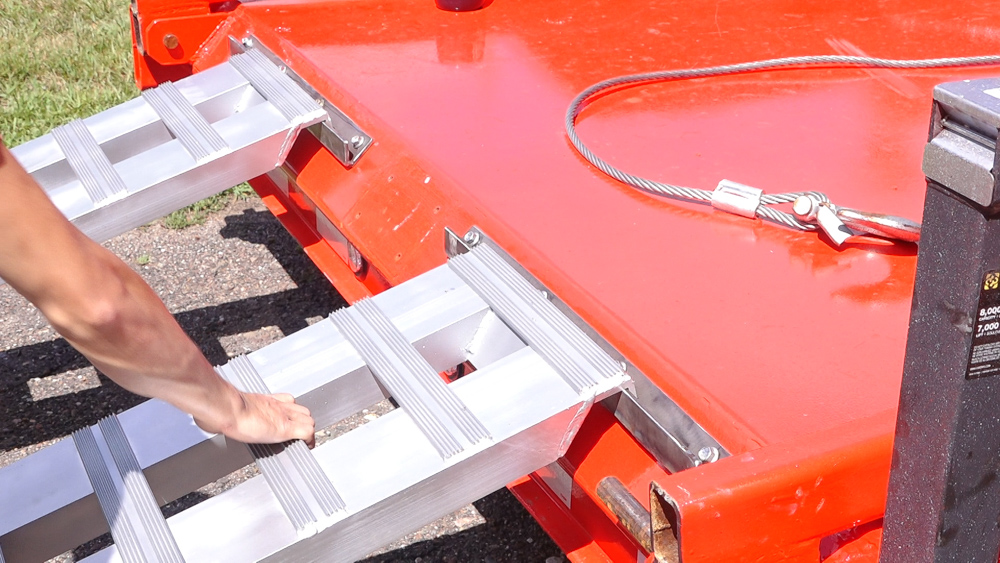
I wanted aluminum ramps so they’d be lightweight and I bought some vs making them myself because after building this trailer, I just wanted to buy something and be done with it.
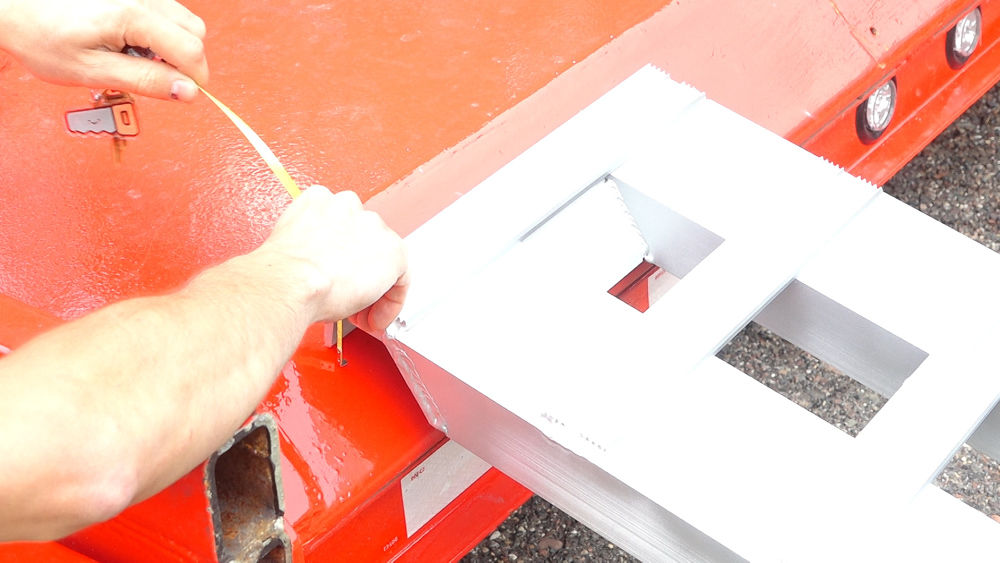
These ramps are designed to hook onto the back of a trailer and since I don’t have any openings on the back of the trailer I’ll just have to whip up some brackets – which will be a little unique since they will need to be at 45 degrees to match the angle of the back of the trailer. I also want them to be removable so they don’t impact log loading or unloading when I’m not using the ramps. I spent some time getting an idea of the size of the brackets so the ramps would end up flush or close to flush with the deck and to get an idea of how long they should be so I can adjust the ramps for wider things in the future.
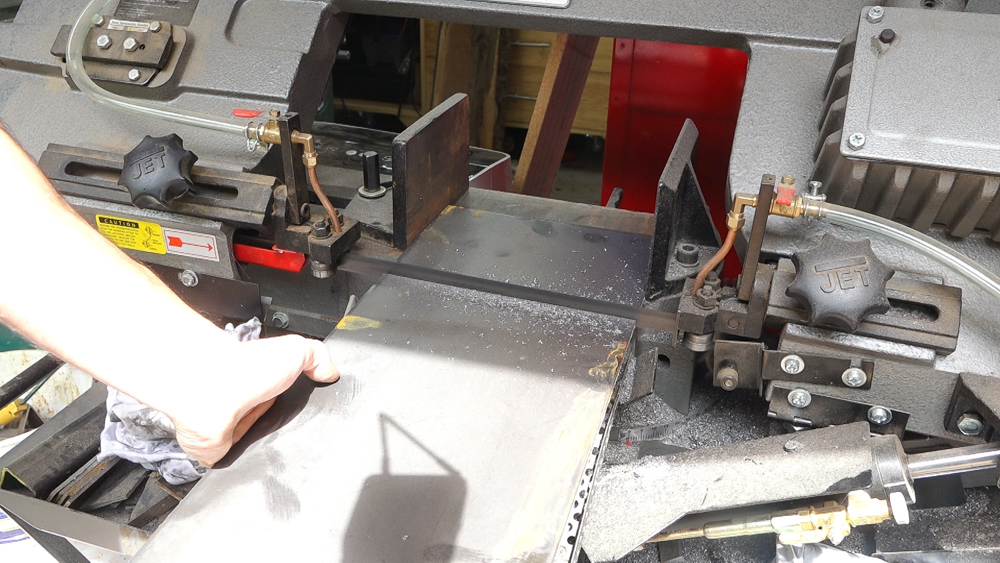
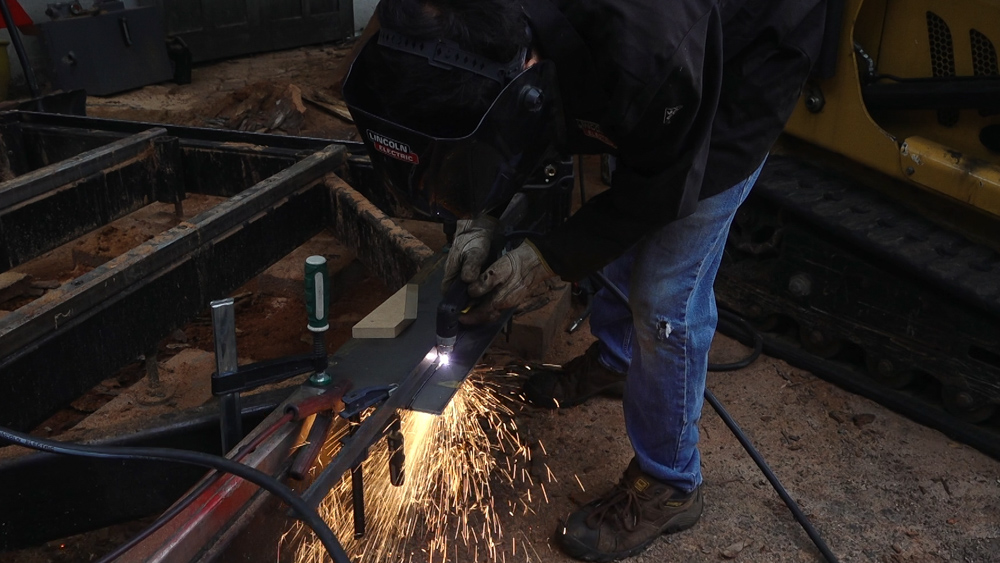
Instead of going out and buying bar stock of the right widths, I figured I could use up some ¼” thick plate that I had and just cut it into strips with my plasma torch. I don’t have a lot of experience with the torch and it shows because I’m not very good with it but I wont get better if I don’t practice. I cut the extra length off the plate so the resulting strips would be the correct length for what I’m after for the mounts.
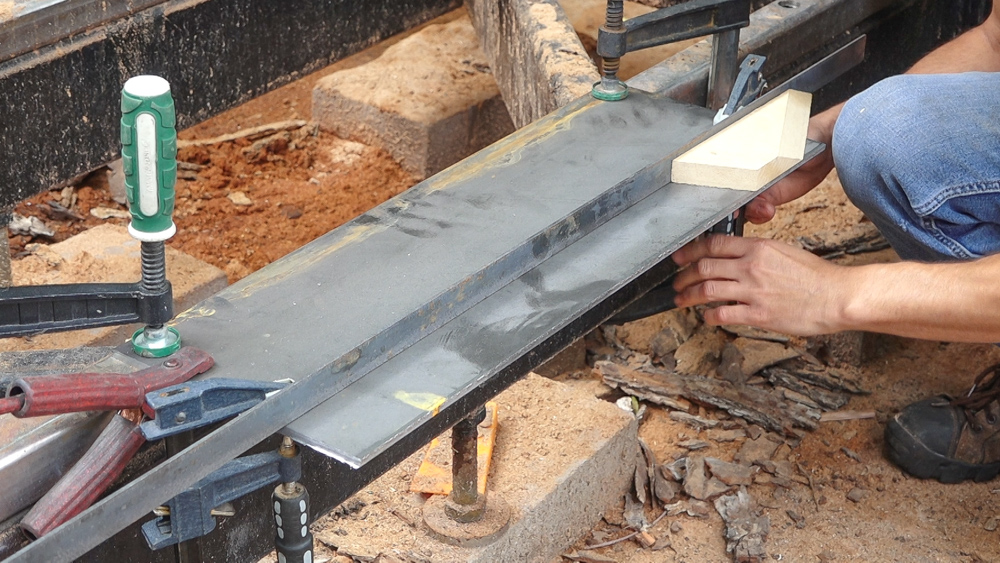
To make cutting the strips easier, I’ll use a fence and to make lining it up simple, I cut a block that is the right width to account for the offset of the torch guide and the kerf of the torch. I can align the block flush with the edge and clamp the fence in place and then I can start cutting.
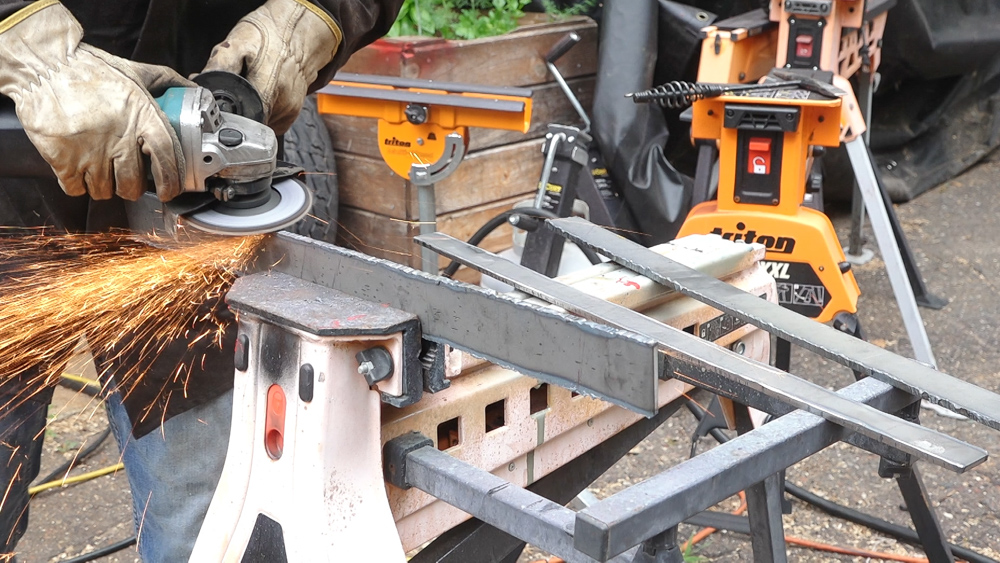
Next I can start cleaning these strips off. Knocking off the dross and then smoothing things out with a grinder. At this point, you can really see how not well cut these are. Luckily I’m going for function over form.
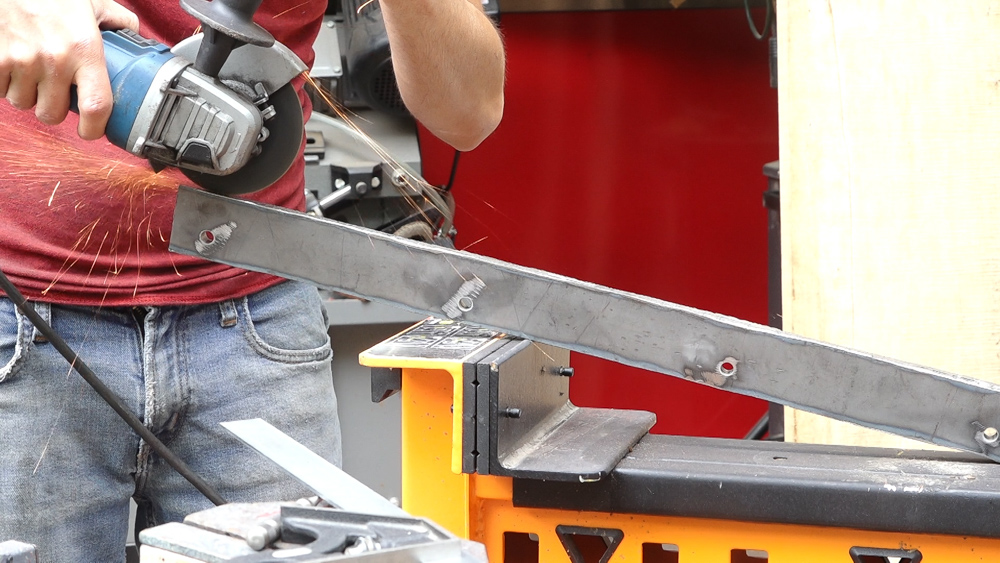
Up next, I can take care of the mounting holes. I plan to attach these brackets to the trailer with 4 3/8” bolts each. I laid out the outer holes about an inch from the end and then split the area between for the other two holes. I laid the holes on just one of the back strips and then I can tack the second strip to it so I can drill all the holes at the same time. My Bridgeport is still disassembled so I’m back to using my little clanking drill press. Luckily drilling 4 holes is a pretty easy process. Back outside, I can cut the tacks and pull the two strips apart.
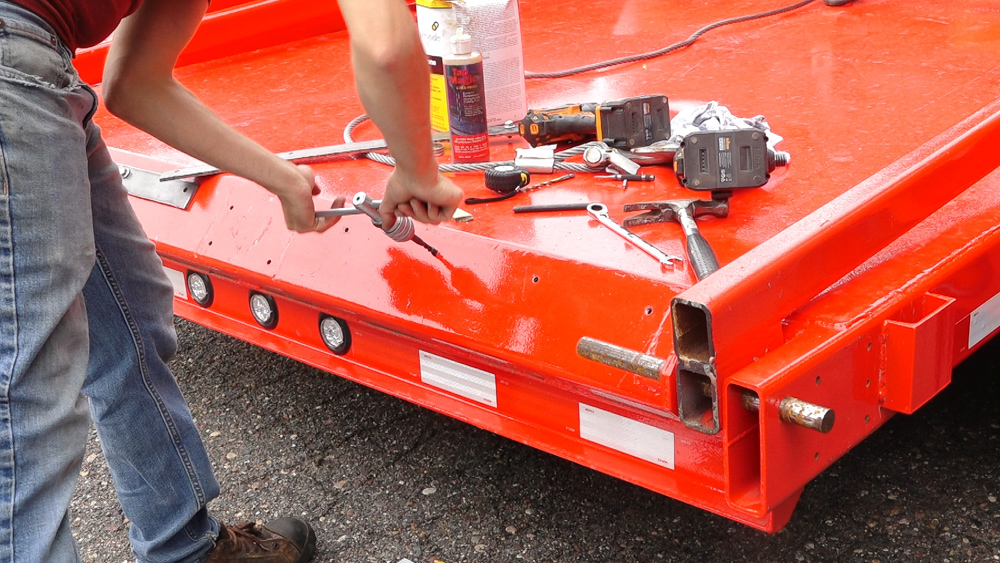
I’ll make the mating tapped holes in the trailer next. I used the ramp to hold the strip in place and used a scrap of wood to help align the strip so it would be parallel to the trailer deck. I’ll transfer the holes with a transfer punch and then define them further with a center punch. The ramp was in the way for the other two holes so I’ll take care of the first two and then come back and do the second.

Now it’s finally time for some welding. I set up my Mega Squares to use the 45 degree corner and bridged them with a piece of aluminum bar stock to keep them aligned. I’ll tack the strips together and then start welding them a few inches at a time. Speaking of practice, I’m again using this process to practice, this time my mig welding. I feel like I’m starting to get proficient at it so that’s good. Now it’s totally excessive but I’ll also weld along the inside of the seam. I’m trying to get some practice in after all.
After these things cooled off the next day I can bolt them on and try things out.
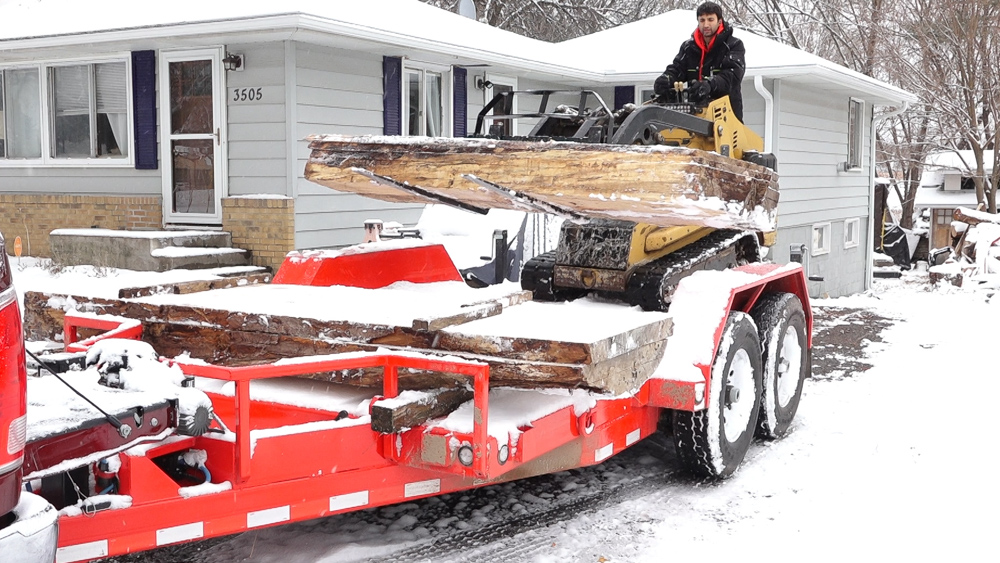
Since people are probably wondering: the weight rating on the ramps is 3000lbs each so 6000lbs for the pair. My little skid steer is right at 3000lbs so plenty of extra capacity to even drive up the ramps with a load or heavy attachment (like my snowblower). The one thing to get used to with loading a tracked machine is that tipping point where the machine goes from being on the ramps to being on the deck of the trailer. It’s can’t be on both. I’ve previously only ramp loaded wheeled machines which don’t behave like this.
Welcome to my shop! This is a quick update to let you know what I’ve been up to. This big chunky thing is the leg

Welcome back to the home renovation. This time I’m going to be working on the kitchen island. Here is a small model of the island.

Welcome back to our home renovation. Today I am going to be working on this wall. It needs some upper cabinets and the surround for