
Matt's Weekly Shop Update
Kitchen Island, Barn Power – March 2024 Update
Welcome to my shop! This is a quick update to let you know what I’ve been up to. This big chunky thing is the leg
Order Chair Kits here: https://www.mattcremona.com/product-category/chair-kits
Each chair will have the following parts:
It is highly recommended that the kits are left in the plastic bag they are shipped in until you’re ready to assemble your chairs. This will protect the unfinished wood parts from changes in humidity which can distort the parts or potentially crack. The end grain of the seats are coated with a sealant to help prevent them from cracking during storage.
Separate the set into individual chairs and label each group. Wood naturally has variability in its color and grain. Group similar parts together to achieve a more uniform look to each chair. If you are planning on painting, grouping similar parts isn’t important.
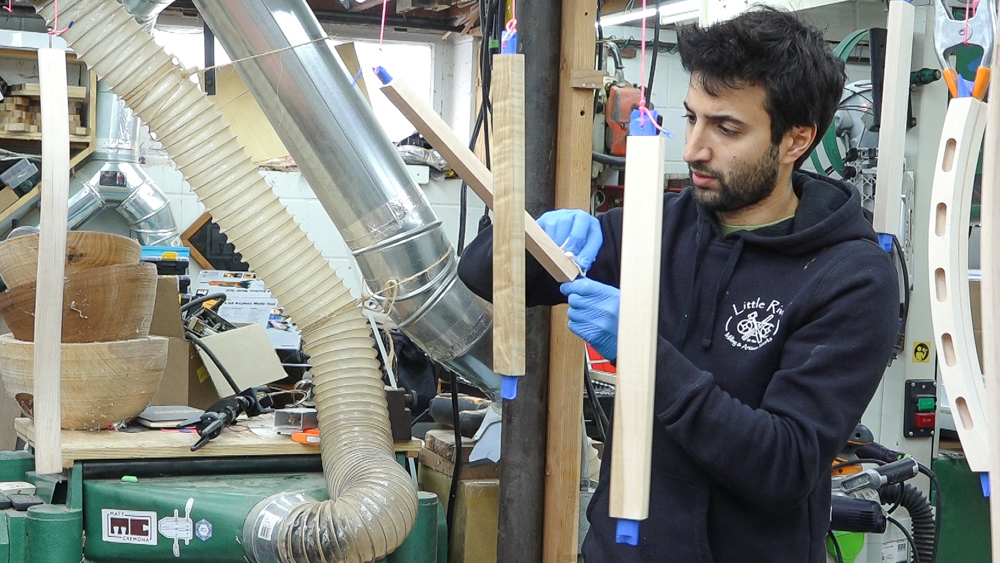
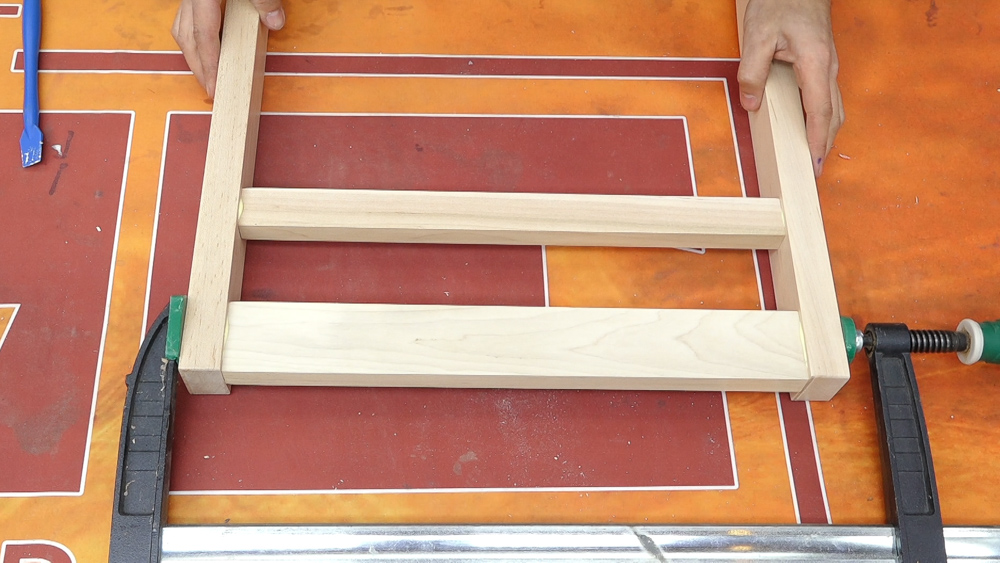
In this first section we’ll work towards getting the kit dry assembled to confirm everything goes together correctly and to ourselves with how the parts go together.
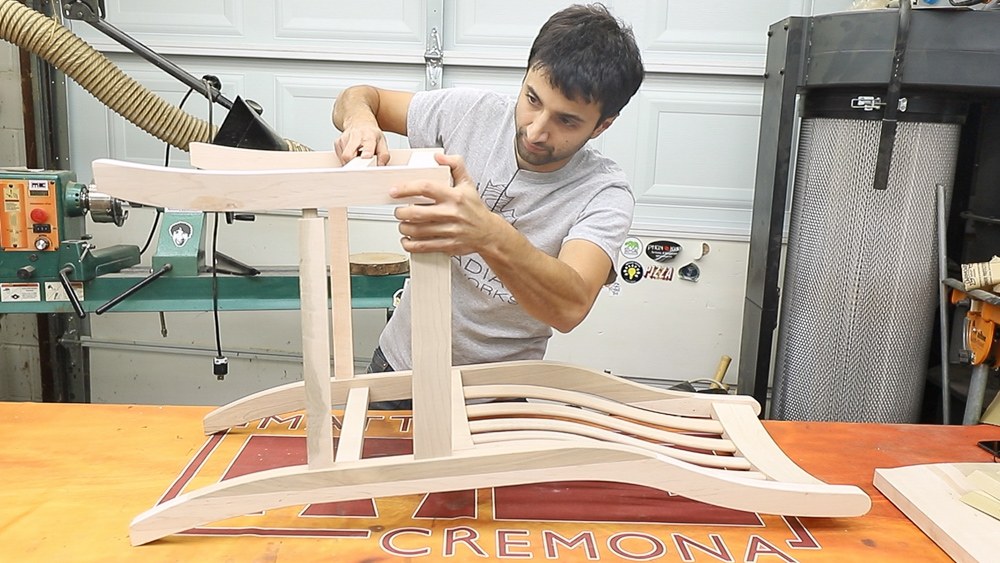
It can help to label the parts to make reassembly later easier.
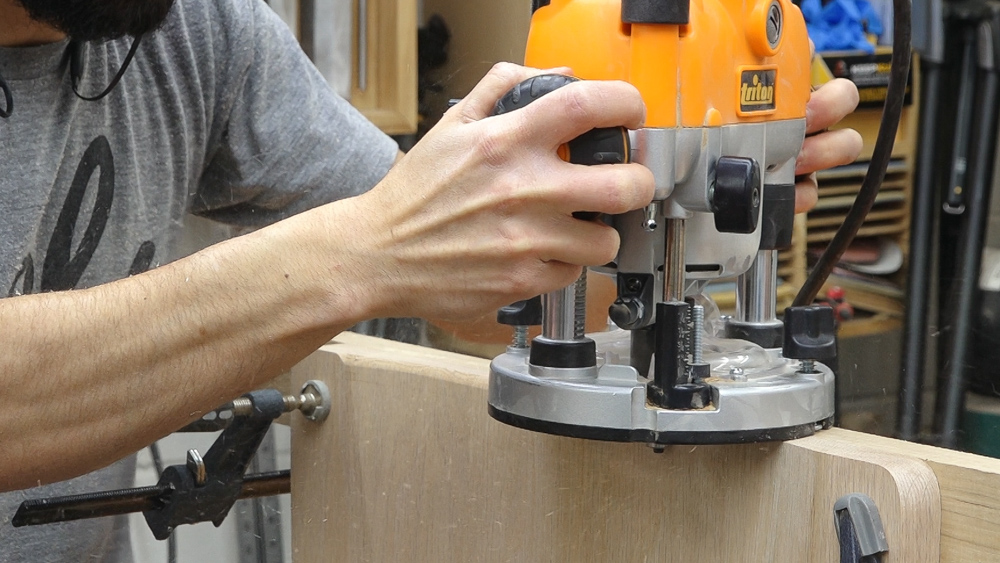
Next we can take care of the final touches on the seat. The first area to be aware of is the back edge. This will meet up with the lower rail so be aware that any edge treatment you add to the back edge will show as a valley between the seat and the back rail when the chair is assembled. The other area to be aware of is the front edge. The top of the front edge will be where the backs of someone’s legs will contact the chair seat. To make the chair comfortable a radius should be added to that edge. I recommend at minimum a 5/16″ roundover but you can go all the way up to 1/2″ radius for a very soft look and feel. In order for the router to follow the profile of the scoop, it needs to be run along the end of the seat. An auxiliary block of wood can be clamped to the backside to provide more support for the router during the cut. If the edge treatment along the sides is going to vary from the treatment along this front edge, leave a bit of material to act as a transition area and blend the two edge treatments together.
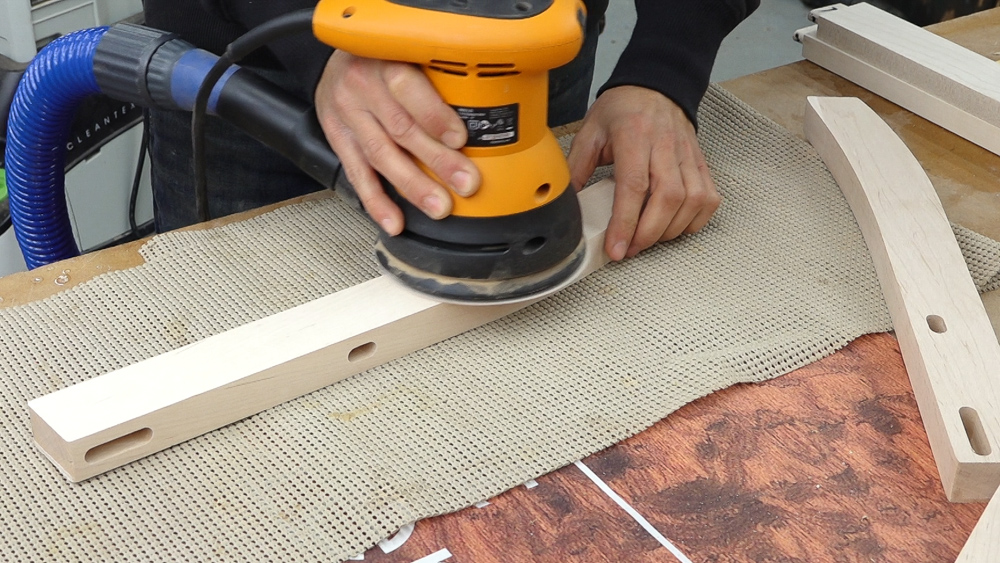
Now that we’ve completed a dry assembly and familiarized ourselves with the parts, we can begin on the finish prep. All the parts come with an initial coarse sanding so we can begin sanding with 120 grit. Many of the parts are flat and can easy be sanded with a power sander but the curves may pose some challenges and will need to be hand sanded. If you are painting your kit, you can stop at 120. If not, sand through 220 grit. At this stage, we can also add any edge treatment as desired. A round over can be added with a router or the edges can be hand broken for a crisper look.
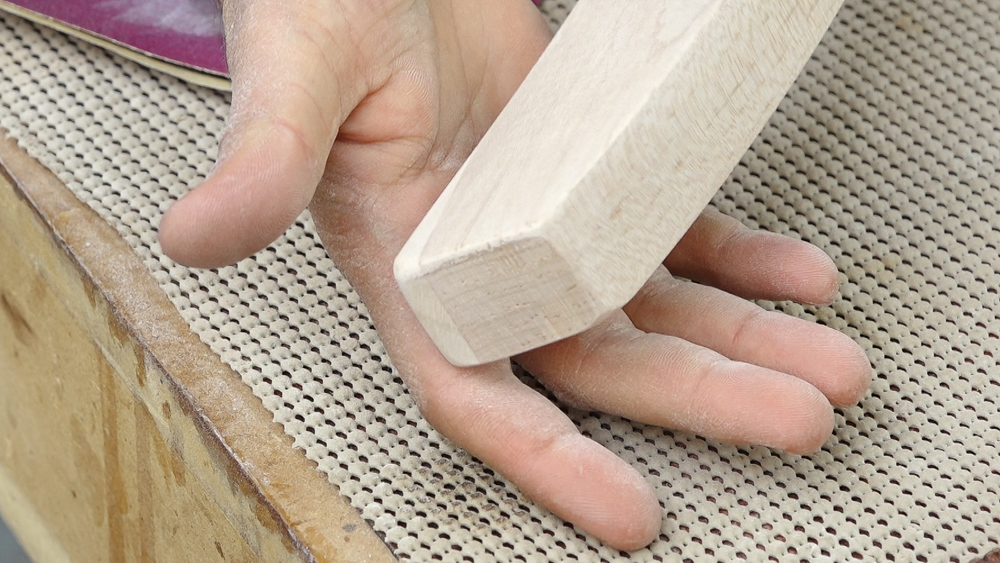
The bottoms of the legs should be rounded over to prevent any fibers from splitting when the chair is dragged along the floor.
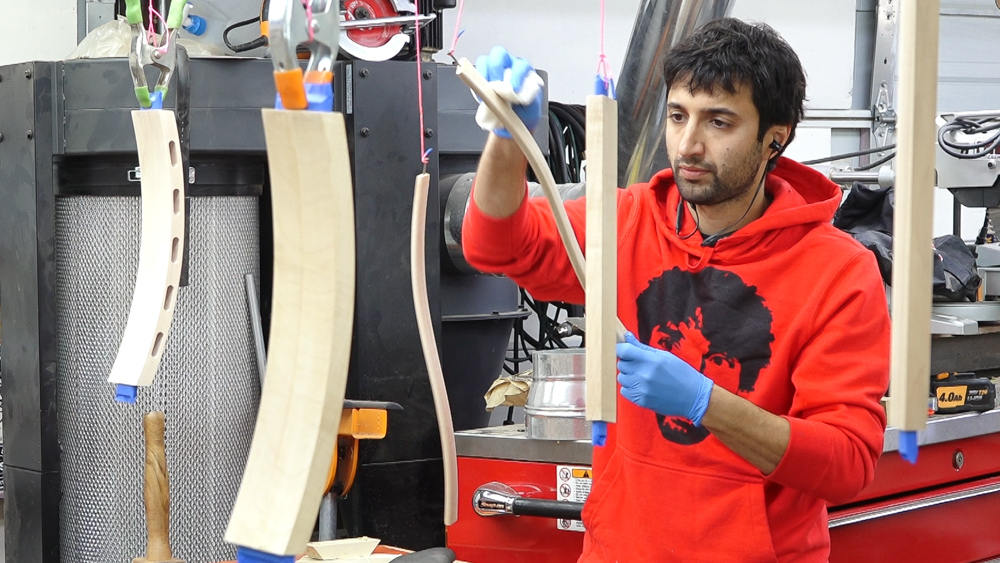
Unless you have a spray booth, I highly recommend finishing the parts before assembly. Finishing individual parts greatly simplifies the finish application process. There are no corners to contend with and all sides of the parts are easily accessible. Drips and runs are also harder to get and easier to spot if they do happen. The biggest consideration is to protect the glue surfaces from the finish. Any finish that gets onto those surfaces will cause the wood glue to not work. I wrap the tenons with masking tape to keep them protected. The mortises I leave uncovered because it is fairly easy to keep finish out of them when hand applying a finish. A good option for protecting the mortises is to pack them with round foam like backing rod which is commonly available at a home center or hardware store. The easiest way to apply the finish is to hang the parts at eye level.
If you’re not entirely sure on which finish you’d like to use, the underside of the seat provides a large sample area to experiment on.
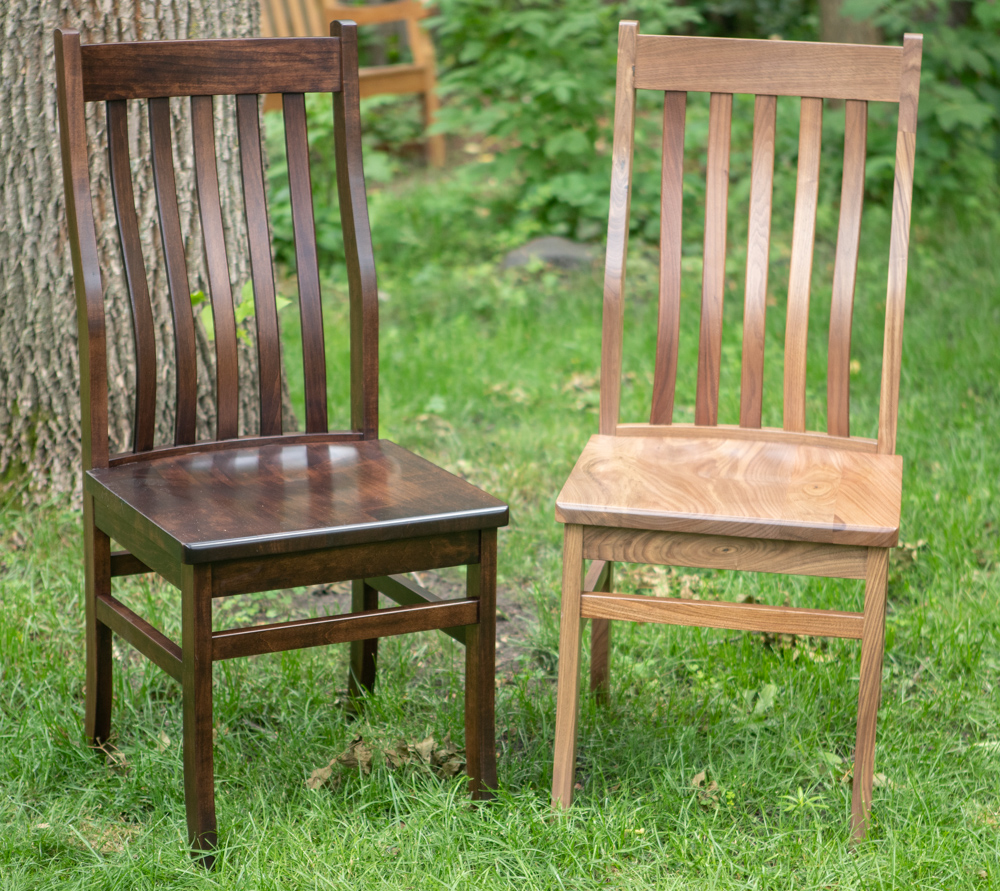
I like to use a wipe on polyurethane since it is easy to apply and the level of build is customizable. On this chair I applied 3 coats which offers a good amount of protection but doesn’t have a heavy film look. In the case of this maple chair, I used a water-based polyurethane to maintain the natural color of the wood vs an oil based product which would impart a yellow-orange hue to the maple. Once the final coat of finish has cured, I’ll lightly sand the parts with 1000 grit sandpaper to remove any roughness in the finish before taking them down and removing masking tape.
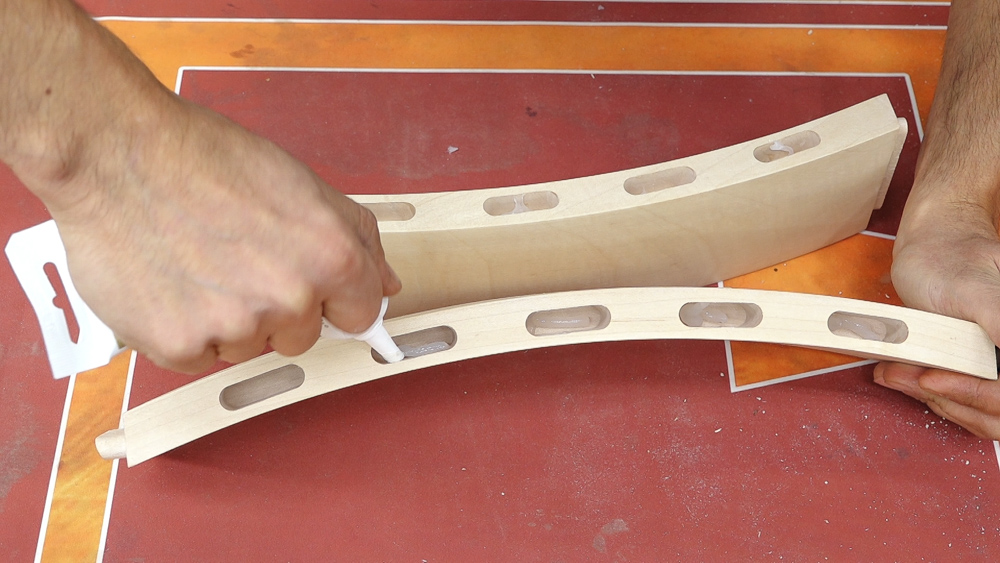
We can start the assembly by installing the back slats into the back rails. The back slat can either be glued or left to float in the lower rail. If you’d like you glue them, the finish can be removed from the bottom 1/2″ of the slat to provide a fresh glue surface if this area wasn’t masked during finishing. The slats need to be able to float into the top so when someone presses their back into the slats, they will flex up into the top rail. To help secure them and keep them from rattling if they are loose, a bead of silicone can be applied into the mortise. The same can be done with the lower rail to simplify assembly.
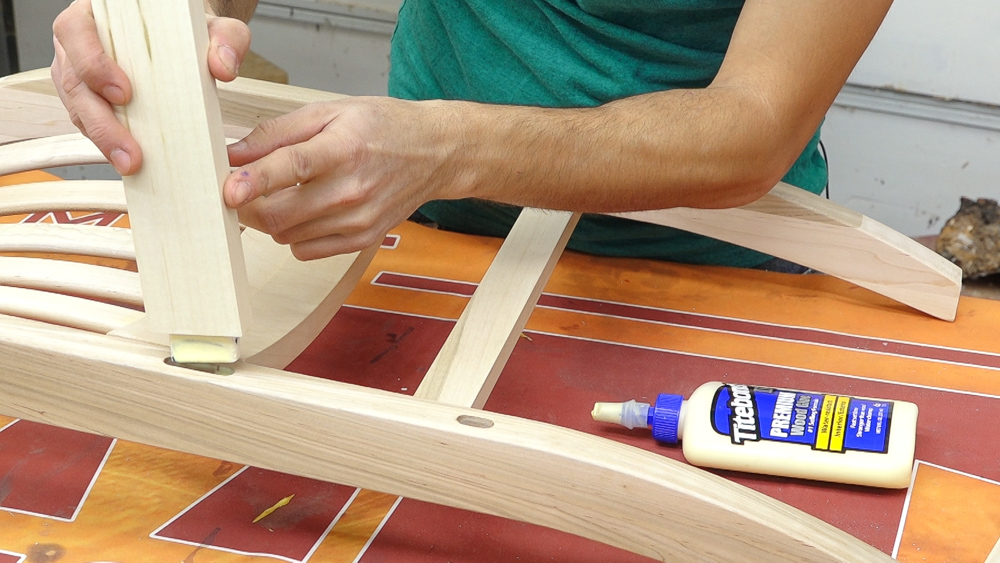
Next, glue can be applied to the mortise and tenon joints that connect the two rear legs together. Don’t forget the lower narrow rail as you’re working through the glue up. A pair of clamps can be used to full seat the rails into the legs.
While the rear assembly dries, we can glue up the front assembly. Lay the front legs on the bench with their front face facing up. The curves at the bottom will be up. The front rails are glued between them. Glue the tenons into their mortises, align the top edge of the rail and the ends of the legs so they’re flush, and place a clamp across the assembly.
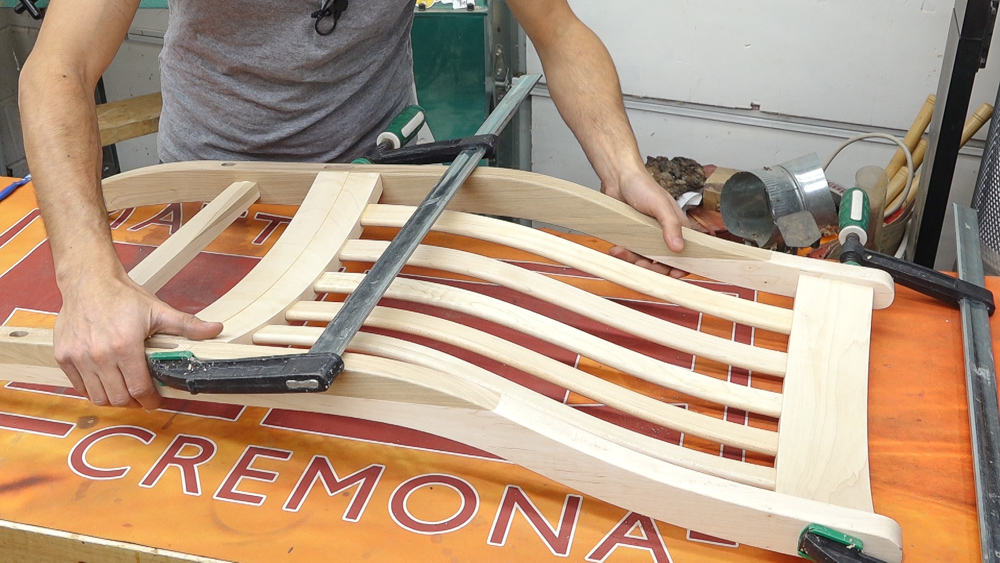
Once the first two sub assemblies have dried, we can connect them with the 4 side rails. The rails have a slight angle on the ends and are installed so the seat area slopes down towards the back. Once again, don’t forget the narrow rails as you’re working through the glue up. Clamps can be run from the rear leg to the front leg to pull everything together. If you need to apply a lot of pressure here, place something between the clamp and the chair to protect the wood.
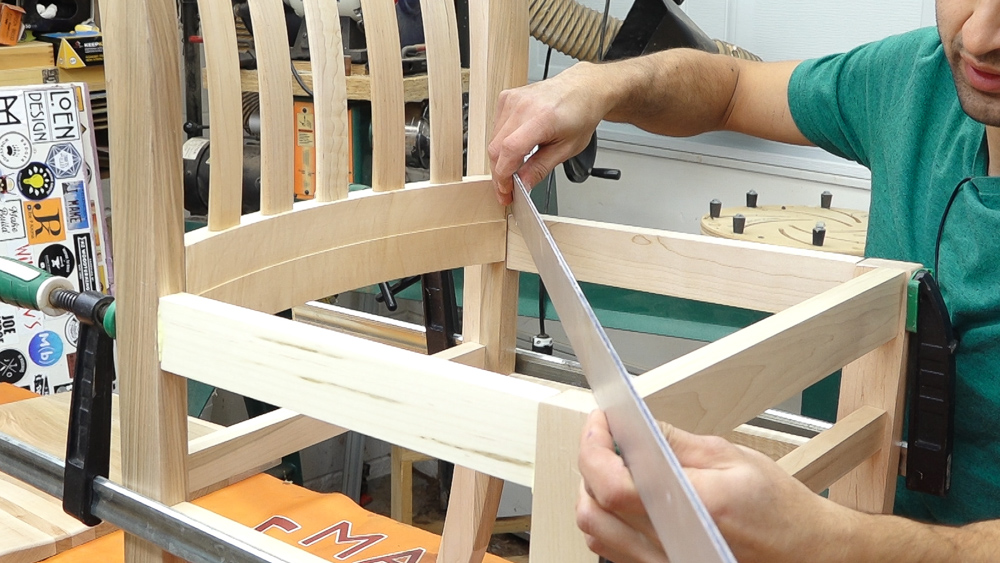
Check that the chair is sitting flat on the workbench and is not rocking; adjust the clamps as needed to take any rock out or clamp the chair down to the bench. Lastly, check the frame for square so the overhangs around the seat will be consistent.
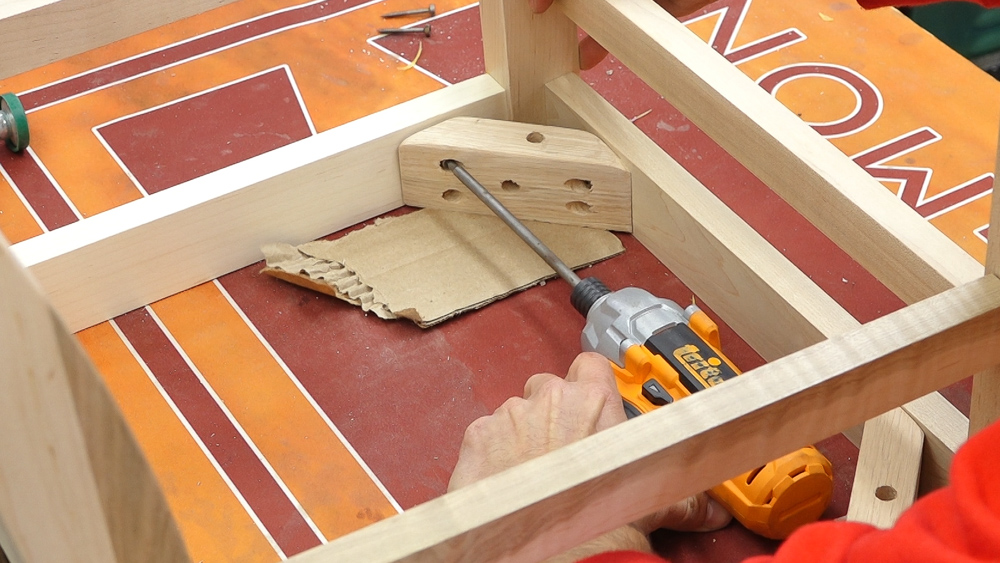
Once that glue up has dried, the corner blocks can be installed. These will brace the corners making the chair frame more rigid. These will also give us a place to anchor the seat to the frame. There are two types of corner blocks. The blocks that go in the front of the chair will have 45 degree ends and the ones for the rear will be at a much steeper angle. To guarantee the seat fully seats against the rails, the blocks should be set a bit low of the top edge of the rails. With the chair flipped upside down, a spacer can be used to lift the block up a bit. A piece of cardboard works well for this. Orient the blocks so the counterbore for the seat screw is facing up. The blocks are secured to the frame with 4 1-1/4″ screws on the ends and are pinned into the corner with a 2-1/2″ screw through the middle. Be careful as you install the screws and don’t over-tighten them which could warp the frame and cause the chair to rock. The angles on the rear blocks might not match perfectly to the frame. They can either be aligned so the ends are touching the frame with a slight gap towards the corner or the angle can be adjusted.
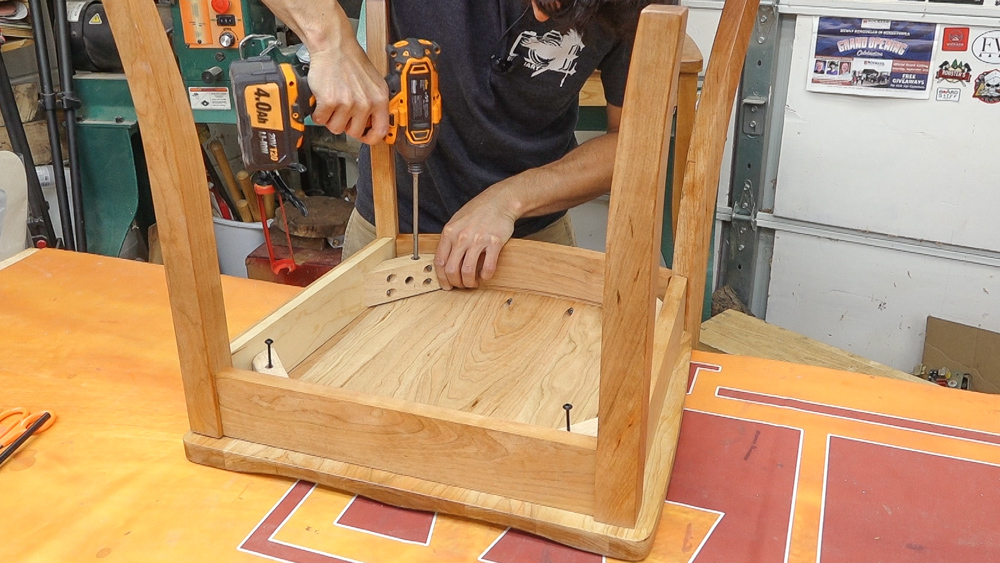
The last step is to attach the seat to the frame. Press the rear of the seat into the lower rail of the frame and pivot to align the frame and seat. The overhang along the back of the seat should match on the left and right side. Once you’re happy with the alignment, install the 2 1-1/4″ screws into the pocket holes in the seat. These screws will set the final location of the seat leaving the 4 screws through the corner blocks. Install the 4 2″ screws through the blocks to lock the seat to the frame. Again, be careful not to over-tighten here as it could result in stripping out the screw.
Welcome to my shop! This is a quick update to let you know what I’ve been up to. This big chunky thing is the leg

Welcome back to the home renovation. This time I’m going to be working on the kitchen island. Here is a small model of the island.

Welcome back to our home renovation. Today I am going to be working on this wall. It needs some upper cabinets and the surround for