
Matt's Weekly Shop Update
Kitchen Island, Barn Power – March 2024 Update
Welcome to my shop! This is a quick update to let you know what I’ve been up to. This big chunky thing is the leg
Welcome back to our home renovation and remodel project.
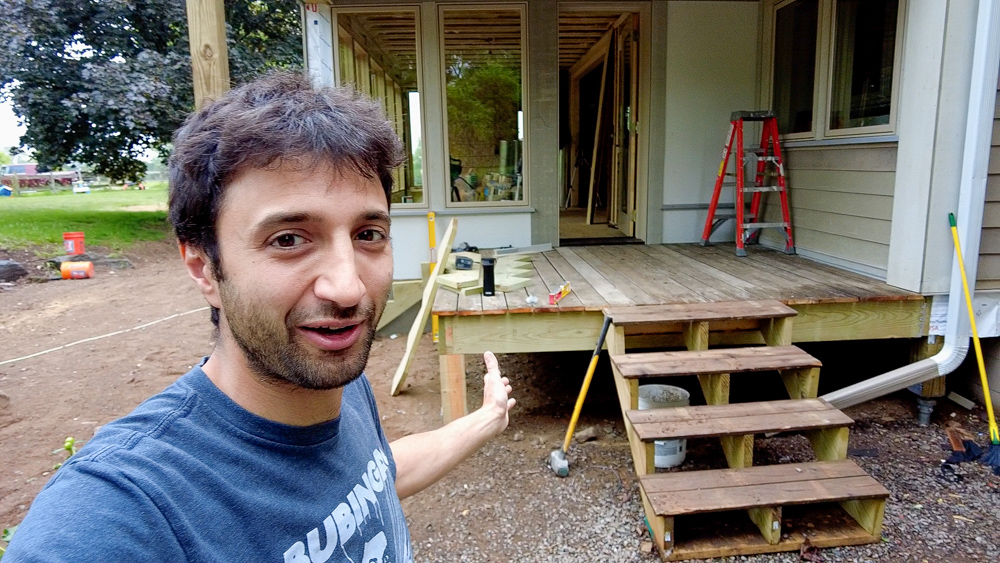
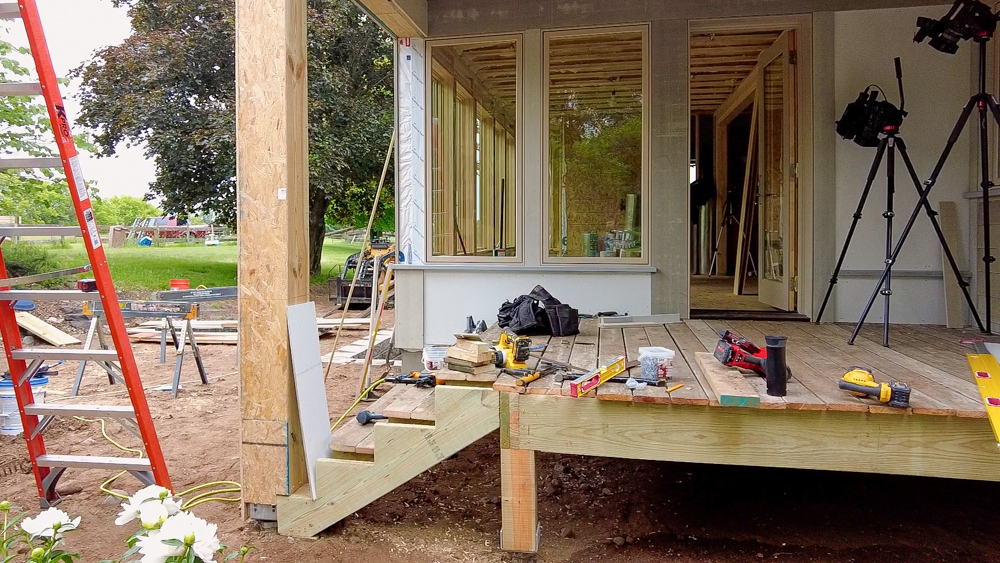
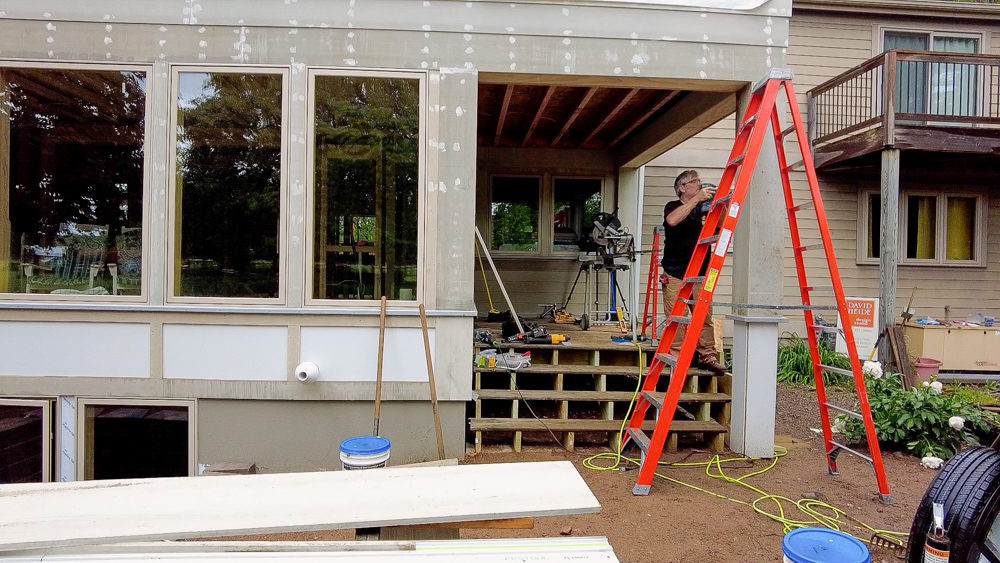
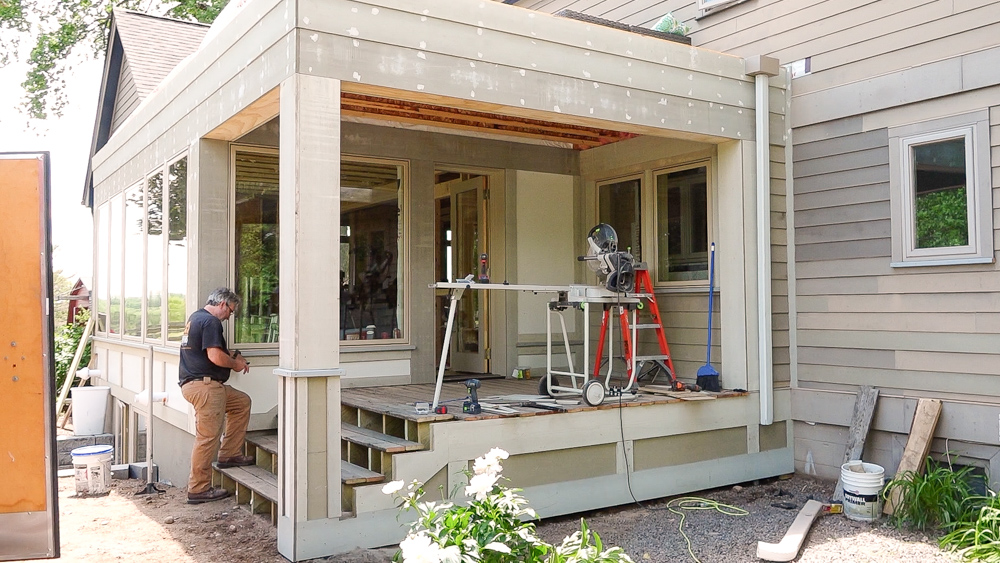
This post should be the last on the outside details on the sunroom here. We have the steps to install, and then we can finish the trim work that goes around the steps as they come off the deck.

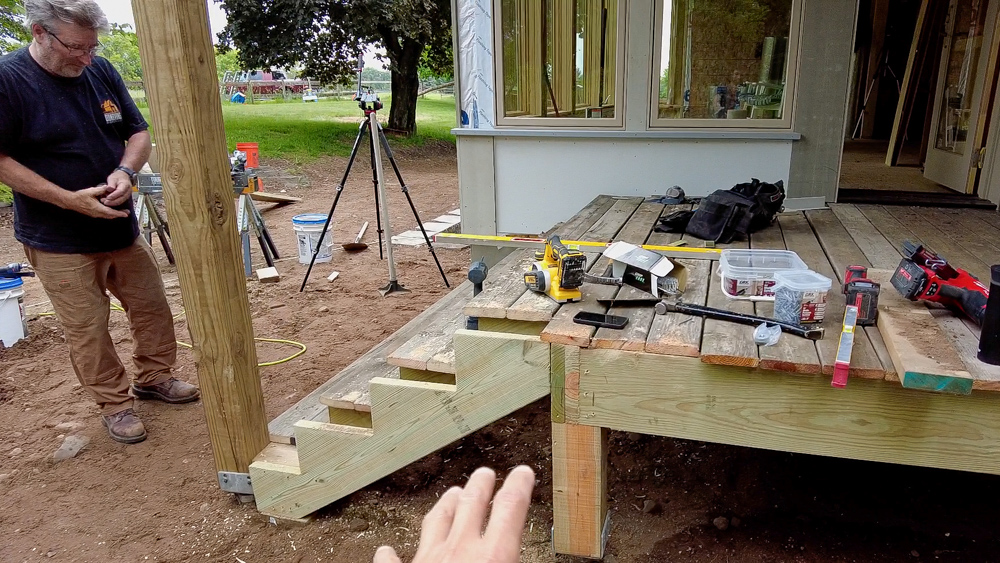
The math worked out nicely so that we could use pre-cut stringers. Because of how this all laid out, we will actually use the top of the stringer as an extension of the deck. We can hang our stringers high and have the deck continue straight onto the first step, and then we go down to our first actual riser.
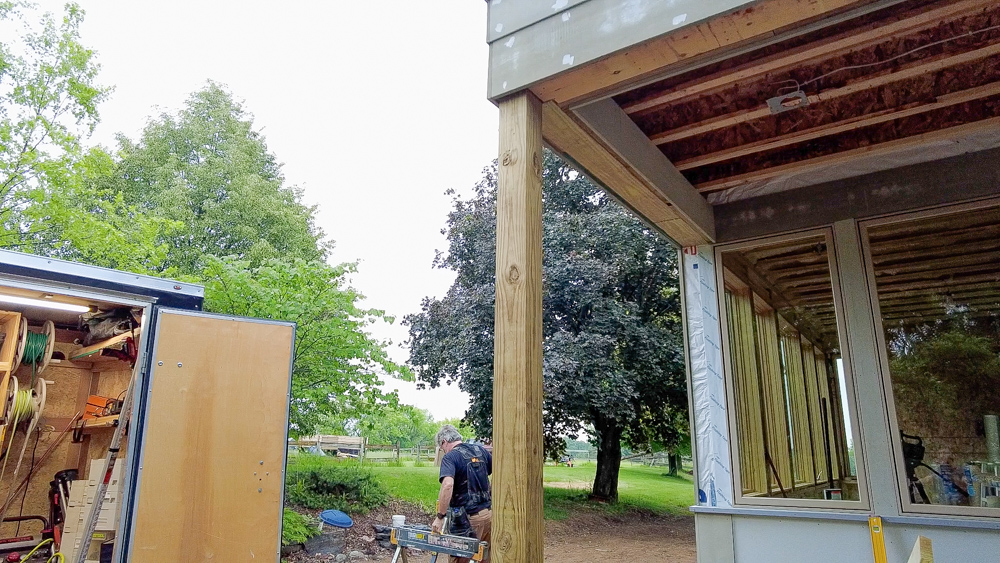
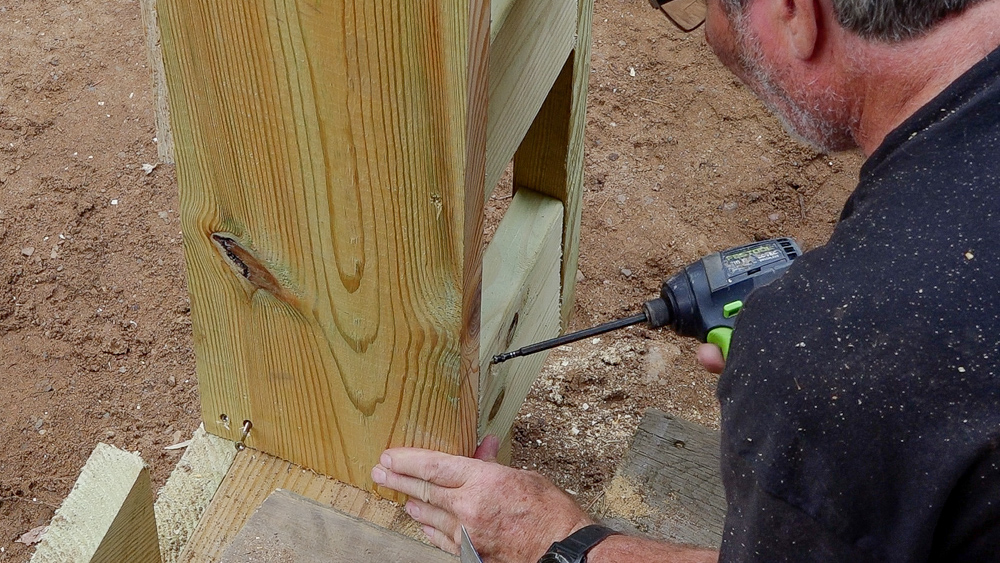
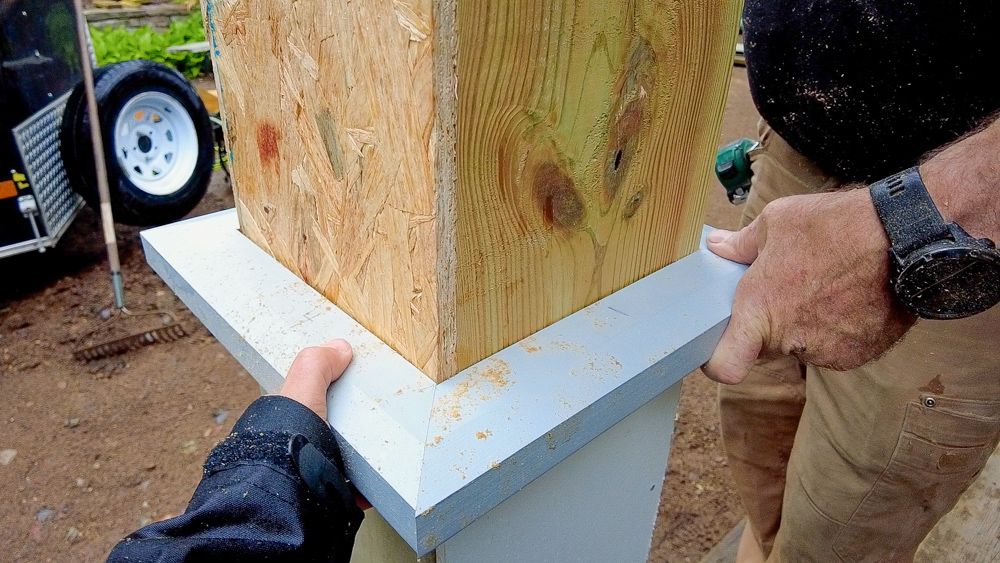
Another fun complicating factor for us to work around is this post. This has been sitting here for two months now and as it has dried, it twisted significantly, so we’ll be shimming this twist out. It’s still square at the structure up top, which is good, but it’s twisting around about a half inch as you go down.
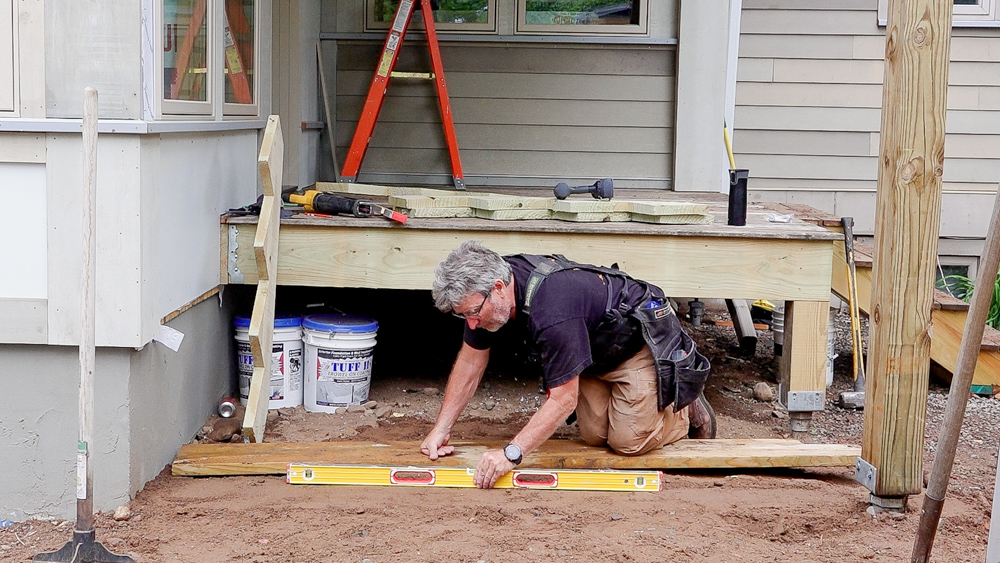
First thing we’re doing is getting our base installed.
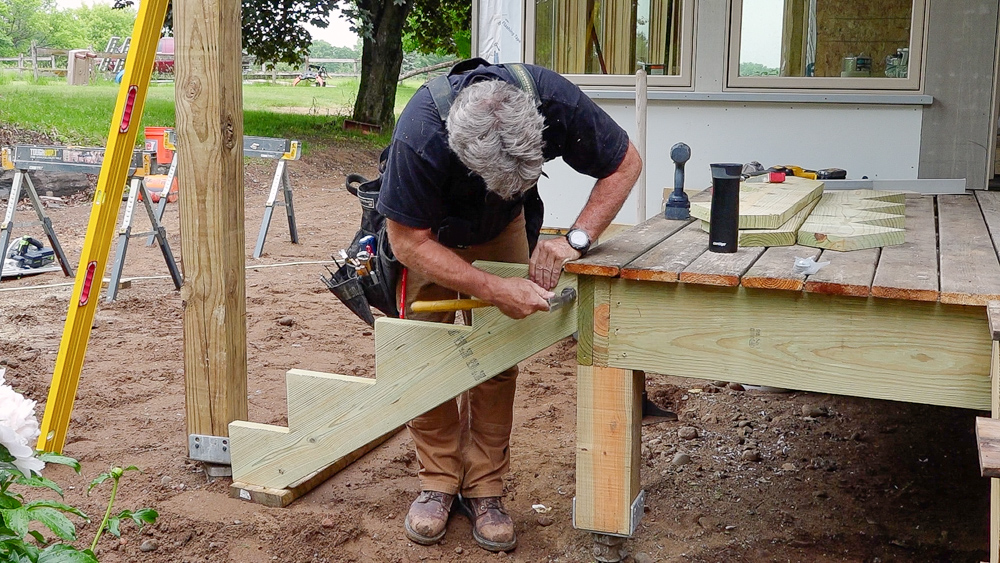
Getting the stringers installed next.
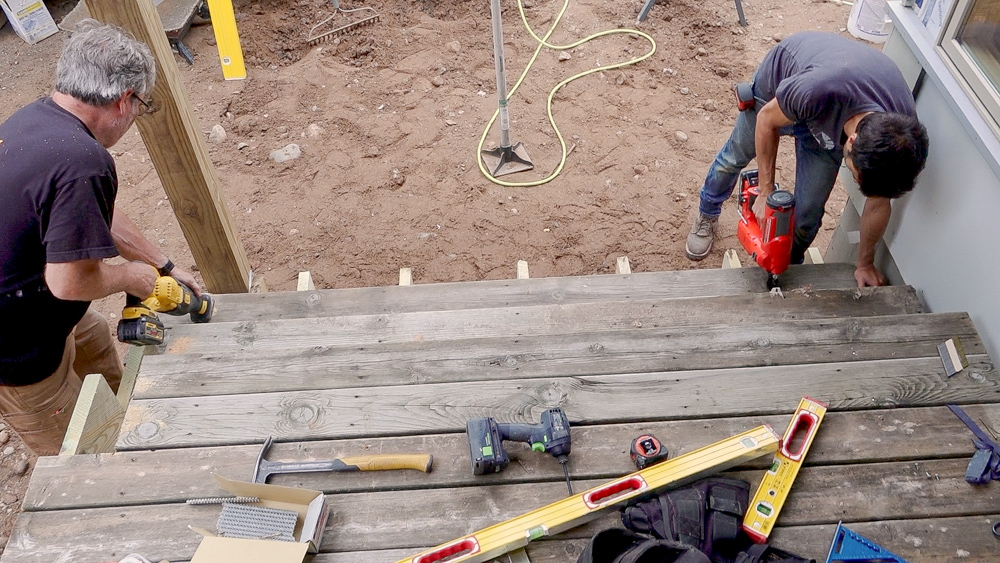
And then we added the temp steps.
With that done, we’re going to take care of this twisted post situation. We’re going to get rid of the twist and make a new reference. That way it will be easier to fill in the area to the right of the post, which is going to get a panel detail.
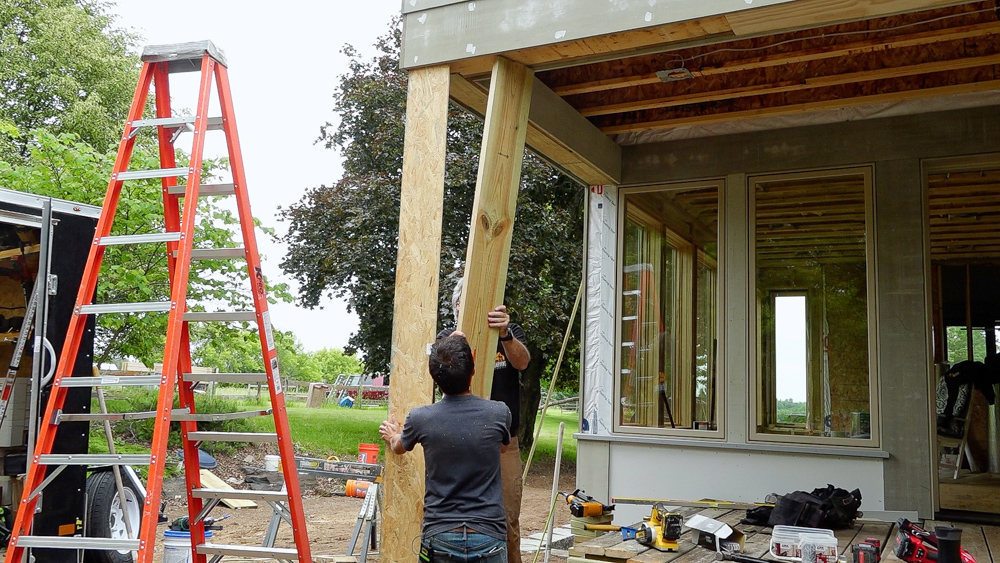
We’re going to attach a new member to this post, get it plumbed up and squared up, and then that’ll become our new reference going around the corner.
We’re still figuring this out because it’s not really coming out square. But it’s getting there, we just have to figure out what needs to go where to pull the whole thing in the square all the way around. Right now the corners are all greater than 90 degrees.
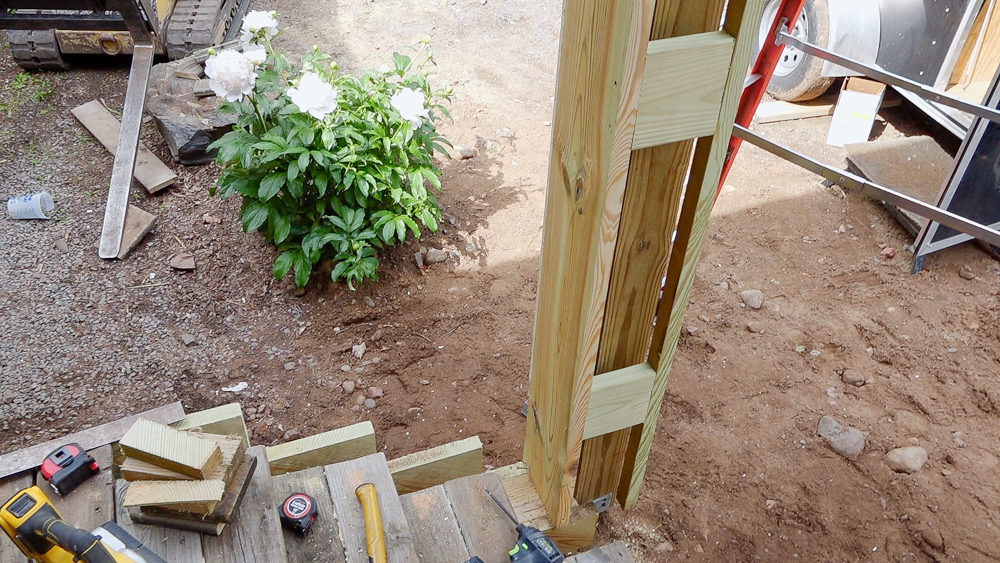
After some more tweaking, our post column is furred out and pretty close to square.
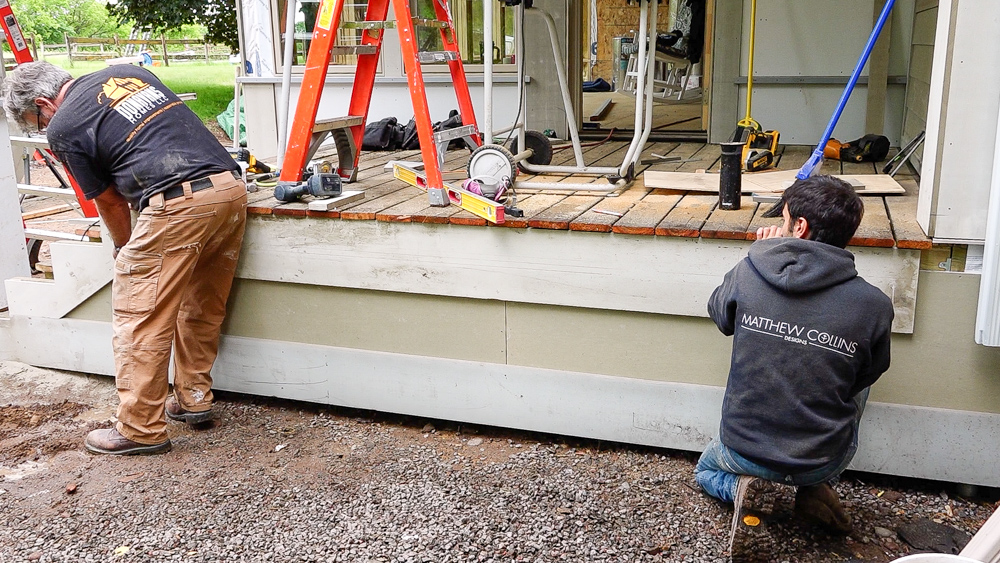
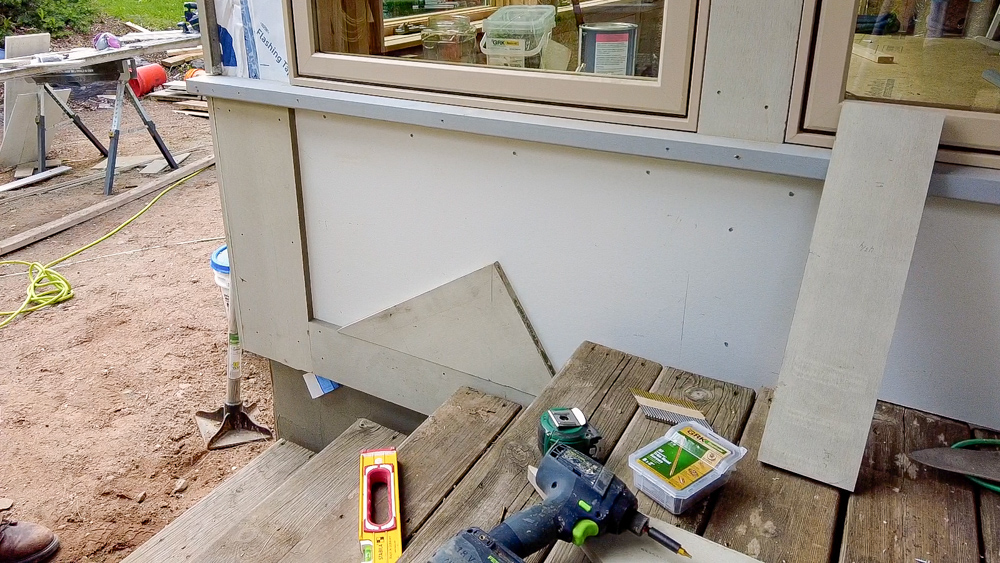
So we’re going to start working through the panel stock. The panels that are going to be on the bottom of the deck are similar to the paneling beneath the windows of the sunroom. We’re also paneling the bottom of the column so that it matches the detail on the side of the house with the Boral, sill, and then panel detail below that.
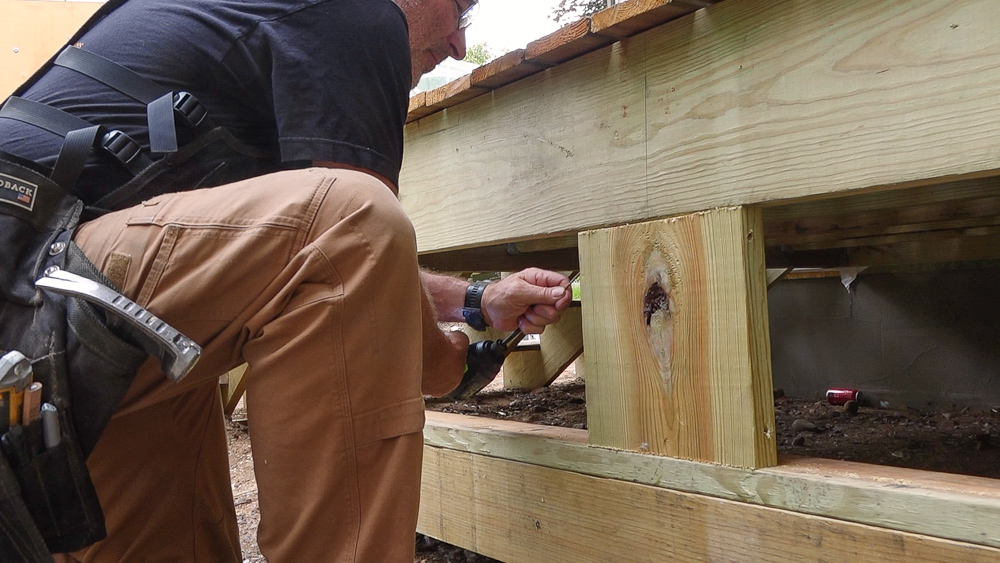
First we’re doing the framing for the panel system..
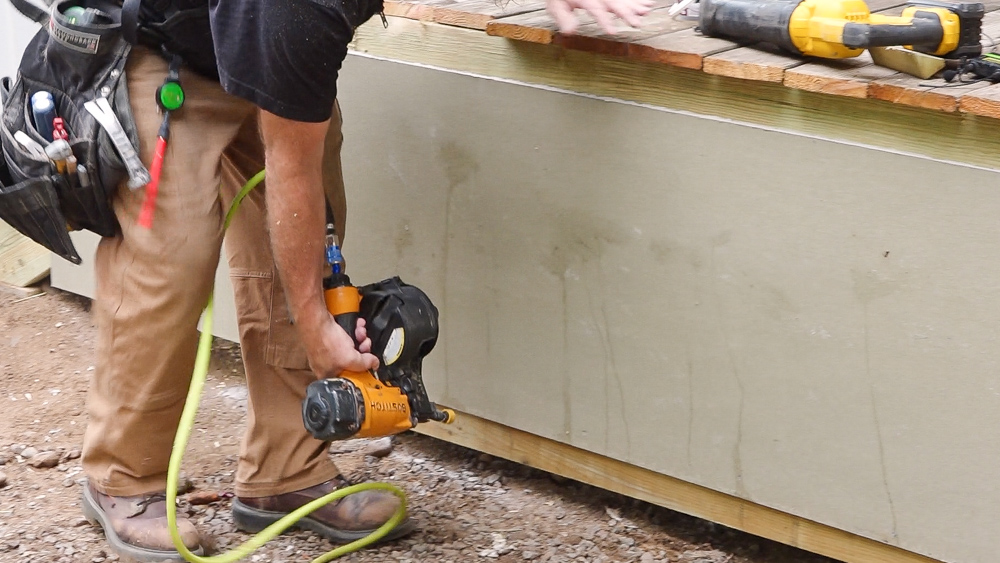
Then we can get the paneling installed.
Next we’re working on fitting our sill around the column. We’re doing miter angles down to a quarter of a degree. This one is 44 and three-quarters of a degree.
The column looks a little weird right now with the skinnier bottom, but it’s starting to look like something. You can really see how this detail on the house continues over to the column.
Next up is the skirt board and the trim.
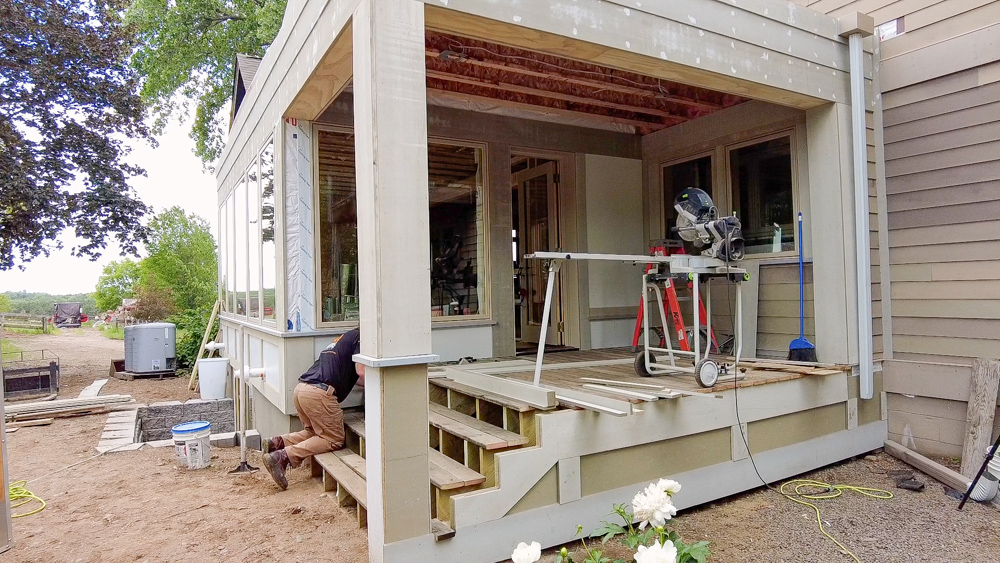
Next we’re going to get through all of the small parts. We have some corner post pieces to put in, we have some panels to finish up, and the spot by the downspout to finish up too. But we’re going to get closer!
Over here, we have this triangle cut out from the skirt board on the other side. And that happens to be exactly the angle piece that we need to go in here. The off cut next to that will also be going into the panel, as well as another off cut that we can incorporate. Feels pretty good to be able to use these materials efficiently.
That is about it for everything. There’s still some things to get finished here and there, but going to basically look something like this. Ta-da!
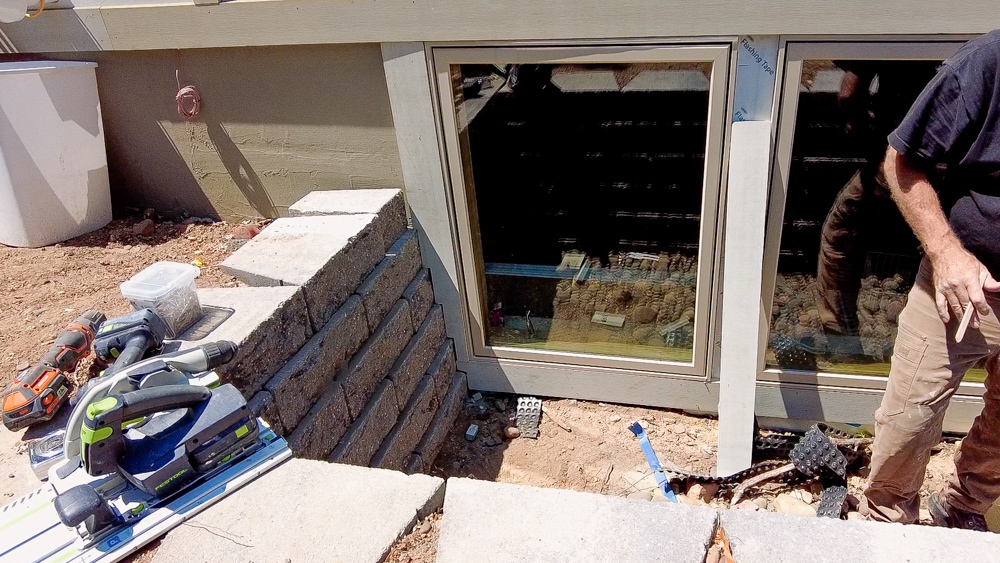
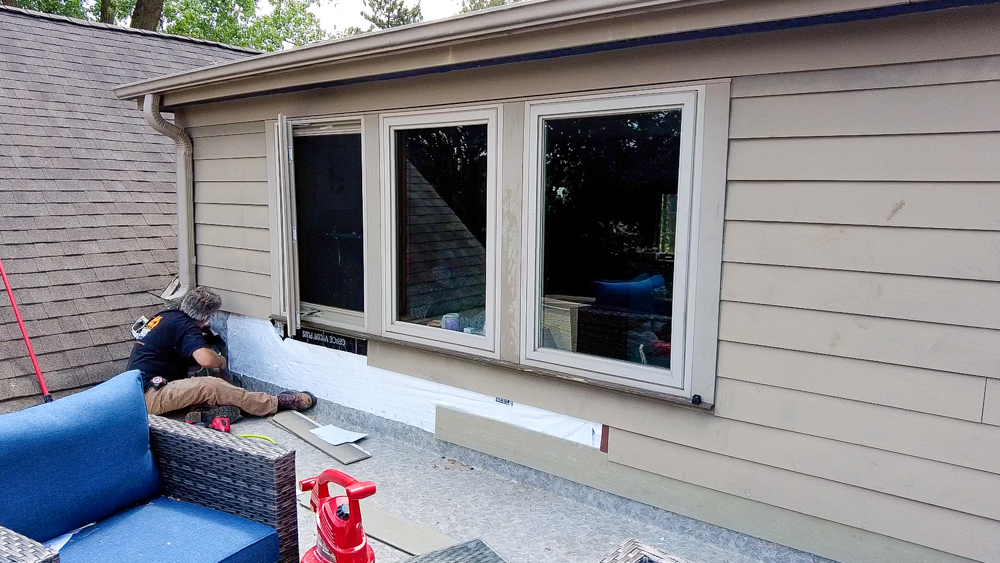
We are finishing up the basement windows now. We have a trim board there along the bottom which will be mostly below grade. The bottom of the window well will get filled with rock, which will put it at the same level as the first course of the retaining wall. So most of that bottom board will be hidden beneath all that rock.
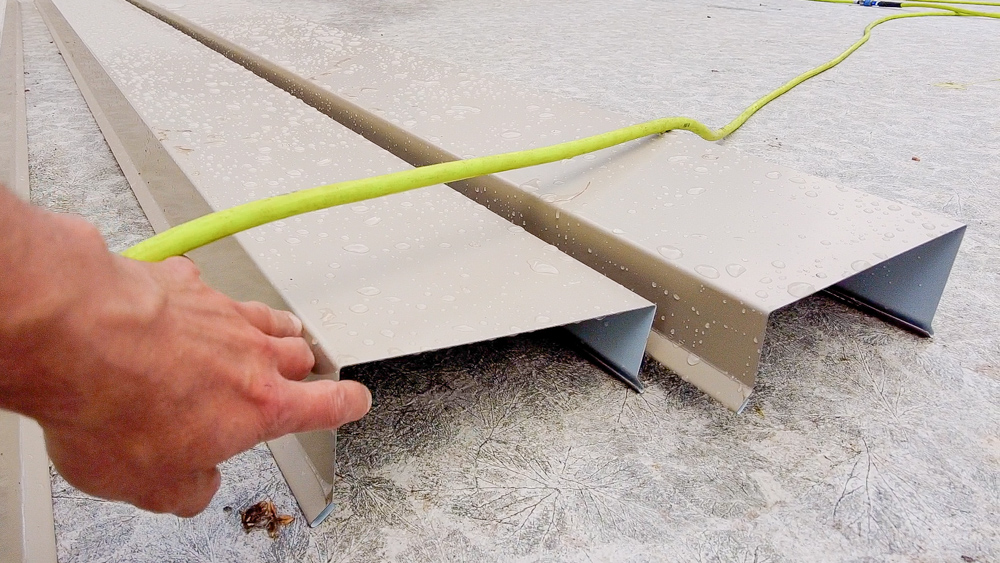
Now we are up on the roof deck because we are installing the parapet cap with some steel. Donavan had these fancy caps made up at a steel shop. These will go on top of that wall and provide a nice waterproof cap on top.
After getting the parapet cap on, it’s time to finish getting the siding tied back in on the back wall. And after that, you won’t see us up here until we do a railing.
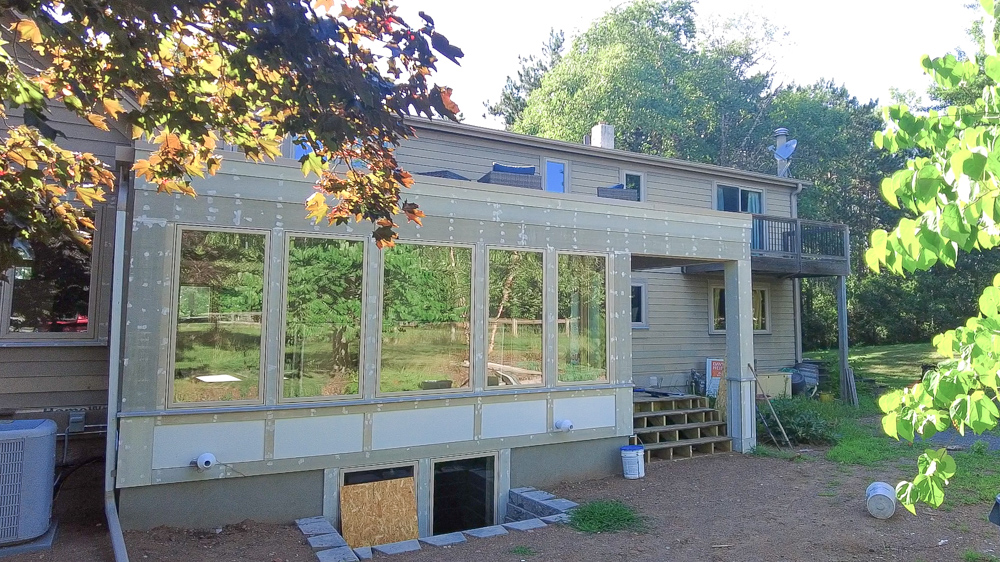
That’s about it for back here until we get some landscaping in here, but we’re not going to do the landscape project until we do the second phase of the renovation with the second story. So this addition has come quite a long way, and that’s pretty much it for the exterior now. For the longest time, this was just a big white Tyvek box, and over the last several months, it’s really transformed into like an actual, almost complete thing. There’s still plenty of stuff that has to happen back here. The whole thing’s going to get painted, which we’ll do when the whole project is done. But at least for now you can get an idea of what the final look of the whole addition will be like.
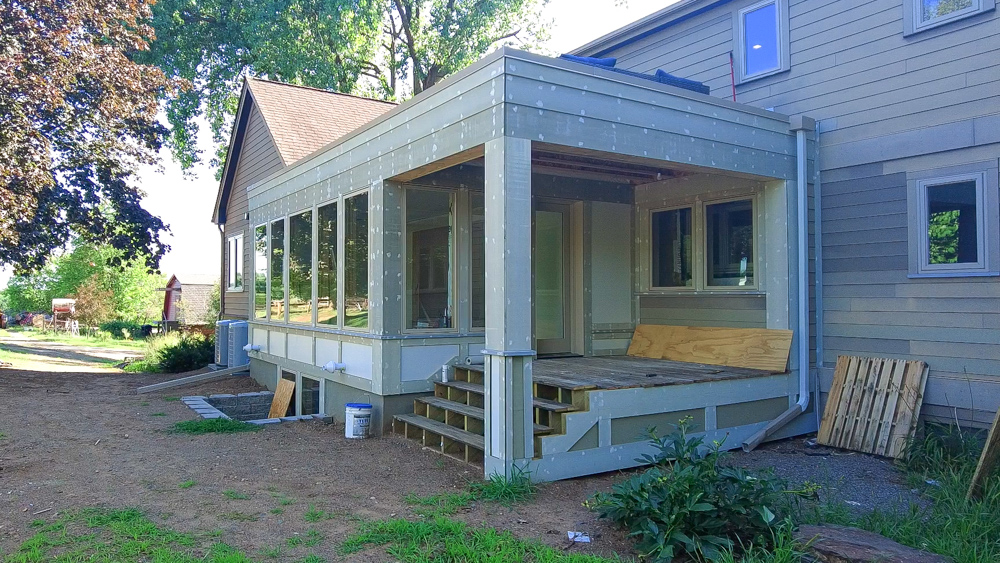
We’re super happy with the way this worked out, and I’m really looking forward to getting the interior done and seeing how that’s all going to play through. Lindsay and I (and Donavan) really love that we decided to add the extra roof section to create this covered porch. I think that adds a whole lot more functionality and a whole lot more visual interest to this thing.
That is going to do it for this one. Next time we’re going back inside to get started there: covering all the walls with drywall and transforming it from a construction site to something closer to a finished space. Thank you as always for joining. We greatly appreciate it, and if you have any questions or comments on the home renovation and addition project, or anything at all, please feel free to leave us a comment. As always, we’d be happy to answer any question you might have. And until next time, happy woodworking!
Welcome to my shop! This is a quick update to let you know what I’ve been up to. This big chunky thing is the leg

Welcome back to the home renovation. This time I’m going to be working on the kitchen island. Here is a small model of the island.

Welcome back to our home renovation. Today I am going to be working on this wall. It needs some upper cabinets and the surround for