
Matt's Weekly Shop Update
Kitchen Island, Barn Power – March 2024 Update
Welcome to my shop! This is a quick update to let you know what I’ve been up to. This big chunky thing is the leg
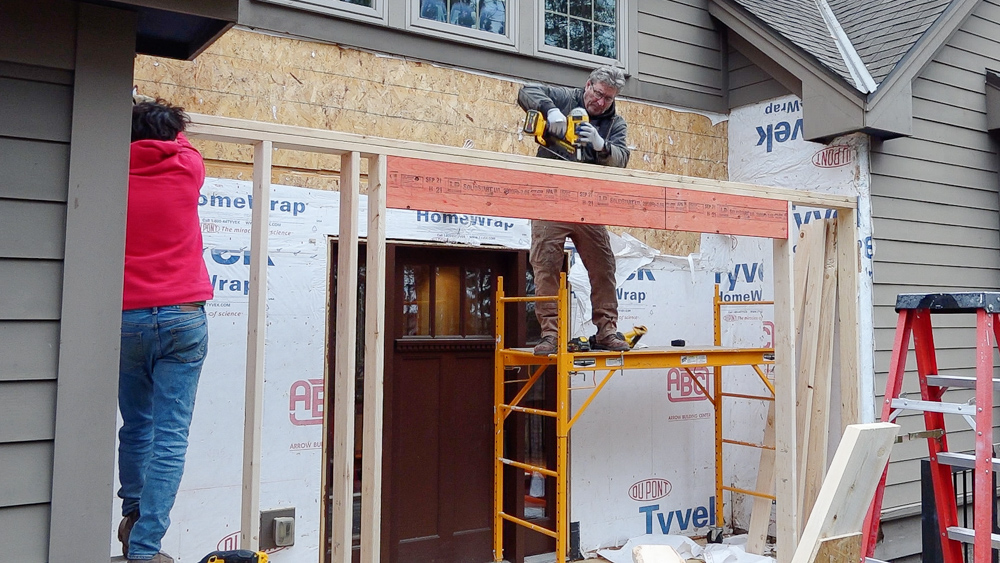
Welcome back to our home addition/renovation project. We are continuing on with the front addition today.
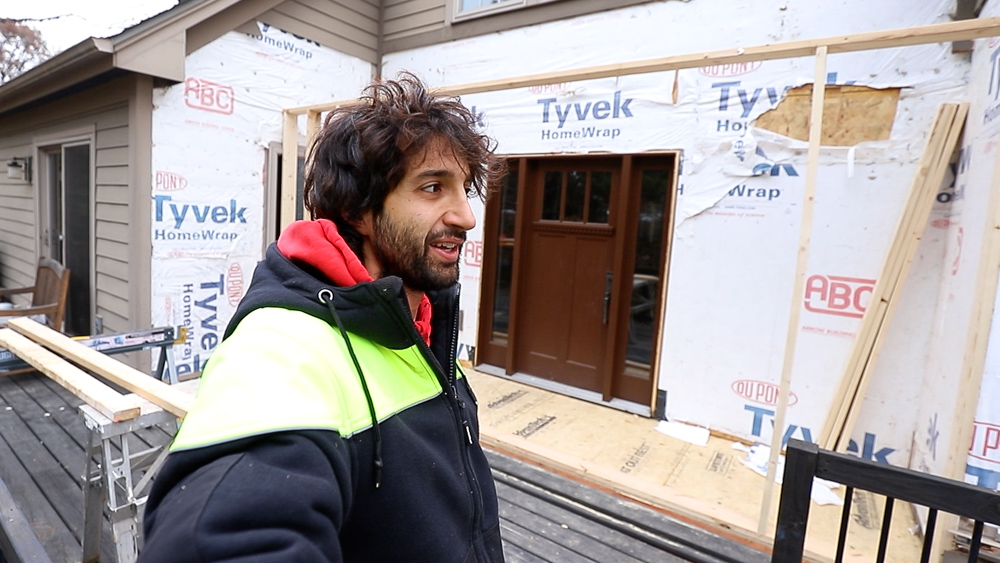
We’re trying to get things buttoned up because the weather is going to be changing. We have had a very warm, atypical fall, but things are starting to go back to normal here, as the temps start to drop, and as we see some more precipitation coming in.
Today we’re going to hopefully get a lot of this framed, and to get to that point, we need to make some rafters and things. As such, we’re setting up our new workshop area, which is actually inside the back addition.

In order to get this area ready to be a workshop, we’re going to close up this opening, put in a temporary door and maybe put in some stairs because the ramp is getting a little ‘iffy. So we’re doing a little work in the back in order to do the work on the front.
It works, it actually swings! I was expecting it not to swing because it’s a Wednesday.
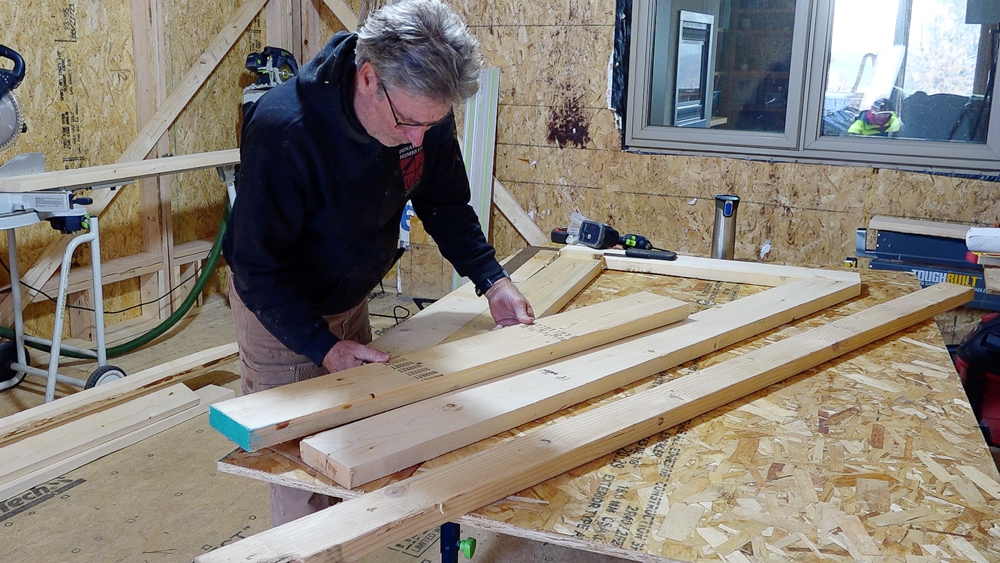
Next up, we are making some trusses. First Donavan made a mock-up to build the trusses. Normally he would have ordered these, but it’s 12 weeks before we get them, so we’re going to do a hand frame. It’s probably a little bit of overkill to build up a jig like this, but that way we have consistency. So we’ve got a 6/12 pitch.

This is our old outside wall. We’re going to have a hanger on both top and bottom.
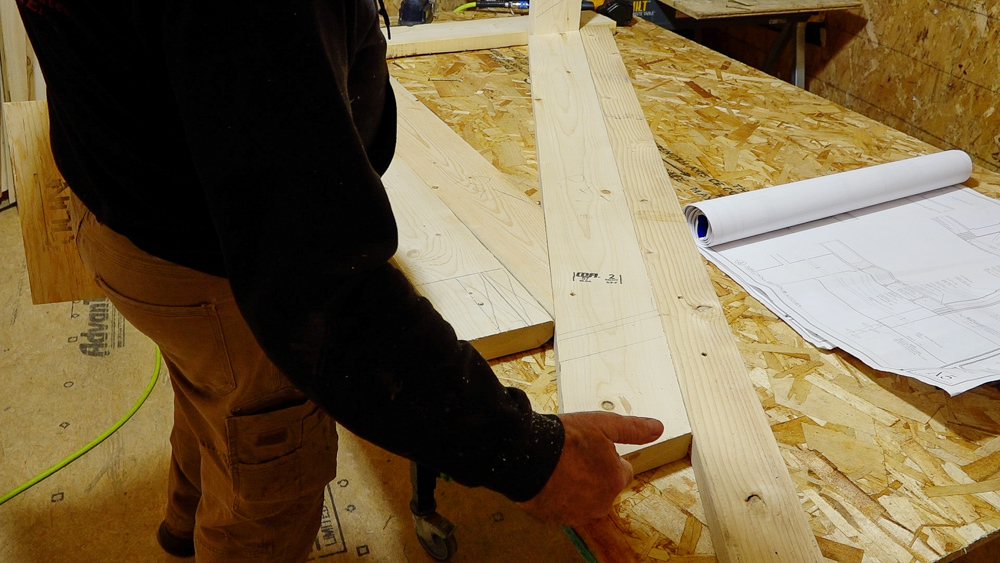
Then with the dimensions, we’ll have another two by six on here.
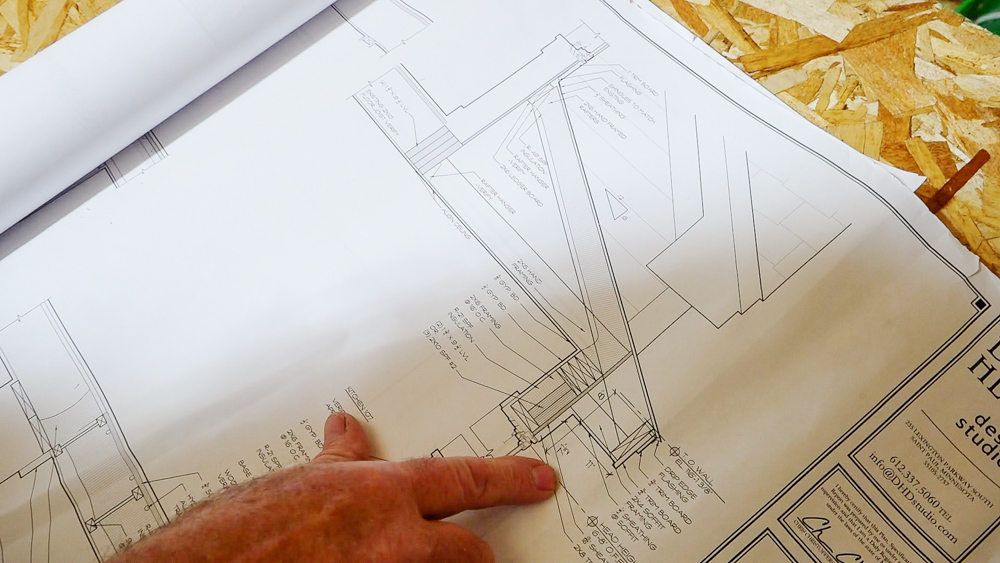
Just like it shows on here in our finish. So we basically built that.
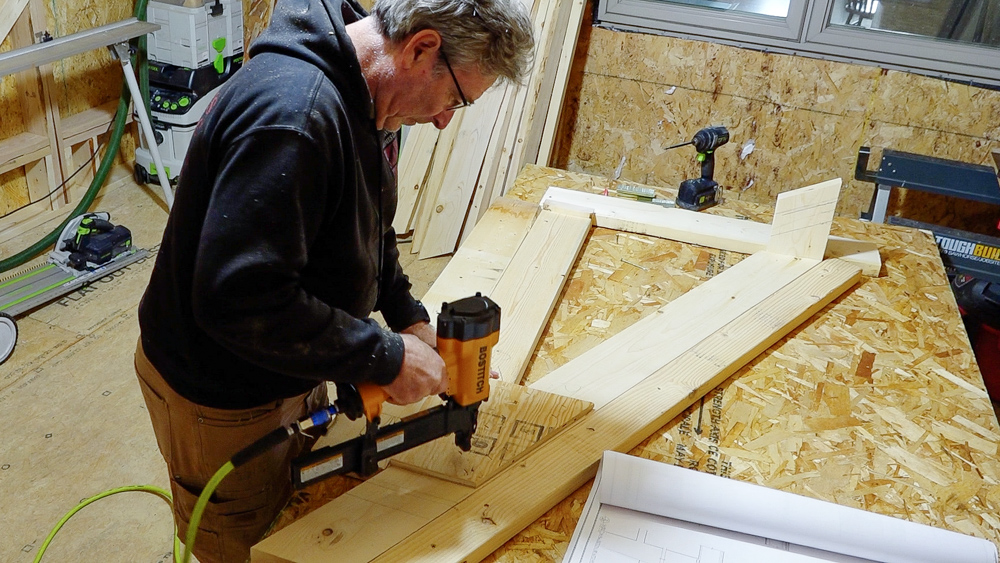
Then we’ll take some of this 5/8″ plywood and put this on both sides, and have a small truss that we can put up. Now we need 12 more of these. The set-up takes longer than the actual work.
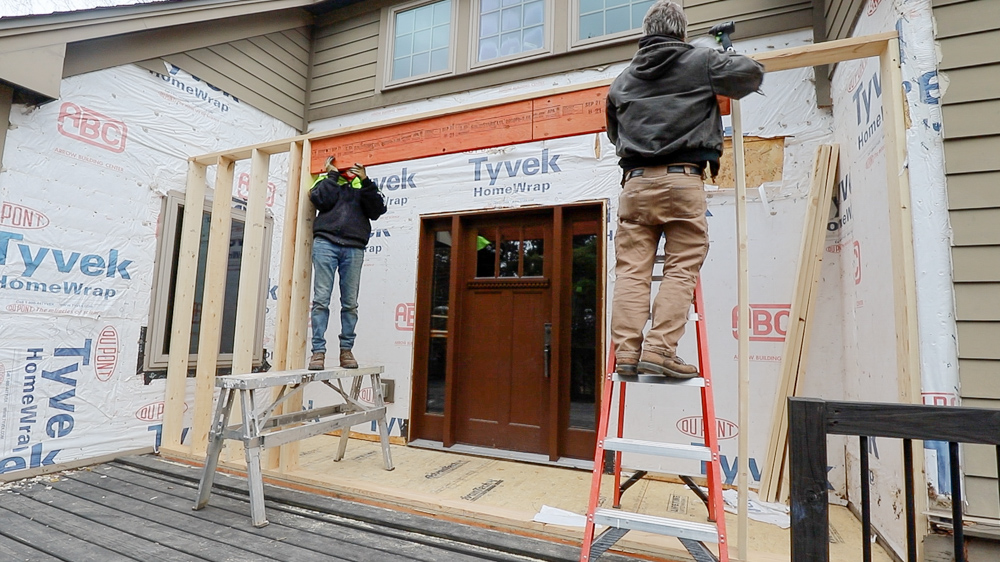
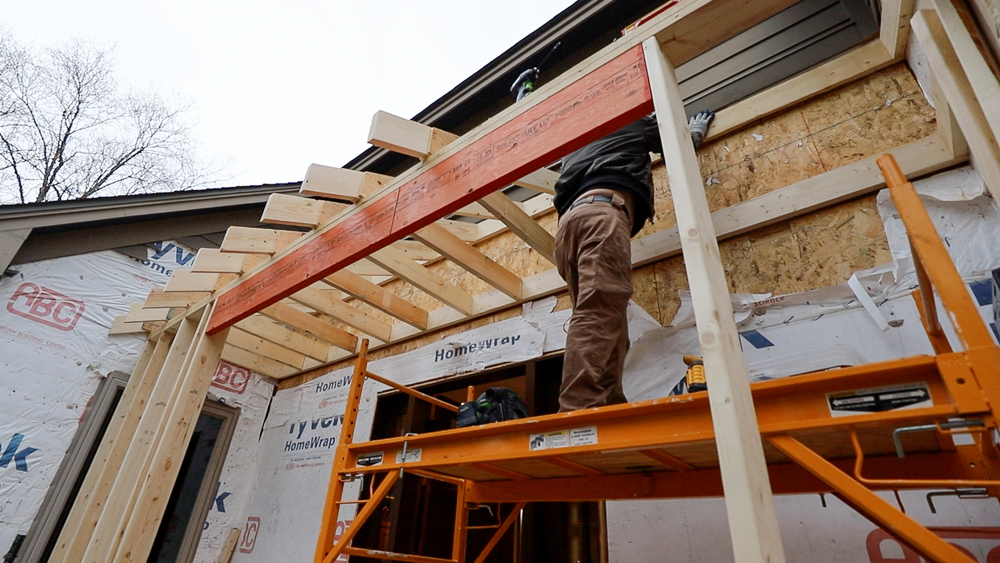
Now that we have all of our trusses, next up is framing.
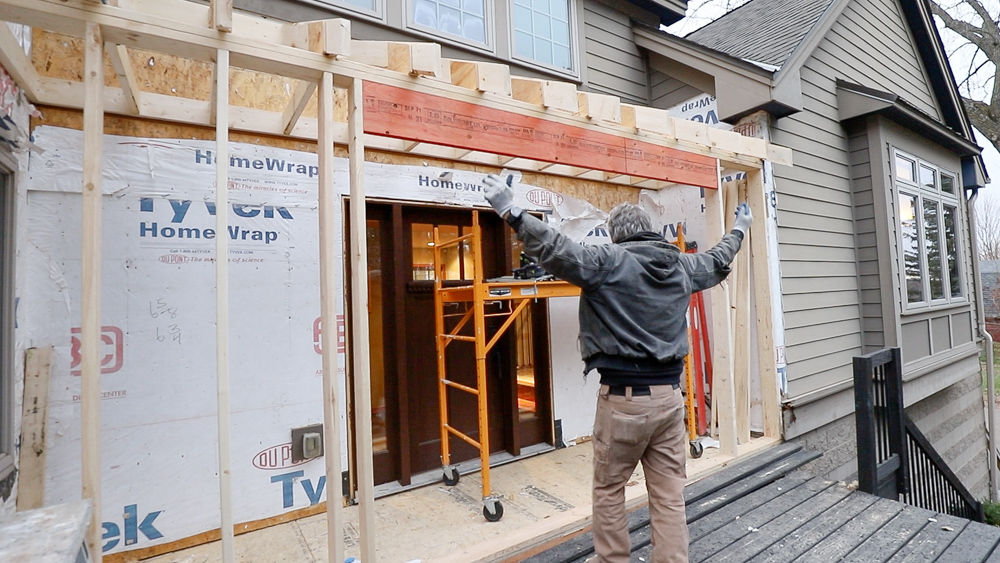
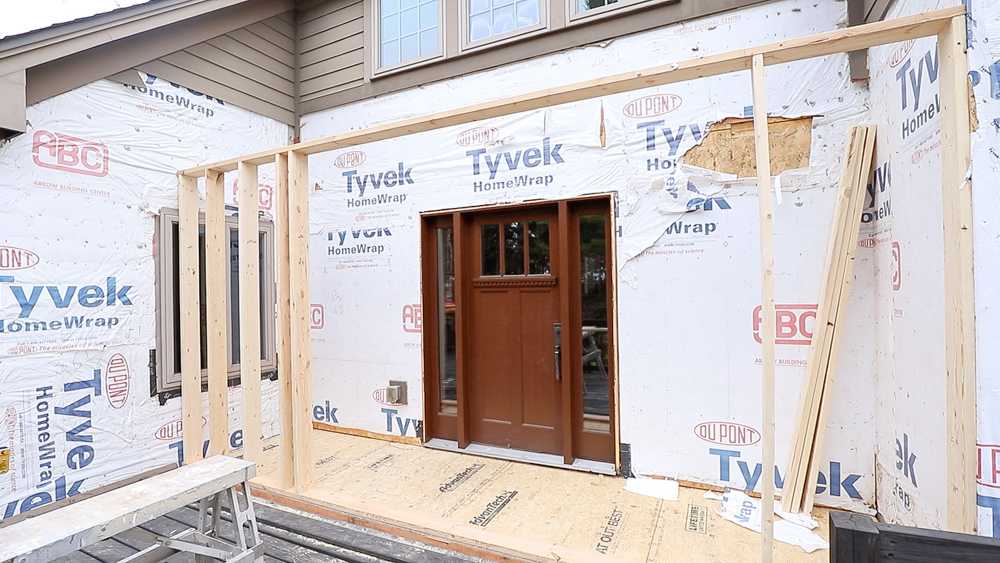
We’re still waiting on the final sizes and placement for the windows, so that big hole right there is where all the windows will go and properly support the header. We are getting some weather rolling in now, so that is all we are going to do for today. We’re going to have some more fun weather for the next few days, so it’ll be interesting to see what we can actually accomplish in the next few days.

Good morning, everybody, and happy Thursday. We got a ton of rain last night, and it’s cold today. Donavan has been super busy right today, you can see that he’s gotten a lot done.
Here’s a view from the inside of the addition. Now Donavan is attaching all these trusses with some long six-inch screws, which will pin those trusses into the double-top-plate.
The next thing today is the sub-fascia, which is the board that’ll span all of these tails and support the actual fascia later on.
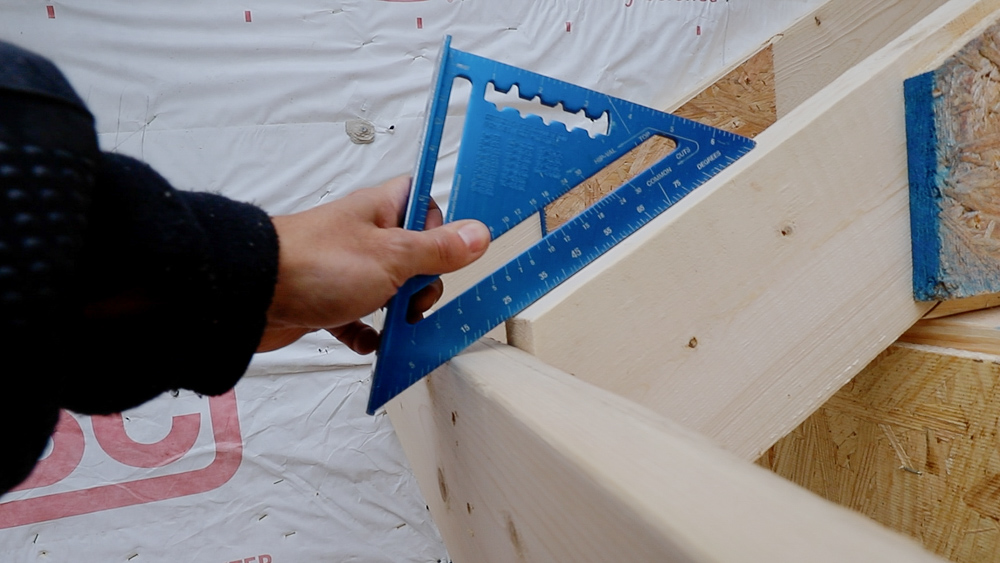
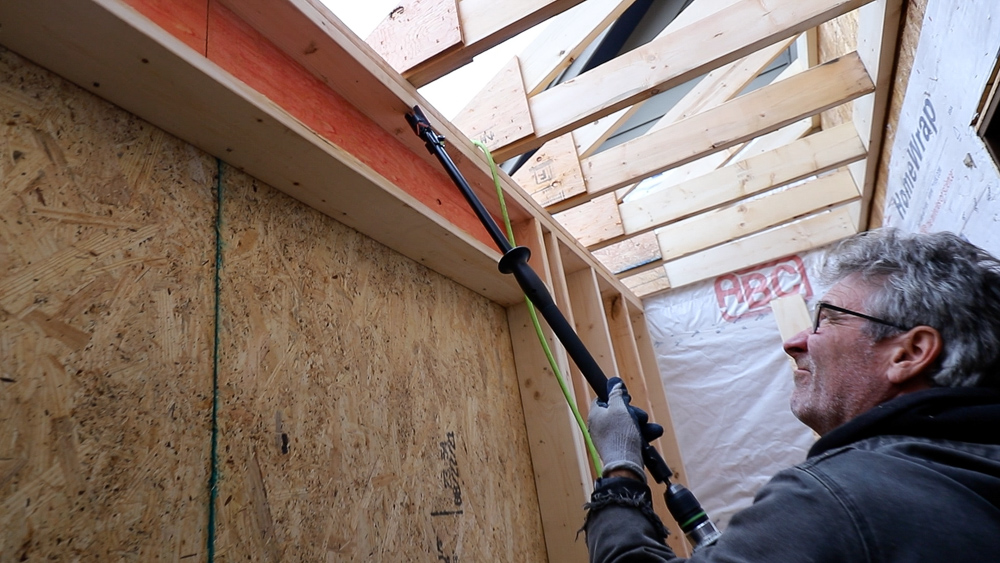
Now one little trick that I found interesting with the sub-fascia is how it’s installed. It’s lined up so that the outside of the sub-fascia is in the same plane as the rafter. If you put a square on, you can see that it’s continuous there, and that saves you from having to rip the roof pitch onto the edge of your sub-fascia. A little bit of a time and labor saver!
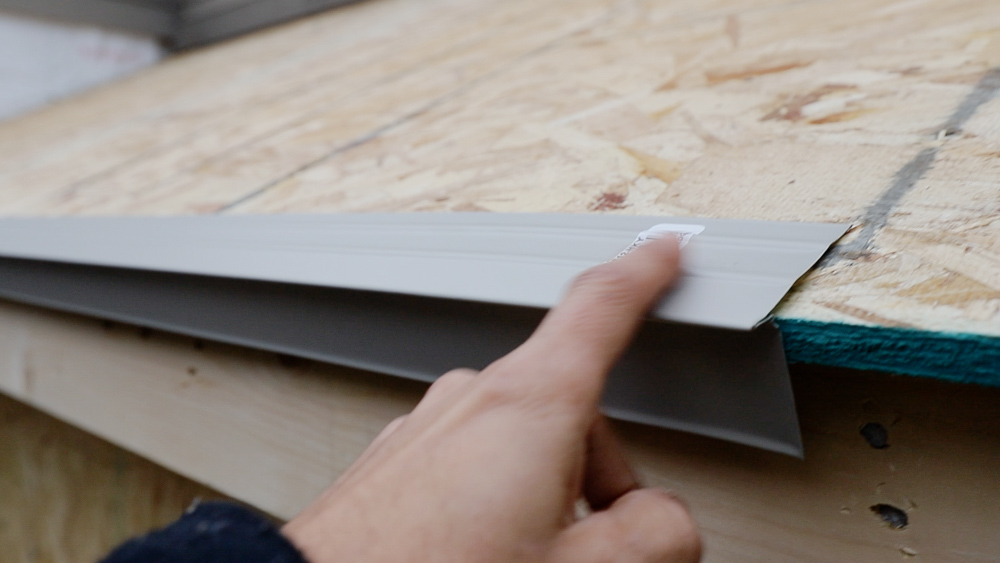
Next, we’re starting with our roofing. First thing going on here is this drip edge, which gives a place for the water to roll over the edge. If you don’t have this on here, as the water comes around here, you’ll probably end up getting your sheathing wet and it’ll rot out, just like my old house, which didn’t have a drip edge.
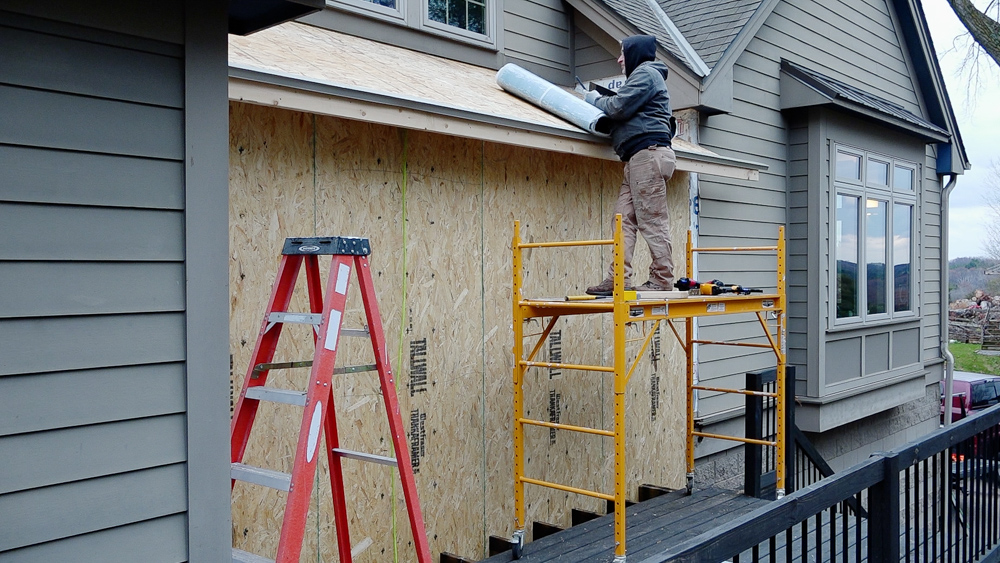
The ice and water shield is self-adhesive, but it’s a little too cold out here for it, because it’s not sticking at all. So we’re going to push that one off to the future for now, and keep moving forward.
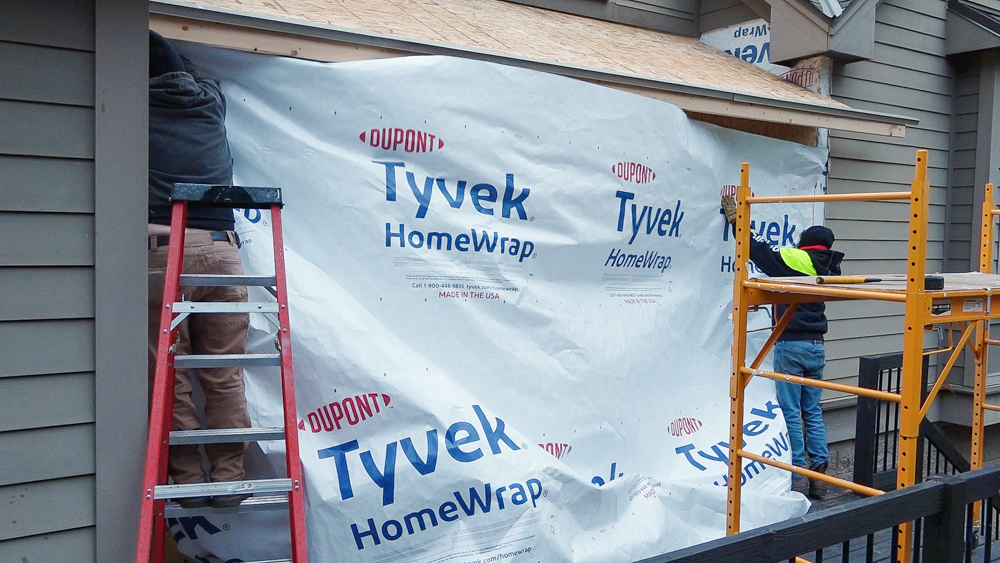
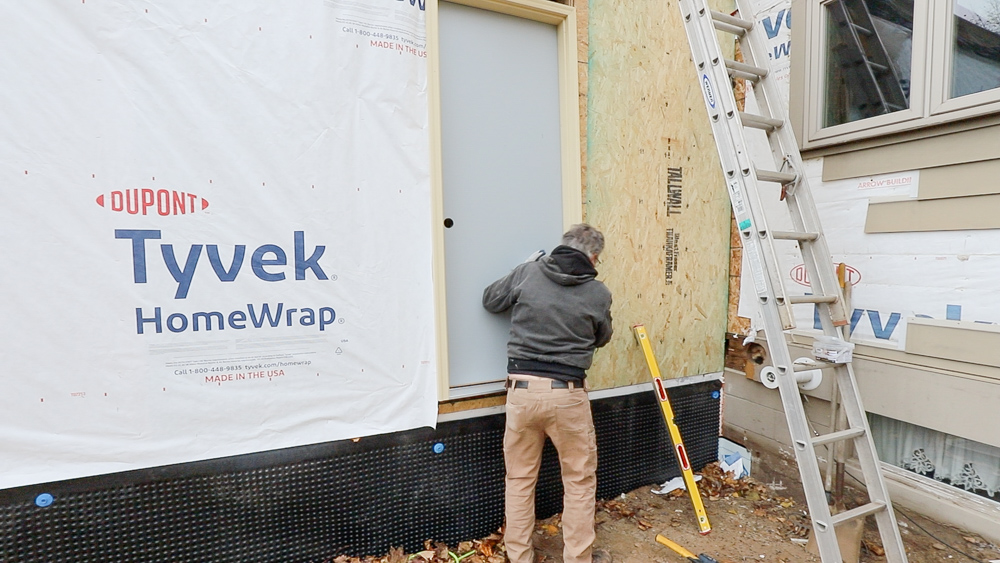
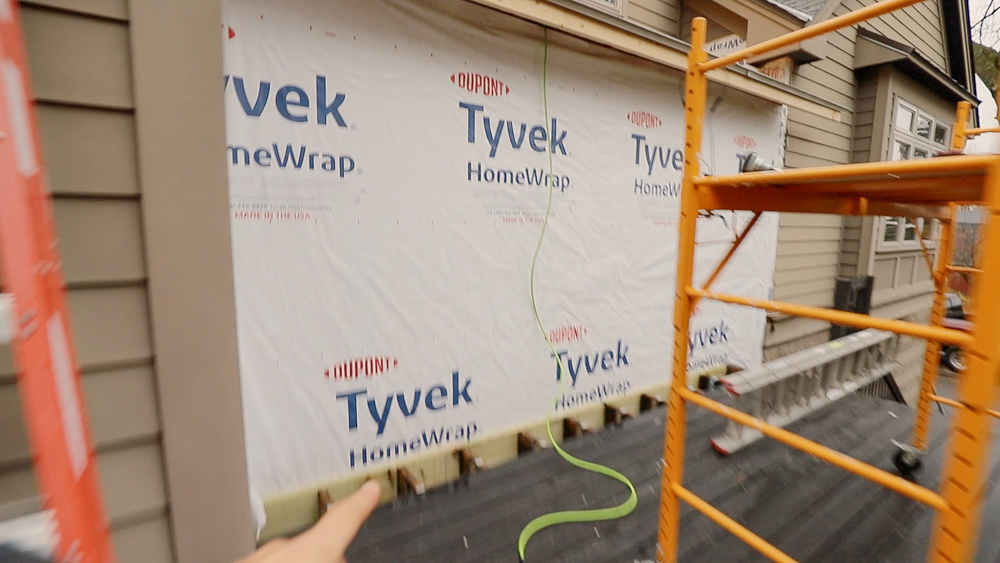
We’re going to get the Tyvek installed in the wall, and then we’re going to reattach the deck to the house.
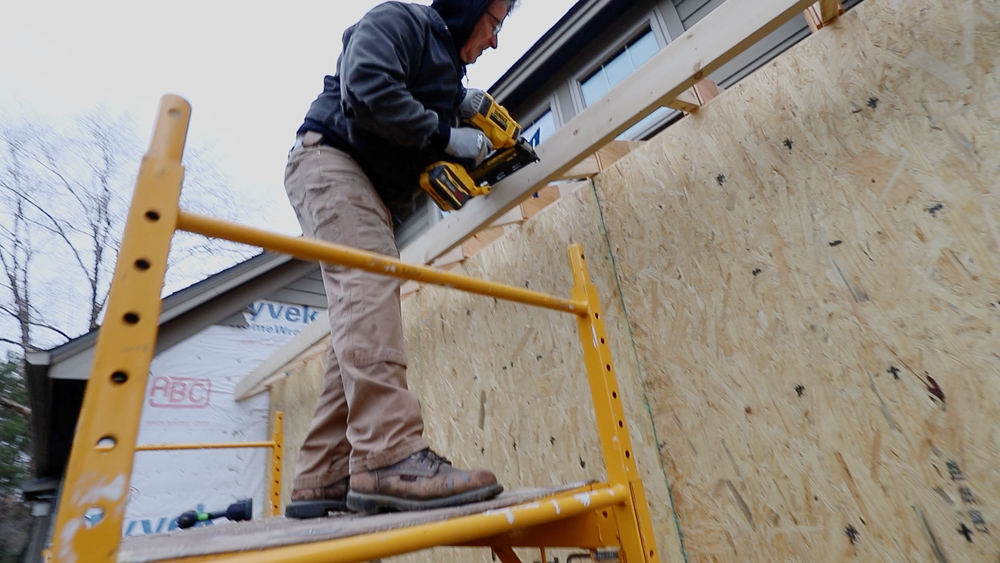
Good morning, everybody. Today is November 12th, and it’s another one of those damp cold days. Today we are wrapping up a bunch of small things and getting ready for what we’re going to be doing next week. Out here, I’m going to get these joist hangers put on, so we can pull the temporary support off from here and essentially be done with this area for now.
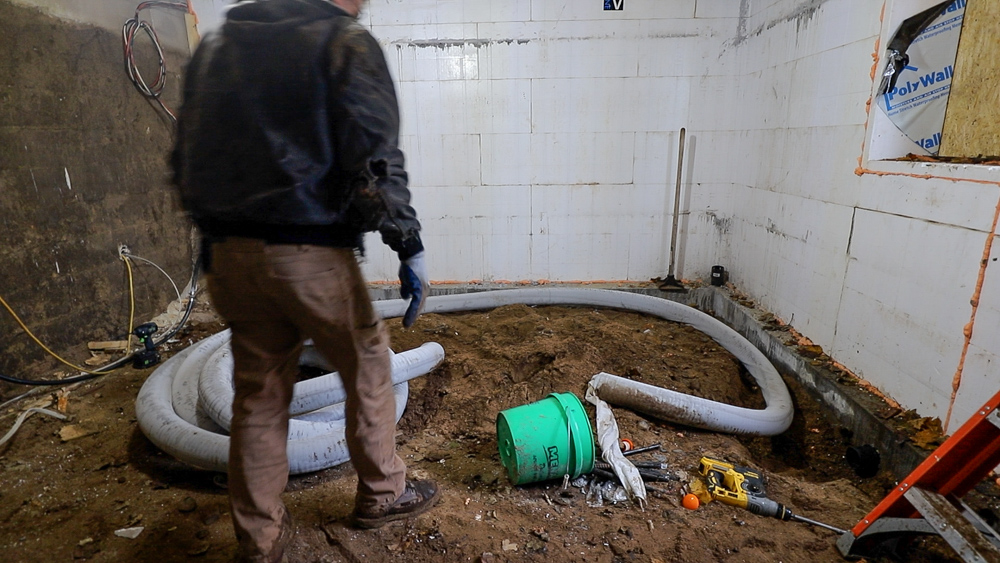
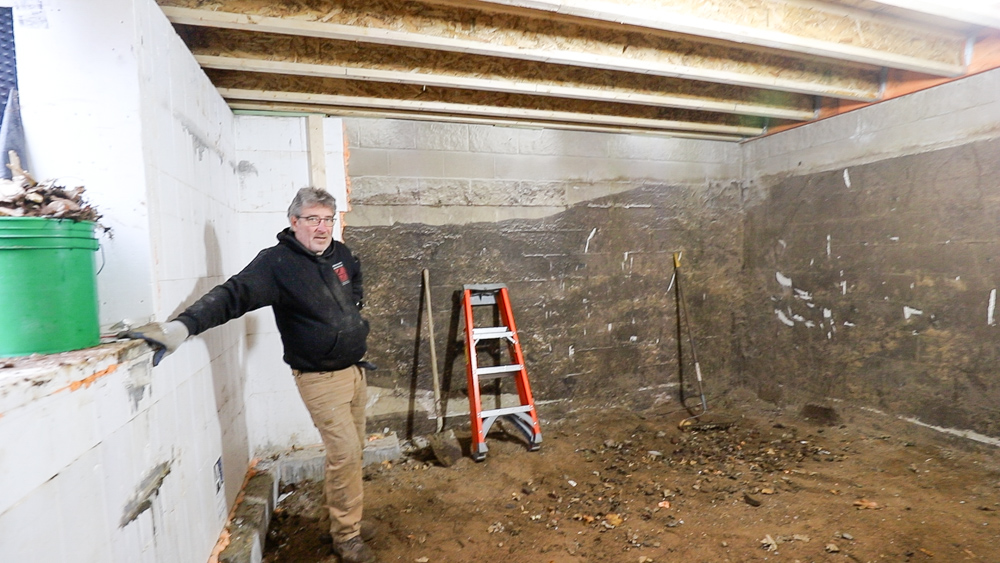
Next week we’re going to be working inside. We’re going to start removing the staircase, so Donavan’s prepping for some of that. He’s down in the new basement, getting things ready for that. We are trying to finish installing the drain tile. We have our through hose, which link us to the drain tile on the outside. That hose will come through the basement foundation and tie into the existing one, and they’ll go to the existing sump pump.
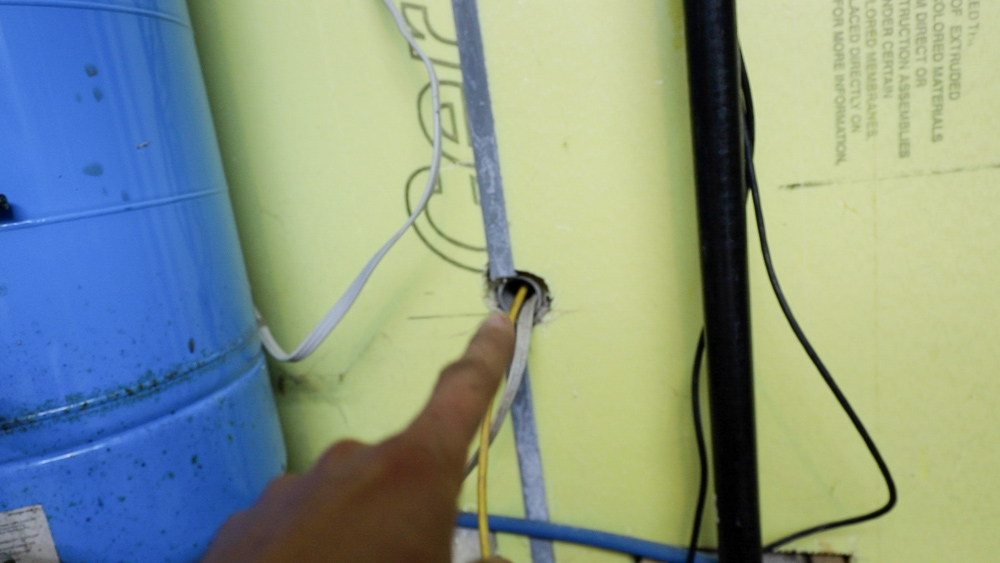
This is the other side of that wall, and this pipe here is where the water line that goes up to the pastures went before. We’re hoping to move that pipe down so it’s not in our finished wall later on right. So it’s 18 inches from the center of that pipe to the floor right now, and the sump pit is just over to the left of that a little bit.

Okay, so there’s a new pathway for the water line that goes to the pastures, this needs a fitting here that connects and that’ll be all good. We’re going to put this area on pause for now until we buy a fitting, and then this can go back together. That will bring our waterline underneath our floor instead of through the wall, which will be much nicer.
While we’re down here I thought I’d answer one question we got quite a lot when we were excavating around this water line: why we didn’t move it to a different spot while we had it out there. Our general logic was that if something ever happens to the waterline, which is under a footing, you’re going to be digging up the yard anyway. So if anything happens to the waterline, the current one would be abandoned, and we’ll put a new one in all the way out to the well. This way there are also no splices, which I prefer.
That is going to do it for this one, and for the majority of the outside work. Next week, we’re going to get into some of the inside work, and that’s where things are going to start getting interesting. Up until this point, there’s a little bit of tying things into existing structures, but there’s a lot more complexity as we get inside and work around all of the existing systems and structures. So that should be fun.
Thank you as always for watching, I greatly appreciate it. If you have any questions or comments on the home addition/remodel, please feel free to leave me a comment. As always, I’d be happy to answer any questions you might have. Until next time, happy woodworking!
Welcome to my shop! This is a quick update to let you know what I’ve been up to. This big chunky thing is the leg

Welcome back to the home renovation. This time I’m going to be working on the kitchen island. Here is a small model of the island.

Welcome back to our home renovation. Today I am going to be working on this wall. It needs some upper cabinets and the surround for